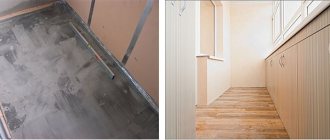
Modern design of apartments and private houses involves the use of combinations of different materials to decorate one plane. So, on the floor in the hallway or kitchen, a practical solution would be to choose durable floor tiles that are resistant to moisture and all kinds of aggressive influences in the work area (kitchen) or at the front door (hallway), and the rest of the covering is made of laminate. This technique also allows for visual zoning of the room. But the question arises - how to design the joint between the two materials? Leaving it as is is, at least, not aesthetically pleasing, but from a practical point of view, the joint will not be resistant to moisture and dirt. In this regard, a wide range of special thresholds has appeared on the construction market. These products differ in many criteria and how to choose the threshold between tiles and today's laminate material.
Threshold between tiles and laminate
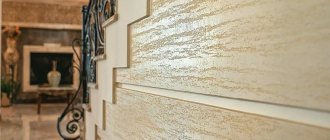
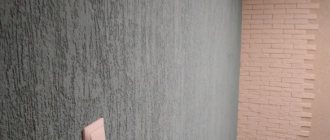
Advantages of laminate as a wall covering
Laminate is one of the most popular floor coverings. As a rule, it imitates parquet, but is cheaper, more practical to use, and installed much easier and faster. The panels are wear-resistant, depending on the class, they can even withstand animal claws, heels and dragging heavy furniture on legs. Why not use it as a wall covering too? This will give the interior an original, unconventional look.
In addition, this coating has a number of advantages:
- Strength, wear resistance. The panels are resistant to damage and can be used in all rooms, including the kitchen, nursery and hallway.
- Practicality. If you have small children in your family, they can leave memorable paintings on the walls. But, unlike wallpaper, laminate can be wiped with a damp cloth.
- Noise and heat insulation. Multilayer panels additionally protect the room from noise and cold from the outside. This is important if an external wall is being tiled.
- Easy installation. The panels are installed quickly and without the use of special tools. Even an amateur without experience can do the job.
- Ease of use. The panels do not require special care. It is enough to wipe them with a damp cloth from time to time.
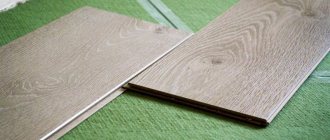
- Wide selection of colors and textures: can imitate wood of different species, as well as natural stone. There are also designer options in different colors.
Laminate boards can be used in all rooms: from the corridor to the bedroom. (photo No. 2)
But this coating also has disadvantages:
- Before installing the panels, the wall surface must be prepared and carefully leveled.
- Not all panels are suitable for wet rooms and balconies, because... they can become deformed from moisture and temperature changes.
Options for connection nodes
Before you start creating a gap, you need to know what material the thresholds are made of. Nowadays, several methods are used to cover the joint with or without a threshold.
| PVC threshold | Consists of a base and a decoration element. Mainly used for sealing curved joints. |
| Metal | Ideal for sealing straight joints, it is also possible for curved ones. A special coating is applied to the material, which increases resistance to various types of damage. |
| Aluminum | Ideal for sealing joints under doors. Masks seams and evens out unevenness. There can be several types: with hidden and open fasteners, on an adhesive basis. |
| Boxed | It has increased sound insulation and protects against blowing. The best option for the bathroom. It has one drawback - it is high (3 cm), you can easily trip over it. It is important to remember that the norm for the height of the threshold under the doors is 2 cm, so that the air masses move freely. |
| T-shaped | Outwardly it looks very beautiful, but the price equivalent is very high - from 600 rubles. per meter, suitable for sealing joints between parquet and tiles, has an adhesive base, and installation is carried out on it. |
| Suberic | The most common option, the seam between the laminate and the tiles is perfectly smooth. Costs approximately 200 rubles. per linear meter, but it causes problems in everyday life - dirt easily gets clogged there, which is very difficult to remove. |
| PVC transition | Masks significant unevenness. First, fix the fasteners, then install the plug. |
Thresholds are made from different materials
How to use laminate as a wall covering?
The panels can be used to cover all the walls in the room. But more often designers prefer finishing one of them. The rest are painted or wallpapered in calmer, usually lighter, shades. A laminate wall will become a bright accent in the room, attracting attention. You can also veneer a fragment of a wall. For example, an area by the fireplace or by the TV. The latter option is especially good because it allows you not only to zone the room, but also to hide the wires behind the panels.
Idea: cover the part of the wall where the TV is installed with laminate. This allows you not only to zone the room, but also to hide the wires behind the panels.
The middle layer, up to 9 mm thick, is usually made from soft coniferous wood, less often from industrial oak. It is located perpendicular to the stabilizing and upper layers - this makes the structure more stable.
An interesting design solution is to lay identical panels on the floor and wall. Or on the wall and ceiling.
The panels are mounted in one of the following ways:
- horizontally,
- vertically,
- diagonally,
- combining directions.
When choosing, you need to take into account the parameters of the room. Horizontal panels visually expand the room. However, they will “press down” a room with low ceilings and make it even lower. This problem can be avoided if you install the laminate not up to the ceiling, and make the upper part of the wall light and plain.
Horizontal laminate visually “stretches” the room. (photo No. 3)
Vertical panels visually raise ceilings. But in a small room they are also not very good, because they compress it.
Vertical lines make ceilings appear higher. (photo No. 4)
Panels mounted diagonally or in a herringbone pattern look unusual. However, their installation is the most difficult and painstaking. There will also be more waste. With a combined fastening method, the laminate can be mounted in squares, diamonds or in the form of other shapes.
The method of installing laminate flooring is space for your creativity. (photo No. 5)
Design ideas largely depend on the room in which the panels are used.
Connecting thresholds for floors and steps of stairs
First of all, the threshold is the face of your home; guests who come to your home and you yourself step over it every day. It is very important which thresholds, trims and profiles will be used in your house or apartment. Not only the appearance of your interior depends on this, but also how much they will get in the way under your feet, and whether you will stumble over them.
Nowadays, when renovating their homes, most builders, during installation, suggest that the owners of the house lay the flooring without a single joint. This method of installation is labor-intensive, but the interior of the floor looks like one single canvas, the interior thresholds are not noticeable and do not get in the way. Laying flooring without a single joint is safe if you use linoleum, ceramic tiles or carpet as the covering material, but if you are laying laminate or parquet boards, then it is simply necessary to leave a technological gap between the rooms. The thing is that wood coatings have the ability to expand due to changes in humidity and temperature. Therefore, if you do not make a technological gap between the rooms, then there is a possibility that with high air humidity, your floor will swell with one large bubble. And this bubble, like a sore on the body, will constantly remind itself, swell and disappear. Don’t tempt fate, create technological gaps between rooms when using wood coverings.
Types and types of interior floor thresholds
OVERLAYED FLOOR THRESHOLDS
Basically, all thresholds that are used for floors are overhead. With rare exceptions, craftsmen use tile thresholds that are embedded in tile adhesive. Most often, the overlay threshold is a plate, corner or T-shaped profile made of metal: aluminum, brass, bronze, stainless steel, titanium, copper or plastic. Such profiles perform the function of joint-bridging thresholds, that is, they close the gap, for example: between ceramic tiles and laminate, linoleum and carpet, and so on. The sill is called an overlay because it is applied to the joint of floor coverings in order to hide an unsightly seam.
SINGLE LEVEL or FLAT THRESHOLDS
They usually have a plate shape, but there are “Z” and “T” shaped profiles, such profiles are used exclusively with tile coverings. Thresholds are designed to cover the joints of floor coverings at the same level and, as a rule, a difference of one or more millimeters is critical for them. Therefore, before buying a threshold, it is important to make sure that the coatings are located strictly on one. If there is a vertical difference in height at the junction of one and the other coating of one millimeter or more, then you need a multi-level threshold.
MULTI-LEVEL, THRESHOLDS WITH A DIFFERENCE OR TWO-LEVEL
Any flat thresholds can easily be classified as transitional thresholds, because they connect one floor covering to another, for example, they serve to transition from tiles to laminate. But most often, the word transition threshold means a profile that serves to hide the joint between floor coverings located at different levels. That is, the threshold is designed to hide the height difference. Such thresholds hide a slight difference from 3 to 15 millimeters. They are semicircular in shape or have the appearance of an unfolded angle.
CORNERS FOR WALLS OR THRESHOLDS ON L-SHAPED STAGES
Many who have at least once encountered the finishing of steps have had the question of how and with what to finish the outer corner of the step. Nowadays, there are different profiles for such purposes, but the most reliable and time-tested is the aluminum overhead threshold. Firstly, it comes in different sizes, the smallest is 10x10 mm, and the largest is 50x50 mm. Secondly, the edges of such corners can be of different widths, for example, 10x25 or 15x35. Thirdly, the corners on the steps can have any color, from classic anodized, silver, gold and bronze, to imitation of any color of wood. Wooden metal thresholds come in two types, laminated and painted, we will talk about them later. Such a variety of colors allows you to choose the threshold to match the steps or, on the contrary, to highlight it. Most corners for steps have a corrugated or, as it is also called, perforated surface, which provides anti-slip properties. The textured surface of the thresholds gives better grip on the sole of the shoe and, accordingly, better stability, especially in damp rooms or on wet steps. For wet rooms, such as a bathroom, a swimming pool or on a street threshold, where there is a risk of slipping on the steps if there is ice, thresholds with a rubber insert are used. Rubber has good anti-slip properties, which provides high stability even when walking barefoot. Stair thresholds are made of a durable alloy of aluminum, brass, bronze, and less often of plastic. They are resistant to heavy shoes, heels, sand, temperature differences and are absolutely not afraid of exposure to snow and water.
Threshold with anti-slip notches
These are floor profiles made of metal or plastic, but with small marks, grooves or relief on their surface. Such recesses on the threshold are made as anti-slip ones for the stability of a person in case he steps on them, less often for decorative purposes. On profiles intended for steps, perforation is required to prevent slipping.
METAL THRESHOLDS
The most common material from which floor thresholds are made is metal. The following raw materials are used for manufacturing: aluminum, brass, steel, stainless steel, and less often bronze. Metal for the thresholds was chosen for a reason, because the threshold, like the entire floor, is subject to a very high load, and given that it protrudes several millimeters above the floor level, it is more susceptible to mechanical stress than the entire surface of the floor covering. Thresholds are also located between rooms that delimit two zones, for example, a room and a corridor; the profiles for connecting the coverings are called “interior thresholds”; such places are more passable, and therefore more susceptible to deformation. Metal as a material for making thresholds is the most versatile.
All metals used as profiles for thresholds or steps can be used not only indoors, but also outdoors. Aluminum, brass, bronze are resistant metals to both mechanical and natural stress. These are materials that are difficult to oxidize, which means they will not rust or fall apart underfoot.
— Aluminum thresholds
Aluminum thresholds are not made from pure aluminum; they are a durable alloy of various metals, in large quantities aluminum is present. Thresholds made from this material are very light and durable. The profile shape that can be given to aluminum can be any. These profiles are more often found on sale than others, because their price is low and their service life is unlimited.
— Brass thresholds
These are durable metal thresholds in a bright gold color. Brass is an expensive, valuable, non-ferrous metal, but is several times cheaper than gold. A beautiful bright yellow metallic sheen is often used for interior decoration, because it imitates gold well. Nowadays, brass materials are used everywhere; many building materials are made from it, for example, terminals for electrical wires, plumbing products, since this metal is difficult to oxidize and is resistant to water, for the manufacture of stair railings, and for others.
Gold has always been a luxury item; people made expensive items from this metal, which over the years became antiques. Gold has always been an inaccessible, expensive material from which jewelry was and continues to be made. Only kings and leaders allowed themselves to use gold as frames for mirrors, paintings, chandeliers, railings and staircases. Now, as an alternative to gold, brass is used for interior decoration. This metal exactly copies gold, but is much cheaper in price.
— Steel thresholds
These are metal thresholds that are resistant to any mechanical stress. It is impossible to find them on sale in their pure form; they are always painted or anodized. The advantages of a steel profile are its stability and strength, the disadvantages are that they rust.
— Bronze thresholds
Such thresholds are not found on the open market, and not everyone can afford them, because they are made to order, since bronze is an expensive metal. But you can easily buy bronze thresholds, although they themselves will be made of aluminum.
— Stainless steel thresholds
Stainless steel thresholds have a silver color with a matte or glossy finish. Their thickness is very different from aluminum or brass thresholds, it is thinner, and this is quite justified, because stainless steel is much stronger than aluminum or brass. Stainless steel profiles can be used both for floors and for finishing furniture or walls. If you have a warehouse where you need to use only durable materials, then stainless steel profiles will be the ideal solution for you. Also, I would like to note that these thresholds can be used in rooms, even where there is strong humidity, they do not rust, do not oxidize, and do not peel off even with constant humidity. Their use is ideal for rooms such as: bathroom, bathhouse, shower, swimming pool, damp basement and others where there is a lot of water or humid air. Such thresholds do not require maintenance, they do not need to be rubbed to make them shine, their radiance and metallic luster will remain throughout their entire service life. The only disadvantage of these profiles is that they are produced only in silver color.
Coating of metal thresholds
Metal thresholds are always coated; there are exceptions when the customer requires raw thresholds, that is, their surface is not treated in any way. Not covered with any profile, they look like ordinary shiny silver metal. Basically, only two types of metal profiles are coated, made of steel and aluminum; very rarely you can find brass thresholds, anodized in a silver color, shiny like a mirror. Brass thresholds are usually not covered with anything, because the natural color of brass is gold, they already look beautiful, and there is absolutely no point in covering them.
There are several ways to treat the surface of profiles, the most popular is anodizing, then lamination, and less often, painted thresholds are found, and very rarely, polished or ground.
— Anodized
This is a complex method of painting by passing an electric current through water with tiny particles of coloring matter in which the threshold is located. Most often, thresholds are anodized in three colors: gold, bronze and silver.
— Laminated
The basis of the laminated profile is also aluminum or other metal, only it is covered with a durable self-adhesive film that can imitate natural wood, stone or other natural materials.
— Painted
The basis of painted thresholds can be an aluminum or steel profile, which is coated with plain paint or with imitation wood.
— Polished
This processing method is usually used for stainless steel profiles, less often for aluminum. After such processing, the profile acquires a matte surface, because it has many small notches similar to scratches, which gives it an attractive appearance.
— Polished
This processing method is applied to any metal, therefore, polished thresholds made of brass, stainless steel, bronze, aluminum and so on are on sale. The surface of the polished profile is absolutely smooth, and its appearance resembles a mirror with its bright shine.
— Chrome plated
Many metals are chrome-plated, but in the case of thresholds, only brass is coated with this coating. The chrome-plated profiles are very scratch-resistant and also highly resistant to corrosion. The coating is polished to such a state that you can see your own reflection in its mirror surface.
Often, when starting a search for floor thresholds, people cannot figure out which threshold is needed and run to the store for detailed advice. This is the right decision, but modern technologies make it possible to solve this issue without leaving home. Why spend so much time looking for a part that costs pennies compared to the total cost of repairs, because there is the Pro-Click online store that will tell and explain what you need. The specialists of our company know everything about the most modern profiles and thresholds; we specialize in this and constantly improve our skills in this area. If you have studied the entire site and still do not understand what you need, call or email and ask your questions, we will answer them! There is no need to waste a lot of time running around the shops looking for the desired profile; with us you will find any solution for your home, office, store, warehouse, and so on.
THRESHOLDS FOR LAMINATE
With the advent of a variety of floor coverings, the need arose to hide the joints between them; thresholds help us out with this. In order for the joint to look neat and not stand out against the background of the general floor, you should take the choice of the desired profile seriously. To create a barely noticeable joint, consider purchasing the necessary threshold well in advance of purchasing flooring, since most of us face this problem after the flooring is completed.
Thresholds for laminate flooring or transition to other coatings are used single-level, multi-level, and in the case of finishing stair steps, corner ones. To ensure that the profile is masked as much as possible in the color of the coating, use laminated or painted thresholds. Their coating exactly imitates wood or stone, which allows you to choose the profile exactly to match the color of the laminate. Using a profile that follows the pattern of the laminate, you are guaranteed to make a completely invisible joint.
Laminate on the wall in the living room interior
Laminate flooring will give the living room a designer and bright look. Here are a few ideas that designers are using in this room.
- Create a niche behind the TV. Contrasting panels, for example, brown or chocolate shades, are suitable.
- If there is a fireplace in the living room, you can tile the area around it. As in the previous case, it is better to choose dark, contrasting panels. Also, designers often line the wall, part of the floor and ceiling around it.
- Using laminate, you can highlight any other area. For example, a dining room, if the living room is combined with the dining room.
- If the room is small, you can completely cover one of the walls. The rest are made monochromatic, lighter, but, as a rule, in the same color scheme.
Against the background of snow-white walls, beige details look very expressive. (photo No. 6)
The seating area is highlighted with laminate. (photo No. 7)
The interior follows the same color scheme, but the panels on the wall are slightly darker. (photo No. 8)
Laminate flooring of any color is suitable for the living room - from white to chocolate, with the texture of wood or stone. You can also choose bright or multi-colored panels if they look harmonious in the interior.
Decoration and decoration of walls
You can make wall decorations yourself or have a professional do it for you. It's your choice, we just have some ideas on how to do it.
Black and white
The classics of the genre are white decorative plaster or matte wallpaper and black laminate. This combination is always winning. The floor can be lined with long-pile fabric, and the headboard can be upholstered in leather. There are many possible combinations, but if you want to choose white laminate flooring for your bedroom, then black or dark brown will suit you.
An interesting option is to lay long sections of laminate vertically, so that there is a gap between them. The material should preferably be light, but the walls should be darker. If you place the spotlight correctly, the effect will be amazing.
Black will highlight, creating an even flow of light on black fabric, while white will give a cool and balanced effect.
A highlight in the light
Lighting can be varied. There are several popular options:
Installing classic lighting away from the wall where the laminate is laid. This is especially important when using non-solid materials. In the case of a solid pastel color, wall sconces installed in pairs are suitable.
A wall light can resemble a lamp or a candle. Another option is spotlights placed horizontally at the edge of the ceiling.
If the laminate is laid on a recess, then the spotlight is placed vertically on both sides of the recess. Such lighting will attract attention and optically enlarge the bedroom, creating a feeling of spaciousness and comfort.
One wall
What types of bedroom designs are suitable for laying single-color laminate flooring on an entire wall:
- predominance of one color;
- Maximum three colors;
- Avoid installing large chandeliers close to the wall;
- The main wall design should contrast with the shade of the laminate (dark-light or light-light);
- the ceiling and wall selected can be the same as the floor and wall;
- The smallest wall or the wall adjacent to the head of the bed is usually finished with laminate.
If you decide to highlight only one part of the room, it is best to start from the top. Ceiling plinths are not used.
Decorative vinyl laminate
Vinyl (PVC) is an excellent decorative material that can be laid on the surface of absolutely any room. It is moisture resistant and self-adhesive.
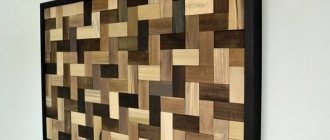
Panel
To add variety to the design, you can make a wall panel from laminate. You can play with colors. The panels can be laid lengthwise or crosswise.
Behind the sofa
The wall behind the sofa can be accented with laminate. It is ideal for accentuating a room and making it the main point of interest.
Laminate on the wall in the bedroom interior
Laminate is often used in the bedroom to highlight the area at the head of the bed. The covering looks beautiful and matches the color and texture of the bedside tables and the bed itself. You can cover the entire wall or just a part of it of any size.
The laminate at the head of the bed is complemented by similar boards on the floor. (photo No. 9)
An alternative option is to line the wall opposite the bed if you plan to install a TV, a fireplace, or hang a large picture there.
Thanks to the panels and lighting, the TV is the main accent in the interior of this room. (photo No. 10)
For the bedroom, finishing in pastel or natural shades is suitable. It is better to refrain from bright colors - they have a negative effect on the nervous system and will interfere with proper rest.
A bold decision: the laminate smoothly transitions from the wall to the ceiling. (photo No. 11)
Work examples
Interior design example
Interior in modern style
Room design option Interesting design idea
Design solution in the interior Ideas translated into reality Methods for decorating a room
Example of designers' work
Laminate on the wall in the hallway interior
There is high traffic here; wet clothes and umbrellas are often hung up. Therefore, a wear-resistant and moisture-resistant coating is an excellent solution for this room.
In a rustic style, laminate looks very harmonious. (photo No. 12)
Often hallways are modest in size. A properly selected finish will visually correct this deficiency. Horizontal panels can be used to “stretch” a room in width, and vertical panels can be used to “stretch” a room in height. The hallway looks impressive if several surfaces are finished with laminate. For example, the floor and one of the walls. In this case, the door and furniture can be the same color, and the rest of the surfaces can be lighter.
The highlight of the bright hallway is the bright laminate on the wall. (photo No. 13)
With the help of horizontal panels the room can be “stretched” in width, and with the help of vertical panels it can be “stretched” in height.
When choosing the color of the panels, you need to focus not only on the general style of the interior. Light shades are preferred - in combination with mirrors they will create the feeling that the room is more spacious. Dark colors, on the contrary, will make the room smaller. In addition, a dark hallway without windows can look too gloomy. On the other hand, if the base color is light, even black boards are perfectly acceptable.
Adhesive fastening of laminate
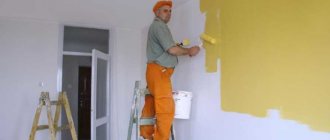
Let's look step by step at the easiest way to fix laminate flooring - adhesive.
Step 1. First of all, the wall needs to be prepared for this type of work, that is, leveled and then primed. Next, you need to wait for the surface to dry, and then you can begin further work.
First the wall is prepared
Step 2. The laminate needs to be brought into the room in which it will be installed and left for a couple of days. During this time, he will “get used” to the conditions of further operation and will have time to acclimatize. Then the packs need to be opened and make sure that all the lamellas have the same color and texture. If necessary, the panels should be re-sorted by shade.
Laminate must adapt
Step 3. Installation in this case needs to start from the upper right corner, since the refrigerator will be on the left, and if something happens it will cover the trimmed and incomplete panels. In visible spaces it is necessary to use the most solid lamellas. You need to try on the first panel.
Let's start laying the laminate
Step 4. Next, you need to cut off the end lock from the end panel from the edge of the surface to be finished. It is not needed there and will only spoil the view. You can cut the lock with a jigsaw.
The end lock is cut off
Step 5. On the wrong side of the lamella you need to apply liquid nails in a “snake” pattern along the entire length of the lamella.
Step 6. Next, the lamella needs to be glued to the wall so that there is a gap of about 5 mm between it and the edge of the wall. The lamella must be carefully pressed against the wall and even slammed with your hand to ensure the reliability of the surface connection.
The lamella is glued to the wall
Step 7. Then you need to measure the space under the glued lamella that remains uncovered, and apply the resulting measurement to the new lamella. The markings must be applied using a pencil and a square to get a perfectly straight line.
The remaining space is measured. Markings are applied to the laminate.
Step 8. Now you need to use a jigsaw to saw off the excess from the lamella according to the applied markings.
Excess is cut off
Step 9. Using the same principle as in steps 5 and 6, you need to glue the lamella to the wall. It is important to align the locks of the new and previously laid lamella with each other. The first row is ready.
Laminate fixing process
Step 10. The second row of laminate must be glued immediately, preliminarily, before gluing it to the wall. It is important that the joints of the lamellas in adjacent rows are not in the same place. The whole lamella and pieces of the required length must be assembled in one row and secured with tape on the front side.
The sections are connected with tape
Step 11. Next, you need to turn the row of lamellas over and apply glue to their reverse side.
Glue is applied to the slats
Step 12. Then a number of lamellas with glue need to be inserted into the locks of the previously laid lamellas and the laminate should be glued.
A number of slats are inserted
Step 13. In this way you need to cover the entire wall. By the way, if you cut off all the end locks, then the lamellas can be glued, without first connecting to each other, one at a time on the walls.
The entire wall is covered in the same way.
Step 14. When installing laminate flooring on the walls, sometimes you need to bypass the sockets. This can be done this way: you need to install the laser level so that the intersection of its two beams falls on the center of the socket box. Then you need to substitute the panel and mark the location of the outlet on it, focusing on the level. Next, you just need to cut a hole of the required size with a jigsaw and glue the panel.
Using a laser level Marking the location of the socket
Hole for socket
Step 15. In this way you need to cover the entire wall. The last row of lamellas will need to be adjusted to the width of the remaining space, not forgetting to leave a small gap between the edge of the wall and the outermost lamella.
How to install laminate flooring on a wall
This is what the finished wall will look like
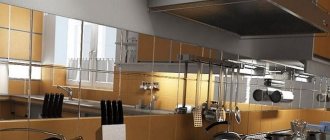
Laminate on the wall in the kitchen interior
Laminate can replace wall tiles in the kitchen. But there is a nuance: the temperature and humidity in the food preparation area are increased. Therefore, it is better to choose moisture-resistant and wear-resistant panels.
Laminate boards can replace traditional kitchen tiles. (photo No. 14)
If the surface of the boards is textured, it is more difficult to clean it from dirt. For the same reason, it is better to choose non-staining colors, on which traces of dirt will not be noticeable. If the kitchen is combined with a dining room, you can use laminate boards to highlight one of the zones by laying them on the floor and walls.
Beige laminate refreshes a dark kitchen. (photo No. 15)
Laying laminate: options
As for the laminate itself, just like on the floor, it can be laid vertically, horizontally or diagonally. In the first case, the slats will go from floor to ceiling, in the second - from one wall to another, in the third - from one corner to another, located diagonally. The last option is the most difficult, and therefore beginners in the repair business are recommended to choose the first or second method.
Horizontal installation
Laminate on the wall in the bathroom
The bathroom is a room with high humidity. A standard laminate board will not work here. You need to choose waterproof varieties. The best option is vinyl laminate. Even with frequent exposure to water, it does not deform.
A bathroom tiled with laminates looks luxurious. (photo No. 16)
Laminate boards will give your bathroom a unique and stylish look. For example, it looks impressive when the panels on the floor flow onto the screen on the bathroom and the wall behind it.
Stylish solution: the flooring continues on the screen on the bathroom and the wall behind it. (photo No. 17)
Only a few elements can be highlighted: cabinet doors, shelves, niches, etc.
How to seal laminate joints
- 1 Sealant for processing
- 2 Tools and materials
- 3 Features of laying laminate panels
- 4 Some tips for beginners in renovation
- 5 Videos
An excellent solution for flooring is laminate slats. Installing laminate flooring does not require any special skills. Laminate boards are an inexpensive and reliable coating that fits into almost any interior. The only thing that needs to be done when installing laminate flooring is to seal the joints. Since the basis of the laminate is fiberboard, when moisture gets under the panel it swells and becomes deformed. A prerequisite for installing laminate boards is sealing the joints. In this case, it is important how to close the laminate joints.
Sealant for processing
Gel for joints
Sealant is a special gel with which seams, gaps and joints are processed. In this case, there is no gluing of the joints, which is a big plus when you need to replace the panel.
It is best to choose a sealant that contains silicone. This silicone-based product has very good performance properties:
- reliability;
- long service life;
- the ability to use a sealant at any temperature.
Sealant for laminate
In addition to silicone, the sealant gel includes the following components:
- additives: quartz flour, chalk;
- antifungal substances;
- dyes;
- and substances that reduce the viscosity of the gel.
If the question of how to seal the joints of laminate flooring has been resolved, now you need to prepare the tools and materials for processing them.
Tools and materials
Sealant for locks
Before using the sealant, you must read the instructions for use. If the sealant is used in residential premises, carefully study its composition for the presence of harmful chemical components.
- Silicone based sealant.
- Rubber hammer.
- Ruler, pencil.
- Jigsaw.
- Latch.
- Spacer wedges.
Before you begin laying laminate flooring, you must carefully prepare the floor on which the laminate panels will be laid. The smoother the base, the less time it will take to process the joints.
Features of laying laminate panels
Joint of laminate with tiles
- The base for installing laminate flooring must be dry, clean and level. Surface differences should not exceed 3-5 mm per meter. Otherwise, the interlocking joints of the panels will quickly become loose and become unusable, which will require additional time and material costs for dismantling and installing the laminate.
- If the differences in the base are more than 5 mm per meter, it is advisable to make a new screed and only then lay the laminate panels. A smooth surface of the base will allow you to correctly lay the underlay under the laminate in order to protect the floor covering from moisture.
- The first row of panels must be laid with a deformation gap of 8 mm. This gap should be maintained around the entire perimeter of the room using spacer wedges. This is done so that when the temperature environment in the apartment (room) changes, the laminate “breathes” and moisture does not accumulate under it.
- When assembling the panels, it is necessary to coat the joints with a sealant. Excess gel must be carefully removed with a sponge or wet cloth. All other panels are mounted in the same way. After laying the laminate, all joints will be sealed.
- The gaps that remain in the doorway can be decorated with elements such as baseboards or thresholds. How to coat the joints between the laminate and the baseboard? You can use the same silicone-based sealing gel.
- If the laminate board is joined:
- with linoleum - cover the seams with a plastic threshold;
- with tiles - cover the seams with an aluminum threshold;
- with a stone surface - it is advisable to close the joints with cork plates.
Nuances of choosing a laminate
Laminate differs in wear resistance classes. It is better to choose a high class (class 32 and above) as a floor covering. walls, the level of wear resistance is not significant. Even cheap panels of class 21-31 will do. But there are some exceptions. So, in a house where cats like to sharpen their claws on corners and walls, it is better to purchase the most wear-resistant laminate board.
The richly colored laminate is complemented by light walls, furniture and ceilings. (photo No. 18)
For the kitchen and hallway it is better to choose a moisture-resistant laminate.
For the bathroom - waterproof. On the balcony, the finishing must withstand high humidity and temperature changes. In all these cases, the best option is vinyl panels. In the bathroom you need to use a waterproof laminate. (Photo No. 19)
Vinyl laminate is the optimal solution for the kitchen, bathroom, hallway and balcony.
For example, vinyl laminate produced by Alta-Profil is not afraid of moisture and scratches, absorbs noise and does not fade in the sun. Such panels, even as a floor covering, will last 20 years or more, and on walls - at least half a century. And finally, one of the most difficult tasks is choosing a color. This must be done in such a way that the design of laminate walls in the interior looks harmonious.
What laminate can be used for finishing
For finishing, a laminated board is used, the same as for the floor. But if we take into account that the load on the material mounted on the wall is minimal, then in order to save budget funds, it is better to take a laminate of less thickness, which has a low wear resistance class. For example, a panel with strength class 31 is used for the floor, while for wall work, material of class 21 will do.
Laminated boards are equipped with locks for secure fastening to each other. The most common types are:
Types of locking connections
- Click. The type of lock connection is very simple and has a simple design. This type of laminate must be glued to a wooden sheathing or flat surface using an adhesive mixture.
- Lock. The strength is not inferior to the previous connection, although due to the end-face type of the lock, it does not tolerate frequent disassembly of the structure. That is, if you installed it once, it is better not to disassemble it again. Installation is carried out on timber using staples or nails.
Advice! When carrying out installation work on the sheathing, you should not use an adhesive mixture. In this case, the area of the fastening surface is too small and cannot guarantee reliability. To secure laminated boards to a wooden frame, special clips are used, which in turn are inserted into the groove of the laminate and nailed down.
Installation features
Another important selection factor is the type of lock for fastening the boards together. It affects the method of fastening: on the sheathing or with glue. The panels are connected to each other using locks. It could be:
- click lock,
- lock-lock (another name is tongue-and-groove).
How does a click lock work?
(photo No. 20) The first one is more common.
It is suitable for fastening to lathing or glue. How does a tongue and groove lock work?
(photo No. 21) The second is no less reliable, but such boards are used only for installation on the sheathing. So, before choosing panels, you need to decide how to install them. In small rooms, you should not attach laminate flooring to the sheathing - it will “steal” precious centimeters of space. In spacious rooms, lathing will be the best choice - this method is more reliable and durable. In addition, if you are gluing panels, you need to carefully level the surface of the wall. When installing on a sheathing, this step is not necessary. A comparison of laminate installation methods is given in the table.
| Installation method | On glue | On the sheathing |
| Advantages | Fast and easy way. Does not require additional materials. Does not reduce the area of the room. | Reliable and durable method. Does not require additional wall leveling. Suitable for any type of panel locks. |
| Flaws | Over time, the panels may peel off. | Reduces the area of the room. |
| Types of panel locks | Click-lock. | Click lock or lock lock. |
Which way is easier? This is individual: some are comfortable working with glue, others prefer dry installation.
Which one is better to choose?
There is no way to specifically answer this question, because the material is selected based on certain conditions. To choose a threshold, you need to know what function it will perform and how it will be mounted. Situations are different - you may need overlays, corners, maybe a special profile, or nothing but cork material will be needed.
If you choose a threshold from a specific material, it is important to know how often the floor element will be used. Wooden and plastic thresholds are most prone to wear and tear and must be replaced frequently. Metal products are not suitable for curved joints. In this case, you won’t find a better option than plastic thresholds to which rubber material has been added. They must heat up, be flexible, and take the required shape.
You need to select the threshold individually
Adhesive installation technology
It is important to carefully glue the entire surface of the board to the wall. (photo No. 22)
To attach the panels you need to stock up on silicone glue or liquid nails. Step-by-step algorithm of actions:
- Level, putty and prime the wall.
- Apply glue to the board from the back and sides, as well as to the wall.
- Press the panel to the surface.
- Level using a level (for horizontal installation) or a plumb line (for vertical installation).
- Remove any excess glue that has come out.
- In this way, glue all the boards one by one.
Color solutions
Most often, classic laminate flooring is laid on the walls under wooden panels. In private homes and classic interiors, it looks good as the main material.
But you can also use it instead of an accent: to decorate functional areas, a niche for a TV, or the space behind the head of the bed. In small rooms it looks stylish when creating a transition between wall decoration and floor decoration. This technique visually enlarges the room and corrects its geometry.
Light, bleached or aged laminate will fit into rustic country and romantic Provence. And dark panels imitating precious wood are good in neoclassical, English or modern styles.
How to hide TV wires on the wall: 12 ideas
Frame fastening technology (on lathing)
If the laminate is installed horizontally, the sheathing slats must be mounted vertically. (photo No. 23)
For fastening using the frame method, wooden or plastic lathing is used. Moreover, if the laminate is installed horizontally, then the sheathing slats are attached vertically. And vice versa.
The technology is as follows:
- Drill holes in the wall for the dowels. Insert them and screw the rail to them with self-tapping screws.
- Attach the remaining slats in the same way. Level using a level or plumb line.
- The laminate is attached to the slats using a stapler or self-tapping screws.
- The boards are connected to each other using locks.
There is no need to pre-level the wall surface.
DOMOSTROYPlumbing and construction
- home
- Connect with us
- Thursday, December 12, 2022 1:04
- Author: Sereg985
- Comment
- Category: Construction
- Link to post
- https://firmmy.ru/
I want to make a kind of laminate mat near the entrance doors. The edges will be uneven. How to seal the end of the laminate?
In my opinion, the best option is these “U-shaped” profiles (edging),![][1] the material of manufacture is different, metal (steel, brass, aluminum), plastic, wood, there are flexible profiles (thresholds) made of rubber , if the surface is curved (end).
Attached to the end of the laminate with glue from the “liquid nails” series, or with adhesive-sealant.
You can choose any color to match the color of your laminate.
The second option is to use edge tape, there are moisture-resistant ones, there is self-adhesive installation with glue, and then an iron (temperature is needed), at the finish the tape is cut to width as well.
Edge tape is used for edging the ends of furniture; in principle, laminate is not much different from it (chipboard furniture, for example, although laminate is a multilayer product, but the base, either chipboard, or fiberboard) is different, except that it is thinner, but the edge strip is also different, including selection by width.
When finishing the ends, look at the place; perhaps the ridge of the lock joint will need to be cut off.
Good day.
When we were still planning what our apartment would look like, we went to all the construction stores in our city, it turned out that the choice was the same and, by and large, there wasn’t that much that suited our subjective taste.
One of the ideas was to make one wall in the room from 3D plaster panels. I had already bought the molds, I was thinking how the house would be rented out, I would go in the evenings to pour several tiles at a time and do everything in 2 weeks. But then it turned out that I didn’t have this time and had to choose another option for decorating one of the walls on the fly. I don’t know why, but I really wanted to make one wall different from the others! =)
And somehow, once again, while searching for ideas on the Internet, I came across wall decor with MDF panels, I really liked it, I was excited about this idea, but upon detailed study it turned out that the material is not reliable, fragile and wears out quickly. And then I thought, eh... if only there was a material like MDF panels, but much stronger... And then, out of the blue... Laminate?! Hmm... and immediately went to Google in search of the same extraordinary crazy people who use flooring on walls! It turned out that this option is not very common, but still there are the same people, and they even share their experience. Now I have the opportunity to tell you about the nuances.
Designer tips
Delicate panels in a snow-white room create a feeling of lightness and cleanliness. (photo No. 24)
A few recommendations from designers to help you create an interesting design project and select suitable panels.
- The classical design school recommends using no more than three colors in the interior: primary (up to 60-70%), additional (20-30%) and accent (10%).
- If there are more colors, they need to be selected with care so as not to turn out tacky.
- Designers recommend using no more than three colors in the interior: primary (up to 60-70%), additional (20-30%) and accent (10%).
- If you plan to cover one of the walls with laminate, choose panels of rich color. And make the rest of the walls plain, pastel shades. Complete the interior with matching furniture.
- Use a play of dark and light colors, vertical and horizontal lines to visually give the room the desired shape and size.
- A room or corridor where the floor and one of the walls are lined with the same laminate looks impressive. You can use the same boards in other rooms.
- If there are several zones in one room (kitchen and dining room, bedroom and office, etc.), they can be separated by decorating one of them with laminate.
Smooth joint
Tiles or porcelain tiles are not always connected to laminate in a straight line. There are connections with smooth, rounded bends. What to do in this case? You can fill the seam with sealant or liquid plug, as described above, but there are special flexible profiles and thresholds. The profiles are mostly metal. They can be easily distinguished by the small thickness of the top shelf, which covers the edge of the laminate (usually). The second distinctive feature is the part cut into fragments, which is placed under the tile. This is what gives the profile flexibility.
These are metal profiles for creating a smooth joint line
The width of the shelf is from 1-2 mm to 4-5 mm. The wider the shelf, the smaller the bending radius. Before installation, give it the desired shape and place it under the tile. On the other hand, the edge of the laminate is placed under the shelf. So installation is simple.
This is a flexible rubber or plastic threshold
There are also flexible T-shaped profiles made of rubber and flexible plastic. They, like ordinary T-shaped thresholds, consist of two parts - a U-shaped embedded profile and an overlay. The only difference is that the pad is flexible. The only thing is that the plastic and rubber used are hard enough so that they don’t wear out or get scratched. That is, in the usual form it will not be possible to bend it much. If you need to make a sharp bend, the threshold between the tile and the laminate is kept in hot water (about 70°C) for about 15-20 minutes. The heated material bends without problems. It is given the desired shape before it cools down.
Leave it as it is
The easiest way is to do nothing, leaving the space between the wall and the fixed panel as it is. This option should be considered in two cases:
- The edge panel is cut straight, there are no visible defects along the edge;
- The inner corner is high-quality puttied and painted. If this is not done, if you accidentally look at the indicated place, you will be able to see the plaster. When painting, the joint will not differ in color from the entire wall.
Replacement and how to hide the junction box.
Today I decided in this article to share my many years of experience in replacing and methods of hiding distribution boxes when renovating in your apartment or house.
Often people are interested in how many, where and how to install distribution or branch boxes (junction boxes). You will find detailed answers to all these questions in our previous article.
How to hide a junction box.
According to current rules, it is prohibited to hide the cover of the junction box under finishing materials. It must always be available for maintenance or, if necessary, repairs.
But you must admit that the white lid will draw attention and spoil the entire appearance of the room’s decoration. Alternatively, paint the lid to match the color of the walls. But it will still stand out, especially against the background of wallpaper or decorative plaster. That's why many people hide them.
Yes, I did this during a major renovation of my apartment. In the kitchen I had a large rectangular box installed on a cabinet in a not very noticeable place, so I covered the lid separately with wallpaper, choosing a pattern and this is what I came up with.
In the hallway and rooms, I had to knock out the old boxes and put new ones in their place because they were sticking out above the wall level (not high-quality electrical installation).
I then had wallpaper glued everywhere on top, so I installed the boxes strictly at the level of the wall so that the lid did not protrude. The wallpaper was glued directly to the lid. As a result, it turned out to be absolutely invisible after pasting. And if access is necessary, I will always find the box and can access it by peeling off the wallpaper in this place. They can then be easily glued back if the wallpaper is heavy vinyl and especially non-woven. If you have paper wallpaper, then you will have to carefully cut along the contour of the lid with a sharp knife and then put the lid back together with the wallpaper glued to it. it’s almost impossible for a person without experience in electrical installation work to smear the box perfectly with the lid on, level with
But after desoldering, it will be
necessary to plaster or putty the installation site .
But remember and mark its location. To avoid the need for subsequent maintenance and repairs, the following installation requirements must be met:
- Carry out work only after disconnecting the voltage from the work area. Take measures to prevent someone from mistakenly turning on the machine in the electrical panel.
- All cables or wires must be stripped without damaging the insulation. If you accidentally damage the core insulation during cutting, be sure to insulate the damaged area with electrical tape.
- The connection of the wires must be reliable : welding or soldering. There is a soldering iron in almost every home, so I and many others use an inexpensive and high-quality method of connecting wires using soldering. Be careful not to melt the insulation. It is enough to solder the tip of the twist 2 centimeters long with a total length of 4-6 centimeters.
- Securely insulate and separate in different directions when laying the phase, neutral and grounding conductors in the box.
- Close the lid tightly so that no solution or glue gets inside.
Before starting finishing work, check the operation of lighting and electrical outlets.
Selection of decorative thresholds
The correct choice of threshold must be made according to a number of criteria:
- functional purpose of joined coatings. For example, if laminate is installed in the hallway, and tiles are installed in the kitchen, then the threshold connecting them must have sufficient strength and moisture resistance in accordance with the operating conditions in both parts of the house. It is best to use an aluminum or plastic strip in such conditions;
- from a design point of view, the choice remains solely with the owner, who should determine how harmoniously the threshold will look in combination with the joined floorings. Here you can play with the method of contrasts or, on the contrary, create a uniform coating. When it comes to delineating rooms, it is best to select a threshold that will be monochromatic for one covering and will set off another;
- if we are talking about height differences, then it is necessary to select multi-level thresholds for the laminate and focus in this process on the thickness to be covered.
Naturally, we should not forget about the prestige of even such a small decorative element as a threshold. A priori, a low-quality plastic threshold cannot be located next to a very expensive laminate.