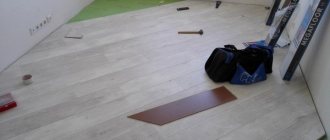
Penoplex is an insulation material that is often used in construction to insulate surfaces, including when laying laminate flooring. This heat insulator is very popular due to its strength and moisture resistance.
Before use, it is recommended to carefully familiarize yourself with the characteristics of the material, as well as the features and technology of laying penoplex under the laminate.
Why choose penoplex?
The popularity of penoplex is due to a number of important advantages:
- Fine cell structure . The presence of many cells increases the effectiveness of penoplex, aimed at retaining heat in the room.
- Moisture resistance . This property is maintained even with prolonged use of the heat insulator. Thanks to its ability to resist fungi and mold, penoplex retains its performance and characteristics for a long time.
- High level of strength . Penoplex has an increased compression resistance. Thanks to this property, sagging of the laminate can be prevented.
- Compatible with underfloor heating system . Contact with hot surfaces does not negatively affect the performance of the insulation. The exception is temperatures above 80 degrees. In this case, deformation of the heat insulator and partial or complete loss of its properties is possible.
- Fire resistance . Thanks to this property, penoplex can be used in wooden houses.
- Versatility . Penoplex is used for insulating floors placed on the ground, above basements, on floors, balconies and loggias. In any conditions, the material is able to provide an optimal level of comfort for people to live in.
- Relatively low cost.
Due to its characteristics, penoplex can be effectively combined with laminate of any thickness.
When choosing penoplex for laying laminate, it is important to consider that this heat insulator loses its properties under the influence of ultraviolet radiation and has lower sound insulation rates than other heat insulators, for example, fiberglass or mineral wool.
Technical characteristics of penoplex of different brands
| Penoplex brand, properties | 31 | 31С | 35 | 45.45С |
| Density (kg/m3) | 28-30.5 | 25-30.5 | 28-37 | 35-45 |
| Compressive Strength(MPa) | 0.20 | 0.20 | 0.21 | 0.41 – 0.50 |
| Flexural strength (MPa) | 0,25 | 0,25 | 0,4 | 0.4-0,7 |
| Water absorption coefficient, % | 0.4 | 0.4 | 0.4 | 0.2 – 0.4 |
| Fire hazard | G4 | G1 | G1 | G4 |
Video: Laying laminate flooring on penoplex - without screed
Penoplex has many positive properties and high performance characteristics. Therefore, novice builders assume that it can be installed without it. In reality, this opinion is incorrect, but although the video shows how to do it.
When can you do without it?
- the laminate is laid over chipboard/fibreboard and attached to them with self-tapping screws - they will still cut through the waterproofing, so there is no point in laying it down;
- laminate flooring is installed in an apartment of an apartment building, not on the ground floor, where people live all year round and there is centralized heating (or other heat sources that work in cold weather);
- there is a wooden floor under the laminate - in this case, waterproofing is needed already under the wooden floor (because if moisture gets on the wood from below, the laminate will survive, but the wood underneath will rot).
Laying with concrete screed
When laying penoplex under a laminate with a concrete screed, first of all it is necessary to level the floor surface. Only after this can you begin laying out the heat insulation slabs and waterproofing material. In this way, it will be possible to prevent the penetration of moisture from the sand-cement screed into the joints.
The next stage is the uniform distribution of the pre-prepared concrete mixture over the entire surface of the waterproofing. It is recommended to use a self-leveler.
Thus, the composition will independently distribute itself evenly over the surface, providing a perfectly flat base for further laying of the laminate. This measure will significantly extend the service life of the coating. The substrate and laminate are installed after the composition has completely dried.
When using cement screed, it is recommended to use slabs with grooves at the ends. They will provide tighter joints.
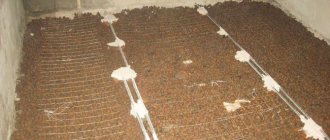
If you plan to install heated floors, it is recommended to follow a number of tips:
- Installation should be carried out using special technology provided for such cases.
- When choosing a heated floor, give preference to a water-type system. Electrical structures have the ability to quickly warm up, which negatively affects the condition of the penoplex.
- When using an electric floor heating system, install thermostats to progressively increase and decrease the heating temperature. This will preserve the suitability of the thermal insulator for a long time.
Film for laminate
So, the laminate film itself is an ordinary, but durable and dense polyethylene, which is sold in almost any construction and even hardware store. Its thickness should be about 0.2 mm - in this case the most durable waterproofing layer will be obtained. The material must be taken as wide as possible so that there are not a large number of joints.
About the requirements for laminate film
On a note! When laying the film under the laminate, it is important to overlap the individual strips with each other. You need to layer the material by about 20 cm, and then firmly fix the joints with tape.
By the way, if the floor is being installed on the ground floor of a private house, where the soil is quite close to the foundation, it is better to take a denser and thicker film. Only then will it be possible to provide the required level of waterproofing and not worry that moisture will still reach the laminate and ruin it.
Laminate must be protected from moisture
In general, the film under the laminate performs the following functions:
- protects flooring materials and laminate in particular from moisture . It turns out that part of the liquid, which this coating does not like so much, can leak from the outside from below, through the screed;
The photo shows a damaged coating: this happens rarely, but water can do this too
- partially levels the base . Laminate should only be laid on a flat surface, otherwise over time it will begin to crunch and its locking joints may be damaged. The film, of course, is not an ideal material specifically for leveling, but it can somewhat smooth out the unevenness of the surface of the rough base;
Laminate should only be laid on a flat surface
On a note! For additional leveling, as well as for sound and heat insulation, it is recommended to use a special underlay for the laminate, which can be made of various materials.
Modern laminate underlays
- complements the soundproofing properties of other materials . Yes, despite the fact that the film layer is quite thin, it still helps smooth out sounds.
Despite all of the above, the main function of the film under the laminate is moisture protection . And experienced craftsmen do not recommend abandoning the installation of this material, especially since it is inexpensive.
The film under the laminate is necessary, first of all, for protection from moisture
Laying with dry screed
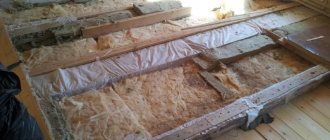
The procedure for laying penoplex under laminate with a dry screed is much simpler than with concrete and requires less time. At the first stage of work, it is necessary to place wooden logs.
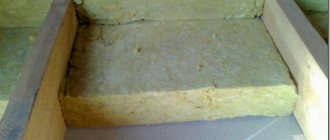
Penoplex should be laid in between them. The height of the logs must match the thickness of the thermal insulator. Thus, the entire resulting load will be evenly distributed between the screed and the insulation.
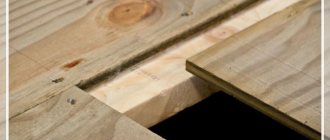
Plywood, gypsum fiber boards (GVL) and other suitable materials are used as dry screeds.
The thickness of the plywood should depend on the distance between the joists. The larger it is, the thicker the screed should be. This will prevent the laminate from bending in the future. When laying plywood, it is important to carefully check the level of the surface. The final stage of work is laying the underlay and flooring.
Deformation of the laminate can lead to damage to the locks of the floor covering and loss of its appearance.
When choosing a dry screed, it is recommended to use a heat insulator without a curved edge.
Flaws
The main disadvantage of the insulation was the inability to hide existing unevenness with its help. If their size exceeds one centimeter, a laminate floor with such a substrate will quickly lose its relief and begin to creak when walking.
Another disadvantage is the packaging of the material. It is not sold in parts; you have to purchase extra material, which certainly leads to financial losses.
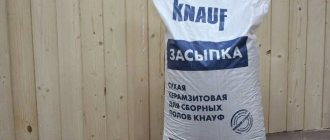
Packaging of polystyrene foam material
Substrate and penoplex
During installation work, it is important not to confuse penoplex and the substrate, which can be cork or polyethylene. The task of the latter is to prevent the penetration of noise and moisture.
The substrate itself is not capable of preventing the destruction of penoplex. This function is performed by the screed. Therefore, during installation work you should not deviate from the technologies developed by specialists.
It is important to adhere to the established rules and use all structural elements: penoplex, screed, substrate and laminate. In addition, it is forbidden to violate the order of laying the listed components.
Only if the technology is followed will it be possible to obtain a beautiful, reliable and warm floor that can last for many years. Otherwise, within six months, new repairs will be required to correct the mistakes made.
Preparatory stage
The screed will help level the base under the laminate.
Floor insulation should begin with eliminating surface imperfections. The concrete floor needs to be leveled: fill existing depressions or holes, grind off the bumps, putty on chips and cracks. If the floor is wooden, the boards will have to be removed. You can install waterproofing to prevent moisture from getting into the insulation being installed.
It is advisable to ensure that during the work you have all the necessary tools at hand:
- jigsaw;
- screwdriver;
- drill with various attachments;
- hammer;
- dowels, screws;
- level or rule;
- roulette;
- marker or pencil;
- construction stapler and knife.
Depending on the type of insulation chosen, the list of tools may expand somewhat. For example, to lay expanded clay you will need a shovel, and when using poured materials, you will need a container for their preparation. It is not necessary to purchase the required tools. You can borrow something from friends or rent it - many construction companies now provide such services.
Floor without joists
Laying penoplex without joists is allowed only on a perfectly flat and smooth floor without any protrusions. Plywood is laid on polystyrene foam in two overlapping layers. Both tiers are fastened with self-tapping screws. Particular attention should be paid to seam areas. The result should be an almost monolithic slab capable of withstanding high uneven loads.
This technology requires careful selection of plywood. If it is not thick enough, sags may form in areas of high pressure over time.
Characteristic
The material is distinguished by its safety and meets environmental requirements. It is made in several types. It all depends on the performance characteristics and thickness. Expanded polystyrene boards can have milled grooves to create a tight connection.
The thickness of the sheet does not exceed three millimeters. This size is mainly used for rooms where the floors must differ in their heat-insulating properties. Typically, sheets are produced packed in packs of 20 pieces.
For all its positive properties, extruded insulation also has several negative qualities:
- high price;
- not very high depreciation rate;
- there is no microventilation.
For a minimum difference in floor levels, you can install any version of polystyrene foam sheets. Thanks to the groove system, the material adheres more tightly to the floor surface and excellent air flow is maintained.
In homes, polystyrene foam boards of the “PSB-S-35” type have become the most popular. If the floors experience increased pressure, PSB-S-50 will be more reliable.
PSB-S-35 series
When choosing a brand of heat insulator, you need to take into account its service life. It is designed for 15 years. After the end of the guaranteed period, the structure may change and deformation of the material may appear.
Expanded polystyrene is a type of polystyrene foam. It has a smooth surface and microporous structure. The material is obtained by foaming polyethylene granules in special extruders.
To obtain a cellular structure and minimal weight, water vapor and some types of volatile petroleum products are supplied to the pressure zone. The lightness of the material does not affect its strength; it remains very high, and the thermal insulation performance is higher than that of other similar materials.
PSB-S-50 series
This polystyrene foam substrate has a large number of positive characteristics:
- does not allow moisture to pass through;
- mold does not appear on the surface;
- fungus never forms;
- does not cause an allergic reaction;
- high strength;
- does not lose stability under high pressure.
The production of such sheets for laminate coating is carried out using special equipment. The result is an excellent material that does not react to accidental snags. It functions as an excellent heat insulator and protector against moisture.
This insulation for laminate is produced in the form of separate sections, with dimensions 1000x500x20. The sections are joined together with a special foil-coated multilayer polymer fabric. The result is an original design that has a moisture-resistant base with well-sealed joints.
Such packs are not unpacked when sold. Therefore, the color scheme can have a variety of shades. However, this does not in any way affect the strength properties of the material.
Ground installation: step by step
The design thickness of such a floor cake is 60-70 cm. The base must be dry and thoroughly compacted.
- A layer of gravel 30 cm or more thick is laid alternately with a layer of fine sand about 10 cm thick - both layers must be thoroughly compacted.
- Carefully level the installation location.
- They are alternately covered with expanded clay and sand to a height of 40 cm.
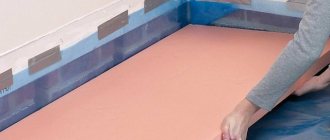
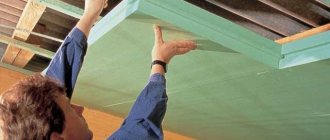
- Then thermal insulation boards with a thickness of 5 cm or more are laid. The insulation sheets are neatly connected without gaps. The joints are sealed with adhesive tape. Penoplex is suitable for the first floor.
- The entire base is covered at the edges with tarred paper (roofing felt) or polyethylene. They are mounted on penoplex.
- Then a metal mesh is laid for reinforcement and the whole thing is filled with concrete. The layer thickness must be at least 5 cm.
- To avoid problems when laying the floor, the pouring is carefully leveled over the entire pouring plane.
Video: DIY ground floors
Security measures
A smoke generator is a device with increased fire hazard. Despite the low temperature of the smoking process, following these rules will help you avoid trouble:
- The device is installed on a flat, non-flammable surface.
- Painting is possible only with heat-resistant paint.
- The device should be placed away from electrical wiring, flammable liquids and combustible materials.
- The factory device must be equipped with an emergency shutdown system.
Following these steps will not only help you prepare delicious food, but also prevent fires and damage to your health.
Insulation of wooden floors
Insulation of a wooden floor is allowed only if the boards are in good condition.
In addition to penoplex, the following tools and materials will be required for work:
- building level;
- hammer;
- grinding wheel;
- screwdriver;
- self-tapping screws;
- primer with an antiseptic composition;
- vapor barrier;
- plywood;
- Chipboard or OSB.
Algorithm for insulating a wooden floor:
- Remove baseboards and top covering.
- Check the quality of the boards. If mold, black spots, insect damage or other imperfections are found, the damaged boards must be replaced. If there are no flaws, you need to return the boards to their original place and check their horizontal position.
- Level the wooden surface using a grinding wheel, fill all existing cracks and recesses with wood putty.
- Treat wooden surfaces with an antiseptic primer. Wait until completely dry. If the wood is too porous, it is recommended to repeat this procedure 2 - 3 times.
- On a dry surface, lay out the foam boards in a spaced pattern and secure them with glue. Foam all the resulting gaps. It is important to take into account that toluene has a destructive effect on penoplex. Therefore, you should choose a foam that does not contain this component.
- Lay the vapor barrier overlapping by 10 centimeters so that its edges slightly overlap the walls. In the future, all excess material must be removed.
- Lay a layer of plywood or chipboard so that the seams do not meet in one place. During work, it is important to control the surface level. It should be perfectly smooth.
- Lay the underlay and lay the laminate.
Video: Insulating a wooden floor with penoplex over joists
Many craftsmen recommend using logs to insulate wooden floors. But in this case, such important properties of penoplex as moisture resistance and strength lose their relevance. Therefore, to insulate a wooden floor using logs, it is advisable to use cheaper materials, for example, mineral wool or polystyrene foam.
When laying laminate flooring as insulation, it is important to choose a material that has high performance characteristics. One of the best options is penoplex. Due to its structure, it has high thermal insulation properties. If the technology and all the listed rules are followed when installing the coating, the floor will remain smooth, beautiful and warm for a long time.
About waterproofing under laminate
Since laminate is afraid of water, you definitely need to worry about waterproofing when laying it. Most craftsmen tend to lay a layer of plastic film under the coating, which will play a waterproofing role. But in general, waterproofing can be done in a different format.
Waterproofing laminate flooring is very important
Table. Types of waterproofing.
| Type of waterproofing | Description |
| Roll | In this case, various roll materials are used to create a waterproofing layer. They can be either polymer or bitumen-based. Usually it is enough to simply glue the pieces of the required size onto the base using glue, make sure that there are no unclosed seams, and the waterproofing is ready. It is recommended to add materials to the walls by approximately 15-20 cm. In this case, only the adhesive layer needs to be dried before starting further work. |
| Concrete | This type of waterproofing is prepared from cement and sand, sometimes with the addition of liquid glass. You should coat the base with this mixture, without missing a single centimeter of the surface, and also partially apply a layer of waterproofing to the walls (15-20 cm). It is best to apply in several layers, after which it is important to dry the surface thoroughly. |
| Cast | In this case, liquid bitumen or polymer compositions are used, which are applied to the base and lower parts of the walls. After the mixtures harden, a reliable protective layer is formed that will not allow moisture to pass through. |
But since the article deals directly with the film under the laminate, it is worth considering this material in more detail.
Laminate film. Film for laminate
Expanded polystyrene
One of the most popular insulation materials for insulating concrete floors under laminate is extruded polystyrene foam. This material is often compared to foam plastic. However, polystyrene foam has better qualities in terms of heat retention. It is made by hot expansion method. Micropores form in the material, similar to foam ones, but many times smaller. Expanded polystyrene sheet is stiffer. It can be laid directly under the laminate or poured under a concrete screed.
The material practically does not burn and does not absorb moisture. It does not form mold. The only negative is that polystyrene foam practically does not breathe. It is better to use it as the main layer of insulation under a self-leveling concrete screed. In this case, you need to reinforce the top layer with metal mesh.
Penoplex is also extruded polystyrene foam. It is also used as insulation.
