To install communications in the walls, you will need to use a specialized tool - a wall chaser. It is rational to buy it for professionals who are engaged in repair and construction work, in particular for electricians, plumbers, plumbers, etc. If repairs are carried out independently in a house or apartment, then it is not necessary to buy a specialized tool, since you can make a wall chaser attachment for an angle grinder. How this can be done with the least investment is described in detail in the material.
What is a wall chaser
When renovating apartments, homeowners take a new approach to the placement of utility networks and various communications:
- water supply pipes;
- heating lines;
- power cables;
- sewer risers.
It is understandable that apartment owners want to place communications inside the walls and thereby improve the appearance of the premises. The technology for hidden placement of highways involves the creation of special grooves. In the vocabulary of professional builders, such channels are called grooves. For their production, a gas silicate wall chaser is used.
Wall cutter for aerated concrete. The tool began to be used relatively recently. Before its appearance, equipment was used for chiselling grooves that created vibration during operation and negatively affected the strength of building structures:
- a bolt or chisel that was struck with a hammer. The process of creating the grooves was slow and required considerable effort;
- pneumatic hammer. The tool created increased noise and significant vibration. A lot of dust was also present during the formation of the channel;
- industrial hammer drill. During the formation of cavities, vibration negatively affected the strength of concrete and caused the formation of cracks.
The use of these types of equipment required significant physical effort and was characterized by reduced productivity and increased labor intensity. Increased concentration of dust, significant noise and vibration caused a lot of inconvenience. The outdated equipment was replaced by a wall chaser for aerated concrete - a hand-held tool that has many advantages:
- reduces the duration of laying channels in walls;
- reduces the labor intensity of construction operations for gating;
- allows you to provide the necessary channel geometry in various building materials;
- provides the ability to adjust the width and depth of the cavity being formed;
- removes dust from the treated area, reducing dust concentration;
- forms a channel of the correct shape with constant dimensions along the length.
Industrial wall chaser for aerated concrete.
For one-time work, there is no need to purchase an industrial wall cutter for aerated concrete, which is quite expensive. There is a good solution - you can assemble a wall chaser from an angle grinder with your own hands. Drawings are not needed for this modernization, because the design is simple. Using available materials, you can expand the technical capabilities of home tools equipped with an aspiration system. The use of a self-made tool ensures:
- reducing the cost of plastering the groove due to the neat shape of the channel. The resulting groove does not require an increased amount of plaster;
- the ability to cut grooves in building materials with increased hardness. In this case, two cuts are performed at once in one pass.
After processing, all that remains is to remove the cut building material located between the cuts, and you can begin laying communications.
The best household appliances
For periodic use at home, a simple and low-power tool (1-1.6 kW) is suitable. When chipping concrete, the speed of such a device will leave much to be desired, but you will be able to save a lot. If you work carefully and intermittently, such a furrower will last quite a long time.
Fiolent B1-30
Fiolent B1-30 is an ideal household model that has proven itself in work. It is intended for processing brick, shell rock, limestone and, to a lesser extent, concrete. In addition to adjusting the speed, all possible functionality is available, including accidental start blocking, soft start and self-switching brushes.
| Advantages | Flaws |
| Combines the functions of a wall chaser and an angle grinder. | There is not enough power to cut concrete, which affects the speed of work. |
| Adjustable cutting width. | |
| It works quietly, without play or noise. | |
| The handle rotates 90*. | |
| Overheat protection. | |
| Cheap price. |
Fiolent B3-40
A cheap tool that has all the advantages of a professional one, except reliability. Quickly and accurately cuts a groove for electrical wiring in a brick wall. Convenience of operation is provided by a fitting for a vacuum cleaner and an additional handle. If necessary, Fiolent B3-40 can be used as an angle grinder (revolutions allow).
| Advantages | Flaws |
| High power and rotation speed. | Overheats quickly when cutting concrete. |
| Extended cable | With frequent use, bearings quickly fail. |
| Ideal combination of price and quality | To adjust the cutting width, you need to disassemble the casing. |
Bison ZSh-1500
A good wall chaser in a low price category. It will help to install wiring in the apartment or lay a small diameter pipeline, but no more. The device is quite bulky and slow; only an experienced technician with a steady hand can handle it.
| Advantages | Flaws |
| Reliability. | Heavy weight. |
| Jam protection. | Not comfortable handle. |
| Start lock. | Incorrectly positioned nozzle, due to which most of the dust is not sucked in. |
| Reasonable price. | The casing is equipped with a spring, so it must be pressed against the working surface all the time. |
| Low operating speed. |
Caliber Master SHTBE - 2600/230m
Despite the versatility of the device, it is advisable to buy it only when planning work on panels and reinforced concrete. The Master gauge is ideal for cutting grooves in the floor. When working with walls, it is convenient to guide the tool from top to bottom - then it cuts with the weight of its own weight.
| Advantages | Flaws |
| Great power. | Heavy. |
| Deep cut | Complex disk replacement system. |
| The nuts on the casing are constantly loosening. | |
| Relatively low cost. | Equipped with low quality discs that will have to be replaced immediately. |
| Inconvenient control handle. |
A little about gating
A groove (the term “furrow” is less commonly mentioned) consists of two parallel grooves, the width and height of the walls of which determine the possibility of installing communications in it. To make grooves, the following groove dimensions are required:
- Width from 3 to 50 mm (the first option provides for laying only power and low-current cables in the groove, the second - for installation of heating system pipes);
- The depth of the groove is no less than its width, but it is better with a small margin of 5...10 mm;
- The bottom of the groove is smooth, without protrusions.
Sometimes you have to cut inclined grooves. For oblique grooves, all specified dimensions are usually increased by 10...12%. The groove should be as even as possible, since any slope of the groove will automatically increase the length of the cable or pipe. The distance from the groove axis to adjacent ceiling structures, openings, etc. must be at least 150 mm, and to the gas pipeline elements - at least 400 mm.
The material of the walls also matters. Since the groove is obtained by removing material from under the tool disk, all dust and stone fragments fall into the worker. Even when performing such work in walls made of foam or aerated concrete, the need for dust collection is very important, since fine dust will remain in the air for a long time.
In a professional wall chaser, all these problems are solved by connecting a vacuum cleaner with a cyclone filter to the tool. Ordinary mesh ones will become clogged with gating products within a few seconds of continuous operation of the wall chaser.
The second significant difference between gating with a specialized tool is the presence of a movable frame with wheels, which, when controlled, can significantly reduce the load on the worker’s hands. A single-disc wall chaser attachment for an angle grinder does not fundamentally solve the problem, since the depth of the groove is not limited in any way, and manual removal of the jumper is very labor-intensive and does not ensure good quality of the bottom of the resulting groove. In addition, during the second pass it will not be easy to achieve parallelism of the walls of the groove.
The best professional tools
The main difference between professional wall chasers and household ones is the ability to withstand constant high loads. Thanks to this, they can work for 60 minutes without interruption.
Makita SG 1250
One of the favorite tools of electricians involved in apartment renovation. Thanks to the revving engine and a sophisticated dust removal system, the Makita furrow cutter cuts a neat groove in drywall, brick and shell rock. Among the options pleasant for the master, it is necessary to highlight the vibration-damping adjustable handle and the soft start system.
| Advantages | Flaws |
| Equipped with diamond discs. | High price. |
| Good dust removal. | Due to its low power, it is not suitable for large objects. |
| High mobility. | The safety clutch on the anchor often fails. |
| Automatic adjustment of rotation speed. | There is no provision for lowering the groove to the floor or ceiling (it does not reach 20 cm). |
Bosch GNF 35 CA
A powerful and compact device that can handle materials of any strength. But it is most convenient to use it on clean concrete. When working with plaster, a large amount of dust is generated that does not enter the pipe. Well suited for laying cables in tiled floors.
| Advantages | Flaws |
| Reliability. | Expensive to maintain. |
| Build quality. | Very dusty. |
| Neat and precise cutting. | Inconvenient power button. |
| Due to lack of power, the protection system often trips. |
Metabo MFE 65
The powerful Metabo wall chaser is designed for professional work with any materials: expanded clay concrete, brick, foam block, reinforced concrete, floor tiles, stone. When using 1 disk, it can perform the functions of an angle grinder.
| Advantages | Flaws |
| High performance. | Very high price. |
| Great power. | |
| Convenient groove depth adjustment. | Difficult to hold in your hands. |
| German assembly. |
Wall chaser for foam blocks - design features
Manual tools for grooves can be manufactured in the following design options:
- based on a regular grinder. The design provides for the installation of two concrete cutting discs on the device shaft, between which a sleeve of the required length or the required number of washers can be installed. By changing the length of the spacer element, the interval between the cutting discs is adjusted, corresponding to the width of the channel;
- modernized version. It is an improved version of the grinder, on which, in addition to two circles, a casing made of metal sheet is mounted. Dust generated during the gating process is removed through a pipe attached to the metal casing of the aspiration device;
Wall chaser based on a regular grinder
- based on a hand grinder. An improved version of the tool is similar in design to a grinder with an aspiration casing. A distinctive feature of the design is the presence of a mobile platform with wheels, fixed at the bottom of the dust receptacle. This option allows you to easily move the device along the wall without applying significant effort.
An electric wall chaser for a gas block is more efficient than a manual tool due to the following points:
- increased cutting speed;
- smooth surface of the groove walls;
- clear channel geometry;
- increased security;
- aspiration possibilities.
Modern electric scoring tools include:
- protective casing. It prevents the operator from being injured by fragments when rotating the disks;
- aspiration pipe. Provides dust extraction from the work area when connected to a vacuum cleaner;
- work site. Provides smooth movement of the device along the wall and allows you to adjust the depth of the groove;
- working handle. It can be installed in various places of the casing, providing a convenient location for the device when cutting;
- electric drive. Accelerated slitting is provided with a power of 2 kW and a spindle speed of 5500 rpm.
If you use a grinder instead of a wall chaser
an angle grinder with a homemade dust extractor, suitable for small jobs.
It is clear from the design that, in extreme cases, the machine for making grooves can be replaced with an ordinary angle grinder - put a concrete disc on it and make the necessary cuts in two passes. This is actually done if one small groove is needed, but practice and multiple reviews show that the dust after such a groove will settle for a long time, which can stall the whole work.
If it is necessary to make several grooves, the loss of time will be significant, and if such work is performed with some frequency, then the method becomes ineffective. Other disadvantages of this method are the inability to maintain the same dimensions of the groove edges and their depths. This cannot be called a significant drawback, but sometimes it can lead to a piece of the wall falling off when the core of the groove is hollowed out.
If the length of the mounting shaft allows, then you can put two concrete discs on the grinder at once and then the groove will be cut in one go. Even if we do not touch upon the issue of safety precautions, there will be no less dust and it will settle at the same speed. As a result, the time gain is insignificant, and the risk of injury increases by an order of magnitude.
Application benefits
Wall chipping is a difficult, troublesome task that takes a lot of time and effort. Previously, a variety of devices were used for such work: a chisel and chisel, a hammer drill, an angle grinder. But it is much more convenient and efficient to use a wall chaser or an attachment on an angle grinder for chasing.
So, using a specialized tool has the following advantages:
- The speed of work completion increases significantly, and labor costs are reduced.
- Can be used in conjunction with a construction vacuum cleaner.
- Work safety increases.
- It is easy to adjust the width and depth of the groove.
- The grooves are smooth, without chips or drops.
Safety precautions
When working with a wall chaser, you should follow the following rules:
- Protect your hearing with headphones. When starting at idle, the machine may seem to be running quietly. In field conditions, the sound of the engine will be supplemented by the grinding of disks and the noise of a construction vacuum cleaner, multiplied by the acoustic effect of an empty room.
- Manipulate with safety glasses. Dust particles that get into the eyes can cause inflammation of the conjunctiva.
- When working on plaster, wear a respirator. Fine particles can settle in the respiratory system.
- Calculate your strength. A wall chaser is a heavy and powerful tool. To cope with it, appropriate physical preparation is necessary. If the device slips out of your hands, it can cause injury or damage. It is especially important to take this factor into account when chipping the ceiling when your hands are in a vertical position.
Wall chaser design and functions
Structurally, this universal tool is most similar to an angle grinder (angle grinder), which in everyday life is called an angle grinder. It is widely believed that this is an angle grinder with two discs. Frankly speaking, it is almost correct. The main difference is that the wall chaser is equipped with a powerful electric motor, usually with the ability to control speed and smooth start. Good models have overheating and overload protection functions. In case of significant loads, they will allow you to save the tool.
The wall chaser uses diamond discs, the distance between them is adjusted to obtain a groove of the required width (usually up to 60 mm). For safety reasons, they are covered with a special casing. In addition, the casing has an outlet for connecting a vacuum cleaner, this allows minimizing the emission of dust during gating. To obtain the required depth, it is equipped with a special adjustable stop (usually up to 80 mm).
With the help of an attachment for an angle grinder, you can completely replace the wall chaser.
Design and features of a wall chaser
In appearance and functionality, the wall chaser resembles a grinder with two discs. This is actually true, because it was the angle grinder that was taken as the basis for this tool. The main difference is that the wall chaser contains two entire disks, and the very high power of the tool allows you to cut out large areas of walls from any material - from brick to concrete - very quickly and with minimal effort. The principle of operation of the device is the same as that of an angle grinder; cutting discs drill out walls to the required depth, but there are significant differences.
Let's look at the kit of the wall chaser:
- The cutting attachment is located strictly perpendicular to the platform.
- The platform, or sole, of the wall chaser allows you to rest it on the surface being cut, making the work easier.
- By adjusting the sole, you can set the required depth of the groove.
- It is mandatory to equip the tool with a vacuum cleaner.
- Two cutting discs, when adjusted, you can adjust the desired distance between the grooves.
Since the wall chaser is a professional tool with a narrow focus, it has disadvantages:
- High price. A high-quality power tool is expensive, and only pays off in cases where the master constantly works with the tool. In case of one-time use, there is no point in purchasing it.
- Narrow list of work performed - Cutting tiles or metal will not work due to the presence of two discs instead of one.
It is useful for owners of private houses to know how to choose a circulation pump for a heating system.
Features of choosing a tool
When there is a need to purchase such a tool, it is better to follow simple instructions:
- Select the required power of the tool. Here it is important to be guided by the amount of work ahead. Low-power wall chasers (up to 1.3 kW) are suitable for solving small household problems. Medium-power tools (1.3 kW - 2 kW) can cope with all household tasks, they heat up much less than their low-power counterparts, and their service life is much longer. It makes sense to buy powerful models over 2 kW only for regular and very large, volumetric work. In addition, the more powerful the tool, the heavier it is. This feature should also be taken into account.
- Determine such characteristics as the required maximum depth and width of the groove, the possibility of cutting the groove at an angle, the range of regulation of the electric motor speed.
- Availability of additional options: slip clutch, protection against overheating and overloads, a brush wear control system, the ability to use it in “grinder mode”, the presence of a vibration protection system.
Advantages
The wall chaser gives the master several advantages at once:
- Minimal dust in the working area. Unlike an angle grinder, any furrow cutter is equipped with a pipe that catches particles of concrete and plaster. This is especially important if the renovation is carried out in a room where people live.
- High performance. Thanks to two disks, the wall chaser performs work at least 2 times faster than any angle grinder.
- High furrow quality. This is ensured by rollers, target marks, good visibility and a disk rotation control system.
Electric
This is a powerful tool that has two rubber rollers that help the wall chaser move easily along the wall surface being processed. This furrower is equipped with comfortable handles and several cutters that move thanks to a built-in electric motor. Designed for cutting grooves in various hard building materials.
This is a fairly simple construction tool, but its use requires certain skills and experience from the master. Also, when working with power tools, you should remember to wear personal protective equipment, as they create a lot of construction dust and noise.
What problems does an electric furrow tool solve?
The best wall chaser for concrete is, of course, electric. Tools of this type are suitable for making grooves not only in brick walls, but also in reinforced concrete and even stone structures. Agree, it would be impossible to handle this manually. The design of this tool resembles an angle grinder. Such a unit is capable of cutting furrows using discs with a diameter of about 150 mm. The discs are attached in the same way as on grinders.
During work, a large amount of dust is generated, and it must be disposed of in a timely manner. Therefore, it is always necessary to work with a vacuum cleaner in parallel with this tool. Basically, all modern tool models are additionally equipped with a special system that connects the vacuum cleaner directly to the furrow machine. It is convenient and a good help for dust removal
It is important to have special clothing when working with this tool: this includes glasses, respirators, and noise protection headphones.
There are power tools specifically designed for concrete. They are distinguished by the presence of rubber rollers, which facilitate the movement of the tool across the working area. The operation of the built-in apparatus begins with the movement of an electric motor by a rotating body with several cutters. For convenience, the instrument has hand holders attached. Often, when working with such a device, additional tools are needed, without which the work cannot be done correctly and efficiently. It is difficult to cope with the work in this case without a level, ruler and pencil for marking.
https://youtube.com/watch?v=YikOFzaEgF0
Do-it-yourself wall chaser from an angle grinder
A wall chaser is a rather rare tool that not everyone has, but almost every home craftsman has an angle grinder. As already noted, structurally, these tools have a lot in common, so for home use you can easily make a wall chaser from an angle grinder with your own hands.
To begin with, it should be noted that you can use a grinder for slitting without any modifications, but it will be inconvenient, dusty and ineffective. A wall chaser is incomparably more convenient in this regard, but it is expensive. The rework will not require any special material or time costs.
We should start with the main difference - the wall chaser has two discs, and the grinder has one. It is necessary to order or grind yourself a nut with an additional ring to secure the second disk. The first disk will be secured in the usual way, and the second one directly to this nut. It is best to make several nuts of different thicknesses so that you can adjust the width of the groove. It is necessary to pay attention to the length of the shaft; it should be enough to mount two disks. It may be necessary to purchase or manufacture an extended shaft. Read about how to make a casing for connecting a vacuum cleaner here.
The second stage is the manufacture of a groove depth limiter. It is much more convenient and easier to work with him. You should also make a support plane so that the grinder with the attachment can be moved along the groove.
At the last stage, a homemade protective casing is made. By the way, the depth limiter can be combined with a protective casing, which is very convenient and greatly simplifies the entire design. It is necessary to provide an exhaust pipe in the casing for connecting a vacuum cleaner, otherwise it will be almost impossible to work in a closed room due to the high concentration of dust. It is absolutely forbidden to work without a protective casing - the likelihood of injury, even death, is extremely high.
Homemade wall chaser - the simplest option
Without making major changes to the design of the angle grinder, you can quickly and cost-effectively produce a simple device for grooving by fixing one disk on the shaft for working on concrete.
Procedure for working with the tool:
- Attach a disc to the shaft for working on concrete.
- Make markings on the surface to be treated.
- Make two passes and form a groove of the desired size.
This method has disadvantages:
- it is problematic to ensure size stability;
- it is difficult to maintain the depth of the groove.
Homemade wall chaser If you increase the length of the spindle, you can install a pair of concrete disks on it and form a channel in one cycle. This will save time, but will not solve the problem of dust formation.
Do-it-yourself wall chaser from an angle grinder
A wall chaser is a rather rare tool that not everyone has, but almost every home craftsman has an angle grinder. As already noted, structurally, these tools have a lot in common, so for home use you can easily make a wall chaser from an angle grinder with your own hands.
To begin with, it should be noted that you can use a grinder for slitting without any modifications, but it will be inconvenient, dusty and ineffective. A wall chaser is incomparably more convenient in this regard, but it is expensive. The rework will not require any special material or time costs.
We should start with the main difference - the wall chaser has two discs, and the grinder has one. It is necessary to order or grind yourself a nut with an additional ring to secure the second disk. The first disk will be secured in the usual way, and the second one directly to this nut. It is best to make several nuts of different thicknesses so that you can adjust the width of the groove. It is necessary to pay attention to the length of the shaft; it should be enough to mount two disks. It may be necessary to purchase or manufacture an extended shaft. Read about how to make a casing for connecting a vacuum cleaner here.
The second stage is the manufacture of a groove depth limiter. It is much more convenient and easier to work with him. You should also make a support plane so that the grinder with the attachment can be moved along the groove.
At the last stage, a homemade protective casing is made. By the way, the depth limiter can be combined with a protective casing, which is very convenient and greatly simplifies the entire design. It is necessary to provide an exhaust pipe in the casing for connecting a vacuum cleaner, otherwise it will be almost impossible to work in a closed room due to the high concentration of dust. It is absolutely forbidden to work without a protective casing - the likelihood of injury, even death, is extremely high.
An angle grinder with a power of at least 1500 W is suitable for conversion.
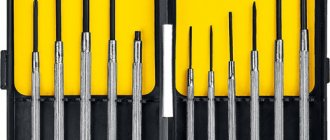
What you will need
Of the basic materials for making homemade products, we will need:
- thick steel washers (you can buy or turn them on a lathe with your own hands);
- extended couplings;
- long bolt (it is advisable to choose one with a high strength class);
- housing bearing;
- sheet metal;
- angle grinder discs designed for working with concrete and stone.
Now let's start making an attachment for the grinder for gating.
Drawings and diagrams
The simplest version of a homemade attachment for an angle grinder is shown in the photo and diagram. The design is a detachable metal cover, mounted on an angle grinder instead of the standard steel half casing.
The dimensions of the protective casing of the attachment are selected based on the power and dimensions of the grinder itself, as well as the diameter of the cutting wheels.
The larger the disc, the more expensive it will cost to operate the grinder. For a home, a disc of 125-150 mm is sufficient; circles of 180-190 mm will require use with a 2 kW motor. Moreover, for the body of the grinder attachment you will have to use metal 3-3.5 mm thick, which noticeably makes the tool heavier.
Stages of work
The first step is to make three washers - using a crown, we cut out three blanks from a sheet of metal. Then the author turns them on a lathe.
Next we need two extended couplings. One of them needs to be shortened. Then the master processes the couplings on a lathe - on one side of each coupling it is necessary to machine a seat for the washer.
After this, in two prepared metal washers, using a step drill, we drill out the central hole to the desired diameter. We put washers on the elongated couplings and scald them.
We clean the weld seams with a grinder. We prepare two ordinary washers, a long bolt and a housing bearing.
All prepared parts will need to be assembled in the following order:
- We put a regular metal washer on the long bolt.
- Then install the housing bearing.
- We put on another washer (regular).
- We put a thick washer on the bolt with a groove for the disc (which we made earlier).
- We install the saw blade on concrete.
- We screw a cut-off elongated coupling with a welded washer onto the bolt.
- We screw on the second extended coupling with a washer.
- We install a second concrete saw blade on the grinder.
- After this, we screw the assembled structure onto the gearbox shaft of the angle grinder.
Making a protective casing
We cut out three parts from sheet metal about 3-4 mm thick: the side walls and the upper part of the protective casing.
We make a fastening clamp. Then we weld it to one of the side walls.
We weld the entire protective casing for the wall chaser - there should be enough space inside to install two disks. It will additionally be necessary to weld a mount to it to install the handle.
At the last stage, all that remains is to assemble all the parts together: we attach the protective casing to the grinder, install the first disk, then install the shaft with the housing bearing, couplings and disk. Everything needs to be secured well.
For details on how to make a homemade wall chaser attachment for an angle grinder, you can watch the video below. This idea was shared by YouTube channel creator Sean Beardon.
Recommendations for gating
Before ditching the wall, you will need to make a marking and cut along it - this is much more convenient, and the result will be of better quality.
Please note: it is best to cut a wall groove from top to bottom.
The depth of the groove for one cable is at least 15 mm. If several cables will be laid in one groove, the depth of the groove must be increased. The main condition is that the cables fit freely into the groove and do not stick out of it.
The width of the groove must be such that a hammer blade or chisel can fit into it.
When slitting walls, a lot of dust is generated, so it is advisable to provide for the possibility of removing it. For this, a construction vacuum cleaner is used, the hose of which is connected to a pipe attached to the protective casing.
Assembling the wall chaser
If you have a new nut, all that remains is to assemble a homemade furrow maker as follows:
- mount the first circle on the shaft;
- install the bushing that was made together with the nut;
- place the second cutting disc on top;
- we pass the modernized nut through it and tighten it until it stops; As a result, the fastening element fixes the first disk and prevents the second one from jumping off the shaft.
At the last stage, a protective casing is installed, to the nozzle of which the vacuum cleaner hose is connected.
Wall chaser - what it is and how it works
Structurally, a wall chaser is similar to a circular saw. It has a protective casing, a motor block and two cutting discs located at a distance from each other. This gap can be adjusted, thereby changing the width of the future furrow. The depth is also not fixed and can change due to an increase in the angle of immersion of the disks into the material.
Industrial wall chasers are sometimes completely different from angle grinders
Wall chasers have high power, a convenient handle for creating pressure on the discs during operation, a system for quickly replacing discs and adjusting their width. Some models can be connected to a vacuum cleaner to remove dust and debris.
How to properly operate a manual wall chaser on aerated concrete
After assembly, you should check the functionality of the device on a pre-marked cutting area and learn operating skills. Sequencing:
- Assemble the discs with the bushing on the shaft and tighten them with a nut.
- Set the required groove depth and turn on the aspiration unit.
- Press the power button after connecting to the network.
- Touch the marked surface and groove.
The device should be moved after the discs are immersed to the desired level. It is important to monitor engine heating and periodically stop the engine to cool.
Installation of wall chaser
If you have a new nut, all that remains is to assemble a homemade furrow maker as follows:
- mount the first circle on the shaft;
- install the bushing that was made together with the nut;
- place the second cutting disc on top;
- we pass the modernized nut through it and tighten it until it stops; As a result, the fastening element fixes the first disk and prevents the second one from jumping off the shaft.
At the last stage, a protective casing is installed, to the nozzle of which the vacuum cleaner hose is connected.
How to properly operate a manual wall chaser on aerated concrete
After assembly, you should check the functionality of the device on a pre-marked cutting area and learn operating skills. Sequencing:
- Assemble the discs with the bushing on the shaft and tighten them with a nut.
- Set the required groove depth and turn on the aspiration unit.
- Press the power button after connecting to the network.
- Touch the marked surface and groove.
The device should be moved after the discs are immersed to the desired level. It is important to monitor engine heating and periodically stop the engine to cool.
Adjusting the cutting depth
Almost all models of wall chaser attachments for industrial angle grinders use roller guides with an oscillating sole.
It is easy to make such a system with your own hands.
The cutting depth adjustment system looks like a frame, the front edge of which is fixed to the casing using a hinge, and the opposite side is fixed with a bolt-nut fastening.
When the wing or bolt head rotates, the back bar with rollers deflects, which allows you to accurately adjust the depth of the wall chaser nozzle disk.
Adjusting the cutting depth
Almost all models of wall chaser attachments for industrial angle grinders use roller guides with an oscillating sole. It is easy to make such a system with your own hands.
The cutting depth adjustment system looks like a frame, the front edge of which is fixed to the casing using a hinge, and the opposite side is fixed with a bolt-nut fastening. When the wing or bolt head rotates, the back bar with rollers deflects, which allows you to accurately adjust the depth of the wall chaser nozzle disk.
Hammer
Another common and fairly simple way to make a wall chaser yourself is to use a hammer drill. But instead of the usual drill, you should insert a cutter of the required size into it.
Such a wall chaser is quite simple and does not require much time and effort to manufacture, but at the same time it produces a very low quality of work. The groove is not only curved in height and length, but also of different depths and widths. As a result, you will have to spend much more time on gating and a much larger amount of finishing materials.
How to care?
Proper tool care can significantly extend its service life:
- Unplug the furrower from the outlet after use.
- After carrying out work, clean the ventilation holes on the housing and the pipe. Avoid the formation of hard deposits on the inner surface of the protective casing.
- Change brushes in a timely manner and prevent them from completely wearing out.
- Periodically tighten nuts and bolts (especially on wall chasers with high vibration levels).
- Work intermittently, do not allow the motor to overheat.
Have you ever used a wall chaser?
It happened! It didn’t happen
What to make a protective dust cover for an angle grinder from
The manufacture of a protective casing involves the use of such types of materials as a plastic canister, aluminum pans, chipboard, plywood, laminate, board, stainless sheets, etc. You can choose any material that is available on the farm. This eliminates the need to buy an attachment, since making it with your own hands is very easy and simple.
The main condition is to ensure sufficient strength of the finished attachment for the grinder. The casing must withstand the impact of small particles of concrete flying out during work. To make the casing, there is no need to resort to the use of auxiliary tools, such as welding, since a nozzle can be quickly made from a plastic canister. An example of such a nozzle is shown in the photo below.
The manufacture of such a device requires a minimum of time. A homemade wall chaser from an angle grinder can be made quickly and easily, using an arsenal of improvised tools. If you use materials made of aluminum or wood, then when working on the manufacture of nozzles you will need self-tapping screws, and when using steel you cannot do without a welding machine. Let's consider the principle of making a wall chaser attachment for an angle grinder with your own hands:
- For production you will need leftovers from chipboard or fiberboard. In addition, even plywood will do, so we use any sheet material that is available
- Two side bases are cut out of chipboard according to the appropriate shape. The shapes of these bases depend on the size of the available tool
- To avoid having to select a shape, it is recommended to first make a drawing on paper and then transfer it to cardboard. Make a template from cardboard, eliminating all the shortcomings
- Based on the template, make a cover using chipboard
- Drill a hole of the appropriate diameter on one side of the chipboard base. Use this hole to secure the finished attachment to the power tool.
- To connect chipboard when making the nozzle, you can use self-tapping screws or special furniture fasteners of appropriate length
The photo below shows the resulting case for the grinder. Such a cover is easy to make, but its drawback is the absence of a hole for connecting a hose. A sleeve of the appropriate diameter and length, which must be mounted in the upper part of the structure, will help eliminate this drawback. A hose from a vacuum cleaner should be connected to the protrusion of the sleeve.
This is interesting! When using a vacuum cleaner to suck up debris and concrete chips, it is recommended to use industrial or construction vacuum cleaners, but not household ones. They are not designed for such things, so in the end they can quickly fail.
The process of making a nozzle is not difficult, and the quality of the final device depends more on the ingenuity and imagination of the master. You can make not just a simple case for an angle grinder with your own hands, but also an adjustable one. The principle of manufacturing an adjustable protective casing is that you need to make an additional moving part. Due to this moving part, the required size of the protrusion of the cutting discs on the grinder will be selected.
In a similar way, you can make a nozzle with an adjustable part from chipboard and other materials.
Features of the tool
Building regulations provide clear dimensions for fines, which are designed for certain materials of building walls and should not weaken their strength. This is especially true for walls mounted from reinforced concrete panels, for which the depth of the groove is strictly limited. Violation of these standards may weaken their strength and lead to undesirable consequences in the future. For example, in old panel houses (Khrushchev-era buildings), it is generally prohibited to use hammer drills, but working with a wall chaser is allowed, since no negative consequences are expected from this.
Compared to a grinder, the speed of cutting a groove with a wall chaser increases almost 2-3 times. The grooves themselves are smooth, identical in width, and what is very important, the specified depth is strictly observed. At the same time, during its operation, a minimal amount of dust is generated in the room, and the work is much safer for the performer.
Description of equipment
A wall chaser is used in construction to cut grooves of both different depths and widths. Particular attention should be paid to the description of this equipment:
- Almost all models of wall chasers are equipped with two cutting wheels with diamond or Pobedit coating on the cutting edges. The distance between the cutting wheels can be adjusted according to the width of the required groove, so that the groove is cut in one pass. In this case, the cuts are smooth and of the same depth, which will subsequently be reflected in saving time and material when sealing them.
- When using a grinder to cut one channel, you will have to perform two approaches. In this case, the slots will be of varying depths and, naturally, with some deviations from a straight line.
- The wall chaser has a base in the form of a platform on which a slide with several guide rollers (2-4 pcs.) is mounted. With the help of the platform, the depth of the slots is adjusted and the stability of the wall chaser is ensured during operation, which is almost impossible to achieve when working with an angle grinder.
- The slide ensures easy sliding of the tool along the surface of the wall while cutting a channel for making a fine. When the tool is removed from the cut grooves, the slides are lowered, covering the cutting discs. This ensures the safety of the worker who could be cut by the spinning discs.
- Wall chasers are equipped with special casings to collect dust, which is generated in large quantities during cutting concrete, brick or other materials. The casing has a special pipe to which a hose from a vacuum cleaner or a filter is connected that collects dust and small fragments from the building material being cut.
Benefits of use
Using a wall chaser for cutting grooves has a number of advantages, including:
- The result is a neat and accurate, according to calculations, depth and width of the groove. Thanks to this, a minimal amount of plaster or putty is used.
- Using two disks, two cuts are made simultaneously in one pass, which significantly saves time and reduces the labor intensity of the work process.
- Thanks to the ability to connect a vacuum cleaner and the presence of a casing, there is virtually no dust in the room during operation. The noise level created by a wall chaser is several times lower than a working hammer drill.
- When cutting channels (fines), there is completely no vibration - which is very important for old panel buildings.
- This method of preparing channels for hidden laying of pipes and electrical wires turns the long and labor-intensive process of gating into a comfortable and time-consuming job.
Stages of cutting fines
Before starting work, markings are made on the wall to cut out the grooves, and on the tool, using a platform, the cutting depth of the grooves is set. To do this, the platform is positioned in such a way that the cutting parts of the disks extend beyond its limits to a distance calculated for the depth of the groove.
When selecting the width of cutting channels (for fines), the distance between the disks is regulated by a set of washers or bushings, which are placed on the tool axis between the disks.
After this, a flexible hose from the vacuum cleaner is connected to the casing pipe, and the tool is connected to an electrical outlet.
The wall chaser is driven by an electric motor, which is powered by a 220 V mains voltage, and the operating principle itself is quite simple. The tool is pressed and guided along the surface of the wall, simultaneously cutting out two even grooves of equal depth. Cutting is carried out simultaneously with two disks, the cutting part of which consists of diamond coating or pobedit brazing.
In this case, the tool does not sample the channel itself. Other tools are used for this operation.
Once the slots are completed, the material between the slots is removed with a hammer drill or a metal chisel and hammer. When performing the same work with a regular grinder, it will take several times longer to complete a similar procedure of the same volume.
Professional wall chasers equipped with industrial vacuum cleaners are very expensive and are usually purchased by enterprises that are constantly engaged in construction work. For one-time work , naturally, purchasing such equipment will be quite expensive. In this case, the best option would be to rent this tool or make a wall chaser cover for an angle grinder with your own hands.
What recommendations and tips to consider when gating
You can begin the procedure for preparing grooves indoors immediately after making your homemade product. When punching a groove, one important nuance must be taken into account - the work should be carried out in a room where the location of the electrical wiring is previously known. If a live wire is encountered along the path of the tool, the result of such an encounter can be fatal for the master.
It is necessary to carry out gating work with both a conventional wall chaser and an angle grinder, taking into account the following tips and recommendations:
- Procedures can be carried out in vertical or horizontal directions
- It is possible to ditch at an angle in extremely rare cases when it is necessary to bypass a decorative element or communications
- Horizontal grooves must be carried out exclusively at a distance of up to 15 cm from the floor slab
- Vertical grooves must be located at a minimum distance from doors and windows of 10 cm
- When carrying out work, it is important to take into account the depth of the groove. It is necessary to select the depth depending on the type of communications that are planned to be laid in the groove, as well as the thickness of the wall itself. If this wall is load-bearing and is external, then the depth of the groove should not be more than 3 cm
- The width of the groove is also selected depending on the technological task, but it is not recommended to exceed the permissible limit of 2.5-3 cm
After laying communications, the groove should be sealed with cement mortar. The location of the groove should be leveled with the plaster of the wall. It is recommended to carry out gating work at the construction and repair stage before plastering the walls.
It is not at all difficult to make a wall chaser for concrete from an angle grinder, and if you set yourself such a goal, then everyone can achieve it. When drawing a conclusion about the work done, it should be noted that when chipping, you need to take breaks to allow the power tool to cool down. If the cover does not have a connector for connecting a vacuum cleaner, then work must be carried out in a respirator. Glasses must be worn in any case, as various small particles can get into the eye.
Depending on the type of material that is being cut, it is necessary to select the appropriate speed of movement of the tool. If you come across reinforcement in a concrete wall on the way, it is recommended to saw it with an abrasive wheel. It is necessary to use a wall chaser on wood with extreme caution, not forgetting about the backlash.
How to make a groove in a concrete wall
The main document regulating the specifics of making grooves in any tool is SNiP 3.05.06-85. It specifies the rules for creating electrical wiring, all distances and basic safety requirements. By ignoring them, you can not only jeopardize the comfort and safety of people living in the premises, but also be fined.
Before starting work, you need to carefully mark everything, determine the location of the wiring, installation of sockets, switches and other elements. Installation is carried out taking into account the requirements specified below.
SNiP regulatory requirements for gating walls for wiring:
- Load-bearing walls cannot be tapped.
- Channels must be laid parallel to the structures: horizontally or vertically; diagonal grooves cannot be laid.
- The distance between the ceiling and the groove should be at least 15 centimeters.
- There must be a distance of at least 40 centimeters to the gas pipe.
- The depth of the groove is no more than 2.5 centimeters.
- Before laying new wiring, you need to check the walls for the presence of old ones (if it is not a new building).
- The grooves are laid exclusively vertically/horizontally; no oblique lines are allowed. An exception may be the need to lay wiring on walls with a slope (attic, for example), when the line can be run parallel to the slope of the wall.
- You can turn the groove between two points only once: each turn represents a bend in the cable, which heats up more in such places. And if there are a lot of turns, the danger of operation increases.
- The size of the grooves should be as follows: maximum width 3 centimeters, depth no more than 2.6 centimeters. The total length of the line from the junction box to the point should not be more than 3 meters.
- Optimal distances: from batteries and gas pipes 40 centimeters, to the door 10 centimeters, from the floor - at least 5 centimeters (but better than 10).
- It is forbidden to touch reinforced concrete structures during the gating process, but if you do this, do it in such a way as not to touch the reinforcement frame and with a minimum groove depth.
- It is prohibited to scratch internal load-bearing walls; on the first floors, work is carried out very carefully, since here the walls support the entire building.
- Grooving in the ceiling is carried out by calculating the shortest path to the lighting point.
- Cutting grooves in floor slabs is prohibited. When a line is laid across the floor, it is embedded in a concrete screed, which is poured taking into account the need to lay furrows.
- During the work process, be sure to take care of personal protective equipment - a respirator or mask is suitable for these purposes.