If you have a summer cottage, then you will certainly want to arrange it in such a way that the time spent here will be remembered for a long time as vivid impressions.
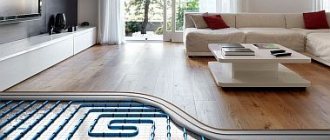
Wooden terrace around the pool
Some people make a mini football field, others a tennis court, others prefer their own garden. This article will look at how to arrange the space around the pool so that it is comfortable not only in the water, but also near the pool itself. And to do this, you can build a wooden terrace around the pool, which will accommodate a table with chairs, a sun lounger, and if you wish, you can even set up a barbecue.
Swimming pool with decking
In a word, relaxing near the water in your courtyard will brighten up your leisure time, and the guests you invite to your place will not remain indifferent to such an original solution for arranging a recreation area.
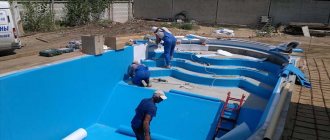
Preparatory stage of construction
To begin with, it is best to make a sketch of the structure that will need to be built. The plan will help calculate the amount of materials, visualize the final material and take into account various important details of the construction.
The first illustration shows a sketch of the pool around which the wooden deck will be built. Since in this particular case the pool is not immersed in the ground, but is located above the surface of the earth, the platform around it will be quite high, and there will be steps leading to the terrace. Fencing structures will be installed along the entire perimeter of the wooden terrace:
- railings (they are shown in green in Figure 1);
- the fence, or Privacy Screen, is what this structure is called in the west (shown in red in Figure 1). The purpose of this element is to create a closed recreation area from prying eyes.
Figure 1. Plan of the terrace around the pool
Privacy Screen - Curly carved wood panels
Consider the direction of the boards.
Fitness club “World Class Kuntsevo”
Photo: World Class Kuntsevo
Another fitness club for the wealthy public, who can afford to purchase an annual subscription for 100,000 rubles. The outdoor 25-meter pool is open all year round, and in general the range of fitness programs offered at World Class Kuntsevo is standard. And thanks to its location in a cozy and green area of Moscow - in a park area and away from buildings - it creates the feeling of a country club.
st. Ivana Franko, 16
View on map
8
worldclass.ru
Supports
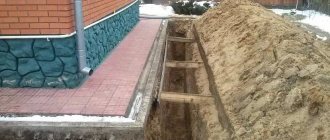
We are considering a terrace project on supports, each of which needs an individual foundation.
Consider the option of arranging concrete supports with a diameter of 12 inches each.
| Feet | Centimeters | Inches | Centimeters |
| 1 | 30,48 | 1 | 2,54 |
| 2 | 60,96 | 2 | 5,08 |
| 3 | 60,96 | 3 | 7,62 |
| 3,5 | 106,68 | 3,5 | 8,89 |
| 4 | 121,92 | 4 | 10,16 |
| 5 | 152,4 | 5 | 12,7 |
| 10 | 304,8 | 12,7 | 32,258 |
| 11 | 335,28 | 11 | 27,94 |
| 12 | 365,76 | 12 | 30,48 |
| 15 | 457,2 | 15 | 38,1 |
| 20 | 609,6 | 20 | 50,8 |
- According to the project, holes are dug of the appropriate diameter and a depth of about 4 feet.
The holes should be the same depth when preparing - 4 feet or approximately 123 cm - Afterwards, so-called “sleeves” made of roofing material secured with adhesive tape are inserted into these holes. They should protrude approximately 1 foot above the ground surface.
Roofing felt is installed and a frame of three reinforcing rods connected with wire is placed inside - Concrete is poured into these “sleeves”, and metal connectors are installed on top, to which wooden supports will be attached.
The solution is transported by wheelbarrow and poured into the formwork with a shovel, compacting or piercing the mixture with an in-depth vibrator
An example of attaching timber to concrete supports
To avoid digging holes again, make a sketch with dimensions that will show the coordinates of each support. It’s better, of course, to do this on a site plan, especially if there are plants in the construction area or there are communications, then you won’t have to uproot a tree or repair the water supply.
Figure 2 shows the location of concrete supports (Footings), as well as their coordinates. If the support ends up on a water pipe, or if there is a tree growing nearby, simply move the support slightly to the side. It is better to calculate everything and draw it on paper rather than face unpleasant surprises during the construction process.
Figure 2. Location of supports
Having marked the location of the supports on the site, dig holes for them and concrete them. Don't forget to install post connectors into the wet concrete supports. After the concrete has hardened, secure the vertical supports in metal connectors. Use 4" x 4" cross-section posts for supports since the deck is less than 6 feet high. If the height exceeds 6 feet, posts with a cross section of 6x6 inches should be used for supports. Metal connectors should be installed in the appropriate size.
The third picture shows a diagram of the concrete supports used in this project.
Figure 3. Scheme of concrete supports
Beams. Longitudinal location
Next, according to the project, it is necessary to install beams on vertically located supports. This is the next step in building a deck around the pool.
Triple or double beams are installed according to the load. In the case where there is no more than 12 feet between adjacent beams located in one row, then double beams are installed, as in this project under consideration, where between each two nearest beams there is no more than ten feet.
The cross-section of the longitudinal beams can vary, ranging from 2x4 inches to 2x12 inches. This choice will depend on the number and distance between adjacent lines of longitudinal beams. It is best to use as few supports as possible; accordingly, there will also be fewer beam lines, and the distance between them will be greater. But then you won’t have to dig a lot of holes for supports, which are not so easy to build.
The fourth picture is a diagram of the beams. The dimensions of these items are 2 x 10 inches.
Figure 4. Beam diagram
Features for bowls of different shapes
The shape of the pool affects the configuration of the support system and joists. In this regard , rectangular bowls are considered the simplest , which make fewer mistakes when marking.
If the bowl or area around it is round, you will have to use special marking techniques.
For example, mark a circle on the ground using a cord with the center in the middle of the bowl. From the point of view of installation of supports and flooring, there is not much difference . On curved shapes you will have to adjust the length of each board, but this is not particularly difficult. Otherwise there are no problems. If no mistakes are made during the marking process, the work is done quickly and efficiently.
Cross beams
After the longitudinal beams are installed on the supports, transverse beams are installed on top of them. At this stage, it is important to maintain an equal gap between the timber being laid. This value will depend on two conditions:
- how the deck boards will be laid (across the beams or at an angle);
- what material will the deck board be made of?
If the boards are laid at an angle, the distance between adjacent cross beams will be 12 inches. If the deck board is laid perpendicular to the joists, then the distance between the joists will be either 16 or 24 inches.
The cross beams are installed at 24" spacing if the following materials are to be used for the deck board:
- ironwood (Ipe Wood),
Ipe decking board (Iron wood) - Tiger Wood,
tiger tree - polymer board.
Wood-polymer composite decking board
These rocks have very high strength and are slightly deformed by bending under vertical loads, so the beams can be placed at a considerable distance from each other.
Also, durable and stable materials used for deck boards include polymer boards. Their advantage also lies in the fact that they do not require protective paint coatings, and also do not have knots that reduce the strength of the materials.
This project uses a fairly soft material, namely cedar deck boards. Therefore, the cross beams will be fixed at 16 inch intervals.
Canadian red cedar decking board
For cross beams, beams with a cross section of 2" x 8" are most commonly used.
Figure 5 shows what the frame of a wooden deck around a pool will look like with the cross beams installed.
Figure 5. Frame of a wooden deck around the pool with installed cross beams
Once the beams are installed, they should be tied together, as shown in Figure 6, so that the structure becomes solid and as stable as possible.
Figure 6. Bundle of decking boards
Prices for the model range of decking boards
Terrace board
The most important thing is capacity
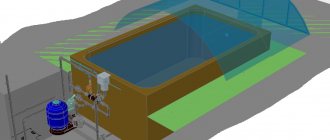
When constructing such artificial reservoirs, the main element is a waterproof container. It can be purchased ready-made (for example, a round container with a diameter of about 3 m will cost 14...16 thousand rubles, including the frame and everything necessary for installation) or made independently.
Basic requirements for the bowl:
- high density and strength of the material. Recommended films and fabrics made of polyvinyl chloride with a density of 650 g/m2;
- smooth surface, especially facing the inside of the pool. Glossy fabric is easier to clean from any dirt and disinfect;
- completely waterproof. Since the container cannot be solid, special attention is paid to the tightness of the joints of the panels;
- good resistance to ultraviolet radiation, frost, high temperatures, mechanical strength (resistance to puncture, tearing).
Industrially produced containers meet the requirements listed above; when creating a bowl yourself, you should choose high-quality awning fabric with the smoothest possible surface.
To connect panels of fabric, use a hair dryer with a temperature range of 70...600 degrees. The temperature is selected according to the recommendations of the fabric manufacturer; a crevice nozzle is used for directed action. An overlap of 20...30 mm is required.
The cut bowl is assembled on a large, flat surface. Heat the overlapped edges of the panels to the recommended temperature and carefully roll them with a special roller to seal the seams.
The upper edge of the bowl (it is cut out in advance with a reserve) is folded twice, heated again and rolled. Next, grommets are mounted on the canvas - metal double-sided ring-holes. To install them, you need a special press or available tools. The pitch of the eyelets is no more than 50 cm.
steps
The next step in building a wooden deck is to install the frame for the steps. The basis is the stringers, which are located at a distance of 16 inches from each other.
To calculate the size of the steps, you can use our calculator with instructions.
Scheme of stringers
To make them, use a board with a cross section of 2x10. In order for all the steps to be the same in length and height, you first need to make a pattern for one step, and then sequentially mark the steps on the blank for the stringer.
Stair stringer is a sawtooth-shaped wooden board or beam with rectangular teeth
For the convenience of ascending and descending the steps, the dimensions of each step, firstly, must be the same, and secondly, in terms of the height and depth of the step, they must be within certain limits. For height, it measures 6 to 8 inches, and for depth, it measures 12 to 16 inches.
There are, of course, non-standard sizes of steps, but most often they are made within the limits given above.
At the bottom, all stringers are connected by one board for stability of the structure. Figure 7 shows the frame of the terrace and steps.
Figure 7. Frame of the terrace and future steps
Open water complex "Luzhniki"
Photo: luzhniki.ru
Located near the Vorobyovy Gory metro station and open every day from 7:00 to 23:00. Luzhniki is divided into two zones - sports and beach. Visitors to the first can swim in the open air on one of the eight lanes in the 50-meter pool and do open-air training.
And the beach area of the aqua complex is located nearby, on a green lawn in the shade of centuries-old trees: there is a 20-meter pool heated to 27-29 degrees with a children's and volleyball court, a food court and a juice bar.
The cost of staying in the aqua complex all day on weekdays is 1200 rubles, on weekends – 1500 rubles. A visit to the pool for three hours - 1400/1900 rubles. A discounted 3-hour session for schoolchildren, students, pensioners and the disabled will cost 350 rubles. And children under 7 years old swim for free.
st. Luzhniki, 24, building 4
View on map
8;
aqua-luzhniki.ru
Base for railings and fences
Before laying down the deck boards, you need to install the posts for the railings and fence. The posts are made from timber with a cross section of 4x4 inches. The height of the fence is 6 feet, this is enough to make the recreation area enclosed. But the height of the railing can be of two sizes.
- If the height of the terrace is less than 6 feet, then the railings are 3 feet.
- When the deck height is more than 6 feet, the railing increases to a size of 3.5 feet.
The distance between railing and fence posts should not be more than 6 feet to ensure the structure is secure enough.
In Figure 8, the posts for the railing and fence are already attached to the main frame of the terrace.
Figure 8. Diagram of fixed posts for the fence
ShoreHouse Yacht Club
Photo: shore-house.ru
Another yacht club with an outdoor swimming pool is located in the north-west of Moscow. The highlight of this place is the “Mediterranean” view of the pier, where snow-white yachts, boats and boats are moored.
At the local restaurant you can order dishes of Azerbaijani, Uzbek, European and Japanese cuisines. And if you get bored of basking in the sun on a sun lounger or under an umbrella on a mattress, you can go water skiing or wakeboarding. On Saturdays and Sundays, children are offered a separate menu and there is a children's room.
On weekdays, access to the pool and beach in Crocus City will cost 1,500 rubles, on weekends it’s a thousand more. But they will give you a towel. Renting a VIP area costs 3,000 rubles on weekdays and 5,000 on weekends. A tent for a company can be booked for 20,000 rubles from Monday to Friday, and for 25,000 on Saturday and Sunday.
Opening hours of the outdoor pool: weekdays - from 11:00 to 21:00, weekends - from 10:00 to 21:00.
66 km MKAD, bldg. 5, Krasnogorsk, Moscow region
View on map
8
shore-house.ru
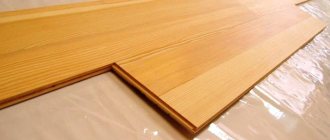
Deck board
Now you can proceed directly to laying the deck boards on the surface of the terrace, as well as sheathing the steps. Under no circumstances should the board be installed without gaps. When the boards swell from moisture, they will increase in volume, and if there is no gap between them, they will float on top of each other. It's like if you lay laminate flooring close to the walls, leaving no gap or room for expansion.
Installation diagram for decking boards
Boards can be fastened with screws or nails, depending on how convenient it is for you and what tools are available. If you are planning to nail a deck board, an automatic nail gun will make this task easier. They will work much faster, and most importantly, your fingers will remain safe and sound.
Do-it-yourself deck board installation
When laying deck boards, it is not necessary to measure each one to the nearest inch. Along the edge of the terrace, the board may overhang a little, just after the entire terrace is covered, you will need to go with a saw along the contour and cut off the excess. The result of laying the deck board is shown in Figure 9.
Figure 9. Terrace cladding
The same deck board as on the terrace is laid on the surface of the steps. You can also cover the steps with vertical boards so that the internal frame is not visible. Such steps are called closed type, and these are the ones made in this project (Figure 10).
Figure 10. Step cladding
Hidden under the lawn
A swimming pool helps the owner of a house or cottage cope with the summer heat. But sometimes you have to choose between a green lawn and a pond, because... The area of the site is small.
A sliding deck lined with artificial grass helps solve the choice problem. It looks like a lawn, but when pulled back, it reveals a pool hidden underneath. When no one is swimming, the platform closes it, again forming a lawn. Everything is done with one click of a button.
The closed platform can be used for relaxation, games, etc.
A visual overview of this technology:
Railings and fence
Once the patio deck and steps are laid, you can begin installing the railings and fence.
Examples of decorative fencing - diagrams
The design of these structures is very diverse, and the materials that can be used to manufacture the components of the fencing sections may vary.
For example, sections for railings may include the following elements:
- glass partitions;
- vertical or horizontal balusters made of metal or wood;
- combined inserts.
The easiest way is to first assemble the sections for the railings, and then simply install them between the corresponding supports. But to do this, you need to accurately measure the openings between the pillars in order to make the sections correctly and not make mistakes with the dimensions.
In this project, sections were used, along the contour of which a beam with a cross section of 2x4 inches is located, and glass is inserted inside. Glass should be at least 3/4 inch thick. Figure 11 shows one such section.
Figure 11. Fence section
When all sections are made, they can be installed in place, as shown in Figure 12.
Figure 12. Installation of fencing sections
Since this terrace is not high, handrails were made for the steps along the upper part to make it more convenient to go up and down without fear of losing your balance. If the terrace is higher than 6 feet, then it is advisable to make full-fledged fencing sections along the steps.
The fence uses a board with a cross section of 1x6 inches, which is driven horizontally to the posts at 0.5 inch intervals. It is easiest to stuff it from the outside, since it is quite difficult to join the boards and supports from the inside, and you will have to make additional stiffening ribs. The thirteenth illustration shows the final result of construction.
Figure 13. The final result of constructing a terrace around the pool
Naturally, after all the work, it is necessary to apply a paint coating that will protect against moisture and termites; accordingly, the terrace will last much longer.
For this type of terrace construction, the deck board is replaced every 5-7 years, but the frame will last for decades if you make it from specially treated wood, which is called pressure treated wood, and has a characteristic green color.
Building a three-dimensional model on a computer is very helpful during construction. With this model, firstly, you will be able to clearly see the end result and see different design solutions, as well as make changes before you start construction. Secondly, with the help of such a model you can easily calculate the material and not purchase too much, which will help you save a lot.
Good luck with the construction and have a nice holiday!
Terrace board near the pool
Video - Laying decking near the pool
Video - Installation of decking boards on Twin fasteners
Pool placement
Regardless of the location chosen for such a remodel, you will have to contact specialists in the field of architecture or construction. Even the creation of the smallest pool requires a professional approach, as it must always remain safe and not cause damage to the landscape of the site.
Before you start choosing pool options for a country house, think about where it belongs: outdoors or indoors? Each accommodation option has its pros and cons.
It is more difficult to create a pool inside a house: you will either have to change the design of the foundation of one of the wings of such a structure, or create additional extensions that will cost a considerable amount of money. In addition, it is not always possible to allocate enough space indoors for a large swimming pool that can accommodate the whole family.
Remember! The pool can be located in the basement, on the ground floor or on the first floor, but not higher, otherwise you risk not only the safety of the house, but also your own safety.
Despite the presence of some restrictions, having a swimming pool in a private house has its advantages:
- you will be able to enjoy active recreation in the water regardless of the time of year or weather conditions. The room will always be warm and cozy, and the water will maintain the required temperature;
- the indoor pool is not so often subject to contamination: dust and dirt from the street, debris and tree leaves will not get into the water, so it will be much easier to clean it;
- Swimming pools in your home also have their own decorative features: here you can use more materials, since they will not be exposed to the negative effects of the climate, and also decorate the interior of the room in the desired style.
Placing a pool in the fresh air is an equally good idea: in warm weather, this area of the site will become the main center of all entertainment, and in the evenings it will turn into the most romantic place in your home. But during snowfall, heavy rains and frosts, you cannot swim in the pool, and garbage from the street will constantly have to be removed from the water.
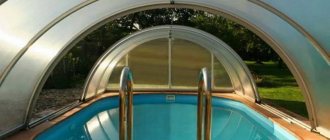
Advice: a special canopy will help solve many problems: it will protect your pool not only from precipitation, but also from some contaminants.
In cold weather, the water in such a pool will freeze. But here, as well as inside the house, you can use the water heating system: just adjust the temperature and your pool will be able to act as a Jacuzzi, although such entertainment will incur additional electricity costs.
But the main advantage of a pool next to your house is the opportunity to unite with nature : you can spend more time in the fresh air.
Another advantage of an open-type pool is that its size is unlimited. If your plot has a large area, you can realize absolutely any idea regarding its size and shape. But, of course, if there is enough money for such a design.
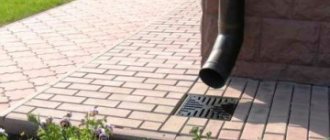
If you already have an idea about where to create a pool, do not forget about the need for ventilation and communications . Every pool needs at least one drain pipe of sufficient width. Well, other details, depending on which version of the modern pool you choose. Let's talk about your options.
Rules and sequence for preserving a frame-type pool for the winter: main points, important recommendations.
What temperature should the pool be? The optimal temperatures for swimming in a pool are described in this article.