A garage is a special room for parking and, in some cases, repairing vehicles. It serves as protection against adverse environmental factors and is built according to standard or individual designs from foam blocks, cinder blocks, metal structures, bricks and other materials. In Russian conditions, it is advisable to insulate the garage, otherwise, due to temperature fluctuations, condensation occurs, leading to corrosion.
- How to install insulation on the ceiling inside a garage
Heating or insulating?
When the temperature in the garage is below freezing, the condensation freezes. And when the engine heats up, it begins to melt. Freeze-thaw cycles do not benefit either the metal or the internal mechanisms.
But heating the room is not the optimal solution. By leaving a warm garage into the cold, we create a situation of sharp temperature changes. And when we return back to the heated space, we get the formation of condensation even on those parts where moisture does not enter when the car is moving.
Experts say that the best conditions for winter car storage are created when the thermometer shows +5°C. The danger of corrosion under such conditions is minimal, and the temperature difference between the street and the room does not have such a detrimental effect on the car.
Accordingly, when choosing between connecting to the heating system and insulating the garage with your own hands, it is wiser to choose the second option. Moreover, it will help you save on your monthly energy bills.
You can't do without ventilation
Without which it makes no sense to insulate the garage ceiling, it is without normal ventilation. At a minimum, it is needed to remove exhaust and fumes. I think everyone has a memory of someone accidentally suffocating in a garage. In our garage cooperative, three men got poisoned in different years.
It is basically impossible to properly insulate a garage ceiling from the inside. Insulation is always placed outside. Otherwise, you end up with a thermos with all the consequences - the dew point moves inward, the floor slab becomes damp, the fittings rust, etc.
Without ventilation, we get an ideal environment for condensation, corrosion and mold to develop. The garage may simply be overgrown with “moss.” Therefore, after insulation, this issue needs to be given enough attention. My ventilation is normal.
Article on the topic: How to make the perfect garage
But I’m thinking about making it forced (installing a fan). I'll see if condensation forms in the winter. And then I’ll decide.
I hope my experience will be useful to someone. I finally accomplished what I wanted, and I’m very pleased. The cheapest and most inconspicuous ceiling insulation with polystyrene foam is better than nothing at all.
In winter, not only is it incredibly cold in an uninsulated garage, but the heated car is also covered in condensation. The result is corrosion. Both the body and electronics deteriorate. Ceiling insulation reduces temperature differences. The garage is already noticeably warmer. No drops of moisture were noticed. In general, I'm glad.
Basic requirements for garage insulation
When insulating a car storage area, it is worth remembering a number of key points.
- Ventilation holes must not be sealed - any thermally insulated structure needs ventilation just as much as a heated one.
- Thermal protection should affect not only walls, but also garage doors, floors, and roofs.
- If you want to do everything according to the rules, it would be useful to study the sixth section of SNiP 2.07.01–89. It regulates the requirements for premises where vehicles are stored. Of course, when it comes to a personal garage, it is not necessary to comply with them. However, standards can help address a number of issues.
- To insulate the gate, in most cases, internal thermal protection is installed.
Materials market review: choosing the best
The first thing you have to consider when choosing a heat insulator is the type of insulation you choose. For example, moisture-permeable materials, when wet, change their properties. Therefore, they are not a good option for external thermal protection. And for internal thermal insulation, insulation materials that emit harmful substances in the summer heat or during domestic heating are not suitable.
The modern market offers several types of materials for thermal insulation of garages. Let's consider the main properties and characteristics of the most popular of them.
Foil insulation
Foil gives a reflective effect and helps to additionally retain heat in the room. Each type of insulating material has its own properties, which give some advantages to each over the others.
Foamed polyethylene has significant strength. Therefore, it is better to use it for floor insulation. Stone wool material can withstand high temperatures.
It is well suited for chimneys, saunas, baths, and heating mains. In addition to its insulating properties, thermal insulation of all types is a good soundproofing material.
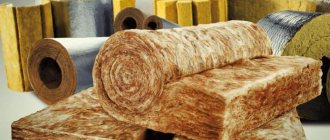
Mineral wool
Available in the form of slabs and rolls. It retains heat well and has sound insulation properties. But at the same time, it easily absorbs moisture - high humidity is the main enemy of cotton insulation. And when wet, it completely loses its ability to insulate heat. Therefore, its use requires high-quality hydro- and vapor barrier. It is almost impossible to dry this insulation; it becomes brittle and easily damaged. And when the glass wool gets wet during installation, it clumps and becomes unsuitable for further use (cavities appear inside it).
Considering that the external insulation pie can be damaged or depressurized, using this material is risky. In general, mineral wool is not the best choice for vertical installation. It has considerable weight and consists of fibers. Under their own weight, they can sag over the years, and voids will begin to form between them - the so-called cold bridges.
This heat insulator has two advantages: low price and equally low thermal conductivity. But that's all. Then only the shortcomings begin. Once in the lungs, glass particles are no longer excreted from the body. They leave itching and irritation on the skin. When installing them, a protective suit, a respirator and a mask are required, and after completion of work, a thorough cleaning of the room is required. Then you will have to wait a day or two until the glass dust, invisible to the eye, settles.
If during operation there is at least partial damage to the protective layer of films or foil material, you will again need to rent special clothing and resort to cleaning after completion of the repair.
And finally, the material shrinks and is not durable. Therefore, it does not matter what type of insulation you prefer: internal or external, it is better not to stop at this option.
Pros and cons of foil-type insulation
Since foil thermal insulation materials are relatively new, the shortcomings of old insulation materials were taken into account when creating them. Manufacturers have tried to level them out and improve the heat insulation. This made it possible to create products with the following advantages:
- The foil on the front side acts as a screen that reflects thermal energy. 90% of the generated heat is reflected and does not escape outside. The room will be cool in summer and warm in winter.
- The material can be used for wet rooms (kitchen, bathroom, sauna, warehouse). Even if the insulation is afraid of moisture, a layer of foil will protect it completely.
- Ease of use. The structure of the product is cellular, it is lightweight and easy to install.
- Excellent insulation from external influences. The thermal insulator will not allow wind and dampness to pass through the walls. Drying out in summer and freezing in winter is excluded.
- Flexibility of the material. Unlike traditional thermal insulators, foil insulation can take different shapes. It’s not for nothing that it’s even used for pipelines.
- Excellent sound and heat insulation, long service life, environmental friendliness.
- A huge scope of use, which is not limited only to wall insulation.
- Affordable price.
If you insulate the walls with foil insulation, you can significantly reduce heat loss, make your home comfortable and cozy, while reducing the cost of utilities.
As for the shortcomings, there are several of them. First, aluminum can become cloudy over time and lose its ability to reflect heat. Secondly, the foil layer heats up well, so the installation process must include an air gap. It is done between the finishing and the heat insulator. Thanks to the gap, moisture accumulating on the material will dry quickly.
Styrofoam
This material is very popular due to its low cost and ease of installation. It retains heat well and lasts for decades. You can install it yourself, without having any special tools or special construction skills at hand. But it still cannot be called an ideal solution. Although not as significant as mineral wool, it absorbs moisture. Very easily damaged and crumbles. Its granules have low adhesive strength, so over the years they can fly out even with accidental pressure on the material.
But that’s not even the main thing. There is a huge amount of uncertified polystyrene foam in the market due to the high demand for it. Finding a high-quality and safe product for health is not an easy task. And the one that was produced in violation of technology, when the temperature rises and the sun’s rays hit it, it begins to release toxic substances. Considering that the garage is a closed space, this is fraught with serious health problems for the car owner.
Conclusion
Of course, looking at various photos of a high-quality insulated garage, everyone wants to reproduce such a decent finish in their own home. And this is quite real, there is nothing complicated about it.
Any “straight-handed” person is able to do everything himself without much expense or effort. It won’t take too much time, but there will be a huge amount of benefits. The car will be protected from the influence of an aggressive external environment, and its owner will be able to comfortably carry out car repairs during the cold season.
Sources
- https://garazhov.ru/inside/uteplenie-garazha-penoplastom.html
- https://pechiexpert.ru/uteplenie-garazha-penoplastom-01/
- https://www.tproekt.com/kak-uteplit-garazh-iznutri/
- https://www.plast.by/novosti/utepleniye-garazha.html
- https://garazhmechti.ru/kommunikacii/kak-uteplit-garazh-iznutri-deshevo.html
- https://mirstrojka.ru/uteplenie-garazha/
- https://uteplenieplus.ru/kak-uteplit/garazh/kirpichniy-garazh-iznutri/
- https://bibiauto.club/sovets/poleznoe/uteplenie-garazha-iznutri.html
- https://garazhmechty.ru/kak-pravilno-uteplit-garazh.html
- https://www.ivd.ru/dizajn-i-dekor/zagorodnyj-dom/vse-o-samostoyatelnom-uteplenii-garazha-iznutri-56901
[collapse]
PENOPLEX (extruded polystyrene foam)
Perhaps, for insulating a garage from the inside with your own hands, this is the best option. It is affordable and even easier to install than foam plastic - the joints do not need to be sealed with foam, because they have L-shaped grooves. It is easy to cut and can be glued directly to the wall.
But the most important thing, of course, is its thermal insulation ability - one of the best among modern materials. Moreover, it remains unchanged in any situation. PENOPLEX does not get wet (moisture absorption coefficient is less than 0.4% in 28 days), is not afraid of defrost-freeze cycles and lasts for more than 50 years.
It is resistant to compression, does not shrink, absorbs noise, does not rot, does not harbor insects, and to top it all off, it is a homogeneous mass of polymer without individual granules. This provides it with high strength even many years after the work has been carried out.
Summarizing all of the above, we conclude that this material is ideal for both external and internal insulation.
No. 4. Thermal insulation paint
Another modern material that amazes not only with its ease of use, but also with its efficiency. Here are just a few striking examples: a layer of paint equal to 1 mm is equivalent to a layer of mineral wool of 50 mm, and a layer of paint applied according to the instructions is the same as a wall of 1.5 bricks. The unique properties of this insulation are based on the structural features and operating principle . All thermal insulation materials known to us work on the principle of a barrier, preventing heat from leaving the space. Thermal insulating paint becomes not only a barrier to the penetration of infrared rays outside, but also their reflector, making it much more difficult for heat to escape the confines of such a room. This effect was made possible due to the presence of a vacuum inside, which prevents the passage of infrared rays.
The advantages of thermal insulation paints can be listed for a long time. They have excellent adhesion to most building materials, have good thermal insulation performance, are not afraid of moisture, are vapor permeable, and protect metal from corrosion. A layer of such insulation is very light in weight, so it does not weigh down the structure, and the application process itself is as simple as possible and is not much different from using conventional paints. The list of advantages is complemented by resistance to ultraviolet radiation, ease of restoration of damaged coating, resistance to high temperatures (paint does not burn, but only chars at 2600C or decomposes at 8000C), environmental friendliness. But one cannot note such a minus as the rather high cost of paint, its high consumption, and it cannot always be used as an independent insulation material, but nevertheless, this option is being used more and more often for insulating a garage.
How to insulate a garage from the outside - step-by-step instructions
For external work, it is most convenient to use rigid slabs. The cheapest option is polystyrene foam. PENOPLEX is more expensive, but much more effective in terms of moisture resistance, heat protection, service life and strength. Therefore, we will consider the installation procedure for this particular material. However, it is almost no different from the foam insulation technology.
We will need:
- glue (branded PENOPLEX is best, since its composition is specially adapted for this insulation and does not destroy it);
- a spatula for applying glue or a special gun;
- paint knife or jigsaw for cutting sheets;
- fastening disc elements (4 pieces for each plate).
Step 1.
We prepare the walls.
We clean them of old paint, dirt, dust, cobwebs and other things. You can use a primer to help the glue adhere better. But this is an optional point.
Step 2.
We fix the bottom bar.
It is typical for slabs to start installation from the ground. We attach the starting profile to the dowels and begin laying the material in a checkerboard pattern.
Step 3.
Insulation fasteners.
This is a simple matter: apply glue in strips to the slab and apply it to the wall. We connect the L-shaped grooves to each other, thereby ensuring a tight fit of the material without gaps. When the glue dries, for greater reliability we fix the sheet with disc-shaped dowels.
Step 4.
Final works.
To protect PENOPLEX from ultraviolet radiation and make the facade more aesthetically pleasing, we plaster the walls or cover them with siding, DSP, or other material.
Floor insulation
It can be done in different ways. One of the simplest and least labor-intensive options is PENOPLEX insulation under the screed. To do this, the floor will need to be raised a little. This will reduce the height of the room, but you won’t have to dig a pit - you can install the heat insulator on the existing floor. The procedure is simple.
1. Clean the surface, make a cement-sand screed (CSS) or level the coating using building mixtures. It is important that the differences do not exceed 5 mm.
2. At the next stage, we lay the PENOPLEX FOUNDATION® directly on the floor without using glue or dowels. You can put insulating material in one or several layers.
3. To distribute upcoming point loads, it is necessary to fill with concrete mortar or self-leveling mixture 40 mm thick. In this case, the insulation is insulated with film, and its seams are securely fastened with tape. Leave 1–2 cm of empty space between the wall and the screed to take into account thermal expansion and subsequently make noise insulation by filling it with polyethylene foam.
4. At the finish, the finishing floor is laid.
Important little things
Insulated metal gates in a garage are a whole complex of measures and it does not end only with the arrangement of the inner surface of the doors. It is
equally important to correctly install the seal around the perimeter of the doors, plus take into account the accompanying factors that reduce heat loss. Let's start with the fact that when you order or choose a door for your garage, do not skimp and take a model that has a simple door
If you constantly open a whole sash, then as soon as your neighbor comes to you several times in the winter for advice, all your warmth will disappear. After all, no matter how hard you try, you won’t be able to squeeze through quickly, the open door is too big;
Let's start with the fact that when you order or choose a door for your garage, do not skimp and take a model that has a simple door. If you constantly open a whole sash, then as soon as your neighbor comes to you several times in the winter for advice, all your warmth will disappear. After all, no matter how hard you try, you won’t be able to squeeze through quickly, the open door is too big;
Doors with and without entrance doors.
Now about the compaction. It is clear that with such large dimensions it is unlikely that the shutters will fit tightly along the entire perimeter of contact with the frame of the opening. You should immediately forget about such things as self-adhesive seals for windows and ordinary doors; they will last a maximum of a week. Rubber hoses with fastening tape are produced for garage doors and other similar structures. They can be hollow or filled with some soft porous material such as foam rubber. Such a seal is fixed to the base with self-tapping screws using mounting strips or comes with the strip;
Types of rubber seals for garage doors.
- It would also be a good idea to install a curtain on the inside next to the gate. There are several options here:
- A thermal curtain that works on the principle of a fan heater and cuts off cold air at the inlet is certainly a good thing. But, firstly, such a unit itself is quite expensive. And secondly, the power of such a garage curtain starts from 2 - 3 kW, respectively, such pleasure will cost a tidy sum;
Thermal curtain.
- The next option is more loyal. A piece of tarpaulin with water-repellent impregnation is used as a curtain. In fact, this is a classic curtain. You need to stretch a metal string or baguette on top and hang your sliding canvas curtains on it;
Canvas curtains over the gates.
- Almost every motorist has been to a car wash; remember how their driveway is equipped. The curtain there is made of vertically cut soft transparent tapes, such as polyethylene. But this is not entirely polyethylene, and if you buy such a thing in a factory version, it will be expensive. It is unlikely that your garage will have the same amount of traffic as a car wash. Therefore, you can simply cut strips of thick technical polyethylene about 10 - 20 cm wide and, with a slight overlap (10 - 15 mm), staple them to a wooden strip. Next, for reliability, screw another similar rail on top, so that the polyethylene is between them, and fasten it above the entrance to the garage. Please note that any curtain should not drag on the floor; a small gap is always left;
Polyethylene curtain.
I would also like to say a few words about the lining of the gate from the inside. Izolon and lining, as you understand, are far from the only materials that can be used for such purposes. One of the most popular in garage design is OSB-3 or OSB-4, about 10 mm thick; it has decent moisture resistance and can be bought for reasonable money. If you take plywood, then in this case you need to buy the FSF brand. For those who like a warmer design, we can advise covering the inside of the doors with PVC panels. They are glued directly onto the foam plastic with liquid nails or something similar, and a edging is put on around the perimeter;
Standard OSB board.
There is one more interesting detail. I've seen advice online about insulating gates with polyurethane foam. People say that you can buy 5 - 7 cans of foam, make a frame and fill it with this foam. They promise that such insulation can supposedly last for almost 50 years. But in the open air and with minor vibration, I have seen polyurethane foam deteriorate within 3 to 5 years. Perhaps the person used some special type of foam, but in any case, I do not recommend this method to you.
Polyurethane foam and blowing gun.
https://youtube.com/watch?v=RyWgwwnY4Nk
Gate protection
Many people are faced with the problem of seasonal “walking” of the pillars (the base of the gate), which is why they do not close. The best solution is to protect the base (posts) from freezing when installing the gate. If you have already installed ordinary iron gates, then they must also be thermally insulated from the inside. If it is possible to attach the sheets with dowels to the material from which the gate is made, it is worth doing so. If not, the usual glue method will do. The already glued insulation is covered first with a vapor barrier film, then with outer skin. To enhance thermal protection, you can use foiled polyethylene.
Thus, the correct choice of thermal insulation material makes insulating a garage a fairly simple process that anyone can do.
15.06.2018
Return to list
Penoizol
Insulation drawing using corrugated sheets.
It is similar to a modernized version of construction foam, only in larger volumes and with improved thermal insulation properties. The only difficulty is to apply it in an even layer; only a professional can do this. Fixed with staples or using lathing. Does not require waterproofing.
The description in the article of all types of insulation makes it possible to weigh the pros and cons and choose the most acceptable option. We also found out why it is necessary to insulate the garage ceiling and how to do it.
Interested in the article? Share it on social networks!
