A rather unpleasant situation, familiar to many - for no apparent reason, the light in the apartment (house) or in some rooms suddenly goes out, household appliances turn off. And at the same time, it is clearly clear that everything is fine with the neighbors’ electricity supply. Everyone's first reaction is probably the same - the owners check to see if the machine has been knocked out or if the fuse plug has blown.
How to find a broken wire in the wall
If this is really the case, and when the machine is restarted (the plug is replaced), the functionality of the home electrical network is restored, then the task is simplified. Of course, it is necessary to figure out the reason for the protection triggering - perhaps the permissible load was exceeded. But, in any case, the wiring is fine. But if there is voltage at the output of the fuses, but there is no voltage in the premises, there is a break somewhere. And the difficult task of restoring the home network lies ahead.
One of the most difficult questions in this case will be how to find a broken wire in the wall. We will consider it in this publication.
Setting up and preparing the multimeter
To use the multimeter correctly, you need to configure it. This means that you need to select the value to be measured and the limit of its operation, that is, the value beyond which it will not go.
Symbols on the front panel of the meter
A multimeter can be used to check various electrical quantities: current, voltage, resistance, frequency. It is also used to test the performance of various radio elements: resistors, capacitors, diodes and transistors. The very part of the word “multiple” implies the presence of several types of measurements. To select these types, there is a knob on the front panel of the tester, by turning which you can select the required value.
In most cases, the symbols depicted on the body of the multimeter represent designations of electrical quantities accepted in physics or conventional graphic designations of radioelements intended for testing. On the front panel you can find the following symbols:
- U - voltage symbol;
- V - stands for volts, this is also a measure of voltage;
- I is the current; when you set the knob to this designation, the current strength will be measured;
- A - amperes, a measure of current strength;
- Ω, R - symbol of resistance;
- Ohm is a measure of resistance, Ohms;
- -| |- - this icon indicates a capacitor, the multimeter will measure its capacitance;
- Diodes and transistors are also marked on the tester body with their symbols.
But not only the measured values are indicated on the front panel of the tester: the holes for connecting the probes also have their own designations. One of the meter slots will always be occupied by the black probe. This is a common hole, it is usually marked with the inscription COM, which means “common”. In addition to it, the multimeter has two or three working holes, designed respectively for measuring voltage, low current and high current.
The socket marked U, Ω, Hz is intended for measuring resistance, voltage and frequency, as well as for testing various radio elements. You also need to install a probe here to test wires and cables for breaks.
https://youtube.com/watch?v=DU1hvRCR2Rw
The hole marked mA (mA) is used to test low currents (up to 1 ampere), and the hole marked A (10 A) is needed to measure high amperages.
Limits of measured values
In addition to designations of the values of the parameters being tested, designations of measurement limits are printed on the front panel of the multimeter. In more advanced equipment, these inscriptions are not present, since the tester electronics itself selects the limit based on the signal supplied to it at the input. However, most multimeters require manual adjustment of measurement limits.
Typically, limits are given by numbers that are multiples of 2: 2, 20, 200... Thus, when choosing a limit, you should be guided by the rule: choose a limit higher than the one being measured, but of the same order. For example, to measure the voltage in a home electrical network (in an outlet), you need to select the AC voltage measurement mode and the measurement limit of 2000 volts. And to test the wires with a multimeter, you need to select the resistance mode and the minimum measurement limit of 2 ohms. However, long cables require a higher measurement limit of 20 ohms. Additionally, you can turn on the button with a sound signal that sounds when a short circuit occurs (circuit presence).
Connecting the tester
To check the parameters of electrical circuits and the continuity of wires and cables with a multimeter, you must correctly connect the meter to the circuit being tested. When checking for circuit integrity, the required area between the meter leads is checked. Therefore, the tester is connected to the terminals of the circuit. If voltage is being measured, the multimeter must be connected in parallel to the section where the voltage is being tested.
When measuring current, the multimeter must be connected in series to the open circuit of the circuit being tested, for example, between the power supply terminal and the load terminal.
Finding the exact location
Having established the approximate affected area, you should begin an in-depth search for the location of the damage, which can be done using different methods. There are various ways to find a damaged wire.
Opening a wall during a major renovation
The easiest way to detect cable damage is to completely clean the walls of finishing materials. In this case, it is easy to inspect the grooves made to accommodate hidden cables. They differ in color from the rest of the surface, and additional putty is applied to them.
Finding broken wires is a rather complex process, so in some cases it is advisable to call electrical network specialists who have special equipment
However, since in this case complete exposure of the walls and dismantling of decorative coatings (paint, wallpaper) is required, it is therefore advisable to use it during a major renovation of the room, which involves a new design of vertical surfaces.
Boolean search method
If residents do not have an electrical plan, you can try to recreate it using logic.
Professional electricians are well aware of the basic principles of laying electrical communications, namely:
Knowing the location of sockets and switches, you can create a communications diagram in the apartment.
Testing wires with a multimeter
Manufacturers make different types of multimeters, but the measurement principle remains the same, only the location of the controls and measurement limits differ. To check the integrity of the wires, the measurement mode switch is placed in the continuity position; this is marked with a diode or buzzer sign. After which the dialing process is carried out using the methods described above. The integrity of the conductor, in addition to the display of zeros (no resistance), is accompanied by an audible signal or an LED indicator, this depends on the brand of the multimeter. article: → “How to use a multimeter for dummies?”
Multimeter GE 2524 in dial position
The probe with the black wire is inserted into the connector with the ground symbol (case), the red one above, into the connector for measuring resistance with the Ohm symbol “Ω”. The disadvantage of many digital multimeters in dial mode is the delay in the sound indicator signal when touching the contacts. It is necessary to fix the probes on the wire for 2-3 seconds to make sure there is contact. This inertia in operation creates some difficulties in checking the integrity of the wire.
Multimeters of the UNI-T type have good performance in dialing mode; the sound indicator operates almost instantly when the contacts are closed.
In other parameters, UNI-T is not inferior to other models in measurement accuracy and number of options. article: → “Checking circuits with a multimeter or tester.”
Comparison table of characteristics of Fluke-179 and UNI-T UN61 multimeters
Please note that for all instruments it is advisable to use probes with gold-plated rods. Unlike steel ones, they are not subject to oxidation and provide reliable electrical contact.
Program for checking access to the Internet Network Traffic Monitor
Search engines often search for the answer to the question: “a program for testing twisted pair cables.” A computer with Windows installed already has a program that displays the message “The network cable is not connected” if the twisted pairs in the cable are broken or shorted. You will have to look for the location of the break or short circuit yourself; there is no program that would indicate the exact location and cause of the malfunction. There are special testers for this, for example MicroScanner Pro.
It’s another matter if there is a connection to the Internet, but it is unstable or the download speed has suddenly dropped. To monitor network traffic, there is an excellent free program, or rather a utility called Network Traffic Monitor.
It allows you to measure data transfer speed in real time, observe changes in speed over time, save data on a hard drive, rubber windows, extensive customization options and many other useful services. Supports many languages, including Russian.
Installing the program on your computer is simple, just run the EXE file and press the confirm button several times. Network will automatically be added to startup and will monitor and save all data. To display any of the windows on the monitor screen, just right-click on the tray icon and select the desired window. Network Traffic Monitor is the best utility for analyzing and diagnosing network quality that I came across during my search. I have tested the functionality of the Network Traffic Monitor program with Windows HP and Windows 7. You can use the Network Traffic Monitor program with one click of the mouse from my website.
Algorithm of actions
Let's consider the situation. There is a computer in the room. It is connected via a patch cord to the router, which, in turn, is connected via an Internet cable to the provider’s equipment to access the global network. At one point, the network checker on the computer shows that the connection is unavailable or not connected.
Troubleshooting
A superficial check can be done using the command to ping all hosts on the home network and several remote Internet servers. For these purposes, open a command prompt as an administrator. Next, enter the commands, focusing on the algorithm of actions:
- Testing the operation of the network card of the computer itself is done by exchanging test packets with itself. If there are no losses, then everything is in order. The ping 127.1.1.0 command.
Fault Analysis
We will start from the losses received when sending packets
It is important to understand that the ping command is a protocol of the fourth level according to the nesting of the OSI model, that is, software, network and hardware errors are excluded, but data levels 5-7 according to the OSI model are not checked
How to check an Internet cable or local cable and understand that there is a break? Eliminate other options related to a faulty network card or router. If there were packet losses when scanning the computer itself:
- Restart your network connection.
- Disconnect from all network add-ons (VPN, proxy).
- Do a Network Reset.
Checking twisted pair breakage and insulation integrity
The following video describes 5 ways to test twisted pair cables:
If all indications are that there is a problem with the cable, it must be identified and corrected. If a short cable is faulty, you can simply replace it. For wires several tens of meters long, you can use special devices to help identify the problem.
Tester
MicroScanner2 is a professional solution for identifying the location of cable faults. By connecting one connector to the port, graphical information about the length of the patch cord to the fault location will be displayed on the tester screen.
Multimeter
In resistance mode, you need to ring the orange and green twisted pair to check the integrity of the cable:
- Remove the second connector from the PC's network card or other network equipment.
- Remove the connector from the end to be measured and expose the wires.
- Apply the tester probes first to the orange and white-orange conductor of the twisted pair. Normal resistance is 1-2 ohms.
- Next, apply to green and white-green. The resistance should also be 1-2 ohms. The polarity is not important.
- Then attach the multimeter probes to the orange and green conductors. The multimeter should read more than 100 ohms. Multimeters usually indicate infinity.
Safety rules when making calls
Any electrical work, including diagnostics of conductors, requires compliance with all precautions and electrical safety rules. The main rules, the observance of which will save your life and health, are as follows:
Always operate with power off. Post a sign that says “DO NOT TURN ON”
PEOPLE WORK!” at a switch or machine; Do not touch exposed conductors with bare hands, use special clothing and special tools; Use power tools with sharp edges carefully: use gloves and do not damage the cord; At the end of the work, all faulty systems must be de-energized, and exposed wires must be properly insulated.
Take care of yourself and remember, if you doubt that you are capable of working with electrical networks, entrust this task to professionals.
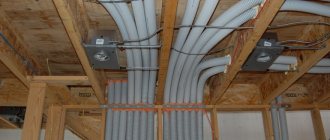
Laying open electrical networks
Repair work associated with a break in a hidden wiring usually requires complex construction and repair work: dismantling the finish, gating the walls, followed by sealing and covering a section of the wall with decorative materials.
Eliminating a broken hidden wire often requires dismantling the finishing, so it is advisable to combine such work with a major renovation of the premises
Since immediate implementation of such manipulations is not always possible, in some cases it can be recommended to lay a new wire along the surface of the wall, covering it in a special box or tube.
You will become familiar with a detailed description of the rules and technology for laying an open electrical network by reading our recommended article.
Dialing methods
There are several ways to ring wires at home:
Using a light bulb and battery. This is the simplest and fastest method. In order to construct such a device, you need to have a light bulb and a battery (several batteries can be connected together), as well as connecting conductors and a probe. In addition, do not forget that the voltage of the light bulb and the battery should be the same, or the battery should have more, but not vice versa. The connecting wire must be long enough to ring the wire from a distance.
In order for the dialer to work correctly, it is necessary to mark the cable in any order. The operating method of such a device is as follows: a wire that comes from the battery is connected to one core, and a light bulb is attached to the probe. Use this probe to touch the conductors at the opposite end of the cable one by one. If the light comes on, it means this wire is connected to the battery.
You can learn how to ring the wires of a light bulb and a battery from this video lesson:
Using a multimeter. This device measures various parameters of the electrical network (for example, voltage, current, resistance). In the house, such a device will be indispensable if you need to check an outlet or switch, check for a break, or find out where the wire goes.
You can test the cable with a multimeter using the following method:
- The dialing function is installed. Depending on which model of device is used, this mode is designated differently. As a rule, it is indicated by a diode.
- Then you need to find the phase in the distribution box. This is done as follows: you need to turn on the power and use an indicator screwdriver to check each cable. We mark the one we need with tape or tape and then determine zero.
- After this, you should find the voltage. To do this, set the multimeter to the “voltage measurement” mode. Using a probe, we check each wire. If the next time you touch the probe, it lights up around 220 V, then the right one has been found.
To check the electrical wiring in the wall for integrity, you need to disconnect the cable from the power source. Set the multimeter to resistance measurement mode. When the probes are closed, zeros should appear on the screen.
The video below clearly demonstrates the technology of testing a cable with a multimeter:
These two methods are convenient if the dialing is carried out over a short distance and can be done by one person. If the cable is long and its ends are in different rooms in the apartment or outside, then use a different method.
Using telephone handsets. Dialing with telephone headsets is carried out as follows: the capsules in the handset are connected to each other and a battery is connected to them, the voltage of which does not exceed two volts. Thanks to this technique, workers can talk to each other over the phone and coordinate their actions.
Cable wiring diagram using telephone handsets:
You can ring as follows: the cable on one side is connected to the tube conductor, and the other conductor is connected to any core. On the other hand, the cable connects to the tube conductor, and the other to each core in turn. If workers can hear each other on the handset, it means they are connected to the same conductor.
You can see the entire technology of work in this video example:
Using a transformer. There is another way in which you can ring cable lines - this is ringing using a transformer, which has several taps coming from the secondary winding. The technique is as follows: the beginning of the winding is connected to the grounded shell of the conductor, and the transformer taps are connected to the cores and power each of them. If you measure the voltage that exists between the shell at the other end and the conductors, you can determine whether the end belongs to a specific conductor. The dialer will allow you to identify and mark the necessary cores. You can learn how to correctly mark wires from our article.
Initial inspection after purchase
Wiring in a new building with a rough finish
Checking the condition of the electrical wiring is the first thing you need to do after purchasing a home. Even minor problems can lead to short circuits, fires and other unpleasant consequences.
New building
In new housing, the wiring is examined before major repairs and finishing work. First, the power of the devices that will be in the room is calculated, the cable cross-section is determined, and compared.
If the value is less than required, the wiring should be replaced. Otherwise, overloads, short circuits, and fires cannot be avoided.
External visual inspection, compliance with laying rules are mandatory. To check the wiring in the house if it is already covered with plaster, you should use a multimeter. The circuit of the outgoing ends of the cables is closed and checked with the probes of the device.
Old housing
“Secondary” or older buildings are more difficult to verify. First you need to find distribution boxes, find out the location of sockets, switches, lamps. The wires in the boxes must not be damaged, rust or other contamination must not be allowed - such electrical equipment must be replaced.
Sockets and other devices are inspected in a similar way. The protective covers are removed and the resistance is measured with a multimeter.
Cable testing devices
To test wiring, there are several devices that can help you complete the task.
There are devices of the E-121 series, popularly called Woodpecker. Using this device, you can determine the location of a hidden wiring break. Testing a power line using Woodpecker is very easy. In this case, it is necessary to guide the tool along the wall along the electrical network. If the Woodpecker made a sound signal, there is a break in this place.
Testers are able to determine the integrity of the cable, as well as the correctness of its connection. Some types of more expensive testers have a built-in multiplexer, as well as an analog-to-digital converter.
Tone generators are used to test cables. These types can more accurately determine the location of the break and determine the location of hidden wiring. In this case, the generator operates in a de-energized network, otherwise the device may fail.
The device is capable of testing various types of cables: from multi-core power cables to thin radio wires. However, tone generators cannot determine whether electrical connections are correct.
You can also ring an electrical circuit using telephone handsets or a transformer.
Timing for replacement of electrical wiring
After the electrical wiring has reached the end of its service life, it needs to be completely replaced without testing or inspection. The timing of inspection, replacement or interval between major repairs is established by VSN 58-88(r) (departmental building codes) and is:
- for hidden indoor networks 40 years;
- for open 25 years;
- for main wiring between apartments and input and distribution devices 20 years;
- for production and technical premises and lighting of public places 10 years.
Checking the electrical wiring in an apartment or private house, despite its apparent complexity, if you have the necessary knowledge and a minimum set of tools, you can do it yourself, without inviting a qualified electrician.
We check the wiring in the apartment with a multimeter
Let's take as an example a modern apartment in which the wiring is done in accordance with current requirements and standards. This means that when laying the lighting lines and power outlets, they were separated, and separate wires were laid for them in each of the rooms. Each of these circuits is powered from the apartment panel through a separate circuit breaker.
If the light has gone out in one of the rooms, you should first check that the lamp is working properly. Before starting work, it is necessary to turn off the power to the room/apartment depending on the power supply. When using an opaque incandescent lamp in a lamp, the integrity of the filament is difficult to visually determine, so you will need a multimeter and its continuity function. Let's figure out step by step how to do this correctly.
First you need to check the shield for triggered circuit breakers. In the first case, they will be in the on position (then the fault may be hidden in the room switch, lamp or socket). The likelihood of damage to the wiring in such a situation is low. If the device works, you will need to check everything except the room switch, including the switchboard itself.
If the machines don't work
- Make sure there is voltage at the input and output of the machine. If it is, you can proceed to further verification.
- Prepare the device for operation and check its serviceability by short-circuiting the measuring leads.
- Unscrew the lamp from the socket.
- Touch one of the measuring probes to the base (the metal part of the lamp with threads), and the second to the central contact of the lamp (the insulated center of the end part of the base).
- A sound signal and instrument readings that are different from 0 or 1 mean that the lamp is working. If it is faulty, you need to replace it, which will solve the problem.
- We check the cartridge for serviceability. To do this, you need to disassemble the lamp, make sure that the connected wires and contacts are intact. If everything is in order, then the cause of the failure is not in the cartridge. If malfunctions are detected, they must be eliminated. The lamp cannot be screwed in yet.
- We check the serviceability of the room switch. To do this, remove the plastic cover, unscrew the screws and take it out of the mounting box. We inspect the equipment for the appearance of carbon deposits and check the tightness of the fasteners. If everything is in order, you need to install the measuring ends of the tester on the contacts of the switch. The appearance of a sound signal when dialing in the on position will indicate that the equipment is working properly. The wires do not need to be disconnected.
During such a check, as a rule, a malfunction is identified, which becomes the cause of all the troubles. Eliminating it allows you to quickly solve the problem.
If the machine worked
To ensure electrical safety during work, in this case the voltage is turned off using a general apartment circuit breaker. Next, the serviceability of the socket and the wires connected to the lamp is determined according to the algorithm described above. If there are no faults, you need to check the wiring itself using a multimeter and the continuity function. Such malfunctions happen quite rarely, but they still happen, for example, when installing suspended ceilings or decorative interior elements.
The wiring in this case is performed as follows.
- Using a screwdriver, disconnect the connected conductor (if installed correctly, it is located at the bottom) and move it to the side. The “zero” of this group is, as a rule, located at the zero clamp under the machines.
- Unscrew the incandescent lamp from the socket. Using a ready-to-use tester, we check the line by connecting one of the measuring probes to “zero” and the other to the disconnected conductor. If the device beeps, it means the wiring is shorted.
- In this case, in the room under the ceiling above the switch, we find and open the junction box. We disconnect the wires.
- We check all groups of wires for short circuits. To determine the section of the circuit in which there is a short circuit, we again check the circuits on the apartment panel with a multimeter. If the signal sounds, it means that it is the wire laid from the switchboard to the box in the room that needs to be repaired. Otherwise, the search will need to be continued until a result is obtained.
New building
It is most often necessary to check the electrical wiring in a new building after installation after purchase, before major repairs - finishing the walls and arranging furniture. The importance of this event lies in the fact that if you do not inspect the cable line from the very beginning, in the future it will be much more difficult to check the wiring under a suspended ceiling or behind plasterboard sheets.
First of all, you must calculate the total power of the electrical appliances that you will use, based on which, calculate the cable cross-section by power and compare this value with the cross-section of the conductor already laid in the walls. If the cross-section is insufficient, be sure to replace the electrics, however, as experience shows, such problems do not arise in new buildings.
The next step is to check the condition of the hidden electrical wiring. The insulation must not be damaged, and all wire connections must be made using terminal blocks or other connectors (for example, PPE caps), but not by twisting. Twisting is prohibited; see the list of permitted connection methods in Chapter 2.1. PUE clause 2.1.21. It is also important to determine the cable cross-section and check the ratings of the sockets. The socket group must have copper conductors with a cross-section of at least 2.5 mm2, the rating of the circuit breaker of the socket groups must not be greater than the rated current of the sockets, usually 16A.
If all the above requirements are met, the last thing left to do is to check the wiring in the apartment for load. In other words, you need to check yourself whether the switchboard is assembled correctly. When all equipment is connected and all lamps in the rooms are turned on, the machines should not operate.
If a circuit breaker trips, it means the electrical wiring is not able to withstand the load from the connected electrical appliances, as a result of which it will be necessary to replace the circuit breakers, divide the electrical wiring into groups, etc. If the circuit breakers in the panel do not turn off after turning on the load, then the home wiring is correct. It wouldn’t hurt to additionally check the reliability of the connection of the machines in the panel, as well as checking the ratings with the load that comes to them.
In what cases is wire testing carried out?
This question can be answered in a few words - if the current-carrying core breaks or the integrity of its insulation is compromised.
Let’s clarify this answer and consider typical situations:
- Let's say an outlet or switch stops working. After you have made sure that the problem is not in the connections (including the junction box) and not in the light bulb (lamp), it is advisable to ring the wires in this area. If the integrity of the wiring is compromised, the multimeter will signal this.
- Developing the first example, it can be noted that such situations are not uncommon during repair work (drilling holes) and short circuits due to dilapidated wiring and network overloads.
- An atypical, but quite effective use of multimeter testing is to determine the required conductors on large sections of wiring. This method is appropriate when the color marking of the wires does not allow you to accurately identify the desired conductor.
- Also, in everyday life, dialing allows you to determine the integrity of electrical appliances (lamp, iron, switch, fuse). And if you are well versed in electronics, then when soldering, repairing printed circuit boards and other devices, testing circuits is a mandatory step.
Troubleshooting
If the problem occurs in the new wiring, the ends of the wire must be connected. The connection is made as follows:
- The phase conductor must be disconnected from the power supply .
- To the left and right of the break point you need to remove the plaster from the wall. Ultimately, you need to release at least 10 cm of wire.
- The ends of the emergency wire must be pulled apart and a hole drilled in the wall for the branch box. The hole is marked with a hammer drill with a crown attachment, and the hole is selected with a chisel.
- Place the box in the prepared hole, secure it with alabaster and insert the wires into it.
- If there is a supply, the ends of the damaged wire are connected to each other according to the color of the insulation and carefully insulated. The connection is made using PPE .
- The box is closed with a lid, the repair area is plastered and the finish is restored.
In some cases, the damaged area must be completely replaced by pulling it through the corrugation using a broaching device.
Checking the electric heating element
You can also ring an electric water heating element with a multimeter. To do this, the probes of the device must be attached to the contact plates of the heating element. If the resistance reading is small, then the heating element is working. With very large values or one (depending on the model), the heating element is damaged and requires replacement.
Note! Sometimes one housing may contain two heating elements connected to voltage in parallel. In this case, you need to ring them separately, having first removed the jumper between them
It is very important for boilers and other water heating devices to ring the contacts of the heating element for penetration into the body
To do this, the probe is connected to one of the contacts, and the second - to the body of the heating device
It is very important for boilers and other water heating devices to ring the contacts of the heating element for penetration into the body. To do this, the probe is connected to one of the contacts, and the second to the body of the heating device. If the tester shows a certain value, the internal insulation has been damaged in this heating element.
To prevent electric shock, the heating element must be replaced.
If the tester shows a certain value, the internal insulation has been damaged in this heating element. To prevent electric shock, the heating element must be replaced.
Search logic
The simplest thing is to find a malfunction if it occurred as a result of mechanical damage and appeared immediately. In this case, the places where drilling was done, nails were driven in or screws were screwed in are inspected. These are the most common reasons that can mechanically damage electrical cables in the wall.
IMPORTANT: faulty wiring may not appear immediately, but after a while.
Wire breaks inside walls rarely occur. Before looking for damage inside the walls, you should analyze whether there have been any changes in the design of the room. Professional electricians advise first of all to inspect those places where electrical wiring breaks most often occur: at the junction of slabs during displacement, in the area of cracks in concrete and wooden walls. Damage also occurs at the wires exiting the wall. If there are no apparent reasons for the wire break, determining the location of the break will require the use of special instruments and tools.
Cable phasing
Phasing is the ability to determine in what order the phases alternate when connected in parallel. This is necessary in order to avoid short circuits. Indeed, in order to increase the reliability of power supply, sometimes one conductor is not enough (or if the consumer’s power is too high). In order for the electrical installation to work normally, another wire is placed in parallel. In this case, it is necessary to take into account the phase rotation. The phasing diagram is shown below:
Phasing can be done in several ways: using a voltmeter or an incandescent lamp. A voltmeter is used for 380/220 V installations. The technique is as follows: cable 2 in the first installation is connected using a switch, and in the second, thanks to a voltmeter, it determines the voltage between the core and the bus to which it is planned to be connected.
If the voltage is linear, then the core and bus have unequal phases, so connecting them is prohibited. If the voltmeter displays zero, then this indicates that the wire and the bus have the same potential, respectively, they have the same phase and can be connected. Other conductors are tested using the same method.
If there is no voltmeter, then phasing can be done using two incandescent lamps that are connected in series and have a rated voltage of 220 volts. If the lamps do not light, then the wire and bus belong to the same phase.
You should also take into account the fact that after such actions a certain voltage remains on the cable cores, which is associated with a residual capacitive charge. Therefore, the cable should be discharged after the next passage of voltage. This is done by connecting the conductors to grounding.
So we looked at the main methods of testing wires and cables, as well as devices that can be used for such work. We hope the information provided was useful and interesting for you!
We also recommend reading:
- How to use a multimeter correctly
- What is phase rotation
- How to detect a short circuit
Checking in the absence of testers
A multimeter and tester may not be at hand. In this case, you can use the manual verification method. To do this, you need to cut off pieces up to 15 cm long from each end of the cable. Next, you should remove the winding by 5 cm. And expose the cores by a couple of cm.
After this, prepare a container with water, which should be made of glass or plastic. Ordinary table salt weighing 1/4 of the weight of water is added to the liquid and mixed until completely dissolved. The cable cores are conductors and their contact must be avoided.
The other side of the cable section must be connected to a power source with a voltage of more than 3 Volts. A regular battery, a smartphone battery, and other safe sources may also work.
After applying voltage, you should monitor the wires in the water. The negative conductor should be covered with white bubbles, and the positive conductor should be covered with yellowish-green ones. If everything is so, then the twisted pair is in good condition and no short circuit has occurred. If there was a short circuit, then bubbles will come from the other vein.
Brief overview of budget models
The most popular budget models of search equipment:
- Bosch Truvo.
Using the device is very simple. The indicator light changes color as the device approaches metal. If the light is green, there is no danger for drilling; if it is red, then there are electrical wires in this place. When the red light is constantly on without blinking, then it is ordinary metal, and if the red light is blinking, then the wiring is live. The device will detect hidden wiring at a depth of up to 5 cm, non-ferrous metal up to 6 cm, ferrous metal up to 7 cm.
Bosch Truvo detector Source umkv.co.ua
- Bison is a professional.
The device will find not only metal, but also wood. The device will detect hidden wiring at a depth of up to 5 cm, non-ferrous metal up to 6 cm, ferrous metal up to 10 cm, wood up to 2 cm. The type of material is displayed on the display in different colors. Indicates the depth of electrical wiring.
- Wall Control.
It can detect not only metal, but also plastic. It has a very durable body that protects from dust and water. It has good scanning accuracy and illuminates the point with a beam. The detection depth of cable is up to 5 cm, ferrous metal – up to 5 cm, copper – up to 4 cm, wood – up to 2 cm.
- Mastech MS6906.
Used to search for metal, voltage, hidden structures. The hidden wiring finder will detect communication lines up to 7.5 cm, ferrous metal - up to 6 cm, non-ferrous metal - up to 3 cm.
How to connect wires
Before measurements, it is important to strip the ends of the wires from insulation and remove oxide from the cable cores. The oxide on the wires may have high resistance, which will be higher than the value limit of the selected resistance mode of the device, which will give incorrect readings
Before making the call, you need to remove the mains voltage from the electrical wiring and remove the terminals from the battery in the car. If there are capacitors in the wire continuity circuit, then they need to be discharged by short-circuiting the terminals. All these precautions will help avoid damage to the multimeter and give more reliable results.
For convenience, when making calls, use special wire clips - “crocodiles”. The “crocodile” is put on the probe and clamped onto a section of the wire. The use of such clamps increases the convenience of working with wires, as your hands are freed.
Short cables and wires can be tapped at one end, while long wires must be thoroughly cleaned of oxides and twisted together on one side. Then the dialing process is carried out only on one side. You can ring the wires without a multimeter. For such purposes, electricians use a specially made “dialer” consisting of a battery and a light bulb. A sound generator and headphones are also used to check cables and wires.
Battery-powered bell with light bulb
conclusions
Finding a broken wire is a rather difficult and serious matter that requires certain skills and knowledge.
To quickly find the location of a damaged electrical wire, you need to know the layout of electrical communications. You can use logic to determine the area where an accident could have occurred. Find the exact location of the break, possibly using homemade or professional devices. You should find out which wire has burned out: phase or neutral, using the recommendations given in the article.
Using the information obtained, you can easily not only find the damaged wire and restore it, but also prevent a similar breakdown in the future.
Checking electrical circuit parameters
When testing electrical circuits, you can test many of their parameters. This includes current, network voltage, and signal frequency. But to determine serviceability, you only need to ring the circuit for integrity and check the insulation resistance. Both can be done with a multimeter.
In order to know how to test electrical wiring with a multimeter, you need to correctly configure the measuring device and correctly perform the measurement steps. To check the integrity of the wire you need:
- Connect the black probe of the multimeter to the socket labeled COM, and the red one to the socket labeled U, Ω, Hz;
- The meter knob must be set to the 20 Ohm position;
- Connect the measuring contacts to both ends of the wire. If the ends are in different places in the room, you need to use a previously tested extension wire;
- The tester screen will display the value. If the value does not exceed 2 ohms, it means that the integrity of the wire is not compromised. If the readings are not at the same level or more than 8-10 ohms, then there is a break in the circuit.
In the same way, wires in a car and cables of various electronic devices are tested.
In addition to checking integrity, wires are tested for insulation resistance. This can also be done with a multimeter:
- The probes remain in the same holes as when checking integrity;
- The measurement mode selected is the same - resistance test;
- The measurement limit must be selected as large as 20 or 200 megaohms;
- Touch the probes to opposite conductors of the cable: phase and neutral or phase and screen. In a car, this is ground and signal wire;
- The screen should remain displaying infinity; if there is any value instead, it means there is a short circuit somewhere. Changing values indicate interference in the network.
In addition to ordinary wires, there are high-voltage wires that can withstand high current and voltage loads. These include spark plug wires in cars. The current that is required when starting the engine flows through them; this current reaches 80-150 amperes. Knowing how to test high-voltage wires with a multimeter is required when diagnosing car electronics. The ringing of these wires occurs according to the specified scheme, with the difference that it is necessary to set a larger resistance measurement limit. Typically this limit should be set at 20 kilo-ohms.
In trucks, as well as in networks located in places subject to constant mechanical stress, conductors with a screen - armor or armored wires - are placed. The only special feature of the armored wire is the screen, made of durable metal. You can check the integrity and insulation of the armored wire in the same way as a regular one, you only need to have access to its ends and the screen outlet.
Causes of malfunctions
If the operating rules for electrical communications are observed, they can serve regularly for decades. But in practice, damage to electrical networks is quite common, which can be caused by various reasons.
These factors include:
- Long-term operation of the cable . Wiring can function flawlessly for many years, but after a certain time limit it begins to deteriorate. In this case, twists scatter in the network and leaks appear, which regularly knock out the RCD (its absence affects the increase in leaks). Sooner or later, such violations lead to interruptions, and then to a complete cessation of the power supply.
- Mechanical damage . Without knowing the layout of electrical networks, when drilling holes and driving nails into the wall, you can easily touch a wire, causing it to break and sometimes short circuit. Sometimes minor mechanical damage has a delayed effect: in this case, the integrity of the core may not be damaged immediately, but after several months or even a year.
- Defective wire or poorly executed electrical installation . Damaged cables tend to become constantly hot, which can have fatal consequences. After a sudden power surge, such wires may break.
- Incorrect use of adapters . Electrical wiring malfunctions can be caused by improper use of extension cords or tees. This can happen if several high-power household appliances are connected to the device, for example, a washing machine and dishwasher.
If the adapter is used incorrectly, the cables that come from it are subject to overheating and increased stress, which can lead to melting of the insulation.
In all cases, it is necessary to identify the location of the cable damage in order to immediately repair the damage.