The foundation is the basis of the building. It depends on it, in particular, how long the construction will last. Competent preparation for construction should begin with ground research on the site. It is based on their results that a decision is made on choosing a suitable foundation. However, not only the soil influences this choice, but also the material of the walls, which determines the load on the foundation.
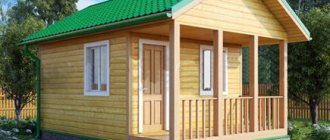
So, bathhouses made of foam blocks or frames do not need a solid foundation, because they have light walls, which cannot be said about a bathhouse made of timber or logs, which are heavier and therefore require a stronger foundation.
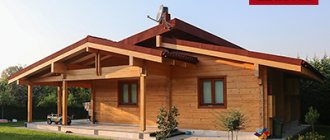
Log house
A log house is the walls of a house made of solid logs.
In the corners of a wooden house, logs are connected into so-called crowns. At the bottom of the log, a piece of wood is cut out the width of the transverse diameter of the log. Wooden elements in the corners of the house form locking systems that do not require additional strengthening. This confirms the popular expression - to build a house without a single nail. Such houses are most often built in areas where timber is available to consumers at a low price. Such places include Central, Eastern Siberia and the Far East. Although it is worth noting that the popularity of building private houses from solid wooden elements has increased widely in all regions of our country.
The low specific gravity, excellent thermal insulation qualities, durability and environmental friendliness of wood are an undeniable advantage over other building materials.
Waterproofing the foundation and installing the first crown
Waterproofing the first crown.
Naturally, the choice of the method and method of how the work will be carried out depends directly on the type of foundation itself, but, for example, for a strip foundation it is quite possible to use roofing felt, which is laid on a base surface lubricated with heated bitumen.
You should definitely take care of constructing the correct blind area, the absence of which may lead to distortion of the structure or even destruction of the foundation. You need to take the installation of the first crown very seriously. For this purpose, as a rule, logs with a slightly larger diameter are selected.
The correctness of their installation is checked by a level - they must be laid strictly horizontally. And only after completing this stage, they should be tied together and connected to the base.
In addition, the connection between the base and the first crown must be properly processed and insulated.
If you are interested in the bathhouse you have built keeping warm for a long time and serving without problems for many years, you should definitely put a layer of waterproofing and thermal insulation between the base and the building. If you ignore the advice and do not put in a thermal insulation layer, most of the heat will escape through the floor, and the bathhouse will cool down very quickly.
The method of carrying out insulation work depends on such parameters as:
- foundation laying depth;
- type of foundation.
Particular attention should be paid to how correctly the blind area is executed. Its absence can lead to the most undesirable consequences, starting with the building being skewed and ending with the complete destruction of the foundation for the bathhouse.
You need to approach the installation of the first crown with a high degree of responsibility. To do everything correctly, logs must be selected with a large diameter.
How correctly the installation is carried out is checked using a building level. The logs must be placed exactly horizontally. Upon completion of this stage of work, they are tied together and securely attached to the base.
However, not only the foundation needs insulation, but also the bathhouse itself. It is best to use polyurethane foam. It allows you to most effectively get rid of existing cracks.
Monolithic base.
This is a floating base, poured with concrete over the entire area of the building, a good option for rectangular structures on heavy soils of heaving, weak-bearing or bulk nature. This is a reliable and durable foundation, the thickness of which should be from 30 cm.
A trench 60 cm deep is dug for it and filled with crushed stone and sand, which are repeatedly watered with plenty of water to allow them to shrink. After installing the waterproofing, reinforcement and formwork are done to strengthen the base.
What is the best foundation for a bathhouse?
After pouring concrete, the monolithic foundation is held under wet sawdust or burlap.
Making the foundation
After preliminary marking, planning and leveling of the site for the foundation, you can begin laying the foundation. Let's consider the process of manufacturing a strip foundation with a shallow laying depth, as the most common and suitable for constructing bathhouse walls from any material.
A strip foundation with shallow depth is a concrete strip about 30 cm wide, going into the ground to a depth of 30–50 cm, the upper edge of which is 15–20 cm above the ground surface, forming the basement part of the structure.
The following tools are required to carry out the work:
- marking pegs;
- measuring cord or wire;
- building level;
- plumb line;
- bayonet and shovel;
- hammer;
- saw a hacksaw for wood;
- hacksaw saw;
- pliers;
- construction vibrator;
- concrete mixer.
A trench is dug on the site marked for construction using pegs and a cord. Its depth is 0.5 m, width - about 30 cm. The bottom of the trench is covered with a layer of sand 10 cm thick and compacted. A layer of gravel (10 cm) is poured on top of the sand cushion and compacted so that the sand and gravel form a single mixture.
According to the plan, drain and water pipes are laid in special recesses, as well as, if necessary, pipes for electrical wiring. To organize the drainage, a drain well is usually used, located at a distance of 3-5 m from the wall of the bathhouse. Drain pipes are laid with a slope towards the drain well to organize gravity flow of water. Where the pipe passes through the concrete strip of the foundation, several layers of waterproofing material are wound onto the surface of the pipe so as not to damage the surface of the pipe during the process of pouring concrete into the formwork.
Along the edges of the trench, formwork is installed from boards 20 cm wide, forming the upper basement part of the foundation. The boards are secured with spacers and pegs driven into the ground. In the corners of the boards, they are additionally fastened with nails or binding wire. The verticality of the trench walls and the location of the formwork is checked with a plumb line, the horizontal position of the edge of the formwork is corrected using a building level.
2-3 contours of reinforcement with a diameter of 10-15 mm are laid in a prepared trench with installed formwork. Vertical sections of reinforcement are connected to horizontal rods using knitting wire. The fastening spacing of vertical rods should not exceed 0.5 m. The ends of horizontal reinforcing rods should not be located in the corners of the building; for this purpose, during installation, the reinforcement is bent so that the ends of the rods are no closer than 0.5 m from the corner of the building.
The formwork rods are laid so that they do not protrude from the concrete. Otherwise, the reinforcement will be subject to corrosion, which may cause the integrity of the foundation strip to be damaged under load during its operation.
After completing the installation and checking the strength of the reinforcement, concrete is poured into the trench, from which air bubbles are removed using a construction vibrator. The surface of the concrete is leveled and covered with waterproofing material to protect it from atmospheric moisture and direct rays of the sun. 10-14 days after the concrete has completely hardened, the formwork can be removed and the construction of the walls of the bathhouse can begin.
If the internal partitions of the bathhouse are light, there is no need to use a strip foundation as their support. To reduce labor costs and save material at the intersection points of internal partitions, columnar foundation elements can be used. To make load-bearing support columns for the internal partitions of the bathhouse, you can use baked brick or concrete. The size of foundation pillars made of brick is usually 0.5x0.5 m, of concrete - 0.6x0.6 m.
If a large stove-heater is used to heat a bathhouse, then to install it it is necessary to make a separate foundation, which can be made in the form of a solid concrete slab or a combined structure can be made in the form of buried brick pillars, the space between which is also laid with bricks on cement mortar.
Necessary tool
When making a bathhouse foundation from a log frame with your own hands, it is advisable to prepare the following tools and equipment in advance:
- Bulgarian;
- perforator;
- welding machine;
- electric drill;
- construction mixer;
- vibrator;
- shovel;
- scrap;
- hammer;
- sledgehammer;
- hacksaw;
- hacksaw for metal;
- chisel;
- measuring bucket;
- container for preparing the solution;
- scales;
- putty knife;
- Master OK;
- pliers;
- paint brush;
- knife;
- scissors;
- roulette;
- construction cord;
- plumb line;
- construction level.
Features of the construction of strip foundations
A strip foundation for a log bathhouse is a fairly common option for medium and large-sized buildings. If the bathhouse includes such premises as a steam room, a washing room, a relaxation room and a dressing room, and even has an attic under the roof, then the strip foundation is made with full depth (1.2-1.6 m), i.e. 25-40 cm below the freezing level. In the case of small-sized log houses, a shallow strip foundation is made (depth 55-75 cm). If a very small log house is being built, then you can limit the depth to 42-48 cm.
Construction is carried out in the following order:
- Preparing the construction site: removing vegetation and uprooting stumps, leveling the area using a theodolite.
- Marking the foundation: pegs are hammered in the corners, and a cord is stretched, indicating the outer boundary of the tape; the right angle is strictly controlled.
- Digging a trench, with its width chosen to be 20-25 cm greater than the width of the concrete strip, and its depth taking into account the cushion.
- Backfilling the foundation cushion in the trench: first, a sand layer measuring 18-22 cm with careful compaction, and a crushed stone layer measuring about 20 cm.
- Laying waterproofing from roofing material.
- Installation of formwork in the form of panels on both sides of the trench: the distance between the panels must exactly correspond to the selected width of the concrete strip.
- Installation of a reinforcing belt inside the formwork in the form of several layers of longitudinal steel rods measuring 11-14 mm, connected by transverse and vertical elements measuring 8-10 mm.
- Concrete is poured in layers (the thickness of each layer is no more than 25 cm) with thorough compaction using a vibrator. The solution is prepared from a mixture of M400 cement, sand and crushed stone in a ratio of 1:3:(3-5).
- Fastening vertical rods in the top layer of concrete to fix the basement crown of the log house - the extension of the rod is about 10-12 cm.
- Dismantling of formwork: carried out after complete hardening of the concrete.
- Applying a waterproofing layer on the side surface of the foundation made of bitumen mastic, and a waterproofing layer of roofing felt on the top surface, filling the gap with soil with compaction.
Installation of formwork
To create formwork with your own hands, edged boards with a thickness of 25-40 mm are used.
There are other materials, but wood is more accessible, cheaper and easier to work with. In addition, after completion of the work, the boards can be used for other purposes.
The thickness of the boards directly depends on the height of the tape.
The formwork is assembled in stages:
- Assembly of shields. The height is 5-10 cm greater than the height of the tape; the length of the boards is determined by the length of the walls or the size of the boards.
- Installation of shields in the trench. They are fastened together by support strips that determine the thickness of the future tape. On the outside, the shields are reinforced with supports that prevent the mass of concrete from pushing the walls of the formwork outward.
- If the boards are low (up to 20 cm), supports can be omitted, securing the walls from the outside with pegs.
NOTE! When assembling the boards, gaps between the boards should not be larger than 3 mm (ideally, there should be no gaps at all). If gaps appear, they are filled with tow or slats. The installed formwork is a structure whose internal space is the exact shape of a concrete strip
After assembly, all dimensions should be checked to eliminate the possibility of errors.
The installed formwork is a structure whose interior is the exact shape of a concrete strip. After assembly, all dimensions should be checked to eliminate the possibility of errors.
Nothing can be corrected subsequently, so the assembly process must be monitored with the utmost care.
Metal and concrete screw piles
On weak, wet, uneven and prone to crumbling soils, the only correct solution is to lay a pile-type foundation under a timber bath. Such work is carried out using special equipment (in case of high soil density and long supports) or independently using devices for screwing metal piles or hand drills for preparing holes for concrete pillars. The technology for constructing a foundation from screw piles is recognized as the most effective and fastest. When implementing it, a simple algorithm of actions is carried out:
1. The pile field is marked according to a pre-drawn diagram, with pegs driven in in the right places and the level checked using a cord and a laser pointer. Supports are laid in the corners and under all load-bearing structures of a wooden bathhouse, including stove foundations, in increments of no more than 2 m. If the bathhouse is heavy and the soil has low load-bearing capacity, the piles are screwed in not only around the perimeter, but also under the building itself, followed by tying it with metal or timber .
2. In the marked places, pits up to 50 cm deep are prepared. After this, piles are screwed into them using a screw device placed on the top of the metal support. Thanks to special blades or pointed ends, problems with twisting metal piles under a bathhouse do not arise; the need to use special equipment arises only in extreme cases (the presence of large debris in the ground or construction on peat bogs).
3. After screwing in and checking the evenness, the piles are cut to a height of 20-40 cm and filled with concrete. At the same stage, threaded rods with a cross-section of at least 15 mm are installed in their upper part to hold the timber frame, or metal caps are welded for subsequent fastening of the channel.
An alternative to metal piles are driven or vibrating supports made of reinforced concrete. This option is considered reliable, but expensive due to the need to use special equipment.
When constructing on wet soils, supports need enhanced protection from corrosion or the aggressive effects of groundwater. Under such conditions, metal piles are pre-treated on the outside with protective compounds, while concrete piles have a higher water resistance grade or are coated with bitumen.
Screw piles bath
Depending on the bearing capacity of the soil
This indicator is considered the main one and depends on the composition and size of soil particles, the degree of its compaction and moisture saturation.
Soils with high bearing capacity (coarse and medium sands, dense gruss, gravel and rocky soils) are suitable for the construction of any type of foundation for a bathhouse, including budget columnar and prefabricated strips of concrete blocks. If there are small and weak particles in the soil (water-saturated sandy loam, plastic clay, fine sand, peat), the foundation under buildings swells and moves during periods of freezing and thawing. The requirements for the stability of the foundation for a timber bathhouse in such cases increase significantly. In particular:
• When constructing on clay soils that are stable only in a dry state and have a bearing capacity of no more than 1 kg/cm2 when saturated with moisture, the lower part of any type of foundation must be buried below the freezing level. • When constructing a bathhouse on peat bogs with high humidity and silty-clayey soils, only pile types of foundations resting on stable and dense layers have suitable characteristics. • When laying buildings on sandstones, the type of foundation depends on the size of the sand fractions and the density of the soil layers. Sandstones with particles of about 1-2 mm have a load-bearing capacity of at least 4 kg/cm2 and are suitable for the construction of any type of foundation; less than 1 mm require a slab or pile foundation.
Of particular danger are quicksand soils , consisting of a mixture of flakes of plastic clay and fine suspensions of clay. Due to the strong risks of horizontal soil shifts in such areas, the construction of residential and commercial buildings is not recommended in principle. The problem can only be solved by a stable pile-screw foundation with a support length of at least 3 m or a complete replacement of the soil in the pit.
Columnar foundation
Let's take a closer look at how to make a columnar foundation for a bathhouse with your own hands and which foundation design to give preference to.
The foundation consists of a number of pillars located along the axes of all load-bearing walls, at the corners and intersections of the walls. The pillars are placed under internal partitions and other massive structural elements, such as a sauna stove. The best distance between pillars is 1.5-2 m.
Construction of a load-bearing building structure from various materials
Initially, the question arises of choosing a suitable and accessible material. The columnar foundation is made of:
- From wooden pillars - logs with a diameter of 200 or maybe timber using insulating materials and treatment with antiseptics. Least durable. Practical if the structure is being built for a period of up to 10 years;
- Made of brick, the size of the columns in plan is 380x380, stone 500x600;
- Made of concrete blocks 400x400;
- From steel pipes or asbestos-cement pipes filled with concrete;
- Made of monolithic concrete 400x400.
A bathhouse on a columnar foundation is being built on a prepared site; below are step-by-step instructions for its construction.
From pipes
The best option for a columnar foundation of a bathhouse is metal or asbestos-cement pipes Ø200 millimeters, which can be easily cut with a grinder into pieces of the required length. It should be taken into account that a pole made of a pipe should protrude above the surface by approximately 0.4 meters.
Asbestos-cement non-pressure pipes
Name of product
Weight of 1 pipe, kg Internal outer diameter, mm Price of 1 p/m, rub.
| BNT 100*3.95m | 24 | 100/118 | 102,97 |
| BNT 150*3.95m | 36 | 141/161 | 165,79 |
| BNT 200*5m | 85 | 200/222 | 319,99 |
| BNT 250*5m | 125 | 238/266 | 392,76 |
| BNT 300*5m | 162 | 292/320 | 617,46 |
| BNT 400*5m | 279 | 365/407 | 958,66 |
| BNT 500*5m | 430 | 456/508 | 1732,51 |
Pipes must be protected from moisture and other negative factors. To do this, you need to make waterproofing - wrap the surface of the pipe with roofing material with bitumen, lining waterproofing materials, or treat it with special mastics.
We prepare pipes for the foundation
The prepared pipes are carefully and evenly lowered into each hole.
Installation of foundation pipes
The gap between the pipe wall and the soil is filled with previously dug earth or sand and gravel (layer thickness 40-50 centimeters), which it is advisable to compact thoroughly.
Reinforcing rods Ø12-14 millimeters should be inserted into the middle of the installed pipes at a distance of 7 centimeters from each other, which act as a reinforcing frame. Since the reinforcement must protrude above the finished pillars, its length should be 20% greater than the size of the pipe.
Fittings in the pipe. Photo The bottom of the hole is reinforced with a metal cross Reinforcement of the foundation Reinforcement and filling
Having carried out these preparatory work, you can begin pouring the foundation pillars. The best option is concrete grade M400. It can be ordered from specialized enterprises or made yourself using a concrete mixer. When making it yourself, it is enough to use M400 cement, coarse sand, fine and medium gravel, which must be mixed in a ratio of 1: 1.5: 3. The required amount of water is 0.4 part of the amount of cement taken.
The process of pouring the concrete mixture itself occurs in several stages (see table).
Work order Illustration
| concrete is poured inside the installed pipe to a third of its height | Fill |
| the pipe rises, which allows the concrete to form a kind of cushion, and then is pressed into this base | The pipe is rising |
| Subsequently, we continue to pour concrete into and around the pipe step by step, compacting it every 0.3 meters with a deep concrete vibrator, and in its absence, a reinforcing rod can be used. This is necessary to get rid of air bubbles and improve the quality of concrete. | Adding soil Filled column |
Small ruined subtype.
In turn, it is classified according to the type of structure under which it is erected: self-supporting and load-bearing walls, columns. Can be combined with foundation beams. Solid slabs in the form of ribbed or flat type and massive under the entire structure are becoming popular.
This subtype is widened at the bottom or built in steps. The upper part of the base is the edge that separates the base from the structure itself. The lower part is the sole resting on the base soil.
To learn the procedure for laying a shallow strip foundation, watch the video:
Its height is the distance from the sole to the planning mark of the earth's surface. Sometimes a glass is placed in the upper part under the column.
Construction technology
Each type of foundation differs from each other in design, depth, size
It is important to study the technology for constructing the selected foundation in advance to avoid any mistakes.
Screw
A universal foundation that is suitable for different types of soil. Arrangement of a pile foundation:
- Mark the general boundaries of the foundation and clear the construction site of debris.
- Mark the locations of the piles.
- Remove the fertile layer to a depth of 20–30 cm. To prevent grass and plants from growing under the building, the recess must be covered with a layer of geotextile.
- Lay a layer of sand mixed with crushed stone.
The method of installation of piles depends on the type of supporting elements. Some of them are driven in using a special installation, others can be screwed in using industrial equipment or manually.
When installing piles, it is important to constantly check that they are as perpendicular as possible
Tape
For a small log bathhouse, a strip base is suitable. Its depth can reach 50 cm. The strips must protrude above the ground by more than 30 cm. Stages of constructing a strip foundation:
- Mark the location of the trenches. Check the diagonals and main dimensions of the future building.
- Dig trenches to the required depth, 20 cm more than specified. Fill the space with a mixture of sand and crushed stone.
- Compact the bedding layer.
- Make formwork from boards. It should rise 50 cm above the ground.
- Connect the formwork panels. Install spacers to secure the panels in one place.
- From the reinforcement, tie a double-circuit frame, which is installed inside the trenches.
The last stage is concreting. For this, it is best to use cement marked M200 or M300. After 14 days, dismantle the formwork.
Columnar
Stages of construction of a columnar foundation:
- Mark the boundaries of the base. Mark where the posts will be installed. The distance between them is 1.2–1.5 meters.
- Use a hand drill to make holes. If the base is very large and there are many columns, you can order specialized equipment. The depth of the pits is 1.5–2 m.
- Install asbestos cement pipes. From the inside they are reinforced with 4 reinforcement rods.
- Fill the pipes with cement mortar. When the solution hardens a little, you need to insert a metal pin into the center of the column so that it comes out. It should have a thread to secure the grillage.
The last stage is tying the pillars with a grillage. It is made of timber with a section of 15x20 cm or 20x20 cm,
Slab
The most expensive type of foundation, but it is suitable for all types of soil. Construction stages:
Mark the boundaries of the base and clear the area of any debris. Remove the fertile layer. Maximum pit depth - 50 cm
It is important to make the hole 3 m larger than the dimensions of the building itself. Lay drainage channels along the perimeter of the future foundation. This is necessary to protect the slab from exposure to groundwater. Level the bottom of the pit, knock down the mounds with shovels, fill the depressions with earth
Lay a layer of geotextile. Fill in a sand cushion 15 cm thick. Compact the sand using a vibrating plate. Sprinkle with crushed stone. The thickness of the layer is 20 cm. The main thing is to level it and compact it with a hand roller. Lay the main communications through a cushion of crushed stone and sand. To do this, you need to make indentations and install corrugated pipes. Make an additional concrete layer with a thickness of at least 100 mm. Assemble formwork from wooden panels 40 cm high. Spread reinforced polyethylene film over the concrete layer. The sheets are connected with bitumen or construction tape. Perform thermal insulation. Expanded polystyrene is used for this. It is important to choose high-density insulation. Reinforce the foundation. For a concrete slab 20 cm thick, one layer of reinforcing mesh will be sufficient.
The last stage is pouring concrete. The formwork can only be removed after 14 days. If the outside temperature does not rise above 3 degrees, it is recommended to wait 6 weeks.
Shallowly buried belt with floors on the ground
Monolithic reinforced reinforced concrete tape is laid around the perimeter and under the load-bearing structures of a bathhouse made of logs with any number of storeys and successfully withstands movements of heaving soils when the design parameters are justified by calculations. On average, under low-rise bathhouses made of solid wood, strips with a width of 25 cm are laid (10 cm is added to the thickness of future walls made of lumber), a laying depth of at least 50 cm (including the obligatory 15-20 cm sand and gravel cushion), and a height above the level soil from 30 cm.
To avoid errors, the width of the tape is checked by calculation. All expected weight loads, including the mass of both the walls, roof and stove of the bathhouse, and the foundation itself, are compared with the bearing capacity of the soil. If the soil resistance is sufficient, the width of the tape is considered optimal, otherwise this parameter is selected again. After receiving all the dimensions, calculations and preparation of materials, the following are sequentially performed:
1. Clearing, leveling and marking the area . At this stage, the fertile layer of soil under the future building is removed, and the place of the future tape and the trench itself is marked with pegs and a cord.
2. Excavation work, with removal of soil to the design depth, compaction of the bottom, backfilling and compaction of at least 10 cm of gravel and sand.
3. Installation of removable or permanent formwork , taking into account the locations of drain pipes and similar underground communications.
4. Knitting and lowering 2 or 3 contour frames made of ribbed reinforcement with a cross-section of at least 10 cm, installed on special plastic cups to protect the metal from below and a distance from future edges of at least 5 mm.
5. Continuous concreting , with layer-by-layer pouring of the solution, forcing out air every 20 cm and laying bolts for attaching the lower beam to the upper layers. The poured mixture is carefully leveled and covered with polyethylene film, the tape is left alone until the formwork is removed (at least after 10 days) and the concrete has completely hardened (28 days according to technology standards). When carrying out work in dry weather, the foundation is periodically watered with water.
6. Waterproofing the walls of the strip foundation and backfilling the soil.
The method of tying the lower crown is thought out in advance; bolts with bent or expanded bases, embedded in concrete when pouring it, are best suited for these purposes. At the tying stage, the tape is leveled, if necessary, with mortar or a grinder and covered with at least 2 layers of rolled waterproofing. Corner and stressed areas are additionally reinforced with metal, the final screwing of the studs is carried out after checking the level and tightening all weak points.
The installation of floors in a wood-burning sauna usually begins after the walls have been erected. In the simplest version, a ventilated board flooring (ideally insulated) is installed in the bathhouse. But when planning to lay floors with tiles or high requirements for durability, the floors are poured with concrete over the ground, with a multi-layer insulated screed laid. There is no need for lags in such cases, but the work as a whole becomes more complicated.
Mandatory technology conditions include:
• Removal and removal of fertile and unstable soil layers. • Thorough compaction of the soil base. • Backfilling and compaction of layers of gravel and coarse sand with a thickness of at least 5 cm. • Ensuring a mandatory 10° slope of concrete floors in the washing room using special frames, beacons and a dry ladder. • Protecting the screed from leakage and freezing in winter using rolled materials, expanded clay, foam glass or compacted polystyrene foam boards. • Use of high-quality concrete with a grade of at least B12.5 and reinforcement of the floor screed with metal mesh. • Installation of a thin damper layer around the perimeter of the bathhouse in order to eliminate the risk of cracking of the floors. • Covering the screed with moisture-resistant flooring materials, impregnations or removable wooden flooring.
Shallow recessed tape
Depth of strip foundation for bathhouse
The classic depth of a strip foundation consists of a twenty-centimeter, well-compacted sand cushion. Above is a foundation 60 cm high: 40 cm lies in the ground, and the remaining 20 cm extends to the surface. Since the strip foundation has become the most popular, universal option for bathhouse foundations, the correct calculation of its depth needs to be studied in more detail.
First of all, they start from the properties of the soil. Frequently encountered problems related to the structure of the soil when designing a foundation affect the depth of its construction. The risk of cracks arises when erected on rocky soil. In this case, a shallow or non-buried foundation is used. Soil prone to swelling requires the foundation to be sunk deeply below the freezing level. The possibility of foundation failure is characteristic of fine sandy soils. When building a foundation on such soil, a deep foundation is designed to increase compression resistance.
From the height of groundwater
Saturation of the soil with moisture, in addition to the obvious negative impact on building structures (corrosion, increased aggressive effects of mineral substances, erosion and freezing of the sole, dampness in basements and underground) sharply reduces its load-bearing capacity.
The only exceptions in this regard are coarse and gravelly sands with a constant resistance to weight loads of at least 4 kg/cm2. The high degree of moisture saturation of the soil in the areas is usually explained by the close occurrence of aquifer veins and is leveled in one of the following ways:
• Placing a drainage system around the perimeter of the bathhouse with a shallow strip foundation. • Installation of a pile-screw foundation with piping above ground level. • Laying an insulated Swedish slab with a high base.
The latter option is rarely chosen when building log baths due to the high cost of materials and the large amount of work. Investments in a pile-screw foundation (if necessary, with enhanced anti-corrosion protection of the supports) and systems for draining water from the building, on the contrary, always pay off when the groundwater level is high.
The influence of soil properties on the dimensions of the foundation
What kind of foundation is needed for a log bathhouse? This problem is solved, first of all, on the basis of an analysis of the soil on which its construction is planned.
The depth of the foundation for a log bathhouse depends on the following basic parameters:
- location of the groundwater level;
- freezing depth in winter;
- soil structure (hardness, heaving, mobility).
The bathhouse foundation must be located above groundwater, which creates the need to take into account such a parameter as the depth of groundwater at its maximum seasonal rise. It should be borne in mind that this parameter may differ for different areas, even on the same private land ownership. It must be verified experimentally. To do this, it is recommended to dig a hole at the site of the proposed construction with a depth of 1.6-1.8 m and determine its filling with water within 3-4 hours.
The depth of a strip or columnar foundation should be 20-30 cm less than the depth of water. If the groundwater level is high, we can only talk about a shallow strip version, a tiled or pile type of foundation.
What kind of foundation is needed for a log bathhouse, taking into account soil freezing in winter? It is important to take into account that the installation of a log bathhouse on a strip foundation or support pillars is carried out under the condition that it is buried below the maximum freezing mark. If this condition is not met, then freezing causes forces that can lift the entire frame, unevenly around the perimeter
Such loads lead to the appearance of cracks in concrete and loss of strength.
In principle, the parameters of seasonal soil freezing are standard characteristics of the region, and their exact values are available from design construction institutions. On the Internet you can easily find averaged maps of various regions in terms of freezing depth. In different regions this indicator is as follows:
- Stavropol - 62 cm;
- Krasnodar - 82 cm;
- Kursk region - 118 cm;
- Moscow – 130cm;
- Samara – 150 cm.
The concrete foundation should be located 28-36 cm below these marks.
The question of how to make a foundation for a bathhouse from a log house cannot be considered separately from the composition of the soil under the structure.
The main parameter is punching resistance, which is standardized for different types of soil and taken into account when carrying out calculations.
Foundations of the strip or columnar variety can only be erected on fairly hard soils: clay, loam, predominance of fine gravel or coarse sand. The best option for it is a rocky or quartz structure, well-compacted fine-grained sand.
In the case of swampy, peat areas, metal piles will have to be used. For loose and moving soil, a foundation in the form of a monolithic slab is more suitable. The composition of the soil is determined experimentally in each specific case to clarify the resistance value.
Stage 1. Preparation of round timber
The construction of a log bathhouse is a labor-intensive and responsible process that is carried out in stages. The initial stage is preparing the bathhouse project. A typical project includes:
- choosing a suitable location for development;
- layout of the number of floors and interior spaces of the bathhouse;
- layout of the location of window and door openings;
- selection of heating, ventilation equipment and lighting devices;
- selection of construction and finishing materials;
- development of premises design;
- calculation of construction costs.
Finished projects are presented in the public domain, but to receive an individual sketch, you should contact the design office.
Preparing the log
Round timber must be harvested at sub-zero temperatures, that is, in winter. It is at this time that the amount of moisture in the wood is minimized, therefore, during drying the material will deform and crack less.
Harvesting logs for a log house
Butt logs
The same applies to diameter. For example, the diameter of the base of the log is 35 cm, while the top is 25 cm or less. Such round timber is categorically not recommended for use in construction.
Logs for a log house
Perform further actions in accordance with the previously drawn up project. You can create such a project yourself, find it on the Internet, or order it from specialists. It is with the help of this document that you can calculate the required amount of consumables, determine the area and shape of the base.
To work you will need the following equipment:
- chisel; Chisel
- carpenter's axe; Carpenter's Ax
- medium power chainsaw;
- plumb line; Plumb
- level; Laser level
- electric drill; Cordless drill/driver
- mallet; Wooden mallet
- "trait". Trait (tool)
We will pay special attention to the last tool - the “line”. For production you will need steel wire with sharply sharpened ends.
Bend the wire in half so that it takes the shape of a compass; you can additionally secure the handle. This tool will be needed when marking logs.
Strip foundation for a wooden frame
Such a foundation is, in essence, a closed reinforced concrete strip located under all the walls of the building and load-bearing partitions. This is a fairly common type of foundation. It can be recessed or shallowly recessed.
The recessed version is perfect for buildings with heavy walls and ceilings. Such a foundation is laid 30 cm below the soil freezing level, but no more than 70 cm below ground level. Due to the significant labor intensity and significant costs of the material used in this process, a recessed strip foundation is quite expensive.
This type of foundation is used mainly on wet soil and soils with a high level of groundwater. The main advantage of installing such a foundation is the ability to build a basement protected from penetration of groundwater.
For such structures, glued or profiled timber, as well as rounded logs that can withstand significant loads, are optimally suited.
There is no need to build a basement when constructing a foundation for a log bathhouse. In this case, it is advisable to use a columnar type foundation, which is also more profitable in terms of the required costs. Compared to tape, savings can range from 2 to 5 times.
In central Russia, it is enough to equip a shallow foundation for a log house. There are shallow foundations and ordinary strip foundations. A shallow-depth tape will require digging trenches with a depth of 0.3 m to 0.7 m. Conventional tape foundations are buried to a distance of up to 1.7 m.
What foundation to choose for a log bath? To answer this question, it is worth determining such site indicators as freezing depth, soil composition and groundwater level.
If the site has weak soils with low bearing capacity, it is best to choose the option of a conventional strip foundation, but it is worth remembering that the work on installing a strip for a log house will require a lot of labor and time. After marking the foundation on the site, you will need to dig a large volume of trenches, install formwork, make a reinforcement cage, after which you can begin pouring the concrete solution.
A finished foundation strip made of monolithic reinforced concrete gains strength in about a month, so you should not plan to start construction in the autumn or early winter, so as not to have to carry out a set of additional work to preserve the foundation for the winter.
Type selection
In order to correctly determine the type of foundation that is guaranteed to last a long time and will perform all the functions assigned to it, it is first necessary to determine the type of soil that prevails at the construction site.
If this procedure has not been carried out before, then in order to independently decide on this issue, you need to drill a hole with a drill up to one and a half meters deep at the site of the proposed construction and carefully examine those fractions that are found in the cross section of the soil.
- The presence of a large number of peat inclusions and damp loose sand indicates that the soil is problematic. Such a foundation is unstable and will be subject to heaving in the off-season, which will lead to horizontal shifts of soil layers relative to each other. In this situation, it is necessary to construct a monolithic or pile foundation, the depth of the supports of which will lie below the depth of soil freezing. It is also acceptable to use a highly buried monolithic strip with reinforced reinforcement, and its depth should also be lower than the level of soil freezing in winter.
- The content of fragments of clay, gravel, and dense dry sand in the soil indicates soil of medium mobility. It is these types of soils that are found in the vast majority of regions of mid-latitudes. Their density is sufficient for the construction of monolithic or columnar strips. In this case, the use of a monolithic slab foundation with a base for the entire structure is impractical and unprofitable.
- If the soil under study has a high content of dense fine sand, rocks, quartz and no clay or loam, then the developer is very lucky. These types of soils are the most elastic, they are not subject to heaving and seasonal shifts, and are ideal for the construction of any structures. However, it is not recommended to use a pile foundation on such soils, since it will be very difficult to drive or screw piles into such dense soil, this process can lead to to damage to the supporting structures themselves. An excellent solution would be to use a columnar or strip base of any type.
Important! To more effectively analyze the soil structure at the construction site, it is recommended to dig several holes in different places on the site. This will allow you to better study the composition of the soil.
Information
If the size of the bathhouse exceeds the linear length of the construction material on each side, for example, the length of a wooden beam (usually 6 m), the most practical option would be to construct a recessed strip foundation with reinforced reinforcement.
A monolithic support in the form of a slab will be irrational due to the high consumption of material.
And when using a columnar base, there is a high risk of skewing of individual supports and, as a result, the bathhouse tilting in any direction.
The choice of foundation type, materials and dimensions should be approached especially seriously, otherwise the entire construction could go down the drain.
Pile
It is used in areas with a slope - screw piles can be deepened to different heights or cut off from above.
When building on unstable soils, the piles are combined using a grillage.
If you plan to make a stove in the bathhouse, then you will need a separate foundation for it. The foundation for a bathhouse stove can be a strip type or a single slab.
Installation
It is recommended to use metal screw piles. Despite the fact that their cost is higher, this is justified by the ease of working with them. They are suitable for almost any type of soil. Can withstand heavy loads.
The process of installing a pile-screw foundation will require the participation of two or three people, but without the use of special equipment. Mandatory places for installing screw piles are corners, places where internal walls intersect with each other and with external structures. It is advisable to install piles between them as additional supports. The distance between them is no more than 2 m.
The optimal pipe diameter for the foundation is 20 cm, and the wall thickness is 0.4 cm. To protect against corrosion, all piles are treated with epoxy enamel before installation.
At the installation site of each pile, a recess is made using a drill. Screw piles are screwed into them one by one. You need to start with the corner ones, then install the intermediate ones. At this stage, the depth of burial is 30 cm or a little more.
Then, using a lever, screw each of the piles to the level of the hard layer in the soil, which is 1.5 m or more. During the process, it is necessary to constantly monitor that the screwed piles do not deviate from the vertical. The tolerance is 3˚, control is carried out using a plumb line.
When all the piles are installed, it is necessary to saw off with a grinder those piles that are higher than the others so that their upper platforms form a single plane. To strengthen the structure, a solution of cement and sand is poured into the hollow piles. Reinforcement with iron rods can also provide additional strength.
After pouring, a cap - a mounting plate - is placed on the top surface of the pile. A level is placed on it and the horizontalness is checked. The heads are then welded to the pile. To protect against corrosion, welding areas are painted with primer paint in several layers. In the pit for the pile, in addition to a solution consisting of cement, sand and crushed stone, you can place stones of various sizes available on the site.
From the terrain of the site
When constructing on flat areas, the type of foundation can be any; in other cases, the method of laying it depends on the angle of inclination.
In areas with a slope of no more than 20 cm on one side of the bathhouse, it is advisable to lay prefabricated or monolithic tapes - after simply leveling the bottom or local deepening of the trench. According to the technology, such tapes must be protected from precipitation and ground moisture using drainage pipes and water collection and drainage systems. The structures are heavily reinforced, and the soil for backfilling, if necessary, is changed to a more dense and frost-free one.
For medium and high slopes, the lowest point of the site is taken as the base level. The costs of excavation work and pouring a solid monolithic tape in such cases are too high; the problem is solved in two ways:
• laying stepped shallow structures (permissible only when constructing on stable, non-heaving soils); • construction of a pile foundation.
The last option is considered the only possible one if it is necessary to build a timber bathhouse on uneven areas with weak soils.
If necessary, piles are used as additional supports and combined with strip or stepped structures. In particular, such a need arises with a complex configuration and large weight of the bath.
But in most cases, the problem of an uneven area is solved by laying ordinary piles resting on dense layers and tied with a channel or reinforced concrete grillage.
Do-it-yourself bathhouse without a foundation
Yes, there are such things too. Such a bathhouse can be placed on rocky ground without any risk. In all other cases, there is some slyness in the definition of “without” - there seems to be no foundation, but the foundation will have to be strengthened. In a similar capacity the following can be used:
- clay;
- sand and gravel;
- crushed stone;
- boulders.
In the first case, clay fills the trenches, as for a strip foundation, becoming a support for the walls.
For crushed stone, you need to dig a pit and drainage trenches that drain water. But in the end, you get a fairly strong and dry base, because roofing felt or other waterproofing material is placed on top of the crushed stone.
Sand and gravel form the very cushion that is placed under the foundation, but here the latter is dispensed with. It is made in the same way as from crushed stone.
Boulders make a great base. But you will have to dig a pit. The stones are laid out along its walls and secured with cement mortar. Small stones are placed between the walls. A grillage is made on top.
Preparatory work
Before starting work, it is necessary to clean and level the site for future construction. To do this, we remove the top layer of soil (about 30 centimeters) under the planned building along with all the vegetation.
Soil cleaning
Then it is necessary to level out all the holes and irregularities as much as possible, and if the soil is clayey, add sand and gravel.
Next, we transfer the plan of the bathhouse directly to the land plot, using a tape measure, a building level, ordinary wooden or metal pegs and construction thread to mark the axes. If the site is located in an area that has a significant difference in height between the sides, then to determine the height of the foundation pillars, it is advisable to use the help of a professional and level the surface. This is a guarantee that the future bath will not have distortions.
The principle of foundation marking
Marking for the foundation
Marking the foundation for a bathhouse
Warming and thermal insulation of the foundation
In order for the bathhouse to serve for a long time and please the owners, it is necessary not only to choose the right type of foundation, but also to carry out high-quality waterproofing and insulation of the finished base structure. This is especially true for buildings that are used irregularly.
Thanks to proper insulation, it becomes possible to:
- Reduce the cost of heating a bathhouse;
- Maintain a fixed temperature in the steam room;
- Extend the service life of waterproofing;
- Protect the base from harmful effects.
The following is used as thermal insulation:
- Expanded clay;
- Styrofoam;
- Priming;
- Expanded polystyrene.
Each material has its own unique properties.
As for waterproofing, roofing felt and bitumen mastic are most often used.
You should also take care of the blind area, the absence of which can lead to deformation of the bathhouse - wastewater will wash away the soil and the structure will become askew.
So, the foundation for a bathhouse - which one is better to choose? The ideal option is selected based on the weight of the structure and the characteristics of the soil on the building site. The issue of laying the foundation should be treated with special responsibility, since deviation from the technology can lead to unpleasant consequences, including deformation and erosion of the structure. A conscientiously thought-out structure of the base, its proper insulation and waterproofing will guarantee the durability and high performance characteristics of the finished bath.
Video about the correct foundation for a bath:
Safety
Safety for a bathhouse is a paramount issue.
Wood, stoves, constant exposure to high temperatures often lead to fires. The main reasons are contact of the chimney with wood and improperly installed electrical wiring. To avoid contact, it is recommended to tile the stove. The wiring must be used with asbestos insulation and run along the surface of the wall. Switches and sockets are not installed in the steam room; the lamps are protected by special shades. Sockets in dressing rooms are equipped with special covers. If we take into account all the mistakes traditionally made by builders, the bathhouse will last a long time and safely.
conclusions
In each individual case, it is very important to take into account the characteristics of the soil, the size of the structure, the quality of the materials used, as well as other factors that significantly affect the reliability and durability of the object. The width also affects the strength of the foundation. In any case, taking into account such characteristics, you can easily and confidently make one or another type of foundation with your own hands, as a result of which you will get a truly beautiful and reliable bathhouse and enjoy your vacation
In any case, taking into account such characteristics, you can easily and confidently make one or another type of foundation with your own hands, as a result of which you will get a truly beautiful and reliable bathhouse and enjoy your vacation.
Attention! If you are not confident in your abilities, it is recommended to turn to specialists with experience who will carefully analyze what kind of soil is on the territory and choose exactly the type of base that is most suitable for you.