24.12.2019 17:38
Cersanit toilet installation systems are designed for loads of up to 400 kg/hour and long-term uninterrupted operation, which is confirmed by the manufacturer’s warranty from 2 to 10 years. But breakdowns occur even in the most reliable structures. There are several main problems that can cause a Cersanit installation to be repaired.
What it is?
Cersanit is a Polish company that occupies a leading position in the production of sanitary ware. The company has been known for many years and offers its audience only high-quality and modern solutions. Today, Cersanit installations are manufactured in 12 factories that are equipped with modern equipment. The manufacturer has repeatedly received Superbrand awards and is considered the best trading brand in Russia. The manufacturer enjoys the attention of buyers as it offers its audience stylish, high-quality models at affordable prices. Devices rarely break down, which is why the Cersanit brand is considered a reliable plumbing supplier.
Popular models of Cersanit toilets
- Trento are compact toilets that have a classic design and are distinguished by an affordable price range. These models are supplied with a seat with a microlift. It is made of durable duroplast. The toilets are made of durable porcelain material, which ensures a long service life.
- Trento TR011 with thermoplastic seat. These models are also made of porcelain and have a service life of up to 10 years. This is a model with an oval rim, has a snow-white color and looks quite attractive.
- Collection Just. This sanitary ware is of high quality. The toilets are coated with a smooth white glaze, making them easy to maintain. The system is equipped with a microlift made of durable duroplast.
- Model Just 031. This model consists of high-strength porcelain and has a rim. The toilets are white. The kit includes a seat with a lid that can be lowered smoothly.
- Arteco 031. This model is in good demand among buyers. This sanitary ware is of very high quality and has a snow-white color. Available in both hanging and compact versions. It is made using modern technologies, thanks to which you can save water.
Peculiarities
The installation is a metal structure on which plumbing fixtures with auxiliary elements (for example, a drain button) are attached. Before purchasing, you should study the pros and cons of this device to make sure that Cersanit products are suitable for your purposes.
The advantages of the installation include the following qualities:
- attractive appearance;
- saving free space: the seat is fixed directly to the box, so you can rationally use the space by installing built-in cabinets and shelves above the toilet;
- cleanliness: since installation is carried out directly into the wall, users do not encounter the accumulation of dirt - wall-hung toilets are easy to clean;
- the drainage system is located in the wall, so the device operates quietly;
- Plumbing installations have a long service life.
Despite the fact that the devices occupy leading positions in the ranking of manufacturers, the products have disadvantages.
Disadvantages include:
- price: the devices are overpriced compared to traditional toilets;
- no direct access to pipes;
- complexity of repair work: in case of malfunction, the box will need to be dismantled.
The manufacturer offers several installations that differ in their design.
Depending on the fastening, two types are distinguished:
- block system - such a device is suitable if there are conditions for fixing the system to the wall;
- frame installations are considered complex devices; installation is carried out on the floor surface, and the frames are fixed to the walls. The frame system allows you to adjust the height of the toilet above the floor, which is quite convenient.
The choice may also be influenced by the drain mechanism of the device.
The flush button can be of several types:
- dual-mode;
- with “flush-stop” option;
- contactless.
The first two options are simple and easy to repair. The contactless button has a special sensor that independently checks whether there is a person near the toilet and drains the water.
Disadvantages of Cersanit toilets
But there are also disadvantages to this product. Among the disadvantages, we can note that certain parts of the device quickly fail.
- Also, most models are too compact in size, such that many will find it inconvenient to use the toilet.
- It is better to entrust the installation of plumbing to a specialist, since carrying out the installation work yourself may end in failure.
Often the installation parts supplied with the device are of poor quality, so technicians recommend using products from a different brand.
Equipment
The wall-hung toilet kit consists of the following items:
- control levers paired with a special block;
- fittings that are fixed to the wall;
- fastening material;
- adapter, drain tank;
- sound insulation.
There are models with and without a flush button. You should carefully read the model and check that all the necessary components are present so as not to return to the store again.
Types of Cersanit toilets
This company has two popular models in its assortment: wall-hung and compact toilets. Each of them has its own varieties, and many more compact models are produced.
On the official website you can find toilet seats, bidets, and much more. There are also models with and without a rim, which are distinguished by their practicality.
Compact models are easy to install, inexpensive, and have a long service life.
Wall-hung toilets are attached to the wall. This model helps to expand the room and maintain the integrity of the floor covering. A bathroom of this type does not create obstacles for cleaning and makes it possible to carry out installation work on installing a heated floor.
Dimensions
The dimensions of the systems may vary depending on the engineer’s ideas. There is a norm according to which standard Cersanit installations are made:
- the length of the products is 50-60 cm;
- bowl height - 30-50 cm;
- product width is 30-40 cm.
The structures can withstand loads weighing up to 800 kg.
There are traditional tank sizes. In rare cases, its length exceeds 50 cm; models with a width of 10 cm are mainly used. The parameters depend on the type of installation. Frame structures have the following dimensions:
- depth - 15-30 cm;
- height - 80-140 cm;
- width - 40-60 cm.
Block systems have the following parameters:
- width - 50-60 cm;
- depth - 10-15 cm;
- height up to 100 cm.
How to position?
First of all, you will need to decide on the place where the suspended structure will be located. Select an area that is close to water and sewer lines. Keep in mind that the toilet should not interfere with users’ free movement around the bathroom.
Once the location has been determined, installation activities can begin.
To do this, you need markup, which should have a number of features:
- is responsible for the accuracy of the entire process and proper fastening of the structure;
- applied based on the dimensions of the installation;
- signs should be placed on the surface of the wall that will indicate the location of the central axis of the system;
- measure at what distance the product will be placed relative to the wall. The distance should not exceed 13.5 mm;
- indicate a location for the cistern. The norms are about 1 meter from the floor surface;
- On the floor or wall, indicate the places where the fasteners will be located.
These steps will help simplify the installation and eliminate installation errors.
Installation
To install a plumbing installation, you need to follow the step-by-step guide and follow the sequence of actions. Correct actions guarantee system performance and save time. The installation instructions consist of the following steps:
- At the marked points you need to drill holes for fasteners and secure the dowels;
- then you should fix the anchor bolts in the dowels on which the toilet will be held; the body part of the installation is secured using bolts and adjusting nuts, which are included in the installation kit;
- Next you need to adjust the installation horizontally and vertically; the horizontal level is adjusted using legs, which must be secured after setting, the vertical level is adjusted with an anchor bolt, closed with a plug;
- connect the communications: it is necessary to connect the pipeline and the tank using a hose, and also connect the structure to the sewer system; to connect to the sewer, it is recommended to use rigid pipes rather than corrugated ones - this is due to the fact that the latter have a very limited resource, and to replace them you will need to dismantle the wall on which the entire structure is attached;
- connect the toilet to the flush cistern using a pipe;
- fasten metal plates to the lower edge of the structure: for this you should use anchors inserted through the installation strip into the holes in the wall;
- secure the plate using fasteners;
- check all connections and make sure installation is secure;
- install false wall cladding that will hide the entire structure;
- install the necessary fasteners;
- when installing to a false wall, you must remember that the wall-hung toilet should be 40-42 cm above the floor level;
- connect the sewer pipe to the toilet, it is located no lower than 22-23 cm from the floor;
- install the drain tank, drain valve together with the button;
- connect the tank to the water supply system.
When working, remember that the required sewer slope must be at least 45 degrees.
First of all, a pipe is brought into the equipped niche , the cross-section of which is 100 mm, with a slope towards the sewer of at least 5 cm. Its edge should be 25 cm from the center of the niche, and only after that is it possible to install its outlet at 45 degrees.
During the installation process, it is necessary to constantly monitor the installation level to prevent the formation of unwanted distortions.
Adjustment
After the installation of the structure is completed, its functionality should be checked. Leaks should also be excluded. If it is found in the installed installation, adjustment will be required. It is necessary to adjust the emergency tube, which drains excess water if the float or shut-off valve does not work.
There are two solutions to this leak:
- in case of a small leak, you can raise the emergency tube above the water level;
- if the first option does not give the desired result and water flows, you need to lower its level in the drain tank. To do this, use the adjusting screws to lower the float lower.
The installed installation may contain defective parts. The drain button is often unusable. If water is not flushed out when the valve is pressed, this indicates a malfunction of the drain fittings. The connections between the button and the valve may be broken, or the failure lies in individual parts. In this case, it is necessary to remove the defective part and repair it or replace it with a new one.
Models and reviews
Plumbing installations from the Polish manufacturer Cersanit are in great demand. The popularity is due not only to the high quality of the products, but also to the affordable prices. If we compare with German brands, one toilet costs the same as a Polish company’s entire system and components. The manufacturer produces several types of products, among which are the following popular models that are in great demand.
Leon Delfi "5 in 1"
This model is considered the best budget choice. The Delfi line is the most popular collection, about which there are numerous positive reviews online. Despite the plastic components, there are very few complaints about the operation of the device; the model is characterized by a long service life and uninterrupted functionality. The systems are equipped with an antibacterial seat or a polypropylene seat with a microlift device.
Some customer reviews indicate that the drain mechanism breaks. Finding spare parts for repairs is quite difficult, so most consumers replace the entire tank completely. The installation is affordable, which attracts a lot of fans.
Tiger
Such systems are considered a fashionable and modern solution for arranging bathrooms. They are based on a durable steel frame, which is fixed to the load-bearing walls and to the floor surface. A shallow cistern and a wall-hung toilet are installed on the frame.
The model allows you to save free space in the room, simplifies the cleaning process and makes the design stylish and modern. The set consists of metal stands, a wall-hung toilet with a seat, a chrome flush button, a tank, a seal and a basic set.
Buyers highlight the following advantages of the model:
- small sizes;
- structural strength and reliability;
- ease of installation;
- convenient use of the installation;
- long service life.
Users who purchased this model note that the product looks expensive and stylish. Each element is reliable and high quality, despite its affordable price. There are practically no complaints about the operation of the installation.
Link Pro
The model can be mounted in a corner of the room, thereby saving free space. Users appreciate the possibility of water supply on both sides of the system, height adjustment and the inclusion of a ball valve in the kit. The manufacturer guarantees quiet operation of the installations and the availability of auxiliary mounting points. In addition to high technical characteristics, the model has an attractive appearance and stylish design that can fit into any interior.
To learn how to install Cersanit, see the following video.
Wall-mounted plumbing fixtures are no longer a curiosity from advertising brochures. Domestic developers are increasingly using installation systems, and there are reasons for this.
1. The wall hung toilet looks light and creative. 2. The bathroom is much easier to clean when there is no floor pedestal. 3. Sewer and water supply pipes are completely hidden. There is no external tap. 4. It is convenient to install warm floors. 5. The tank is well insulated from the noise of rising water. 6. The plastic drain container has a foam casing. There is no condensation at all. 7. We have the ability to adjust the installation height. 8. Saving space is a controversial issue, but there is some mobility in placement.
Although the design looks like something out of space, do-it-yourself installation is accessible to any home craftsman who is at least a little familiar with plumbing. The manufacturers tried to keep our work to a minimum - they assembled and adjusted everything they could in advance, and also provided the kit with detailed instructions. We recommend that you study it thoroughly first, and we will help you with the rest.
Advantages of Cersanit toilets
Toilets of this brand have many advantages, such as:
- Affordable price category;
- Long service life;
- Versatile yet stylish design;
- Reliability and durability;
- Availability of additional functions;
- Application of innovative technologies;
- Environmental Standard Certificate;
- Uniformly painted surface;
- Protective film that prevents the growth of bacteria.
Installation sequence
So, the first step is to assemble the frame structure for fitting work.
Next, we select a place for our ceramic friend. Typically, the height of the sewer tee does not make it possible to install a floor-standing toilet at a significant distance from the riser. In the case of installation, everything is much simpler; the outlet elbow can be deployed, thus providing the required slope, often without even resorting to complex manipulations to lower the main indoor tee. In addition, you can always gain a few precious centimeters on the adjustable legs of the frame. By the way, think about the layout of the tiles in advance; the seams should be symmetrical to the toilet and the button, otherwise it will be a design failure.
We install the structure in its original position, using the adjusting bolts we set it vertically and horizontally. We pay special attention to the verticality of the front part.
Using the legs, we adjust the height of the toilet installation - usually it is about 40-50 cm from the finished floor to the top of the plumbing fixture. You can use a paper template to control the height.
We mark the locations of the fasteners on the floor and on the wall. We also draw a projection of a corner sewer elbow on the wall (it is usually black with a reduction from 90 to 110 mm).
We remove the frame and drill holes for installing dowels; as a rule, plastic plugs have an outer diameter of 12 mm. Please note that if the strength of the screed is insufficient, it is better to clear the place for the bracket and “drill” directly into the slab.
Now you need to assemble the entire sewer, including the black corner elbow. This is where the projection on the wall comes in handy. After installing the installation, working with the “ditch” will be very difficult.
The next stage will be organizing the cold water supply. Yes, yes, even before installing the frame, while it is convenient to solder and pack, we recommend screwing a threaded coupling onto the fitting (usually a ½-inch angular MPB) and soldering a “tail” of any length.
We put the installation in place again, but now we can tighten the fastening screws. Be sure to check the plumbness of the product again and tighten all adjustments. There should be no backlash.
We bring the sewer elbow to the installation and fix it with a special plastic clamp. We recommend installing an expansion gasket between the sewer pipe and the wall, for example, from EPS scraps. The same applies to the pipe that goes from the tank to the drain. This will help stabilize the rather mobile sockets and will greatly simplify the finishing installation of the ceramics.
We finish soldering the water and connect a flexible hose to the tank. We put a plastic protective cover in place of the button - during subsequent operations it will prevent debris from getting inside the tank and will serve as the basis for fastening the facade.
How to choose a toilet
You can attach not only a wall-hung toilet, but also a floor-standing toilet to the installation. The tank will be hidden in the wall. Basic requirements for a plumbing fixture:
- strength;
- comfort;
- hygiene (ease of cleaning, careful flushing without splashing);
- compatibility with the bathroom interior in size and appearance.
It is important to choose a toilet so that the fastenings match. It happens that the designs are incompatible: the holes or their diameter do not match. To avoid mismatches, it is recommended to choose the installation and toilet from the same manufacturer, or even better, from the same model range.
There are two types of installations:
- Block - represent a block that is attached to the wall. It needs to be installed in a niche. It is fixed with anchors and it is these fastenings that bear the main load. This option is optimal for installing a floor-standing toilet.
- Frame - attached to the floor and wall, have legs. The main load falls on the lower part of the structure. The legs are adjustable in length, so you can install the toilet to the desired height.
The first installation option will cost less, but it is only suitable for main walls. The second type of structure is attached not only to brick and block walls, but also built into plasterboard partitions. Low and wide frame installations are suitable for wooden walls.
Easy installation installation
What is the QUICK FIX
?
The design of the fastenings allows the handle leg to tilt 45°
, and the handle itself rotates
360°
. Thanks to this, movements are free, and it only takes a few minutes to secure the elements. The installation frame is height adjustable and equipped with an internal stop that allows you to install it alone.
Installation parallel to a wall, in a corner of a room or even on an uneven surface is made easier thanks to the micro-adjustment function. It allows you to adjust the distance from the wall using a simple screwdriver. Intuitive system and ease of use are the main advantages of QUICK FIX
. However, even after reading the instructions carefully, you can make annoying mistakes that will not be easy to correct.
What's included
When purchasing an installation, you need to check the package contents so that you don’t have to purchase the necessary elements later. It includes:
- steel supporting frame with retractable legs;
- cistern;
- drain fittings;
- water supply pipe from the cistern;
- sewer drain pipe;
- holders, studs for fastening the installation to the wall, mounting plate;
- nuts and washers.
At the manufacturer's discretion, the kit includes:
- soundproofing of the tank;
- toilet gasket installed between the toilet and the installation;
- flush elbow adapter;
- flush buttons.
The button panel is one of the important elements. Firstly, it determines the manufacturability of the model: it is made of plastic, wood, glass, and can be single-mode, dual-mode, or touch-sensitive. Secondly, it plays the role of an inspection hatch.
DIY installation repair instructions for Cersanit
You can perform simple repairs to the Cersanit installation yourself. The cistern fittings are dismantled and installed through the inspection window behind the flush panel.
Step-by-step instruction:
- Remove the decorative trim of the flush button.
- Unscrew the screws and remove the plastic mounting frame-key holder.
- Rotate the two plastic holders and remove the transparent partition.
- Remove the rocker arm block with pushers of different colors.
- Turn off the water and disconnect the connection.
- Remove the filler fitting, disassemble it, wash it or, if necessary, replace it with a new one.
- Perform all steps in reverse order.
Planting frames and fittings for different lines of Cersanit installations can be purchased in our Aquasliv online store.
Spare parts for installation of Cersanit
from 1,200 rub.
Go to catalog
Preparing the bathroom
Installation of the installation is carried out before finishing work in the bathroom. Moreover, “before” means that the tiles have not yet been laid on the floor, and in some cases there is even no screed, and the walls have not been plastered.
Before installing a wall-hung or floor-mounted toilet along with the installation, choose a suitable location. The optimal place for installation is the least accessible place or the one farthest from the door: the plumbing fixture should not be located in the passage. In limited conditions, the installation should be mounted in a corner. In general cases, plumbers do not recommend moving the location of the unit, but advise putting the toilet in the same place where the old one stood. This will greatly simplify the work. A niche with risers is suitable for installation, but the risers will have to be moved apart.
If the installation site is moved, it is necessary to maintain the correct slope of the sewer pipes to the drain (2 cm by 1 m). In addition, the toilet should be located closer to the sewer drain than other plumbing fixtures, otherwise when the water is drained, the water seals will break and a sewer smell will enter the room.
If the floor screed has not yet been poured, calculate its height. Sewer and water pipes are connected to the installation site. All pipes must be secured to prevent them from moving before the screed is poured.
Sometimes the design of a room requires:
- installing a toilet under the window;
- installing a plumbing fixture on a partition separating the space of the bathroom.
In the first case, it is necessary to purchase a low installation (below 82 cm), in the second, it is advisable to use a double frame structure, which is more stable.
On the wall, mark the central axis, the contours of the installation, the location of the tank, holes for fastening, including on the floor, setting aside the required distance from the wall (at least 13.5 cm).
Recommended dimensions to follow: seat from the floor - 43 cm, button from the floor - 100 cm, frame from the wall - 15 cm, tank from the wall - 2 cm.
Instructions and files
| File | Pages | Format | Size | Action |
Tiger installation is a fashionable, modern solution designed for equipping bathrooms. Its basis is a rigid and durable steel frame, fixed to the load-bearing wall and to the floor. A shallow cistern and a wall-hung toilet are mounted on the frame. This solution saves space, makes cleaning the room easier, and gives it a stylish look. The kit, in addition to the basic metal stand, also includes a wall-hung toilet with a seat, a chrome flush button, a flush tank and a seal.
- compact design;
- mechanical strength and guaranteed reliability;
- ease of installation work;
- ease of use;
- durability.
Qualified sales consultants of Leroy Merlin stores, where the Tiger installation is available at the most affordable price, will provide you with comprehensive information about the features of installation, operation and maintenance of this plumbing system.
The description for this product is taken from the official website leroymerlin.ru
| 24 | 4.97MB | To read the instructions, select the file in the list that you want to download, click on the “Download” button and you will be redirected to a page where you will need to enter the code from the image. If the answer is correct, a button to receive the file will appear in place of the picture. If there is a “View” button in the file field, this means that you can view the instructions online, without having to download it to your computer. If you think the material is not complete or you need additional information on this device, for example a driver, additional files, such as firmware or firmware, then you can contact the moderators and members of our community, who will try to quickly respond to your question. You can also view instructions on your Android device Installation kit and toilet Cersanit TigerRating: (4). Number of reviews (27) read reviews. buy the Cersanit Tiger installation kit and toilet in the online store of one of our partners, just click on the blue button above. We automatically collect similar advertisements in other online stores for this product. Below you can see this list. Delivery rules: Delivery of the purchased goods is made to the entrance, dacha, cottage only if there are access roads intended for the passage of trucks. more details Returning goods: Have you made a purchase, but changed your mind or incorrectly calculated the required quantity of goods? Within 100 days, Leroy Merlin will quickly and without unnecessary questions accept back the purchased product, which has retained its presentation and consumer properties*, returning its cost. more details Prices in stores for Cersanit Tiger installation kit and toilet | TECHPORT.RU | Toilet set Cersanit Delfi Vector Movi toilet, installation, microlift seat, matte chrome button (SET-DEL/Vec/TPL/Mo-Cm-w) | RUB 11,490 | To the store | |
| TECHPORT.RU | Toilet set Cersanit Delfi Vector Actis toilet, installation, microlift seat, chrome button (SET-DEL/Vec/S-DL/Ac-Cg-w) | RUB 12,590 | To the store | ||||
| LEROYMERLIN.RU | Installation kit and toilet Cersanit Tiger | RUB 8,406 | To the store | ||||
| TECHPORT.RU | Toilet set Cersanit Delfi Vector Movi Enter toilet, installation, microlift seat, white button (SET-DEL/Vec/TPL/En-Wh-w) | RUB 10,690 | To the store | ||||
| TECHPORT.RU | Toilet with installation Cersanit Delfi Black toilet + installation, microlift seat, glossy chrome button (S-SET-DEL/Black/TPL/Cg-w) | RUB 11,990 | To the store |
| LEROYMERLIN.RU | Installation kit and toilet Cersanit Tiger | RUB 8,406 | To the store |
| Vendor code: | 15979320 |
| Weight, kg: | 29.4 |
| Set contents: | installation system for easy construction TIGER, wall-hung toilet DELFI, thermoplastic microlift seat, CHROME flush button, seal |
| Frame width (cm): | 35 |
| Frame depth (cm): | 25 |
| Brand: | CERSANIT |
Characteristics taken from the official website leroymerlin.ru
Rating: (5)
Pros:
Minuses:
Review:
1. This is not an installation. This is a kit - installation + toilet. This is in the description, but the product itself is in the installations section, not kits. 2. There is nothing with the word TIGER on the Cersanite website. There is LION. It’s unclear where TIGER came from. An Internet search using the words CERSANIT+TIGER brings up only Leroy. Apparently there is nothing like this anywhere else.
Date: 03 November 2016 18:59
Review taken from the official website leroymerlin.ru
Rating: (5)
Pros:
Cheap, fits our small toilets
Minuses:
Review:
The seller insistently recommended not to buy it, he said that the frame is not solid, it sags, if the button breaks, it will take a month to make it to order, he argued that you cannot save on the bathroom and you should buy an expensive one, not this cheap one. I went to get a cart to buy this toilet, but the seller ran away somewhere.
Date: December 03, 2016 21:15
Review taken from the official website leroymerlin.ru
Rating: (5)
Minuses:
Haven't discovered it yet
Review:
For this money, you won't find anything better
Date: February 12, 2022 01:21
Review taken from the official website leroymerlin.ru
Rating: (4)
Pros:
Minuses:
Haven't come to light yet.
Review:
Complete correspondence between price and quality, for such a sum, is simply excellent. I slightly modified the design (instead of plastic bushings I made metal ones) and it turned out great. Although it could have been left as it was.
Date: March 06, 2022 19:30
Review taken from the official website leroymerlin.ru
Rating: (5)
Review:
So this is a toilet set plus a built-in tank!
Date: March 19, 2022 17:29
Review taken from the official website leroymerlin.ru
Rating: (4)
Review:
Nice toilet, flush works very well. Some complain that the installation frame is bad, but they have installed more than one, everything is fine. You just need to look carefully at the toilet itself. Sometimes they make something lopsided.
Date: March 22, 2022 15:59
Review taken from the official website leroymerlin.ru
Rating: (5)
Pros:
Minuses:
Review:
Take it and don’t listen to anyone, the flushing mechanism is simple, not pneumatic, of course, but it’s even more reliable, it works smoothly without jamming, in my opinion I bought it for 6800 at the beginning of 2016, there are simply no competitors!
Date: March 22, 2022 16:57
Review taken from the official website leroymerlin.ru
Rating: (5)
Pros:
Price/quality, elevator, everything you need included
Minuses:
The button was not the same as in the photo
Review:
The frame itself looks reliable despite the prefabricated structure. It is convenient to use; thanks to the lift, the lid does not slam. The wall-hung design of the toilet makes cleaning easy, so the wife is happy too!
Tools
To install the installation you will need the following tools:
- stationery for marking the wall;
- a hammer drill to drill holes for fastening, along with drill bits appropriate for the type of wall;
- open-end wrenches;
- tow or FUM tape for sealing threaded connections;
- level;
- roulette;
- silicone sealant.
Additional tools may require pliers, screwdrivers, and a stationery knife.
Installation of frame installation
Installation of the toilet frame installation is carried out in accordance with the step-by-step instructions:
- The frame is secured at least at four points with dowels. First, holes are drilled for the fastenings slightly smaller in diameter than the dowel itself, and then, changing the drill, they expand it to sizes corresponding to the diameter of the dowel. Then the hole will be the desired diameter with smooth edges.
- Secure the lower part of the structure. Then, after checking the evenness of the installation using a level, fix the upper part. Anchors and brackets are used as fasteners. The nuts are tightened using open-end wrenches.
- The 90 degree bend is secured with a plastic fastener clamp. When connecting pipe elements, silicone sealant is used.
- Connect the water pipe to the toilet cistern. The water supply location can be located on the side or on top. It is better not to use flexible hoses - they are short-lived. Preference should be given to polymer pipes or stainless bellows connectors.
- After installing the pipes, check the system for leaks.
- Upon completion of installation of the frame, the holes in the pipes, drain tank and installation studs are closed with plugs.
- The wall is covered with moisture-resistant plasterboard. The drywall profile is attached to the installation and to the wall.
- Install the tiles by first cutting out the necessary holes for pipes and studs. You can hang a toilet after tiling only after the tile adhesive has completely hardened - after 7 days.
- The pipe included in the kit is connected to the toilet drain hole. Then, using a level or other level object, draw a line coinciding with the plane defined by the edges of the toilet.
- Measure the depth of the pipe in the installation. From the marking on the pipe connected to the toilet, set aside this distance and cut it off. The same is done with the pipe for supplying water to the toilet.
- Silicone sealant is applied to the rubber cuffs and the rubber elements are inserted into the pipes, and the pipes themselves are inserted into the toilet. Moreover, the pipes must be inserted first into the toilet, and then the device is secured together with them, and not vice versa. If you do otherwise, the rubber bands will let water through.
- An insulating gasket is attached to the studs and the plumbing fixtures are installed, having previously lubricated the corresponding holes in the pipes with sealant.
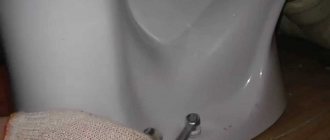
- Having placed the toilet on the studs, install the rubber band, washer and nut. The fasteners are clamped, after which caps are put on them so that the bolts and studs are not visible. The fasteners should not be tightened as tightly as possible; the tension may cause the bowl to burst.
The wall-hung toilet has been installed. Now, using a utility knife, cut the insulating gasket along the contour of the device.
Features of installing a block installation
The block installation does not have legs, so the mounting to the wall must be reliable:
- Mark the height from the floor - 1 m. Mark the holes for the dowels. Horizontalness is checked with a level, ensuring that the holes are equidistant from the vertical axis.
- Drill holes with a hammer drill. They hammer in the dowels.
- Insert anchor fasteners into the dowels and, having leveled the installation, fix it.
- Plugs are placed on the fasteners.
- Attach the drain tank to the base.
- The system is connected to communications: a water pipe is connected to the tank, and a sewer outlet is attached. In order to maintain tightness, the connections are treated with silicone sealant.
- Subsequently, the installation is walled up. This can be done using drywall, foam blocks, and tile adhesive.
- Finishing the wall. Secure the toilet.
In general, the installation procedure coincides with the instructions for installing a frame installation.
Installation selection criteria
When choosing which installation to purchase, you need to pay attention to its quality. The structure is retracted into a box, so in the event of a leak, the malfunction will not be detected immediately, and to eliminate it, you will have to refinish the toilet. Quality is determined by the thickness of the metal, plastic, and the appearance of the welds. In addition, take into account:
- Compatible with toilet model. The installation holes do not always match if the installation and the toilet are made by different manufacturers. There may be differences even between models belonging to different lines from the same company.
- Complete set. The kit sometimes lacks fastening elements, soundproofing gasket, and drain buttons - they need to be purchased separately. At the same time, another company may offer not only these elements, but also the toilet itself.
- Drain buttons. The buyer has the right to choose a regular “start/stop” drain button, dual-mode buttons or touch buttons.
- Manufacturer. Leading companies provide a 5-10 year warranty on installations, not only on the frame, but also on all components, so you can be confident in their quality.
These are the most general conditions for choosing an installation; in each specific case, it is necessary to take into account the manufacturer’s recommendations.
Choosing the right model
When choosing a Cersanit toilet, you need to consider some points.
- The toilet may well consist of porcelain, although it is not the cheapest material, but it is durable and resistant to abrasion of the enamel.
- Toilets made of sanitary ware are much cheaper, and they are quite widespread on the market, so they are easier to purchase. They have an aesthetic appearance, and in the suspended version they significantly save space.
- Horizontal models of toilets are more suitable for apartments, and vertical ones for private country houses.
- The Cersanit company offers models with both bottom and side water supply. The former is notable for the fact that it makes virtually no noise, while the latter is a more common and inexpensive option.
- It is better to choose a model with a circular flush, this will ensure the sanitary cleanliness of the toilet.
- You don’t have to look for Cersanit lids separately, as they come complete with the selected toilet model.
You should not give preference to an expensive toilet model; among inexpensive ones you can also find quite high-quality and decent models.
Popular lines
The reliability and quality of the toilet installation largely depends on the manufacturer.
Grohe is a German plumbing company that carefully controls the quality of its products. The reliability of the brand and the possibility of combining sanitary ware from different lines is confirmed by customer reviews.
Geberit is a Swiss brand that directly competes with Grohe. Once upon a time, it was with Geberit that Russian consumers began to become acquainted with installations for toilets. In terms of quality and price, the products are approximately comparable to Grohe.
TECE - the company offers premium German equipment at an affordable price. All products are compatible with each other. Installation is simple. You can install any installation yourself.
Viega is a German brand whose products are aimed at the mass consumer. When compared with the three main competitors, the cost of installation, all other things being equal, will be significantly lower. At the same time, the designs are reliable and meet all the latest technological requirements.
Cersanit is a Polish manufacturer that has earned its place in the top thanks to its high quality products and affordable price. This is the most budget option for the Russian consumer.
Customer Reviews
Alena, Moscow : “My husband and I spent a long time choosing an installation. I wanted to choose something that was optimal in price and quality, not very expensive, but a worthy option. We settled on Grohe Rapid SL 5 in 1. Even from its appearance it is clear that it was made to last.”
Roma, Moscow : “We installed the Ideal Standart installation. It turned out that she was not ideal at all. In 5 years - three repairs: the cuff does not hold, the inlet valve is broken, the buttons stopped working. In addition, the water entering the tank is too noisy. I don’t even want to estimate how much I overpaid for it. Grohe is much better."
Anna, Moscow : “I don’t regret at all that we installed the installation and wall-hung toilet. Although at the purchasing stage, an unpleasant discovery was that you need to buy an additional button, and it is not cheap at all. When I consulted with friends. They all said that Geberit could not be found better. They bought it. It has been in service for 6 years without any complaints.”