For most plumbing buyers, the phrase “toilet without a tank” means that the tank is not included with the bowl and must be purchased separately. And for online stores, the answer to such a request will be unambiguous - they will show exactly the same bowls for floor or wall installation. Which drainage device will be selected for it depends only on the client’s wishes (and, of course, on the compatibility of the units).
In total, there are four options for how to equip a toilet: a wall-mounted cistern (hanging, high-level), a compact cistern, a built-in cistern and a drukspüller. It is the latter option that is “tankless”.
Design
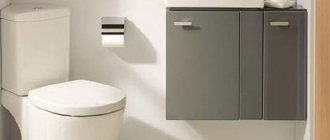
An attached or wall-mounted toilet is a fairly popular design. It is a monolithic plumbing device that has a streamlined shape. This toilet is suitable for both spacious bathrooms and small rooms.
Attached toilets are characterized by a hidden, slightly less often external, flush system.
Attention! Before installing a floor-standing toilet, pay attention to its outlet. It can be oblique, straight and vertical. Therefore, you need to purchase an attached toilet based on the toilet outlet in your toilet.
When you enter a bathroom that has a wall-mounted toilet, you will not see the cistern. This is his distinctive feature. Instead of a regular cistern, a flat device is installed, hidden behind the thickness of the wall.
In addition to all of the above, the attached toilet has a useful device - a microlift. It makes lowering the toilet lid smoother and quieter. Some call this function a closer, by analogy with the mechanisms installed on furniture doors.
Operating principle
Toilet design without tank
A toilet without a tank with a connected drainer works like this:
- After pressing the button or turning the lever, the main valve opens and water under pressure from the main line is supplied to the drainage system.
- At the same time, through a hole in the membrane, liquid flows from the upper compartment of the cartridge to the lower.
- As water enters the lower compartment, pressure equalizes in both compartments.
- As soon as the lower compartment is filled, the pressure in both compartments will be equal.
- When the pressure is equal, the return spring is activated, cutting off the flow of water into the toilet.
The bore diameters of the nozzles and the hole in the membrane are designed so that 5-6 liters of water under pressure flow in one cycle. Some models allow this parameter to be adjusted.
Advantages and disadvantages
It’s worth starting, perhaps, with the shortcomings of the model. There are only two of them:
- High price.
- Installation cost. If you hire professional workers, you will have to shell out a considerable amount of money to install an attached toilet. If you decide to install the toilet yourself, then there will be only one drawback - the cost of the toilet.
As for the positive qualities, there are many more of them.
- Silence. When the tank is mounted behind a wall, the sounds of water filling or draining are practically inaudible.
- Attractive appearance. Often the tank spoils the appearance of the toilet, but by getting rid of it by installing it in the wall, you can create an original and attractive interior in the bathroom.
- Reliability.
- Long-term operation.
- Ergonomics.
How to adjust the water level
The problem of too much or too little water is the most common problem with a universal toilet flush. When the supply hole is placed on the side, the level is adjusted by changing the length of the spoke. This filling element serves to fix the float. In almost all old models of the cistern, the spoke was made of brass wire. To move the location of the float down or up, the lever is bent in the middle. Increasing the level of its location leads to an increase in the filling volume of the tank.
Modern toilet models use plastic rather than metal levers. As you know, bending plastic is quite dangerous, because... Because of this, it may break. To adjust the level of water entering the tank, a shift is carried out here in one direction or the other. This makes it possible to increase or decrease the lever arm. To increase the volume of water in the container, the float must be moved away from the valve. If the tank is filled through the bottom hole, the float arm is oriented in a vertical position. This makes it much easier to adjust the volume level: just move the float up or down. When the desired position is found, the glass is secured with a clamping nut.
The main difficulty when adjusting the filling volume of the tank is that you have to remove the container lid. The fact is that there is a drain button on it, which is most often connected by a rigid coupling to the release mechanism. Therefore, you have to act very carefully and slowly. First of all, carefully unscrew the clamping plate on the button. This makes it possible to move the lid without fear.
Most elements of modern drain mechanisms are made of plastic. Metal parts are found mainly on old Soviet models. This explains the reduced durability of toilet siphons: they are much easier to replace than to repair. To facilitate maintenance, plumbing departments present assembled modules or their individual units. Therefore, in the event of a breakdown, you must remove the damaged element and take it to the store. There, experienced consultants will tell you how best to proceed - change this part or the entire mechanism.
Material
The materials from which wall-mounted and regular floor-standing toilets are made are exactly the same. This could be earthenware, porcelain or liquid stone, etc. In order to find out which materials are considered the best, you need to analyze their characteristics.
- Earthenware is one of the cheapest and most popular materials. Quite durable, but has a porous structure. It is for this reason that it gets dirty quickly. To solve the above problem, faience wall-mounted toilets are glazed, that is, a coating of sintered ceramic is applied. This makes caring for them easier.
- Porcelain is a more expensive material than earthenware. Its structure is denser and stronger, surpassing even glazed faience. A toilet made of this material gets dirty much less often.
- Liquid metal is another material from which wall mounted toilets are made. True, it is not used as often as the two previous types. The reason for this is the high cost of the product and low resistance to contamination.
- Stainless steel is a material that is very popular. Toilets made from it can mainly be found in public toilets. Stainless steel is easy to clean, bacteria do not grow on its surface and this metal cannot be broken.
Advice. A floor-standing toilet should be selected based on the conditions in which it will be used. So, stainless steel is suitable for a summer house, porcelain is suitable for a classic bathroom, and natural stone is suitable for an Art Deco room.
Of course, this division is not suitable for many. You can independently decorate your room in a suitable style.
Source: https://sandizain.ru/santexnika/unitazy/pristavnoj-napolnyj-unitaz-so-skrytym-bachkom.html
Attached toilets with a hidden cistern - the best manufacturers
The main difference between the attached type and the conventional model is the design of the water tank. The shape of the hidden tank is more like a canister, in which there are several holes for connecting to the sewer and water pipes.
It also has special fastenings with which it is placed in the upper part of the toilet structure.
Water tanks for attached toilets are made from durable plastic or propylene.
Often the outer layer is supplemented with sheets of foam plastic, which protects the tank from condensation and serves as a sound insulation layer.
Unlike hanging models, bowls are installed on the floor. And to install the tank, you do not need to install a frame or special blocks.
The tank is simply attached to a niche in the wall and covered with a false panel on top. The only thing left on the outside is the drain button. Therefore, installation of a wall-mounted model is much simpler than installation of an installation kit for a wall-hung model.
- Laufen is a famous Swiss brand that produces ergonomic sets of attached models with a hidden tank. Recognizable design is combined with good performance characteristics and consistently high product quality. The main distinguishing feature of this company’s plumbing products is efficiency. All models are equipped with fittings for a double flush system, which can significantly reduce water consumption. At the same time, the drain is quite powerful, so it washes away all the dirt the first time. Attached toilets are part of such collections as Kartell, Pro, Palace, LB3, Alessi, Palomba.
- Villeroy & Boch is a well-known German brand whose catalog includes several series of attached toilets. All bowls for them are made of porcelain, and the proprietary coating of a special glaze makes them even more durable. Models from this company are adapted for bottom water supply and have a horizontal outlet. The company offers two configuration options. The “economy” series includes the toilet itself and mounting hardware. Premium collections additionally have a quick installation system. Among the most popular lines are the following: Omnia Architectura, O'Novo, Hommage, Subway.
- Roca, a reputable Spanish manufacturer, presents many collections of toilets with a built-in cistern. In the catalog you can find models with oblique and vertical outlet. The company uses sanitaryware to make bowls. Seats are usually not included. For each model, you can choose either a cheaper toilet seat made of polypropylene or a higher quality and durable one made of duraplast with a micro-lift system that ensures smooth closing of the lid. Popular lines: Meridian, Beyond, Gap, Dama.
- Aquanet is a Russian manufacturer that can compete with European brands. Hidden toilets from this company are ergonomic, and the classic design allows the models to be installed in bathrooms of any design. The company's catalog already includes several series of plumbing fixtures with a hidden tank: Tavr, Atago, Nova, Cetus.
Toilets with a hidden cistern are also offered by other well-known brands: German Duravit and Ideal Standard, French Jacob Delafon, Czech Jika, Italian Althea Ceramica.
Therefore, everyone can find a model based on their preferences.
Popular models
Despite the fact that wall-mounted toilets have appeared on the Russian market relatively recently, buyers have managed to form their opinion, identify the pros and cons, and identify the most popular models.
- Roca Gap 347477000 is an original faience design from a Spanish manufacturer. An unusual square bowl in hi-tech style looks attractive and aesthetically pleasing. The toilet has a horizontal outlet and is equipped with a cascade flush system. The kit includes a hidden tank, a duraplast seat with chrome hinges. You can choose a lid with a microlift.
- Grohe Euro Ceramic 39329000 - plumbing fixtures with a hidden cistern from a German company. The rectangular shape of the bowl with smooth lines will fit perfectly into the interior of a bathroom decorated in a modern style. Made of durable porcelain coated with high-quality glaze with antibacterial and dirt-repellent properties. The main difference between the model is that it has no rim. This means that plaque and mineral deposits will not form on the walls of the bowl. The unique drainage system has three holes that direct the flow of water so that cleaning is as effective as possible.
- Aquanet Cetus-F is a Russian-made attached model. The bowl looks very unusual: cast, oval in shape, without protrusions or recesses. The ultra-thin lid included in the kit visually merges with the bowl. An additional dirt-repellent coating significantly improves hygiene and makes the product easier to care for.
Attached toilets with a hidden cistern are becoming more in demand, and manufacturers annually offer more and more options for such plumbing. Therefore, everyone can find a product to suit their taste.
On average, the price for such models varies from 15,000 rubles. up to 30,000 rub. But you can find models that are much more expensive.
Source: https://santehnicheskij-mir.ru/unitaz/unitaz-so-skrytym-backom.html
Comparison of popular models
Model from Grohe
The German companies Shell and Grohe were the first to supply tankless flushing systems under water pressure to Russia. Their products are most adapted to Russian realities. Grohe has developed a druckspühler that operates with low water pressure. The minimum pressure required for full operation of this model is 0.6 atm.
Devices are also produced that allow you to save drained water. Shell has made separate controls for the two flush buttons. One is designed to release a standard volume of water (5 - 6 liters), and the other is for economical drainage. The drill presses are equipped with adjusting screws that allow you to adjust the required volume of a single release.
The cost of tankless drain devices produced by these companies is 5-8 thousand rubles.
The products of the Italian companies Mamoli (Mamoli) and Remer (Remer) stand out for their stylish design. But prices for flushing systems connected directly to the water supply are in the range of 10-15 thousand rubles.
How to choose a product, taking into account its form factor?
When choosing toilets with a hidden cistern to renovate your bathroom, in addition to its aesthetic aspects, you should take into account the method of connecting the equipment to the sewer inlet pipe, which must correspond to the release of the product.
At the same time, there are only three types of releases: straight, oblique and vertical.
- The straight line occupies a horizontal position relative to the plane of the floor. Easily connects with a corrugated or corner adapter to a sewer pipe located in an inclined or vertical position;
- The oblique has an axis of inclination to the floor at a certain angle, if it coincides with the inlet pipe, it can be mounted without the use of adapters;
- The vertical one connects to the sewer pipe located under the toilet in the floor.
In facilitating the maintenance of toilet fixtures, its internal shape also plays a certain role. Let's look at typical models.
- With a plate bowl or in the form of a shelf. Everything that ends up on the plate surface is effectively washed off with water without causing splashes. However, remaining water on the shelf contributes to the appearance of an unpleasant odor and the deposition of salts. Another disadvantage is the increased water consumption.
- With a funnel-shaped bowl. Once in, the sewage does not linger and is directed through the water seal into the sewer system. At the same time, unpleasant odors practically do not have time to form, and water is also saved.
- With a bowl like a half-shelf. The model combines the two previous forms, where one side is flatter. There is less contamination of the toilet while saving water when flushing.
Drain device
The attached plumbing fixture is equipped with a special flat tank, which is specially designed for hidden installation. It is installed in a niche, which is made in wall structures to a depth of 10 cm.
The tank, made of high-quality polymer material, is highly durable and has a long service life, which also applies to all its filling. Therefore, situations with adjustments or repairs will not bother you for many years.
A concealed cistern for an attached toilet can be connected to the water supply network from any accessible position along the perimeter of its side surface. The built-in shut-off valve is a prerequisite for its operation.
The drain fittings are connected to the flow activation button by a pneumatic drive or cable. The control, consisting of two buttons, allows for significant water savings. One button initiates the pouring of half the volume of liquid, the other - the remaining part.
And equipping it with a device that allows you to interrupt the flow by pressing the button again makes it possible to independently regulate the amount of water discharged.
General views
It is precisely taking into account the above characteristics that the owner undertaking a renovation should consider, as an option, a floor-standing toilet with a hidden cistern. Such products are installed on the decorative floor covering close to the wall. Such models successfully combine the properties of both classic floor and suspended installed frame products.
Attached toilets are equipped with flat flush cisterns connected to water supply and sewerage systems hidden behind a decorative wall. Therefore, attached-type equipment, being much cheaper than frame installations, becomes the optimal solution for rooms that combine a latrine and a bathroom.
In addition to performing the usual functions, the plumbing fixture can be supplemented with some convenient options.
- Microlift. A mechanism resembling a door closer. It smoothly lowers the lid, thereby protecting the product from mechanical damage and preventing the plastic from hitting the ceramic.
- Bidet. Faucet, to facilitate hygiene procedures, mounted on the bowl of a plumbing fixture.
Installation steps
Installing a toilet tank means installing it in a wall niche as provided in the design, fastening it using dowels with self-tapping screws or anchors.
Communications are connected to the device: water supply, spout pipe, and also a box-shaped extension for the button is attached with latches. The spout pipe is pre-adjusted to the length and height corresponding to the distance from the outlet of the plastic container to the entrance to the attached bowl.
Securely fixed pipelines and the tank are completely walled up with cement mortar or covered with sheet materials (plasterboard, magnesite, fiberglass, etc.), which, as a rule, are decorated with tiles, sometimes with cement plasters or other hydrophobic methods.
On the outside of the screen (in its holes) there remains a socket for connecting to the sewer (for straight and oblique outlets) and a flush pipe, to which the attached toilet is later connected, as well as a protruding box-shaped extension of the button.
Final assembly of the push-button mechanism is carried out after trimming the extension flush with the outer surface of the decorative trim and checking the operation of the shut-off valves.
Next, the bowl itself is installed, which is initially placed in the intended location for marking. Having identified the points of the fastening elements, the product is moved to the side and holes are prepared for anchoring.
After which you can connect the toilet to the water supply and sewerage pipes, installing it in place and tightening the fasteners. It is recommended to treat the back mating surface of the bowl with sealant.
What else to consider?
- That the height of installation of plumbing fixtures depends on the tiles being laid, i.e. plus 12-20 mm to the semi-finished floor surface.
- That the connection of sewer systems is carried out with a rigid liner. Connection using corrugated cables is not recommended due to their rapid wear.
- That at all stages, until final fixation, control of the spatial orientation of the construction blocks is used using a level.
- That the connection of pipes will become easier and more reliable if plumbing silicone is used to connect them.
Compliance with simple installation techniques, as well as the recommendations of the factory instructions, which are necessarily included with the attached toilet, will provide you with a guaranteed long term of comfortable operation of this plumbing product.
Source: https://santech-info.ru/santexnika/pristavnoy-unitaz-so-skrytym-bachkom.html
Mounting options
Floor standing toilet
This is the most classic installation option. In this case, a floor-standing toilet without a tank must be fixed, and the built-in toilet tank must be hidden in the wall. The sequence of this type of installation is as follows:
- fixing the toilet to the floor;
- installation of the tank in the wall using a special set of fasteners;
- outputting the flush key to the wall surface or connecting the contactless flush function;
This design creates a feeling of reliability for the user, and the appearance of the bathroom is immediately transformed and the free space increases.
Maintenance of this design is carried out through a pre-installed technological hole. It can be accessed via the flush button.
Wall mounted toilet
A slightly more complicated installation option is to install a wall-mounted toilet, however, this completely hides communications from prying eyes. This type of installation requires the following materials:
- supporting frame. This is the structure on which the toilet itself will be attached;
- set of fastening tools. Most often it comes complete with plumbing fixtures;
- directly flush cistern for the attached toilet;
- flush button or photocell for contactless flushing.
When installing, you must remember to provide a technical hole for access to the tank mechanism.
Installing a wall-hung toilet is not only a good design decision, but also minimizes the surfaces where dirt accumulates. You can always easily wash the floor under the toilet and do not need to wash the leg itself and the places where it is attached to the floor.
Despite the apparent lightness of the design, modern plumbing can withstand loads of up to 400 kg, and its quality and reliability are improving every year.
Non-standard installation
There are also options for non-standard installation of a toilet with a hidden tank. Installing a toilet with a partition made of plasterboard is an excellent option when remodeling an apartment or carrying out finishing work in a new building. In this case, the sequence will be as follows:
- It is necessary to mount the profile and prepare a plasterboard partition. The partition must withstand decent loads and be of high quality, since it will be necessary to attach a hidden cistern for the toilet to this structure.
- It is necessary to measure the height and installation of the frame itself. The frame must be installed perfectly level. This can be checked using a building level.
- The next stage involves fixing the frame and attaching it to the profile. Self-tapping screws are used for this.
- Water is connected to the sewer pipe, which is fixed with a clamp.
- It is necessary to provide a technical hole in the wall in which the flush key will be installed. This hole will also provide access to the connections.
- When all the preparatory work is completed, you can proceed to the actual installation of the toilet with a built-in tank. To do this, you need to cover the wall with plasterboard, secure the product and install a flush button or photocell.
If drastic changes in the room are not expected, you can install a tank in a niche directly in front of the sewer pipes.
The sequence of actions is as follows:
- dismantling old plumbing, cleaning walls from old tiles. At this stage, it is necessary to prepare the wall for subsequent laying of tiles or other material, otherwise the installed structure may be damaged later;
- the pipes necessary for connection to the product are installed on the fan pipe;
- the height at which the structure will be mounted is measured, and the supporting frame itself is installed in a horizontal position, after which the location of the studs is determined. It should be located behind the sewer pipes, and the studs should not touch them so as not to damage them.
Places for attaching the frame are marked on the wall, and the frame itself is fixed with self-tapping screws to the wall and floor. You need to remember the level. The frame must be fixed very firmly and withstand heavy loads.
The tank is attached and the water is connected. It is necessary to provide a hatch in the wall for access to meters, valves and connections. After installation is completed, finishing material, such as tiles, is applied to the wall.
Installing flush cisterns in the wall has a number of undoubted advantages:
- Firstly, saving space. This installation allows you to increase the distance from the entrance door of the room to the edge of the toilet by up to 10 cm, which, with a small toilet room, can significantly expand the free space.
- Secondly, from a hygienic point of view, this is a more correct solution, since there are fewer surfaces in the bath or toilet room on which dirt accumulates. Now you don’t have to waste time cleaning the toilet tank. In addition, in this installation option, the plumbing is adjacent directly to the wall, so dirt and pathogenic bacteria do not accumulate behind it. In the case of a wall-hung toilet, cleaning takes just seconds.
- Thirdly, installing a tank in the wall allows you to bring any design solutions to life, since plumbing fixtures can be mounted almost anywhere without being tied to pipes.
- And finally, the floor-standing toilet with a hidden cistern is equipped with a built-in microlift, thanks to which the toilet lid can be lowered almost silently.
Expert advice:
- It must be taken into account that different types of structures imply not only different costs of materials and equipment, but also different operating prices, so it is necessary to calculate the budget in advance.
- The structure on which the tank will be attached must be strong and can withstand not only the weight of the tank itself, but also the weight of the water in it.
- During installation, it is necessary to regularly use a level to determine how level the structure is installed. This will help avoid a number of problems in the future.
- It is better not to skimp on connections and use high-quality materials, since access to the structure will be limited and repairs will be inconvenient.
Source: https://zonavannoi.ru/santehnika/unitaz/pristavnoj-so-skrytym-bachkom.html
Repair instructions
Do-it-yourself repair of built-in tanks becomes possible if the user understands the principle of operation of internal devices and the dependence of breakdowns on the degree of malfunction of the components. Mechanisms have to be replaced more often, which is much easier than repairing their individual parts.
Before starting work, turn off the shut-off valve at the inlet . If there is no such thing in the apartment, turn off the tap in the basement.
needed for repairs :
- flathead and Phillips screwdriver;
- open-end wrenches or adjustable gas wrenches;
- rubber spatula, hammer, screwdriver, pliers;
- sealant gun.
If you have no experience in servicing plumbing devices, it is better to turn to specialists.
Water slowly fills into the tank
If the installation does not take in water, examine the permeability of the supply pipes and the lumen of the inlet valve. The supply unit is disassembled, the hole is cleaned, and flexible hoses are replaced. During the initial installation of a built-in tank, rigid pipes with corners and fittings are used, since hoses in a rubber sheath or metal braid do not last long.
Operating procedure:
- Clean the mesh insert at the entrance to the tank (if provided).
- The assembly is disassembled, the filter is removed, washed, and cleaned with a toothbrush to remove fine debris from the cells.
- Additionally, the position of the float and valve is adjusted - they bend the steel lever or tighten the ratchets that move along the threads on the plastic arm.
Repairing the float valve. Sometimes it warps, so it requires leveling. If not adjusted, it will regularly shut off the fluid supply.
Inlet valve clogged
The tank fills, but after the float reaches the intended position, the water does not stop flowing. The valve is not completely removed, but only loosened to remove the rubber seal.
Procedure:
- Manually raise the float bulb as high as possible. If the water does not flow, it is necessary to adjust the optimal height of the buoy for the device to operate. To do this, install it lower and tighten the plastic rod.
- Valve repair involves cleaning from layers of dirt and limescale. To do this, the element is removed and cleaned. After mechanical removal of particles, they are washed with water under pressure.
If the intake valve assembly cannot be cleaned and repaired (this becomes obvious after maintenance), it should be disposed of and a new one purchased.
Drain button doesn't work
When you press the key, nothing changes; the water does not drain.
There are two types of problems:
- the button (its seat or shaft) is clogged;
- The drain fitting connecting the button to the internal device does not work.
In most cases, the device is replaced with a new one.
Violation of button functionality:
- The key on the front wall of the installation sinks in and remains recessed after being released.
- In the two-button version, one or two keys jam at once.
- The key gets loose and you have to move it around the window for it to work.
- Requires increased pressure.
Valera
The voice of the construction guru
Ask a Question
Sometimes you can't unscrew the key the first time because it scrolls. The button is pressed down, then the bezel is rotated to unscrew (clockwise).