The location of power supply points, the installation height of sockets and switches is a serious issue that requires planning, drawing up diagrams, and calculating their number for each room.
If you approach the installation with advance planning, you won’t have to unwind the extension cord, trip over the carrier, and plug everything in there, thereby overloading the outlet or even the network.
Our material will help you determine the optimal amount of electrical fittings and the rules for their location. We will also tell you about all the intricacies of placing and installing electrical points in an apartment or house.
Sockets: where to put and how much to take?
First, sit down and together with the designer think about how many sockets you need to be happy. As a rule, such questions somehow fall out, get lost in the general list of what needs to be done. And after renovation, the apartment suddenly becomes overgrown with electrical extension cords, and even extension cords plugged into extension cords with splitters.
Draw a floor plan of the apartment along with the arranged furniture and household appliances. Think about where it would be convenient for you to connect this or that electrical appliance. Determine the height of the outlets and their distance from walls and windows. But first things first: let's go through the rooms, from the hallway to the toilet, and think together about how best to place the sockets.
Photo of the ideal location of sockets in the apartment
Share with friends
Corridor and hallway
In the corridor or hallway, two or three pieces will be enough. Most often they are used to turn on a shoe dryer. Therefore, do not raise the connectors too high. Of course, there is no need to hide them behind a hanger or behind the door; it is best to place them in the corners. It is better to turn on wall lamps directly, through a separate switch connected to the mains.
What is rarely thought about
Very often, when drawing up a plan, home owners forget about important things that are an integral part of the life of any person. It is always necessary to make a block for such simple things as a vacuum cleaner or other appliances. It is better to make such an outlet near the input switch. A separate place for cleaning electrical appliances is very convenient, since you do not need to disconnect other appliances from power each time you clean.
It is important to consider how to place outlets in the bedroom for air conditioners or humidifiers. The air conditioner must be placed so that the air flow does not go directly to the bed. An air humidifier can be installed at the entrance. Then it is better to make the outlet for the vacuum cleaner a steam room.
In the photo below you can see how to decorate the frames of the blocks to match the overall design of the room.
Living room
This is the room in which the family spends most of their time when they are at home. Here, as a rule, there is a TV, a cable or satellite TV set-top box, a media center or some other audio-video equipment, such as game consoles for children. Often in the living room there is a base for a landline telephone handset and a wi-fi router. There are already five or six points. Plus, you need to leave a couple of free connectors just in case: charge your mobile phone, turn on your laptop. You never know!
Sofa area
To correctly place sockets, along with planning the electrical network, you need to immediately think about the placement of furniture in the room. Otherwise, it will turn out that they are located behind the sofa or closet. Most of the electrical appliances in the living room are always on, for example, air conditioning, TV, set-top boxes, router, telephone. Sockets for them can be obscured by a chair or, for example, a decorative flowerpot. Free points must be easily accessible.
TV zone
If the sockets for all electronic gadgets in the living room can be left at a level of 30 cm from the floor, then the socket for a TV hanging on the wall or an air conditioner requires a separate approach. In this case, provide a place directly behind the TV screen or near the air conditioner so that hanging wires do not spoil the picture.
Bedside table: how to choose the size
A piece of furniture should not only please you, but also look harmonious in the overall interior of the room
Therefore, it is necessary to pay special attention to the dimensions. At the moment, most furniture stores and manufacturers offer the following standard dimensions for this piece of furniture:
- depth - from 40 to 45 centimeters;
- width – from 50 to 55 cm;
- The height of the bedside table is from 50 to 65 centimeters.
Cabinets of the above sizes are widely available in modern furniture stores. You can also order furniture according to individual sizes, depending on your preferences and the dimensions of the bed. But, this option, as a rule, costs much more than standard models.
When choosing, be sure to take into account the height of the bed: an incorrectly selected bedside table can completely ruin the overall impression of the room’s interior. If the bedside table is too wide, it will make the space look bulky.
Bedroom
What to do in the bedroom? Sleep? Certainly. But there is technology here too, so it’s worth figuring out in advance where to place the sockets in the room.
Sleeping area
If your bedroom has a classic format with a double bed and bedside tables at the edges, it would be nice to have two points near each of them: connect a night light and charge your mobile phone or tablet. The same number of connectors is needed for two separate beds. If the bedroom also has a dressing table, then there should certainly be sockets near it, preferably two or three. Turn on the hairdryer, for example.
TV zone
A TV in the bedroom is a common sight. Most often it is hung on the wall so that it is convenient to watch it while lying on the bed. Therefore, a point is needed for it too. The principle of its installation is the same as for a hanging TV in the living room - behind the screen. The air conditioner in the bedroom requires another outlet, which must be installed at the top, next to where the air conditioner is installed. Remember those ugly hanging wires? Just the same case.
How to install electrical outlets yourself
Connecting sockets is not difficult, so many people prefer to do all the work themselves. This can only be done correctly if you know how to connect them. Remember that any connection error can be dangerous for a person.
So how do you connect electrical outlets? Here's a quick guide :
- turn off the electricity in the building;
- make a hole in the wall where the outlet should be (be careful not to damage the internal installation);
- insert the electrical box and connect the cables to it;
- connect the cables to the socket (yellow wire to the contact, black phase wire to the L plug, blue neutral wire to the N terminal);
- secure the socket cover to the wall using a screwdriver;
- turn on the power and check the operation of the contact, for example, with a screwdriver with a voltage sensor.
According to international standards, each wire connected to an outlet must have a specific color. Zero - blue wire, phase - red or brown
Children's
Sleeping area
The children's room is the same bedroom, only for younger family members. While they are very small, they do not need many electrical appliances: a night light by the crib is quite enough.
Game Zone
But later, your offspring will need additional places for charging: for gaming gadgets, a personal computer and computer peripherals, and a game console. The two required by building codes are clearly not enough, especially if there is more than one child.
Connectors in children's rooms are often made “safe,” that is, with special covers and plugs that the baby cannot pull out on his own. If the child is small, it makes sense to install just these. And no dangling wires for a child to pull on!
Workplace
It is also necessary to consider the number of sockets in the space that you plan to allocate under your desk. All computer equipment and table lighting require one point for each piece of equipment. And, as always, one more in reserve.
Types of electrical outlets - which ones to choose
You will find several types of sockets in stores, so it is worth knowing how they differ and which one to choose. Here is a list of the most important contacts you will need at home:
- Grounding (pin) sockets - used to connect higher power devices such as refrigerators, washing machines, TVs, computers, and power tools. However, more and more devices have plugs that require a pin, such as electric kettles, irons or coffee makers, so nowadays most outlets in the house must be grounded;
- Non-grounded sockets - these are no longer recommended nowadays, if only because most devices have plugs adapted to the contacts; however, it is worth having a few regular sockets at home, which are useful for connecting simple low-power devices, such as chargers;
- Sealed sockets (including those with a splash-proof damper) are special contacts for bathrooms, garages and basements, protected from water and moisture;
- External sockets - they are resistant to water, sunlight, frost and dust, so they are ideal, for example, for a terrace;
- Shutter Outlets - Recommended for children's rooms as infants cannot insert anything into the openings that could cause an electric shock or short circuit.
In addition to standard plug sockets, other types and types of sockets are used in homes, including the aforementioned USB sockets, TV sockets, telephone sockets, and fiber optic sockets.
Types and types of electrical outlets for home use
Kitchen
In terms of the number of electrical appliances per unit area, the kitchen will give odds to any room. Let's just count: refrigerator, electric stove or gas stove, but with electric ignition, oven, hood over the stove, microwave, electric kettle. And these are only those devices that are constantly connected to the network. Plus, a washing machine and dishwasher can live in the kitchen.
In addition to them, there is also a mixer, blender, coffee grinder and coffee maker, electric meat grinder and juicer, pancake maker, sandwich maker and a bunch of all sorts of appliances that are taken out and turned on regularly. Let’s count again: for those who are always on, it’s eight, and at least five is needed “just in case.” Therefore, the question of how to properly place rosettes in the kitchen has its own technical nuances.
Appliances
Connectors for the refrigerator and stove can be located directly behind them: how often do we rearrange our kitchen? Turned it on and forgot it. If your microwave is on the refrigerator, and this often happens, its point is there - behind the refrigerator. The same applies to the washing machine and dishwasher: connectors for them, as a rule, are hidden behind the kitchen unit.
Many people do not know where to place the outlet for a constantly switched hood. In our opinion, the most suitable place is under the ceiling. If you are going to use an electric stove and an electric oven, they will need separate, thicker gauge wiring.
Additional equipment
It is convenient to plug small and infrequently used equipment into the connectors located above the worktop. It is convenient to use two groups of three: many designers offer their clients exactly this arrangement. Another option is to build them into the countertop.
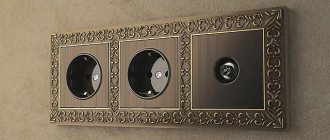
Adjustment to the interior of the room
When buying a switching device, you need to visualize how it will fit into the interior. It is extremely important that its appearance and colors do not stand out from the general style of the room. Otherwise, the impression of the room will be spoiled.
Socket and switch in loft style Source retro-light.ru
Let's look at the recommendations for choosing for each style:
- Country. Rustic design requires simplicity as well as naturalness. Therefore, the plastic of the switch can be disguised with a leather covering. It may even be artificial.
- Minimalism. Square designs with rounded edges are ideal for the most modest of modern styles. As for color, the priority is grey, black and white.
- High tech. Style loves chrome and glass. Therefore, transparent switches will fit perfectly into the environment. But the design also emphasizes everything new in technology. And touch devices will easily find their place.
- Modern. A bright style requires extraordinary colors, but enclosed in a strict geometric shape. Therefore, green triangles, red squares and yellow circles will be in place.
- Loft. One of the most interesting and popular styles requires deliberate roughness. Therefore, a good solution would be to use devices that imitate industrial ones in the interior. Switches and toggle switches made of metal fit best into industrial design.
- Ethnic. This requires complete naturalness, which is best emphasized by wood. Such as cherry, light maple and dark mahogany. Also, ornaments and patterns are not alien to the style.
- From Empire to Rococo. All trends reflecting historical eras require luxury and pomp. Therefore, the color scheme should only be gold. And if the device is decorated with rhinestones and appropriate painting, then the interior will only benefit.
- Retro. The style loves large sizes and rounded shapes. In addition, vintage is a must. And it can be achieved with a worn effect. The color of sockets and switches should be neutral.
Experts do not recommend making switchgear accents unless the style requires it. Since these items are more practical in nature, often the best solution is to simply disguise them. For example, make it the same color as the wall.
Vintage sockets for retro style Source inteks-elektro.ru
Bathroom and toilet
In houses that were built more than thirty years ago, such electrical communications in the bathroom and toilet were not provided at all. People had never even heard of such miracles as a Jacuzzi or a shower stall, so no one asked themselves the question of how to place sockets in the bathroom.
Some craftsmen independently pulled wires into the bathroom, attached connectors into which they plugged in a Kharkov electric razor or hair dryer. Today everyone knows about these miracles, they are all accessible and pleasant. Therefore, when designing a bathroom, you need to immediately look at places for sockets.
Important:
- All switches and other electrical equipment must comply with the standard for electrical equipment for wet rooms (protection class no less than IP44) and be reliably grounded. The designer or planner should definitely tell you about this
- The socket for the Jacuzzi and shower can be installed behind their decorative walls; you will not constantly turn these units on and off
- The socket for the exhaust fan can be installed at the top, next to it, although most often the exhaust fan is connected to the lighting system: turn on the light - the fan hums
- You can mount one or two points near the bathroom mirror, which usually hangs above the washbasin. One can be used to power the lights above the mirror, the second for a hair dryer, razor and other small appliances. Naturally, we remember about the protection class and grounding
- If the dimensions of the bathroom allow you to install a washing machine, remember that the connector for it is located at a distance of at least 50-60 cm from the water pipes
Accommodation tips from experts
Where and how to locate switches and sockets must be determined only on the basis of safety and, of course, comfort. Today there are no prescribed standards that would indicate the location of electrical connectors and switches. Especially their quantity in a separate room.
Planning is the stage of calculating the number of mechanisms that a person will use on an ongoing basis, regardless of the premises. Plus 1-2 more sockets on top for additional devices. The most stringent requirements are imposed only on craftsmen who install electrical appliances in the apartment. Such people should be specialists with good experience.
But if you decided to carry out all the work yourself, then you need to familiarize yourself with all types of electrical equipment. Since the product range is very wide, this means that equipment can be found for every need.
This can be an audio socket that allows you to connect acoustics, a stereo system or a connector for a landline phone, as well as a socket for an Ethernet cable.
The installation height determines the comfortable living conditions in the house, its safety, improvement and beauty.
And further…
All this, of course, at first glance is understandable and seems to be uncomplicated. It seems like you can handle it yourself. And it’s true: buy a screwdriver, pliers, a couple of rolls of cable, and your new homemade electrician is ready.
You can google a couple more articles on the topic “how to plug in sockets correctly.” Draw a diagram and plug in all the sockets, saving some money on the designer, planner and professional team. But you probably already have an idea of what will come of it. By the way, the fire service number is 101.
Why is this necessary?
According to rough estimates, at least 6 household appliances are used per day in each apartment. This number is constantly increasing, but the number of electrical outlets remains unchanged, so it is important to properly plan their location. If power points are installed randomly in the house, you will have to turn off some devices to charge others. This leads to inconvenience of use and the risk of increasing the maximum power for which the mechanism is designed and causing damage to the connected device.
When planning a room yourself, you need to understand its purpose, what devices to use and how to be located. The arrangement is carried out taking into account technical standards.
Drawing up a wiring diagram
Electrical wiring in an apartment begins with drawing up a network wiring plan. Installing electrical wiring according to an existing design drawing is much simpler and more expedient for a number of advantages:
- the electrical network diagram will allow you to plan in advance the necessary equipment and facilities;
- the presence of a circuit will allow you to accurately determine the power of the input input;
- the drawing gives installation personnel an understanding of potentially fire-hazardous wiring components in order to take measures to redesign them or take additional safety measures;
- The diagram will allow installation to be carried out as planned, with verification of completion of the full cycle.
Examples of schemes for a one-room apartment
Electrical engineers believe that if the total load on the apartment’s electrical network does not exceed 25 A, then it is possible and even cost-effective to plan the network with one circuit per machine. This method is a typical standard scheme of the past, when lighting elements with power sockets were included in the circuit. Today, these techniques have been abandoned and installation is carried out along independent separate circuits. An example of wiring a one-room apartment is shown in Figure 3.
Rice. 3. Electrical supply diagram for a one-room apartment
The drawing shows the competent distribution of the network load of a one-room apartment into several separate circuits with their own RCDs. Such a system will ensure trouble-free operation of the wires and correct operation of the equipment without voltage drop.
For a two-room apartment
The difference between the drawing for the installation of supplies for a two-room apartment and a one-room apartment is in the larger number of circuits in terms of wiring. Some arrangements are possible here. Figure 4 shows an example of such a circuit.
Rice. 4. Electrical supply diagram for a two-room apartment
The example clearly shows several lighting circuits, as well as separately dedicated protected circuits for the kitchen, rooms and other powerful equipment.
For a three-room apartment
Figure 5 shows an example of a drawing, which is often used for apartments with three or more rooms, where a fairly large number of conductors will come out of one distribution board.
Figure 5. Example of a power supply diagram for a three-room apartment
The peculiarity of this option is that there are separate circuits enclosed in separate blocks with their own protection. In this example, there are 2 blocks (25 A and 40 A, respectively). This method allows you to separate zones of cable products, making the system more convenient and practical.