Tiles are an excellent finishing material, which has a number of obvious advantages and an aesthetically pleasing appearance, which can easily be ruined by untreated, sloppy seams. It is for this reason that after laying ceramic tiles, the joints are putty, which hides all visible imperfections in a well-done job.
This procedure must be approached with absolute seriousness, since poorly carried out work not only does not eliminate the shortcomings, but will also add new ones, completely ruining the appearance of the finish.
For this purpose, a special grout is used, which fills all the resulting space between the tiles. Thanks to this, it acquires the most attractive and finished appearance. This article will discuss the distinctive feature of this technology. You will learn the details of how ceramic tile grouting is done.
Purpose of jointing
The jointing is done not only for the purpose of decoration, but also to avoid moisture from getting under the cladding.
The purpose of the jointing boils down to the following:
- Hygiene. Bacteria and various dirt do not accumulate in the joints between the tiles.
- Protection against moisture penetration. A special water-repellent composition is used for jointing. This prevents water particles from reaching the base of the cladding.
- The reliability of the product increases.
Jointing increases the working life of the surface being coated. In addition, it protects the tile adhesive from the destructive power of moisture. - Easy care. Grooving the joints between the tiles makes cleaning the surface easier. If you keep tile adhesive in the joint, it can fall out over time.
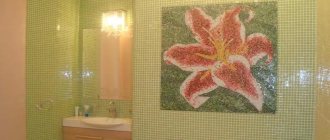
- Decorative qualities. Thanks to the jointing, the seams between the tiles look much more beautiful and neat.
Tile cleaning products
Edding 8200 is a colorful composition for touching up joint surfaces. It contains waterproof ink. It is produced in the form of a marker for more convenient application. You can find white and black markers with a line thickness of no more than 0.4 centimeters.
Pufas cement-ex is a product for removing cement mortar from tiles. Can be used on regular tiles, clinker and terrace tiles. The product is also used as a bath and sink cleaner.
Colored stain remover is used to clean tiles from stains of varying severity and nature of formation. Also suitable for washing natural stone, porcelain stoneware and all types of marble.
Pufas frische fuge. This is a colorful composition for easy renovation of seams. Not recommended for regular use. It is produced exclusively in white colors, but the addition of color is allowed.
Kiilto clean is an aggressive cleaning agent based on various acids. It is used to clean tiles from serious stains, so you should not use it every day.
Return to content
Peculiarities
It is important to understand that after completion of installation, at least 7 days must pass before it is possible to begin grouting the seams.
There are various types of glue that make it possible to start jointing already on the fifth day, but it is also preferable to wait.
Many tilers neglect this fact and, in order to complete the job faster, begin to grout the joints the very next day after laying.
This is impossible, since it can negatively affect not only the appearance of already finished seams, but also their quality and strength.
The peculiarity of flooring, compared to wall finishing, is the increased requirements for strength and density. For this reason, the grout for joints must be waterproof and stable to mechanical stress, and in addition have optimal elasticity.
The use of low-quality grouting material can cause the accumulation of debris and dust in the space between the tiles. And the penetration of moisture will promote the formation of fungus.
How to clean seams
The problem can be solved in two ways.
- The conservative method is appropriate for jointing on only tiled walls or in the presence of minor contamination.
- In order to avoid the need for jointing, you need to keep the seams open and clean them from time to time with special-purpose household chemicals.
The less often the cleaning is done, the more abrasive products are required.
Household chemicals are effective only against surface contaminants. Although some dust particles still cannot be washed off. If mold is present, the conservative method is powerless.
Required Tools
To work you will need:
- Small rubber spatula. With its help, it is possible to carefully and uniformly fill the seams without various defects.
- Molding. A mechanism for forming a precise and neat line of joints between tiles. The molding can be replaced with a regular cable with the required cross-section or a toothbrush handle.
- A special knife with a cut blade designed for cleaning glue from joints.
- Construction syringe. Used for comfortable filling of joints with mortar.
- Foam sponge for cleaning the surface from fragments of the composition.
Using washing powder
How to make the seams between tiles white using this method? To do this, perform the following steps:
- The solution is initially prepared by adding a glass of white washing powder to a container with a small amount of water;
- the components are thoroughly mixed, which allows you to obtain a homogeneous mixture;
- the resulting slurry is collected with a hard brush or toothbrush, after which it is used to wipe all the seams on the tile surface;
- while working, it is important to move the brush back and forth;
- After completing the process, the remaining product is washed off with water.
This method provides quick whitening of seams, but this option is only suitable for seams that are white in color. Additionally, the result is short-lived, so in just a few days the seams will become dark again.
Materials
The final stage of finishing work is carried out with a grout mixture. Even in the case of seamless masonry, it will be required, because minor gaps always need protection from the penetration of moisture and dirt. Moreover, grout solves several main problems at once. Namely:
- preventing the appearance of fungi and mold;
- auxiliary strengthening of the outer coating in the cladding;
- ensuring dryness even during subsequent care;
- creating the desired decor for the cladding.
There are several types of grout. All of them, one way or another, have their own advantages and disadvantages. Therefore, their use is designed for a specific solution to problems.
Cement based
They are the simplest. Their use is not difficult, and they are sold ready-made. Application consists of pouring out a powdery substance and mixing it with water in special proportions.
You can find them on the back of the package.
Noteworthy is the fact that seams larger than 0.5 cm are not treated with such a mixture. Carry out the work carefully so as not to scratch the surface of the facing material.
The advantage will be the ability to choose from a wide range of colors and shades. But the disadvantage lies in the possibility of destruction from strong household chemicals.
Furanic
This grout is used in industrial facilities. The whole point is its complex application. The facing material must first be coated with ordinary wax.
Then, if it goes beyond the seam, the substance is removed using a hair dryer. Otherwise, it will dry out, and an aesthetically beautiful look cannot be achieved without replacement.
The main advantage will be the ability to use very caustic chemicals for cleaning. This ensures disinfection at all possible levels. The only downside is the black color of the grout.
Epoxy
Used in places of public use or sale of goods. It is easy to clean from dirt, as it is resistant to acid or strong alkali. The advantages include the presence of a solid substance in the chemical composition.
After drying, any dirt can be cleaned off quite easily. There is also a wide range of shades to choose from. The embodiment of the most daring ideas or design solutions is available to buyers.
Disadvantages include high cost and the inability to work in very small seams. The resulting consistency is very viscous. All work is carried out carefully.
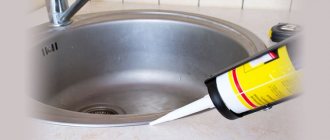
Silicone based
Very easy to use. It is easy to learn, even for beginners, which makes it possible to use it in any household. The solution does not spread after squeezing out. All hard-to-reach places are processed without any difficulties.
Unfortunately, this is where all the advantages end. Among the disadvantages, instability to moisture is noted.
Moreover, this includes not only bathrooms, but also simple cleaning. If you neglect this property, you will have to fight fungi and mold.
Latex
One of the most convenient to use. The chemical composition is extremely elastic, which ensures 100% filling of each seam. Does not change its properties due to exposure to temperature or moisture.
It is even possible to cleanse with strong chemicals.
The advantages include a huge selection of shades and colors.
One of the disadvantages is the need to use antiseptics during jointing. These additional measures will once again protect against the appearance of fungi or mold. Also, during application, it is necessary to cover the edges of the facing material with masking tape.
Types of grout mixtures
There are several types of grout for joints:
- Cement . This composition is based on cement; additives and color pigments are also used. To use this composition, it is mixed with water to the consistency of thick sour cream. Dry grouting is much more economical, since tilers use the required amount of cement at a time. Sand is added to the composition for wide joints, which, due to its dispersion, fills the joints. The material is easy to use, low cost, durable, but not resistant to mold.
- Epoxy . Such mixtures consist of two components - a hardener and an epoxy resin. The finished mixture looks like a dense elastic mass. This grout is not very popular, but it is resistant to moisture, hardens quickly, is durable and can remain attractive for ten years.
- Polymer . This includes silicone and silicate compounds. Special polymer additives are added to such grouts; the putty is easily washed off and creates a dirt-repellent surface.
Examples of epoxy grout mixture Source ohiogas.info
Cement grout is considered the most popular; epoxy mixtures are less commonly used. Tilers often choose dry compounds, as they have lower consumption and are economical.
Optimal seam width
It is necessary to decide on the selection of the width of the seam before the laying process. It depends on the preferences of the master or designer.
Here are a number of recommendations that can help you choose the best type:
- Seams wider than 12 millimeters will make the edges of the tiles visually smoother and hide their disadvantages. But you need to understand that this width reduces the reliability of the tiles, which leads to the formation of cracks. In order to avoid this, it is possible to add sand with large particles to the solution.
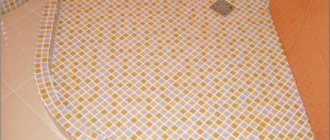
- A joint with a width of 3 millimeters is best suited for square tiles measuring 10 - 60 cm.
- It will be difficult to fill a 1.5 mm joint with grout. If the job is done poorly, moisture can seep between the tiles and ruin it.
There is no need to be afraid of making the seams wide, since narrow ones are much more difficult to work with and not any solution will be able to completely fill a small space.
Mechanical methods
Mechanical methods are the best way to remove grout. Such methods are much more effective than traditional ones. They will certainly remove the putty from the surface itself, as well as remove it between the seams.
How to remove grout? Old putty between the tiles can be removed with a construction knife, joint spreader, electric drill, Dremel and screwdriver.
Absolutely all methods work well and clean seams perfectly. You don’t have to immediately run to the store to buy a tool, look at what you have in the house, one will be enough.
And if you can’t get the job done, or the tool seems inconvenient, then check out other methods and choose the most suitable one.
Construction knife
This method of removing old grout from tile joints is the safest.
Any mechanical procedures require maximum attention; try not to be distracted by conversations and other details.
How to remove:
- Insert a paint knife into the old grout between the tiles.
- Start moving the blade at an angle. That is, slowly move it from the bottom corner of one tile to the top corner of another. Repeat the same thing, only from the bottom second to the top first.
- The old putty will immediately begin to fall out. Pry up the remains and remove them from the joints with the same painting knife.
This tool is very sharp, so be extremely careful. Also carefully handle the surface cleaned from the edges of the fugue; you can easily knock off the corners.
Stipper
A suture opener is a tool that is designed specifically for this procedure. Removing old grout with its help is quick and easy, without damaging the tiles.
The seam spreader has a comfortable handle and a sharp blade. An alternative is a painter's knife or a kitchen knife.
How to remove old grout:
- Bring the stitcher to the seam and press the blade against the seam.
- Apply a little force to get the blade to bite into the puffer. Carefully go over the grout areas on both sides.
- Then pry up the putty and it will fall off on its own.
Be careful with corners. These places are considered the most vulnerable to chipping.
Electric drill
Cleaning can be easily done with a tool such as an electric drill. Removing the fugue between the joints of tiles in the bathroom or kitchen is not difficult if you have previously used a similar device.
How to remove grout from tile joints with a drill:
- Buy a thin drill and change it. The drill should be slightly smaller than the seam itself so as not to touch the tile, otherwise it will crumble.
- Mix vinegar and water in a 1:2 ratio and apply it over all joints. This mixture will loosen the putty a little. In half an hour you can start working.
- Set the device to medium speed. If this is your first time removing the puffer this way, turn on low speed.
- Hold the tool well so that it does not fall out while working.
- Remove the fugu carefully and take your time. Work an hour more than planned, but keep the tile intact.
- After you have cleaned the seam between the tiles, go over it with a brush, removing any remaining fugue or cement.
Then you need to wipe off the remaining putty from the tile itself. Use chemical reagents or traditional methods.
Once the surface is dry, apply a new grout between the joints of the bathroom tiles.
Dremel
The electric chisel resembles a smaller and simplified version of the grinder. It's easier to work with, which is why most people use it.
Principle of using the tool:
- Turn on the device.
- Work in a circle along the joints, trying not to touch the edges of the tiles.
- All that remains is to wipe off the remaining putty from the surface and brush off the dust.
This procedure should be carried out if you are confident in yourself. If your hands shake while removing the fugue, stop. The tile will become cracked or chipped if you accidentally touch the edges.
Screwdriver
If the grouting was done too early, or something got under the seams, a screwdriver will help remove the putty.
Don't miss: Electrical work
This special tool is actually used for something else, but is also suitable for cleaning joints from hardened joints. Professionals in tile laying love to use this device.
How to remove grout from tile joints:
- Buy a thin circle with a brush at the store.
- Plug in the instrument.
- Place the circle on the joint, press the button and start stripping.
Be careful. The brushes rotate at such a speed that you can easily damage the tiles.
Choosing a color
Usually the shade of the grout is chosen to match the main color of the tile. It is possible to deviate by several tones, but designers do not recommend choosing shades that contrast with the main color.
However, if you choose the right palette, it is possible to use diametrically opposed combinations in order to achieve a fascinating and unique room design.
When selecting grout for floor tiles, it is better not to select white-colored solutions because of its impracticality. After a short period of time, the seams become a dirty gray shade. For snow-white tiles, designers usually advise choosing consistencies and pastes of light gray colors of different intensities.
Rules for using soda and peroxide
Additionally, you can update the seams using regular baking soda, which is mixed with hydrogen peroxide. But the method can only be used by persons who are not allergic to these compounds.
To obtain a solution, you need to mix 4 tablespoons of soda with 3 tablespoons of peroxide. If there are greasy stains in the seams, then you can additionally add a small amount of gel to this solution. The resulting solution must be thoroughly rubbed into the existing seams. The product is left on the surface for several hours, after which the surface is wiped with a dry cloth.
Preparation of the solution
It is imperative to prepare the mixture in a clean and dry container (for example, a bucket), since if water or dust gets in, the grout may become unusable or lose quality.
To dilute the container, you need to pour water or another required mixture (will be noted in the instructions) in a ratio of approximately 3/4 of the container.
The dry mixture must be added gradually, thoroughly stirring the composition. Then the remaining water is poured into the mixture in small doses.
The resulting mass must be allowed to stand for approximately 10 minutes so that the dry lumps can become saturated with liquid. After the composition has infused, it should be thoroughly stirred one more time until a homogeneous mass is obtained.
IMPORTANT! It is necessary to regularly monitor the consistency of the solution, since in some cases less water may be required than specified in the instructions.
Why is this necessary?
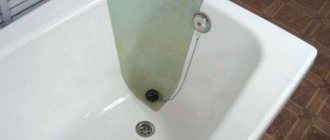
Grouting (fugue) is not required when laying seamless walls - tiles without chamfers are used for this. A perfectly even, tight butt laying is assumed. At the same time, it is almost impossible to find joints on a textured surface.
But ordinary citizens are unlikely to lay out designer collection tiles in their baths and kitchens, so the grout that is needed for ordinary tiles is a pressing issue.
For ordinary tiles with chamfers, grouting is necessary - this is the only way to achieve the tightness of the wall.
Without proper treatment of the joints, moisture will accumulate under the tiles, which will ultimately lead to the tiles falling off.
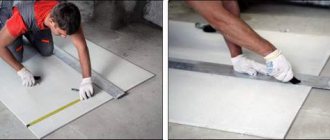
Surface preparation
Before grouting, newly laid tiles should be left for about 7 days. But it is worth considering that different types of tile adhesive have different drying times. 7 days will allow literally all types of glue to dry.
Next, you should clean the excess from the seams using a soft metal float, knife or sandpaper.
Wipe with a sponge or vacuum cleaner to get rid of small particles. Without these steps, the tiles or grout may soon begin to crack.
What the modern market offers: popular brands and formulations
The market for grout mixtures offers options from foreign and domestic manufacturers. The most popular brands with brief characteristics:
- Ceresit - this kind of fugue has long been a success among tilers, because the company produces easy-to-use cement grouts. Just add water and achieve the desired consistency - the material is ready for use. Latex and epoxy compounds are sold separately. Bulk mixtures are sold in packages of 2 and 5 kg, suitable for joints up to 10 mm. The finished compositions are packaged in buckets of 2 and 5 kg.
- Mapei . An Italian company offering cement and epoxy mixtures. Suitable for 2-5 mm seams, available in 2 and 5 kg packs.
- Litokol . A company from Italy also produces cement and epoxy grouts for joints. Cement compositions require preliminary dilution with water; they are suitable for grouting joints of 1-6 mm. The epoxy base allows the composition to be used for joints of 1-15 mm.
- Kerakoll . The company produces dry and liquid mixtures that are immediately ready for use. Epoxy grouts are suitable for tiles in the bathroom and where there is high humidity. The mineral composition is suitable for seams up to 8 mm in size.
- KIILTO . Manufacturer from Finland, cement mixtures are suitable for narrow joints; they tolerate moisture and air well. Such compositions are packaged in packs of 1.3, 10 and 20 kg.
Manufacturers of grout mixtures Source remontidei.ru
Each manufacturer offers tilers different types of mixtures. Cement-based compounds are more suitable for narrow joints, while ready-made epoxy or latex compounds can be used on larger tile joints.
See also: Contacts of companies that specialize in insulation and finishing of houses.
Application technology
There are different tools for application, but all you need is: a small container, metal and rubber spatulas, a bucket of water, a thick sponge and a piece of cable. Prepare the grout mixture according to the instructions on the package. Most often this is the ratio of 1 kilogram of dry mixture to 300 milliliters of water.
The main thing is not to add too much water as this will affect the properties of the material. Add the dry mixture little by little to the water while constantly stirring it. Let it sit for about 5 minutes and you can start grouting.
After making the mixture, use a rubber spatula to press the mixture into the seams, collect the excess and rub it in again.
Then we pull it perpendicular to the seam with a metal spatula and cut off the excess. And let's move on to the next section. After about 15-20 minutes, we begin to wash the seams.
At this stage, it is important to squeeze the sponge out well, as if it is very wet, so-called patches of different colors may appear.
Using a sponge, we remove the grout around the seam and if you chose the right time, the seam does not stretch behind the sponge, but it is still elastic. After this, we take a cable that fits the width of the seam and press it in, thanks to which we get indentations that are made using a professional spatula.
We wipe the squeezed out mixture with a sponge, then rinse everything again with a damp, but not wet, one, and after a day the seam may come into contact with water. And after 5-7 days, it will reach its final strength.
Video description
The process is described in more detail in the video:
Tilers make sure that the grout mixture does not protrude beyond the plane of the tile, otherwise it will be difficult to wipe it off later. Ideally, the grout should be slightly pressed into the space between the tiles. Then the master runs a spatula along the seam, removing excess. The tiles embroidered with grout should stand for 24 hours, then you can begin cleaning work.
Finish stage
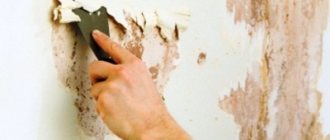
Some tilers immediately wipe the tiles, others wait until the grout is completely dry. To do this, take a damp cloth and carefully wipe each tile, without touching the space with seams. A white coating may form on the surface of the tile after applying the grout mixture - this must be removed. To do this, use a damp sponge or cloth. Difficulties arise when the tile has a porous surface and the grout mixture eats into the tile relief itself - then it becomes difficult to wipe off the grout.
Grout update
The most common way to update grout is to use household chemicals. But it can be different, from powders to all different gels. If you are going to use a powder product, the most popular are: Comet, Bref, Pemolux and Domestos.
Of the listed products, only Comet and Bref should be considered for use.
Comet is worth using due to its disinfecting ability. And Bref because of its low price in Russia.
Gels are very expensive and are used only when nothing else helps.
The way to use them is to apply the gel to the seam and then leave it for 8-9 minutes. Then use a hard sponge and plenty of water to remove the gel and seam.
But no matter what product you choose, we advise you not to use sprays as they are most often the final remedy.
After choosing a product as a brush, you can use a toothbrush or any other brush with stiff bristles. Dilute the product you have chosen with water and dip the brush in it and carefully wipe the seams until they completely disappear.
After that, rinsing with water and bringing it to perfection with sandpaper, drying it and performing exactly the same actions as when applying a seam.
Tips from a tiler
To ensure that you do not have to change only the existing grout to a new one, consider the following points:
- It is better not to use light-colored grout in those rooms where the tiles are most often exposed to contamination;
- It is best to use epoxy grout - such joints will last a long time. However, the price for such grout is quite high;
- The cheapest option is to use cement grout and then treat it with a special agent that prevents the formation of mold and the proliferation of bacteria;
- Avoid prolonged contact of seams with water.
Nuances of choosing a shade
The universal rule for choosing the color of the grout is to match or slightly darker/lighter than the shade of the tile. Another universal option is to use a white fugue, which matches most shades of ceramic cladding, visually slightly expands the bathroom, and also hides minor unevenness in the edges of the tiles and errors made during its installation better than other shades.
For the floor, it is recommended to select dark shades to fill the joints: this will make accumulated dirt and dust less noticeable. White grout on the floor will turn gray in just a few months.
For finishes with a rich pattern or made of multi-colored tiles, a transparent aggregate or a special “chameleon” mixture, which has a different shade from different angles, is suitable.
Another interesting option is to add metallic powder of golden or silver color to the fugue, which makes the seams original and provocative. But it is worth remembering that this method of highlighting seams is suitable for certain design styles.
Criteria for correct selection
It is important to approach the choice correctly; the fugue must perform the following tasks:
- fill the void between the tiles.
- protection from dampness
- maintaining the properties of the adhesive composition.
A well-chosen material turns a tiled wall into an airtight surface.
Qualities of a good material:
- Uniform texture - to create an even layer, without uneven inclusions
- Elasticity – a coherent, plastic structure that makes application easy
- Durability – preservation of the seam and its protective properties over time
- Hydrophobicity – the internal structure of the wall is protected from moisture
- Resistance to different temperatures
- Resistance to aggressive environments (relevant when laying out a pool)
- Wear resistance (especially when laying floors or paths)
- Ability to maintain a given color (for example, when exposed to ultraviolet light)
- The optimal seam width for this composition.
The color of the fugue usually matches the main color of the tile; contrasting combinations are used much less frequently.