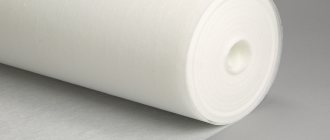
How to glue non-woven wallpaper is a common question, because new materials are increasingly appearing on the market and are quickly gaining popularity among consumers. The time has long passed when paper sheets were glued to every house. Nowadays, non-woven materials are becoming widespread, which will be discussed in this article.
Working with non-woven wallpaper is easier than with paper
Read more about non-woven wallpaper
Working with non-woven wallpaper is somewhat different from pasting walls with regular wallpaper, and can be difficult at first. This is due to the thickness of the product. However, don’t worry: after just a couple of stripes you will master this easy skill, and the work will go much easier from there.
In addition, non-woven material does not have to be coated with glue, since to apply them it is enough to treat only the surfaces of walls, partitions, and ceilings. The main advantage of such materials is their thickness, which can hide some wall defects .
Video - Features of non-woven wallpaper
There are some nuances that help in the process of gluing non-woven wallpaper. Here are some of them:
- non-woven products are recommended for decorating surfaces in any room because they are considered universal. This is largely due to their composition of cellulose fibers and polymer particles that bind the components;
- working with wallpaper is not difficult , just adapt to the new principle of application. This allows you to somewhat reduce costs without allocating money for the services of repairmen, who charge considerable sums for their work;
- The surface of the walls needs to be prepared . The color of the ceilings and walls of the room should be the same shade as the color scheme of the wallpaper you have chosen, since the latter have a transparent texture (that is, white wallpaper can only be glued to a white wall so that the brighter color does not break through the material);
- align the strips end to end. Thanks to this, the seams will not be noticeable on the wall at all, and it will feel as if the room is covered with one layer of wallpaper;
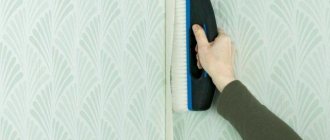
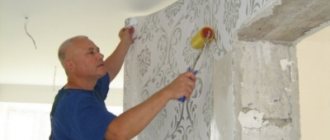
- There is no need to treat the canvas with glue . It is enough to coat only the walls with the adhesive mixture and then apply a strip of wallpaper to them. Afterwards, the canvas is pressed more tightly, and air bubbles are expelled with stroking movements.
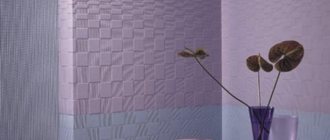
The canvases have a wide range of colors, from pastel to bright red tones
When starting to work with non-woven wallpaper, you need to carefully check the rolls for defects (remember that the rolls may have differences in shade). Then calculate the footage of the room you will cover and cut it into strips of the required size.
53 centimeters wide . Foreign companies provide the opportunity to choose sizes from the following width options: 106, 70, 90, 100 and 140 centimeters .
Important point! Quite high-quality vinyl sheets on a non-woven basis are produced in Germany, France, Belgium and Italy. Dimensions when purchasing materials from these manufacturers can vary greatly.
Table 1. Advantages and disadvantages of non-woven wallpaper.
| Advantages | Flaws |
| · good level of air permeability. With such material, dampness and mold are unlikely to appear in the apartment. This property is preserved only for wallpaper that has not been covered with vinyl; · There is no variability of forms. After drying or after several years of service, the canvases do not deform; · environmental friendliness and safety. This type of wallpaper is not harmful to humans. | · It is prohibited to wash products that are not covered with paint or vinyl. Otherwise, the surface will completely deteriorate in the near future, if not after the first procedure. The maximum that is allowed is vacuuming to remove dust, cobwebs and other contaminants. |
| · Can be used for painting. This is a fairly common solution for repairmen. You should know that during such work the canvases do not change in any way, do not tear, but, on the contrary, become stronger. Products can be painted up to ten times without harm to them; · ease of use. Non-woven products do not need to be treated with glue, and therefore the joining of two strips is smoother and faster; · the ability to stick products on any material (plasterboard, chipboard, fiberboard, wood, concrete walls and partitions, etc.). | · high cost of material. The price of non-woven fabrics may vary, but it will be almost impossible to find a high-quality product at a low price. |
Find out how to glue vinyl wallpaper on paper, and also read the instructions on how to glue it correctly in a special article on our portal.
Vinyl wallpaper on paper - harm and benefit
It is known that vinyl coverings consist of two layers - a decorative top layer and a basic bottom layer. The top layer is always polyvinyl chloride - a synthetic material of artificial origin. This explains the reviews about the dangers of vinyl coverings - PVC does not allow air to pass through and contains formaldehyde. Toxic substances are released into the atmosphere only when the material burns, so vinyl wallpaper is not poisonous, as many still believe.
With the throughput, everything is more complicated - air, in fact, does not pass through them, since vinyl does not have pores. This situation is fraught with disruption of steam circulation in the room and the accumulation of condensation on the wall under the decorative covering. All this leads to the appearance of mold and mildew, which is harmful to health.
It is quite easy to combat negative factors - the walls are treated with fungicidal primers before pasting. Many modern paper-based vinyl wallpapers are pre-disinfected during production; no additional measures are required.
It is unlikely that vinyl will cause harm to the inhabitants of the house, but precautions will not be superfluous - it is better to treat the walls and buy high-quality material. Thus, the disadvantages of PVC are quite conditional.
Choosing wide canvases
The fewer joints there are between the wallpaper strips, the less noticeable they will be. It is for these purposes that people most often purchase meter-long canvases. Now we will tell you how to choose the right canvas of a given width.
Calculating the amount of wallpaper and preparing the necessary tools
How to choose meter-long wallpaper - step-by-step instructions
Step 1: Look at sample stands. Any product, especially one covered with vinyl, looks completely different on the wall than you see on a rolled up roll of the product. Therefore, always first look at samples of pasted wallpaper - these should be in all decent stores specialized in construction and repair.
In specialized stores, pieces of wallpaper are often pasted onto the wall as an example.
Step 2. When choosing wallpaper, pay attention to the top and bottom rows of samples. In a row located at eye level, samples are usually placed that are either practically not taken or are overpriced for the product. In this way, workers attract the attention of customers who are usually looking straight ahead.
Wallpaper samples can be installed in several rows, and those at eye level are usually less in demand
Step 3. Select rolls of wallpaper from one collection, series. Check the batch number on the packages - it must match. Otherwise, you run the risk of purchasing a product of slightly noticeable, but different shades.
All rolls must be taken from the same batch - others may differ in tone
Step 4. When choosing the color of the wallpaper, take into account the color scheme of the entire interior of the room that will be covered with these canvases. You may have to take into account the characteristics of the furniture and room decor.
When buying non-woven materials, do not ignore design decisions: all colors must be combined correctly
Step 5. Check the quality of the wallpaper. As already mentioned, the price of good non-woven fabrics is very high, and therefore it will be a pity for the money spent due to your inattention and trust in sellers. Always check the product for integrity when purchasing.
Prices for different types of wallpaper
Wallpaper
Low-quality non-woven products can tear even before they are applied to the wall
Product Features
Before choosing, you must take into account a number of features that will allow you to understand how high-quality the composition you are using:
- when stirring the glue there should be no clots or lumps;
- storage in packaging can reach a very long time;
- high-quality products protect against the formation of fungus and mold;
- it must be safe for health;
- The preparation process is indicated on the package and even a beginner can perform it.
If the glue has all these characteristics, then most likely you are buying a quality product. Preparation of the solution takes no more than 10 minutes.
Inconveniences in working with non-woven wallpaper
As you already understood from the table above, there are no particularly significant disadvantages to non-woven wallpaper. In order to get walls with a perfectly smooth coating at the end of the renovation, you need to prepare the walls for this process. To do this, you must first level the surface of the walls (if there are defects and large flaws, the product will hide minor flaws), and then putty and sand the walls.
If you need to putty walls, we definitely recommend that you familiarize yourself with this process in more detail in our separate article - How to putty walls with your own hands.
But even such a seemingly simple job has several disadvantages that significantly complicate the process of gluing the material. These include:
- the need for a preparatory stage before wallpapering. How well the canvases stick and how they look will depend on the quality of the wall surface;
- you will have to have at least one roll of the same wallpaper in stock . Such forethought will save you if suddenly there is not enough product or the strip breaks while gluing it to the wall. A spare roll must be taken with the same batch number as the rest;
- availability of an assistant for high-quality wallpaper gluing. This is necessary when you use wide, meter-long materials. The second person must hold the edge of the strip so that the canvas does not stick to the wall on its own, distorting the entire picture;
- immediately after gluing, you need to expel the air from under the wallpaper . Otherwise, over time, the canvas will swell even more in these places, and then begin to peel off.
Living room design, complemented by non-woven wallpaper of different textures
Important point! Non-woven fabrics are non-toxic and do not harm humans. Therefore, this material can even be used to furnish a children’s bedroom.
Recommendations from experts for beginners
To hang wallpaper correctly and beautifully, you cannot do without certain knowledge, which you can glean from the advice of professional finishers:
- Give preference to a stepladder rather than a scaffold - this is a more stable option.
- When gluing with non-woven fabric, there is no need to coat the strips with glue in advance. It is applied to the walls.
- A 1-2 centimeter allowance on the slopes will allow you to get a neat edge. Wait for the wallpaper to dry, then trim off any excess.
- Do not join the panels at the corners; make transitions from wall to wall with a large allowance, the size of which is equal to the length of the deviation of the wall in a vertical position.
- Remove excess fabric with a sharp knife blade.
Also, do not neglect the use of a building level - it makes it easier to glue the canvases.
Be sure to use a building level. It helps to hang wallpaper evenly, avoid unevenness, join corners, and do the job beautifully.
During the pasting process, it is important to keep your hands clean, promptly wipe them with a napkin, removing glue and dirt.
To avoid injury, experts advise laying plastic film on the floor after each sheet. But tiles and parquet are covered with cardboard or paper.
Additional tools
As already noted, the main advantage of non-woven wallpaper is that it is not necessary to apply glue to it. This means that the process does not require a large room to place long strips of material on the floor to process them.
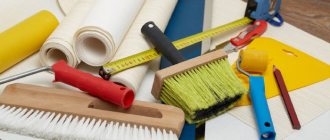
In order to wallpaper a room, you need to immediately find all the tools necessary for this, so as not to look for them later. You may need the following items:
- the canvas itself and the glue that suits it;
- building level;
- two small containers, in one of which you will knead the adhesive composition, and in the other you will hold water;
- metal spatula and roller;
- a plastic spatula and a brush with which you will apply the adhesive;
- tape measure, pencil, stationery knife;
- foam sponge, sandpaper;
- starting and finishing putty, sickle mesh, primer;
- paint (if you will be covering the canvas on top).
Listed above are not only tools for gluing wallpaper, but also materials for preparing walls for decoration. You will also need plinths or plaster corners, polyurethane foam, and polystyrene foam for the final processing of the walls. This will make the renovation complete and aesthetically pleasing.
Set of accessories for working with wallpaper
Conclusion
Now you know what foam wallpaper is and what properties they have. If you have any questions regarding this coverage, ask them in the comments and I will be happy to answer. But, preview the video in this article.
– wallpaper made by applying a layer of vinyl to a base. The screen printing method allows you to create a variety of patterns and textures. soft to the touch, have a relief surface and a pronounced pattern. As a rule, this material is used for pasting the walls of non-residential, well-ventilated premises: hallways, kitchens, dining rooms, living rooms. But there are also special foamed vinyl wallpapers for bedrooms with micropores; they usually display an environmental safety icon.
Foamed vinyl wallpaper, also called structural, is becoming the most popular type of material for wall decoration today. They are used both in residential buildings (private houses and apartments) and in public buildings (offices). There are foamed vinyl wallpapers on non-woven and paper bases. Buy vinyl foam wallpaper
Now you can do it at very affordable prices.
Preparing walls for decoration with wallpaper
The surface of the walls must be carefully treated before wallpapering. If you leave noticeable flaws on the surface, then soon the glued canvases will begin to lag behind, and then completely peel off or tear in some places. It is clear that such an appearance of the coating will greatly spoil the external qualities of the room, so try to avoid this.
Prices for mixtures for leveling walls and ceilings
Mixtures for leveling walls and ceilings
Preparation for pasting is a difficult stage in this work, which involves the following:
- Removing all sockets, switches , hanging furniture, chandeliers. Moreover, the holes that appeared from these works must be sealed with tape.
- Strip off old wallpaper . If they are paper, then wet them with water first - this will remove the paper faster. Non-woven fabrics are much easier to remove; you just need to pick up the edge and then pull it. Plaster, paint, whitewash also need to be removed or washed away.
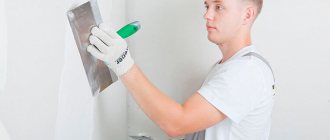
- After this, you need to evaluate the external condition of the room: look for cracks, creases, holes, tubercles. These defects must be corrected with putty using a sickle mesh. Let the mixture dry. Then apply a finishing coat of putty, smoothing the surface of the walls. If there are uneven differences, smooth them out.
- If the surface of the room is in terrible condition, which cannot be corrected with putty, cover it with plasterboard . Treat the seams with putty so that it is not noticeable.
- Where the two-phase putty was applied, go over it with sandpaper. Clean the room from dust, dirt , wipe the walls with a damp towel or rag.
- Treat the surface of the walls with a primer . But don’t rush into this – the walls should be allowed to dry out.
Video - Preparing walls for decoration with wallpaper
That's all. The main points of preparing the walls are considered, and the walls are leveled. Remember that only with a careful approach can you achieve a beautiful renovation. Also know that neglecting the primer layer will cause the adhesive to soak into the wall, making it difficult to glue the product.
The smoother and lighter the walls are, the better the wallpaper will look.
Voting for the best adhesive for vinyl wallpaper
What adhesive would you choose or recommend for vinyl wallpaper?
Semin Sem Vinyl
0.00 % ( 0 )
"Snowflake -3" Melate
25.00 % ( 1 )
Kiilto Master Pro
0.00 % ( 0 )
Lacra vinyl
0.00 % ( 0 )
KLEO total
0.00 % ( 0 )
Moment Vinyl
0.00 % ( 0 )
Axton vinyl
0.00 % ( 0 )
Quelid vinyl indicator
0.00 % ( 0 )
Quelid special interlining
25.00 % ( 1 )
PUFAS Euro 3000
25.00 % ( 1 )
Tytan Euro line vinyl with indicator
0.00 % ( 0 )
Metylan
0.00 % ( 0 )
Preparing the glue mixture
For non-woven wallpaper, preference is given to universal or special products for this type of material. Before the purchase itself, as well as mixing the glue, you need to carefully look at its compatibility with this wallpaper. This is an important point, since different types of adhesive mixtures are offered for different sizes of material.
How to mix the adhesive composition:
- Pour water at room temperature into a bucket in the proportions that you read in the instructions.
- Stir the water to form a funnel in the middle.
- Slowly add glue into the funnel, without ceasing to stir .
- Mix the mixture and leave for half an hour.
- After 30 minutes, mix the glue thoroughly again.
Prices for various types of glue for paper wallpaper
Adhesive for paper wallpaper
The mixed glue should sit for half an hour
The composition is not applied to the product - they only need to treat the top layer of the walls. However, to be more confident, you can apply the compound to the material. You need to work in a concentrated manner, especially in the summer, since the adhesive mixture quickly hardens on the surface.
Important point! Follow the instructions each time when mixing the glue. Incorrect proportions may result in a different consistency. As a result, the properties will be lost and you will not be able to work with this composition. It is also recommended to use freshly prepared composition each time.
The most convenient way to apply glue to the wall is with a lint-free roller
Performance characteristics and properties
As already mentioned, non-woven wallpaper for walls has more weight. This determines the requirements for the adhesive that must be used to attach the sheets to the surface. In addition, it is necessary to take into account that the thickness of the coating and its upper layers are quite transparent - this can lead to translucency of heterogeneous plaster.
This problem does not apply to wallpaper that can be painted - a layer of paint will hide the difference in shades. But still, paints that are too light can get undesirable shades if the thickness of the paint layer is low.
Image of patterns on non-woven wallpaper
Regarding harm, we can say the following - at an average temperature of 15-30 degrees in the room, they do not emit any harmful substances. In addition, non-woven fabric is resistant to fire - even in the event of a fire, it will simply melt without burning. Performance specifications are shown in the table below.
| Characteristics | Values |
| Wallpaper width, m | 0,53/1,06 |
| Length for regular canvases for painting, m | 10,05 |
| Length for repair interlining, m | 30-50 |
| Density, g/m2 | 130-200 |
| Number of repaints | 3-10 (depending on the type of material) |
| Moisture resistance | Waterproof - super washable |
| Service life, g | 10-25 |
| Removal from surface | No leftovers |
Glue strips of canvas
The process of gluing wallpaper on walls itself is unlikely to raise questions, since it is no different from working with paper wallpaper. The only difference is the optional use of glue for the canvases themselves (excluding hot weather and working with ceilings).
Important point! The main condition when working with wallpaper is to completely prevent any drafts or winds from entering the room. Otherwise, the stripes will move away from the surface.
Now let's talk about how to glue the canvases themselves:
- Prepare the surface of the walls, and then take out the necessary tools, the already mixed glue and the wallpaper itself.
- Determine in which direction you will glue the canvases. This must be done taking into account the angle of incidence of the light.
- Prepare one strip of wallpaper, apply the adhesive to the wall using a brush or roller.
- Fix the canvas on the surface.
- Moving your hands from the central part of the canvas to its edges, expel the air from under the wallpaper.
- Remove excess wallpaper from the bottom by cutting it off with a utility knife.
- As you work, carefully monitor the consistency of the pattern on the wallpaper so that the pattern appears continuous even if the seam is noticeable.
- Combine all the canvases clearly end to end.
Video - Pasting non-woven wallpaper
To ensure that the bottom edge is even, apply a spatula to it and trim the material along it. If you choose wallpaper with a pattern, then you need to measure the canvas in advance so that the pattern matches. Cut off the rest so as not to get confused with the location of the pattern.
A spatula is necessary to ensure that the cut edge is smooth and straight.
Find out how to choose wallpaper for brickwork, and also familiarize yourself with the gluing process in a special article on our portal.
A few words about care
The manufacturer must write about wallpaper care in the operating instructions. Marking symbols are also present. For example, waves:
- 1 - wiping with a damp sponge is acceptable;
- 2 - can be washed with a cloth and a gentle detergent;
- 3 with a comb - the coating can withstand cleaning with a brush with soft natural or synthetic bristles.
It is worth remembering that the substrate absorbs moisture. Because of this, the edges can quickly peel off or become deformed due to periodic swelling and drying. To avoid this, it is enough to limit yourself to care and timely removal of moisture from the base using a dry sponge or rag.
Working with difficult areas
There are areas in the room that can be called difficult when working. These include corners of rooms, doorways, window openings, arches, and so on.
Working with these areas involves the following:
- Corners in the room . In order to paste over the inside of the corners with a neat seam, you need to measure the area from the edge of the already pasted wallpaper to the other wall, adding 1 centimeter to this. Spread the entire adjacent part, as well as the small edge of the next wall, with glue and glue the canvas, covering the second wall by 5-6 centimeters . Next, carefully level the material and cut off the excess part from the other wall, leaving only one centimeter. The same should be repeated on the other side of the corner. After this, the product must be cut vertically so that the bottom layer is not touched. Then carefully align the edges of the wallpaper - you will get an even joint without visible seams.
Processing internal corners
- Door and window openings . If the canvases are without ornament, then it will not be difficult to paste: you will have to measure out the required amount of wallpaper and glue it to the top and bottom of the openings (in the case of a window, in a doorway - only on top). If the product contains a pronounced pattern, it will be more difficult. You will have to select a strip of wallpaper, measuring it so that it matches the ornament, and you also need to select the position of the door or windows. After this, cut out the place in the canvas where the doors and windows themselves are located, and then glue the strip to the wall.
Working with door and window openings
- Unfolded corner . If the room has an angle of more than 90 degrees , then the work cannot be done according to the first principle - the overlap will be very noticeable. In this case, it is recommended to stick the canvas, extending it onto the other wall exactly 2 centimeters . But the overlap is not made the same - the second strip must be glued so that the overlap is only one centimeter. This way the overlap will not be noticeable, and the seam will remain smooth and neat.
Processing a rotated corner
How to glue corners?
It is important to prepare the corner. This is done at the stage of filling the walls. Then the corners need to be equipped with special plastic corners, which are attached to the walls with putty.
The structure must dry, after which the walls will be ready for wallpapering.
When a corner is glued, the wall needs to be generously coated with glue, as well as the plastic corner itself (of course, if it was provided for when preparing the walls).
The panels will overlap, because gluing a whole panel into a corner is not recommended by experts. After all, the angles in our rooms are often far from ideal.
Therefore, you can expect defects: the corners of the wallpaper will wrinkle, the strip will become skewed, which will affect the evenness of the next one. To prevent this from happening, the corners must be glued correctly.
The basic principle of gluing non-woven wallpaper in the corners is as follows. The canvas needs to be glued so that there is a slight overlap on the adjacent wall. The ideal option is up to two centimeters. We glue the next strip on the other wall, gluing it to the corner with a slight overlap. Then this “tail” must be cut off using a knife, focusing strictly along the vertical of the corner (along the inner line of the corner).
Thus, under this canvas we will have up to two centimeters of cloth from the adjacent wall glued. And this canvas will rest its edge against the corner.
