LED strips are becoming more and more popular. They are used both as decorative interior lighting, acting as part of the overall design scheme, and as elements of main lighting. The very popular replacement of a conventional lamp with lighting devices stems from the practicality and cost-effectiveness of these devices. After all, they are distinguished by minimal energy consumption, having decent indicators of the light flux that they create.
To ensure the effectiveness of this lighting scheme (regardless of whether it is the main lighting or decorative), an accurate calculation of the power of the tape and the choice of its type are required. You also need to take into account the need to properly connect the LED strip. As a result, its maximum durability is ensured, failures and final malfunction are eliminated.
LED strips, varieties
Features of LED strip
This tape has the form of a flexible solid board. The width varies. LEDs with other elements necessary for operation are mounted in this one. The placement of LEDs can be single-row or double-row. In this case, the same step is observed. Thanks to it, the light is scattered evenly.
To determine the characteristics of the purchased tape, you need to be able to decipher the markings that are applied to this tape.
The color of the luminous flux, in addition to the abbreviation, is sometimes written in full words (English and Russian languages are used). This is determined by the manufacturer. In addition, it makes sense to clarify that the tapes (W) producing white light come in 3 shades - warm, neutral, cold. In living spaces, warm and neutral colors are predominantly used. Whereas cold is more suitable in the office.
The specific power consumption is indicated on the label, the location of which is the bay. It also indicates the parameters of the light that 1 LED emits (sometimes also expressed in linear meters and relative to the equivalent of an ordinary incandescent lamp). The power supply voltage must also be indicated.
LEDs have dimensions that comply with certain standards. The most popular options are SMD 5050 and 3528. On 1 m 3528 there are 60, 120 or 240 diodes, on 1 m 5050 there are 30, 60 or 120. This type of tape can have a self-adhesive layer on the back.
Each tape is sold by the meter. Taking into account the model, 1 m can contain a different number of diodes.
Every SMD device has a contact pad. It provides extension of the tape or assembly of the required extended tape from 2 or more fragments. Using these areas, indicated by a scissors icon, it is possible to cut an excessively long tape into shorter strips.
Tape sections are spliced by soldering or special LED connectors. As a result, switching of 2 or more segments is significantly simplified and accelerated.
The tapes have different widths. The production of very narrow SMD tapes has been launched, the width of which is from 3 to 4 mm. They can be mounted on panel ends or on the walls of shelves and cabinets, and also in hard-to-reach places for lighting.
DIP LED is an LED whose difference from those used for mounting on flexible strips lies in its shape. Their diameter can be 3 or 5 mm. They can be mounted on flexible cores in the center and on special legs. The garland, which is assembled from similar lamps, is filled with silicone. Its length may vary.
Another option involves placing a DIP LED inside a flexible matte silicone tube.
Garlands and tubes are used for indoor and outdoor lighting due to their high moisture resistance.
RGB is a multi-color type of tape. The combination of colors and their parameters are provided by a special controller.
LED strip power supply
To ensure long-term and normal operation of a 220 V LED strip, you need a power supply that converts energy. Often it is not included in a single set with the tape. For this reason, it is required to be selected for electrical voltage in terms of power and purchased separately.
In terms of electrical voltage, tapes with 12 V are most often used. The 2nd place in popularity is occupied by those that require an electrical voltage of 24 V.
The power of such a tape is determined by the number of diodes per linear meter and is 4-25 W. However, there are also options that are much more powerful. The power must be specified when purchasing the tape, as well as everything that is needed to connect it.
To determine the power of the required power supply, it is necessary to multiply the specific power of 1 linear m of tape by the number of m. Then it is recommended to add 25 to 30 percent of the power reserve to the resulting value.
As a result of these calculations, the minimum power that the power supply should have will be obtained. For example, if an SMD 3528 tape is 5 m long with a power density of 9.6 W, a power supply whose minimum power is 9.6×5+25%, i.e. 60 W, is required.
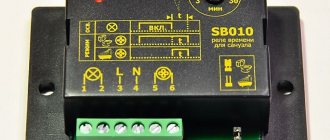
Controller (dimmer)
It is a device whose purpose is to control a strip-type lamp with diodes. To ensure optimal functionality of the RGB strip, a controller is required in any case. After all, with the help of this device they set the range of colors and light parameters. In a monochrome film, you often can’t do without a controller. With its help, it is possible to turn on certain zones of the lighting system and adjust the brightness of the light created by the strip.
The controller is capable of controlling the system when the user does not interfere with the process. For example, in accordance with the program laid down by the manufacturer and in which a smooth change of colors is assumed. This type of device has the lowest price.
The rest are controlled using the remote control. This ensures convenient operation. Commands can be transmitted using an infrared receiver or via a radio communication channel. Those controllers that are controlled via a radio remote control have wider capabilities, since these devices have more different light adjustment modes.
Correct determination of the required power of the device plays an important role. It can be 72, 144, 180 or 288 W. Similar to the power supply, it is advisable to select a device with a power reserve. With a lower parameter compared to the LED strip, the controller will quickly break down.
Light brightness
This indicator should also be taken into account. When choosing a tape, it is often difficult to understand how it will provide lighting for a particular room. For this reason, digital marking plays an important role. She can tell you about the dimensions of the strip's LEDs and the intensity of the light they create.
- 3528 is a code for a tape with low brightness of light. 1 diode emits only approximately 4.5÷5 lm. This tape is suitable for decorative lighting of cabinets, shelves and kitchen work surfaces. It is possible to use these tapes as a means of additional lighting as an addition to the main one when illuminating plasterboard multi-tiered ceilings.
- 5050 (as well as 5055, 5060) are common varieties, since each of their diodes emits 12 ÷ 14 lm. Thus, 1 m of strip having a density of 60 LEDs is capable of providing 720÷800 lm, which exceeds the same parameter of an ordinary 60 W incandescent lamp. Therefore, these strips are suitable for both decorative and main lighting. For good lighting inside the room, you need to consider that 8 sq. m require about 5 m of tape of this type.
- 2835 is a very bright version of the tape, the light intensity of which is 24÷28 lm. At high power, the light of this device is narrowly directed. This feature can be used to illuminate a separate area or an entire room. When using tape as the main light source, you will need 5 m of it per 12 sq. m of premises.
- 5630 (and 5730) - the brightest LED strip. In addition to homes, it is also used in offices and shops. It is often used for advertising structures. The narrowly focused light created by its diodes can reach 75 lm. However, during operation they become very hot. For this reason, when installing such a tape, aluminum heat exchangers are required.
Working with uneven surfaces
There will be no problems installing the tape on a curved surface, since it bends well and for installation you should follow the procedure described above. But if we are talking about porous or ribbed surfaces, it is recommended to prepare by installing special flat plastic or metal strips.
Profile for LED strip.
It is better to purchase an aluminum bar. The material will provide reliable adhesion and also act as a radiator to remove accumulated heat. If it is not possible to purchase a profile, the surface is primed and covered with a layer of varnish or paint to improve adhesion to tape or glue.
How are LED strips used?
Let's consider in which rooms and which diode strips are most preferable to use:
- When lighting a rack, wall shelf, or cabinet, SMD 3528 tape is suitable, the density of which is LED 60 pcs. per 1 linear meter. This is the simplest option at a moderate cost. The color of the luminous flux can be chosen based on personal tastes.
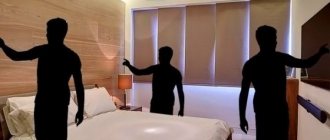
- In bedrooms and children's rooms, it is also possible to use 3528 or 5050 as an additional lighting system. In this situation, it is better to choose soft white lighting with a neutral shade.
- In a large room, SMD 5050 and 2835 are predominantly used as an additional or main light source. These varieties, provided that the required length is correctly determined, cope excellently with their functions.
- SMD 5630 and 5730 are used in large premises, in particular shops.
- To illuminate the car interior, they use SMD 5050 and RGB strips, the protective class of which is no less than IP54.
- To decorate or illuminate an open gazebo or other garden building, you will need to purchase a tape that has a protective silicone shell and a protective class of at least IP65.
Classification
Depending on the parameters of the apartment (room area, ceiling height, size of window and door openings), different modifications of lamps are used.
Areas of application
The ways to use LEDs in an apartment are numerous and are constantly being expanded.
Application options in the apartment:
- built-in;
- ceiling;
- wall;
- hanging;
- console;
- desktop
Countless gradations of halftones combined with creative design create true art.
The miniature dimensions of LEDs allow illumination:
- shelves in the closet;
- kitchen countertops;
- arched openings;
- skirting boards;
- steps;
- door handles;
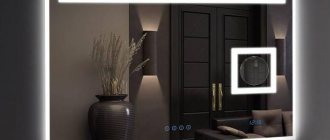
- mirrors
Types of LEDs used
Only a few technologies have been used in mass production.
There are 3 types of diodes for lighting:
- SMD is a common type for household lighting fixtures with a long service life.
- COB is distinguished by its reliability and adjustable light distribution. Several crystals are mounted on one board. Each is individually controlled by a controller. The maximum reached is 128 LEDs working together.
- Filament LEDs are the latest generation of LED lamps. Manufactured with power from 10 to 100 watts. They have the most efficient light output.
The method of fixation of LEDs varies depending on the design. Linear and tape are attached with double-sided tape, glue, and staples.
The lamp base is adapted to the operating conditions:
- threaded - similar to the usual LN, has a different diameter;
- pin - used in ceiling lamps;
- pin - for work in conditions of high vibration.
LED strip manufacturers
There is now a high demand for diode strips. For this reason, they are produced by many companies. Most of all there are cheap Chinese tapes. They are not structurally complex. For this reason, even among inexpensive models it is possible to find a reliable one.
To eliminate doubts about the quality of the tapes, it is advisable to select lighting systems produced by companies from the Russian Federation, Europe and the USA. These include companies Osram (Germany), Joliet Technologies (USA), Cree (also USA), Cobra-250 (RF), JOLIET (Spain), etc.
But when purchasing LED strips from foreign manufacturers, you should take into account that most of the devices described are also produced in China. However, their price is much more expensive compared to the cost of Chinese products from unknown manufacturers.
Light control
Multi-colored ribbons are controlled by a controller. According to a given program, it changes the brightness of the glow, color, order and sequence of activation. The brightness of the light and the inclusion of different groups of lamps can be controlled by remote control.
LED lamps can be equipped with motion sensors that respond to human presence.
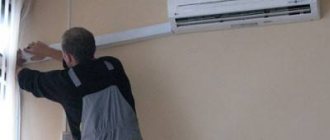
Connecting LED strip
To connect a diode strip inside an apartment or private residential building, you need to purchase a power supply that has the appropriate protective class against moisture and dust. As a rule, units are used whose output voltage is 12 V, in more rare cases - 24 V. Less common are rectifiers with an electrical voltage of 36 V. There are also diode strips that are connected to a 220 V power supply. But they also need constant voltage, not alternating voltage.
If you connect an LED strip, you can also use a dimmer to adjust the light intensity. This helps to relax at home in the evening, especially if there is bright light in the work area (workshop, office) all the time, causing eye fatigue.
Safety precautions
- All installation work is carried out with the power turned off.
- When installing the SDL on a conductive surface, the attachment point is pre-insulated.
- Observe polarity when connecting contacts; multi-colored conductors help with this.
- Do not touch exposed conductive parts while the power is on.
- Do not expose the board to mechanical stress (kinks).
- Follow electrical safety rules when working with 220 V networks.
- Related Posts
- Design and features of a CFL lamp
- Aquarium lamps and fixtures: types, requirements and characteristics
- Antibacterial (bactericidal) lamp: beneficial and negative properties
Are a controller and power supply required?
Sometimes amateur craftsmen try to avoid spending on additional devices. In such situations, ingenuity helps. For example, there is an RGB strip 10 m long, but there is no power supply or controller. Then they resort to tricks. Instead of a conventional power supply, you can use an adapter for a plasma TV or LED TV that produces 12 V. Prerequisite: the rectifier must be suitable in terms of the original power. The only problem is that there should be 3 similar blocks - 1 for each color.
Also, instead of an ordinary switch, a 3-key switch is installed. They are connected like this:
- Zero must go to the power supply blocks immediately and after these blocks it must again be connected into a single line.
- The phase electrical wire must go through the switch and there turn into 3 electrical conductors. Then each of them goes to its own power supply, then it is fed to an RGB strip of the desired color.
As a result, by turning on specific keys, a specific color is lit, and by combining these keys, additional colors can be achieved. RGB strips for interior design can be used in many different ways.
Installation in cornice
When installing an LED strip in a plasterboard cornice, it is recommended to follow the following instructions:
- We install the cornice, while leaving part of the structure open.
- After marking (we mark places 15 centimeters below the level of the base ceiling surface), we attach a metal profile to the wall. We install another profile 10 centimeters below the cornice. After this, we place profile sections every 40 centimeters, based on the width of the cornice.
- Along the perimeter of the entire profile we cut slots for the sides. After that we connect these elements.
- At the corners of the bent sides we attach a shelf on which we will mount the LED strip using self-tapping screws.
- When the profile is fixed, we begin to install the electrical wiring. We fix the wires in previously prepared (marked) places. Next, we cover the entire cornice with plasterboard sheets.
- The LED strip is glued to the ceiling with the adhesive side facing the hidden shelf.
- We connect the power supply and test the system for functionality.
How to connect the tape yourself: instructions
After the power source has been determined, a strip with diodes is connected. Let's look at the 2 most popular methods.
1st - 1 tape and block
A tape is used that has a classic reel length of 5 m. In most situations, at the tip of the tape (on its outer side) there are small fragments of electrical wiring for switching. If these sections are missing, you will need to solder them.
To do this, take electrical wires that have several cores, whose cross-section does not exceed 2 mm. Fragments of sufficient length are cut from them to secure the tape and install power supply equipment. To conveniently connect electrical wiring, it is better to take it in insulation of different colors. For example, red is better for “plus”, blue is better for “minus”.
Rosin and special acid from solders are used to tin the electrical wiring at the ends. Then the cable should be soldered to the contact areas of the tape. This manipulation must be performed very quickly. Then it will be possible to avoid damage to the diodes due to the high temperature created by the soldering iron.
“NSHVI” tips on fragments of electrical wiring connecting to the power supply . They provide the highest quality switching with those terminals that relate to the power source.
But to install these elements, a special pressing tool is required, which is used by electricians. Although you can use regular pliers. Soldering areas are thoroughly insulated. Optimal insulation is ensured by heat shrink tubing.
2nd - 2 tapes and a block
If such switching is carried out, you need to make sure that the power supply unit can withstand the required load. For example, you need to connect a tape that is 7 m long to a power source. Tapes of this length are not sold, so you will need to cut 2 m from an additional reel.
Cutting is carried out according to the required markings, which are applied to the strip. To do this you need to use ordinary scissors. The method by which 2 pieces of tape are connected to the electrodiodes is demonstrated above. It involves soldering or using connectors. When the segments are connected, the prepared common tape fragment is connected to the block, creating a single whole.
Often the situation regarding lighting is such that the circuit consists of 2 or more strips, which are located at different distances from the power supply unit. An example is the lighting of 2 or more areas inside a room or a store display.
To connect all the circuit fragments, it is not necessary to extend the electrical wiring to the power source from each fragment separately. You only need to connect the main (main) diode strip to a 12 V power supply, and the required number of segments can be connected to the main line. But the ability of the block to withstand the load is mandatory.
Installation in niches
Installation of LEDs in plasterboard niches is carried out by simply applying a self-adhesive base to the surface. This is the simplest of all possible installation methods, however, here you must follow certain rules:
- First of all, remove any dirt or fat deposits from the surface.
- Remove the protective packaging from the self-adhesive base.
- Carefully apply the tape to a dry and clean surface.
- We level the LED strip along its entire length.
- If the result of the previous operation is satisfactory, we press the material firmly against the surface so that the tape sticks well.
Advice! In the future, the tape may come off, and to avoid this, the base of the adhesive material can be lubricated with glue. However, it must be borne in mind that if necessary, it will not be possible to remove the tape without damaging the material.
Unit power
To ensure the full power of lighting created by the devices and ensure that the unit can withstand loads when purchasing the latter, simple calculations will be required. In most situations, the tape marking contains a designation of power consumption for 1 m of product. For this reason, this parameter will need to be multiplied by the desired length, then adding 20 percent to ensure a margin.
For example, you need to install a backlight, the total length of which is 13 m. The rated power of the tape is 9 W per 1 m of length. When you multiply 13 by 9 you get 117 watts. 20 percent of this value is 23.4 W. By adding 117, you can see that such a backlight will require a unit with a power of 140.4 W.
The most advantageous installation locations
LED strip can be installed on a wide variety of surfaces. But it will look most impressive in certain places:
- niches on the ceiling. Here it is necessary to create special boxes. In this case, you will get hidden lighting;
- on the ceiling or walls using special devices - plastic corners;
- behind the ceiling plinth;
- lighting set in the kitchen;
- niches in the walls, as well as figured partitions.
Now let's take a closer look at the LED installation methods listed above.
Main mistake
It is worth mentioning a popular mistake that is made when 2 segments are spliced. It consists of connecting them in series. Some people think that directly connecting the 2 ends of the tape is enough to obtain the required length. This switching is incorrect, because the connection of the tapes must be parallel.
In practical terms, this error leads to an increase in loop resistance. At the end of the circuit, the diodes will produce extremely dim light or no light at all. In this case, excessive electrical voltage will be applied to the initial tape fragments. It quickly causes damage to lighting elements.
An even higher electrical voltage leads to an increase in the temperature of the tape with diodes. This also cannot be called an advantage. If two pieces of tape are connected incorrectly, they quickly wear out and their service life is significantly reduced.
Installing lighting on kitchen units
LED lighting is very common today in the kitchen. Moreover, LEDs are often used for high-quality and complete lighting of the kitchen work area.
LED illumination of the working area
In addition to the work surface of the sink, stove and countertop, LED strips can be used to illuminate kitchen units quite effectively. In the kitchen, lighting can be installed in the following places:
- inside hanging cabinets. In this way, the internal contents of the shelves are illuminated with high quality;
Kitchen cabinet interior lighting
- on top of wall kitchen cabinets or below floor units. In this case, lighting performs only a decorative function;
Headset illumination from below and above
- illumination of drawers for spoons, forks and other necessary things in the kitchen.
Drawer lighting
You can create any type of lighting here in two ways:
- Directly stick the tape equipped with a self-adhesive base onto the surface of the kitchen unit;
Installing tape with self-adhesive base on the surface of the cabinet
- use a mortise or overlay profile. A mortise profile will make the lighting as comfortable as possible for use, but its installation requires a significant investment of time and effort to cut the required hole in the cabinet. The overlay profile is easier to install, but it will stand out a little from the background of the kitchen unit.
Mortise and overlay profile in the kitchen
As you can see, the easiest way to attach the tape in this case is to simply glue it using a self-adhesive surface. All stages of mounting this product will be similar to the previously described installation on the ceiling.
general information
LEDs appeared in the middle of the last century. But due to the high cost they were not in demand. In the 90s, manufacturers expanded the range of colors and lowered the price - this attracted a mass buyer.
The scope of application of semiconductor diodes is varied: gadgets, liquid crystal screens, lamps and LED strips for illuminating the ceiling of a room, signs and traffic lights - and this is not the limit. They replace conventional light sources even in street lighting. Attempts are being made to switch areas to LED lighting. We are not talking about cities yet, but this is possible in the future.