Mosaic cladding in the bathroom allows you to reliably protect the walls from the effects of high humidity. In addition, this is a spectacular and unusual solution for the bathroom interior.
Various types of textures, materials, sizes and colors of finishes make this type of coating universal. How to glue a mosaic in the bathroom, what kind of glue you will need for this, and how to care for it, we will discuss in this article.
Ceramic tile cladding
Ceramics is a unique material, the advantages of which can go on for a long time. And the disadvantages of tiles often include its features, for example, hardness, significant specific gravity, which only need to be taken into account correctly when choosing where to use the tiles. Such a “minus” as the difficulty of dismantling is also not objective - in another way this is called the strength of the cladding.
The main advantages of ceramic tiles:
There is an opinion among non-professionals that the ceiling cannot be tiled, since it will definitely fall off - if not during installation, then soon after it. This is wrong. When properly prepared, even an ordinary cement-sand mortar has adhesion, ensuring a fairly strong fixation of the tiles on the ceiling surface immediately after installation, and modern tile adhesives are superior to CPS in this characteristic. If the tiles are glued incorrectly, they will fall off the wall.
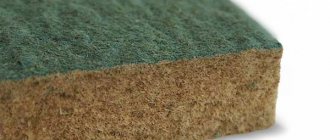
A variety of ceramics is mosaic - ceramic, glass, smalt, natural stone.
Mosaic ceiling coverings have the same advantages as tiled ceilings, but despite their higher cost, they are used more often. This is due to the same false fears that falling tiles from the ceiling is dangerous, but mosaics are not.
If safety is considered the main criterion for choosing a bathroom ceiling, then ceramic cladding is one of the safest technologies.
One of the unpleasant features of using tiles and mosaics is the contamination of the object during rough leveling of the ceiling and laying of the cladding.
In Moscow and the Moscow region, contractors perform tiled and mosaic finishing of ceilings at the following prices (taking into account the material):
Prices for ceiling tiles
| Type of work | Unit change | Price (RUB/unit) |
| Ceiling priming for plaster | m2 | 80,0 |
| Plastering the ceiling surface simple (long-term) | m2 | 400,0 |
| Installation of plaster mesh | m2 | 150,0 |
| Cladding a flat ceiling with ceramic tiles of standard sizes | m2 | 1400,0 |
| Grouting ceiling tile joints | m2 | 150,0 |
| Mosaic cladding of a flat ceiling | m2 | 1800,0 |
| Grouting mosaic cladding | m2 | 400,0 |
We produce grout
Grouting the mosaic
Grouting of the joints should begin a day after installation. For this work, a rubber spatula is used. Before grouting, inspect all seams. Remove any protruding adhesive residue and debris from them. The grouting itself is done with strokes in different directions. The last pass must be perpendicular to the previous one.
Painting the ceiling
Finishing by painting (whitewashing) goes back hundreds of years, but thanks to the development of ever new types of paints and varnishes, it is still in demand. The popularity of the technology lies in the affordability of the prices of the materials used and the possibility of execution by any home craftsman, but with a caveat - the creation of an even, smooth, monochromatic coating requires professional skills, including in preparing the base for painting.
Advantages of painting the ceiling:
The paint on a bathroom ceiling can last up to 10 years, but how long it will remain attractive depends primarily on the characteristics of the paint. In bathrooms, water-based compounds are usually used - acrylic (the most popular), latex, silicone, silicate.
Not only the specified groups of materials differ in their properties, but also paintwork materials within the group - when purchasing a cheap composition, they are often faced with the need to apply additional layers.
Considering the environmental friendliness of the coating, affordable prices for materials and ease of execution, painting ceilings can be classified as the second most popular finishing method.
In Moscow and the Moscow region, contractors perform this type of ceiling installation at the following prices:
Prices for painting work on ceilings
| Type of work | Unit change | Price (RUB/unit) |
| Ceiling priming for putty and plaster | m2 | 80,0 |
| Plastering the ceiling surface along beacons (thickness up to 3cm) | m2 | 480,0 |
| Puttying the surface for painting (three layers) | m2 | 400,0 |
| Ceiling sanding | m2 | 30,0 |
| Ceiling priming for painting | m2 | 100,0 |
| Ceiling painting (two layers) | m2 | 250,0 |
Plastic cladding
Finishing plastic refers to decorative coatings made of PVC - polyvinyl chloride, produced in the form of strips, panels and tiles of various sizes, designed for a specific installation method.
The main advantage of PVC cladding, which determines its demand for finishing bathrooms, is absolute moisture resistance. In addition, plastic finishing has other “advantages” that are common to products of any format and method of fastening:
mobile split air conditioning system for apartments
Plastic cladding also has general disadvantages:
There are several ways to decorate a ceiling with plastic; let’s look at the most popular ones.
Lining with PVC panels
The material consists of plastic strips of a certain width with a tongue-and-groove section of the sides, which allows you to assemble a solid covering from them.
Planks 10-12 cm wide are called PVC lining - its coating resembles the wooden cladding of the same name, wider products are called PVC panels.
The lining is produced in white, colored plain or with imitation wood. The profile of the strips is such that the coating is rusticated - this increases the aesthetics of the finish.
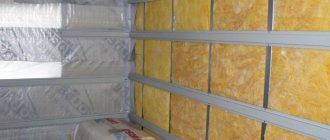
Plastic panels and lining are most often mounted on a sheathing made of wooden blocks or galvanized thin-walled profiles, which is mounted in a horizontal plane under the ceiling. This eliminates the need to level the base, but will lower the ceiling after finishing by at least the thickness of the profile and panel. On the other hand, the gap between the cladding and the ceiling is used for laying insulation and placing communications.
This design of plastic ceiling trim is good because the lathing is made from inexpensive materials, and the whole complex of work can be done with your own hands. Its disadvantages are common to all plastic claddings.
If you hem the ceiling by a contractor, then in Moscow and the Moscow region this work is performed at the following prices:
Prices for ceiling lining with PVC panels
| Type of work | Unit change | Price (RUB/unit) |
| Insulation and sound insulation of the ceiling with penoplex | m2 | 300,0 |
| Covering the ceiling with plastic PVC panels along the frame | m2 | 500,0 |
| Installation of plastic corners | m. linear | 120,0 |
| Installing spotlights on the ceiling | PC. | 300,0 |
PVC lining and panels can be mounted on the ceiling and without sheathing - using glue. In this case, the loss of height in the room will be only about a centimeter, but the base for the sticker must be carefully leveled, smoothed and primed.
Installation of slatted ceiling
This cladding differs from the previous technology in the design of the frame, the cross-section of the planks and the method of their fixation.
Special profile guides, called tires (traverses, “combs”), are attached to the ceiling using suspensions adjustable in length. The tires are placed at a certain pitch and the suspensions are adjusted to a horizontal plane. These rods have retaining teeth along their entire length, into which plastic slats snap into place.
Based on the layout of the slats, slatted ceilings are divided into two types: open and closed. The first type is assembled from two types of planks - wide and narrow, alternately. In tall bathrooms, narrow slats may not be installed - the ceiling will not be visible through the cracks, but air will circulate under the finish.
The advantage of the slatted structure over lining with PVC panels is the ease of fixing and removing the planks, including preserving the material. In addition, the slats are made of thicker plastic, so they are stronger than the panels, and it is more difficult to damage such a coating with an accidental blow.
The disadvantage of a slatted ceiling is the impossibility of installing it in a frameless manner. If the ceiling surface is flat, you can dispense with the suspensions and mount the tires directly on the ceiling. But it is impossible to do without “combs” at all - the back side of the slats is not designed for adhesive installation, so it will not be possible to perform slatted cladding without losing the height of the bathroom.
Aluminum slatted cladding
The difference with slatted PVC ceilings in the material of manufacture gives this finish the following advantages:
"Disadvantages" of aluminum slatted ceilings:
In Moscow and the Moscow region, rack structures are installed by contractors at the following prices:
Prices for installation of slatted ceilings
| Type of work | Unit change | Price (RUB/unit) |
| Installation of a plastic slatted ceiling | m2 | 500,0 |
| Installation of a metal slatted ceiling | m2 | 750,00 |
| Installation of a spotlight in a ceiling structure | PC. | 350,0 |
Stretch ceiling
The popularity of this type of ceiling decoration is high, and the choice of material is growing every year.
Thanks to the huge variety of artistic designs, stretch ceilings can be chosen to suit any taste and interior. Canvases with photo printing and 3D images are especially impressive.
Advantages of suspended ceilings:
The cost of stretched canvas depends on the type of material and manufacturer (quality). In Moscow and the Moscow region, prices for 1 m2 of canvas look approximately like this:
Prices for stretch fabrics
| Name | Unit change | Price, rub). |
| Film canvases | ||
| Russia | ||
| Matt/satin white | m2 | 90,0 |
| Matt/satin colored | m2 | 160,0 |
| Gloss white | m2 | 110,0 |
| Gloss colored | m2 | 175,0 |
| Germany PONGS | ||
| Matt/satin white | m2 | 170,0 |
| Matt/satin colored | m2 | 270,0 |
| Gloss white | m2 | 210,0 |
| Gloss colored | m2 | 280,0 |
| China MSD | ||
| Matt/satin white | m2 | 120,0 |
| Matt/satin colored | m2 | 210,0 |
| Gloss white | m2 | 160,0 |
| Gloss colored | m2 | 230,0 |
| Fabric sheets | ||
| Germany | ||
| D-Premium (Descor) fabric, white | m2 | 360,0 |
| France | ||
| (Clipso) fabric, white | m2 | 1110,0 |
It should be remembered that to the costs of film you need to add the cost of baguettes, baseboards, installation of canvas and installation of lamps (chandeliers). As a result, 1 m2 of stretch ceiling in place will cost:
Glue consumption
The packaging indicates the consumption in kg per 1 m2. This is an average. The figure is for laying on a flat surface. Increase consumption:
- wall unevenness;
- heavy material (gluing stones requires applying a thicker layer);
- temperature regime (needs to be laid at 18-20°C, temperatures higher or lower increase consumption);
- weather conditions (when laying outside, the wind dries moisture from the mixtures faster);
- qualification of the master (an experienced layer evenly distributes the mass with a spatula, while a novice has to additionally level it by removing excess).
Almost all causes of increased consumption can be eliminated before work begins.
Features and procedure for installing mosaics on the ceiling
We will not consider the classic method of creating mosaic panels on floors in this article, since the technology is very complex and to implement such an idea you need to have artistic talent, as well as be familiar with many of the subtleties of the process. It is unlikely that a person who knows all this will look for a solution on the Internet. A much simpler method would be a mosaic glued to the ceiling from ready-made blocks - it is not so difficult to do it yourself.
Tikkurila wood paint for facade
What is it and what does it look like
Ready-made mosaic kits are sold at any hardware store. They are several individual tiles or decorative fragments glued to a special base made of paper or film. With the help of such blocks you can design any surface much easier and faster. It is enough to prepare the base and, having smeared it with tile adhesive, simply attach the finished fragment of the coating to it.
There are many different options for such blocks - from simple sets of square tiles to entire mosaic patterns consisting of individual fragments glued in a certain sequence. The material of the tiles can be glass, ceramics and even small stones. There are a lot of options and choosing the most suitable one for you will not be difficult.
A surface created from such tiles will look very beautiful. Especially if you use tiles of different shades, correctly placing them on the plane. In order to get a beautiful result, you need to first draw a sketch of the future decor, and laying the mosaic on the ceiling should be carried out in strict accordance with the developed diagram.
Preparatory work
The main difficulty with which mosaic installation is directly related is the availability of a high-quality base. As a rule, in order to beautifully lay a mosaic on a wall or other surface, it must be made perfectly flat. Unlike tiles, this material is flexible, and if the base is uneven, it will simply repeat all the shapes of the surface.
As a result, you will end up with a crooked and ugly surface that even the highest quality mosaic cannot save. It is for this reason that the base must be leveled in every way available to you. Do you know how to plaster - please! Are you comfortable working with drywall? Also normal.
The already leveled surface must be cleaned of dust and thoroughly coated with primer. No adhesive will properly hold the facing material on a dusty surface that quickly absorbs moisture.
If the walls have been plastered, then the best option before laying the mosaic tiles, especially glass ones, would be to go through the starting putty. Otherwise, all the black crumbs of cement and sand will mix with the glue and appear when grouting the joints. So, it would be better to have a white base that matches the color of the glue, than to get black blotches afterwards.
This is interesting: Enamel PF-266 - characteristics and application
What you need
In order for the result to please you and the decorated ceiling to last as long as possible, you should purchase not only the tile itself and the adhesive for it, but also other materials. A complete list of what may be required when finishing with mosaic blocks looks like this:
If the mosaic is installed on the ceiling in the bathroom or kitchen, you will need a special type of adhesive solution - waterproof. This glue can withstand direct contact with water and does not lose its properties under such influence. In addition, if your ceiling has defects and unevenness, it will need to be leveled first, which means purchasing everything necessary for this.
Important Tips
- To maintain the same distance between parts, cross-shaped dividers are installed in the spaces between the plates. The crosses are then removed before the glue is completely dry.
- You can install the mosaic not only from bottom to top, but also in any direction, since it is light in weight.
- It is recommended to glue decorative panels at temperatures from +10 to +30˚С.
- To prevent mold from forming in the gaps, the surface is treated with a fungicidal coating.
- When cleaning the surface from glue and grout, avoid hard abrasive materials. You may scratch the parts and they will lose their shine.
Procedure
First of all, you need to carefully prepare the plane on which you will work. Preparation consists of leveling and priming. If the work takes place in the bathroom or kitchen, impregnation with waterproofing compounds is added. After this, precise markings are applied to the area where the mosaic pattern will be pasted. Even if you are going to completely seal the entire surface of the ceiling, you need to draw approximate lines.
Next, everything will be quite simple, but you should pay special attention to the accuracy of laying out the coating fragments - even a small mistake will be very noticeable, since the pattern is obtained with clear geometric lines. First, glue is applied to the area that is supposed to be covered with one or two fragments of coating with small reserves at the edges. After this, the first fragments of the mosaic are laid. If everything turns out smooth, continue working until the first row is laid. Next, all that remains is to precisely place the second one next to it, and so on. The distance between adjacent mosaic fragments should be equal to the spaces between the tiles glued to the base.
Source
Glue processing of the base
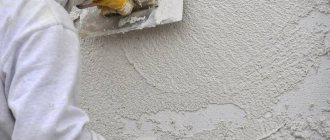
The next step after leveling and cleaning the base is diluting the tile adhesive solution.
To apply the solution, equip yourself with a spatula, the smooth surface of which spreads the glue over the wall. The spatula is leaned against the wall with maximum density so that no air voids form. Then, with a spatula turned over to the ribbed side, spread the mixture on the base again.
Before laying mosaic tiles, coat them with adhesive. In this case, the solution is applied to the canvas using the smooth sole of a spatula. The thickness of the adhesive layer should not be too large so that the mixture does not extend beyond the boundaries of the seams. The main principle of applying the adhesive mixture is uniformity. After which the cladding elements are applied to the base. Here it is appropriate to use a metal trowel, a rubber roller or a wooden block.
Types and features of mosaic ceiling decoration
In your search for an original idea for decorating floors, you may come across a variety of solutions and ideas, which may differ in the complexity of implementation and the materials used. Some methods are not suitable for everyone, as they look too original, while others can be used at home. One of these “acceptable” options is a mosaic laid on the ceiling.
Methods for making mosaics
You can start with the simplest thing - stretching a film or textile covering with a mosaic pattern. However, this solution cannot be called a mosaic in the literal sense - it is just an imitation of it. Therefore, it is not worth considering this design method in detail. It is better to pay attention to classic decor of this type, created from individual parts.
There are several techniques for creating such patterns. If we talk about traditional decor, then this is one of the most labor-intensive and difficult options to implement. However, it looks very beautiful and will definitely be completely unique. The ornament is assembled from small pieces of stone, marble shards, glass and other similar materials. Each small fragment is selected by color and glued by hand so that when the work is completed, a complete picture is obtained.
An easier-to-implement technique for creating a pattern is to use ready-made tile blocks. In this case, you don’t have to select the shades of the parts and bother with laying each of them separately. Stores sell ready-made blocks of such square or rectangular tiles, mounted on an adhesive base. After the block is applied to the surface coated with tile adhesive, the base is removed. This mosaic looks great on the bathroom ceiling. The only disadvantage of this solution is the impossibility of creating a specific picture - the tiles simply create a beautifully designed surface, without specific patterns.
Another option for using ready-made tiles would be to independently select the colors and shades of parts sold in the form of ready-made blocks. This option is very similar to making your own drawings in the classic way, but differs in that ready-made parts are used. Since you can buy blocks of a variety of colors, there is no problem creating the desired pattern from individual fragments.
The last way to assemble a mosaic panel on the ceiling is to use large panels of different shapes and combine them into one large composition. Mirror parts made of plastic or glass are very popular. They make it possible to decorate the interior with very original decor and at the same time improve the illumination of the room due to the reflection of light. Such a mirror mosaic can be mounted on the ceiling in the living room, bathroom or even in the kitchen - the main thing is that the decor matches the main idea of the room.
Avito perennial flowers for planting in the country
What are they made from?
Like any other, self-adhesive mosaic can be made from different materials. This type of finishing differs from the traditional one only in that the mini-tiles in this case are fixed on an adhesive backing at the production stage. The latter is made using rubber and bitumen.
Like a regular mosaic, self-adhesive mosaics are usually assembled into mounting squares with an area of 30x30 cm. A white waterproof film is glued to the back of each such flexible plate. The use of this material helps prevent the rubber-bitumen adhesive substrate from drying out.
Advantages and disadvantages of ceiling tiles
Ceiling tiles for the bathroom have a wide list of advantages:
Important! If you plan to lay tiles on the ceiling in the bathroom, the adhesive composition is selected based on epoxy resin or a dispersion mixture.
There are also disadvantages to this finish:
There are few downsides, so tiling the bathroom ceiling will be a good alternative to all other types of decoration.
TOP manufacturers
- Axton mosaic adhesive. It is used for interior decoration with mosaics in bathrooms, showers, and kitchens. Axton glue is available in the form of a dry mixture for mixing. Has high adhesion to concrete, brick and plaster.
The diluted mixture is viable for 2 hours. Economical consumption, allows you to apply glue in a layer of up to 5 mm. Axton provides reliable fastening without loosening or falling out of mosaic chips.
Types of ceiling tiles
There are several types of material:
All options differ in their performance characteristics, and therefore it is worth considering the types in more detail.
Foam tiles for finishing the ceiling in the bathroom
Lightweight and practical material does not weigh down the floors; the elements are not very thick, so they do not hide space.
Let's consider all three types of foam slab decor:
Advice! Since stamped products break quickly, when purchasing materials it would not be a bad idea to add 5-10% to the stock.
On a note! Extruded foam tiles are laid with minimal gaps, resulting in a virtually seamless coating.
Plastic tiles for bathroom ceiling
A strong and durable coating that easily tolerates any level of humidity and is undemanding in maintenance. Due to the large size of the elements with a side of 50 cm, cladding does not take much time. In addition, by choosing lamellas of different colors, you can decorate the ceilings with mosaics or checkerboard.
On sale there are not only squares, but also rectangles, as well as special plastic ceiling tiles with built-in LED lighting.
On a note! LED lighting is considered to be as close to sunlight as possible and is healthier than light from a standard incandescent lamp.
Gypsum tiles for finishing the ceiling in the bathroom
Quite an expensive material with high aesthetic and practical characteristics. Gypsum panels are suitable for decorating the base surface in Empire and Baroque styles, and decorative lamellas, false columns, pilasters and other details are used to enhance the effect.
But gypsum does not tolerate moisture, so such a ceiling will not last long in a bathroom. You also need to take into account that gypsum boards are a fragile material that crumbles and breaks under any mechanical stress.
Advice! If you really want gypsum decor in the bathroom, the slabs should be placed in the “dry zone”, at least 3.5 m from the bathtub or shower.
Ceramic tiles for finishing the ceiling in the bathroom
It often happens that none of the decor options stick to the ceiling. There may be several reasons, but the result is the same - it is difficult to apply the finish even to the most resistant adhesive mixtures. In order not to leave the ceiling without cladding, bathroom ceiling tiles will come in handy.
The material has many advantages; it is an environmentally friendly product, produced in a huge assortment and suitable for display on walls, ceilings, and floors. A room decorated with matching decor looks especially good. It is only important to choose a high-quality adhesive composition with high strength, for example, Eunice HiTech.
Dimensions and shapes of finishing material
Most often, square or rectangular tiles are found on sale. The size range of square decor is 30 cm or 50 cm, but rectangular elements can be of different sizes, here the choice depends on the wishes of the owner.
On a note! If the master has little experience working with decor, it is better to choose seamless tiles. The coating is smoother. And if, for example, a mosaic is laid out on the ceiling in the bathroom, the pattern will not be disturbed by visible gaps.
Manufacturers offer tiles of a certain color or white, which can then be painted. When choosing paint, you should carefully read what materials it is intended for; there are mixtures that corrode foam, it is better not to use them.
Required Tools
To work with mosaics prepare:
building level;
- spatula (toothed with a comb profile height of 3 mm, as well as rubber);
- roulette;
- pencil;
- plumb line;
- rule;
- grater (preference is given to a polyurethane product);
- rubber mallet;
- container for preparing the solution;
- knife;
- construction mixer.
In areas of complex configuration, you need to divide the mosaic tiles into parts. A standard tool, a tile cutter, is not suitable for this. You need to use an angle grinder, and with a diamond blade. There is a risk of injury when handling the material.