The constant desire of many owners of apartments and private houses with average incomes and above to create an aesthetically advanced interior in their homes has led to the appearance on the building materials market of such a product as ceramic seamless tiles. This product is not fundamentally different from ordinary tiles, but has a number of nuances related to its shape and installation specifics.
Seamless tiles have many advantages
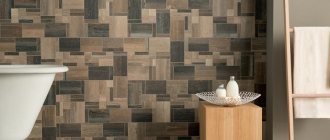
The absence of a chamfer along the edges of the front edge is the main sign that you are holding seamless ceramics in your hands. It is this difference that allows it to be laid joint to joint without leaving gaps. Therefore, upon completion of the work, the surface will look like a monolithic canvas.
Seamless tiles look like one piece
Which tile to choose for installation without seams
In an attempt to achieve the absence of seams in the process of laying porcelain stoneware, manufacturers have developed rectification technology - processing the edges of the tiles on a special machine. The result is a product that has a strictly rectangular or square shape without chamfers along the perimeter edge. Only such slabs can be used if you decide to make seamless masonry.
For seamless installation you need to use special tiles
Selection requirements
The seamless method does not forgive defects; not every ceramic tile is suitable for this type of installation.
The quality of the edges - their cuts must be smooth, have the same dimensions, not a millimeter difference, otherwise big problems will arise during installation.
Rounding of both corners and cuts is unacceptable.
Porcelain floor tiles with a rough finish are recommended for the bathroom or kitchen; in order to avoid injury, if water accidentally spills on the floor.
It is worth taking with a reserve, it will be difficult to find exactly the same size and color material.
The porcelain stoneware model is suitable for such equipment. It has virtually ideal, even edges and a low-porous structure, thanks to this property it can withstand difficult conditions, temperature changes, and high humidity.
What does seamless styling mean?
The term “seamless installation” does not imply that the seams will not be visible at all. Due to the fact that products from different manufacturers will differ in the quality of processing, the range of conditional “seamlessness” is within the framework from complete contact of the edges of the plates to a gap of 1.5 mm. Otherwise, the seamless installation process is similar to the installation of conventional tiles.
Seamless installation is similar to other methods of laying tiles
Points for and against"
The arguments in favor of laying seamless ceramic tiles are the following factors.
- Aesthetic beauty.
- The integrity of the surface and, as a result, prevents the accumulation of moisture, the growth of mold and mildew at the joints of ceramic tiles.
Laying in this way prevents the accumulation of moisture.
Seamless tiles are not without their disadvantages.
- Possible inconsistency of seams due to dimensional errors resulting from serial production of the product.
- No gap for temperature fluctuations. Frequent temperature changes, typical, for example, in a bathroom, cause the adhesive base to expand and contract, causing the tiles to move on top of each other. This process will ultimately lead to individual slabs lifting and peeling off.
Despite its advantages, this installation method also has disadvantages.
Disadvantages of rectification
Limited installation area
Alas, unlike “normal” cladding, in the case of rectified tiles we are faced with some limitations.
- Temperature changes make the ceramic coating not completely static. Of course, the dynamics are completely unnoticeable, but micro-displacements of the sheet of slabs that occur as a result of temperature fluctuations destroy the cladding if the tiles do not have a spatial reserve - in the form of seams. Completely seamless installation is possible only in “home” conditions – where there is no influence of negative factors.
Of course, using edged porcelain tiles, you can forget about the street and heated floors - in both cases, the amplitude of the displacement is enormous (in the context of the situation, of course).
- Seismic activity and shrinkage of building structures further narrow the range of application of seamless technology. If the first factor from this point can be ignored in many places, then shrinkage cannot be avoided in the case of a new building. In general, the building is constantly shrinking, but a few years after the completion of construction, the dynamics regarding the laying of the rectification become insignificant. However, in the first years, facing with seamless tiles is extremely undesirable, if not impossible.
The described problems are solved by installing seams, which provide a margin for the movement of the tiles. One might argue: what is the point of rectified porcelain tiles then? In fact, in most cases, joints of 0.5-1.5 mm are sufficient to solve thermal and seismic problems. For ordinary ceramics, these figures are also unattainable, if we are talking about cladding with seams that strive for the ideal. So seamless tiles make sense.
Installation difficulties
Edged porcelain tiles require more qualifications from the tiler - the smaller the seam, the greater the risk of running into trouble in the form of “crooked” geometry. Yes, the tiles can be perfectly flat, but your hands are not necessary. The need for careful marking increases. This is especially true for the first, lighthouse, rows. A minor mistake can be costly - the specialist will not have the room for maneuver that he may be used to when working with ordinary tiles.
Although, of course, on the other hand, the very essence of rectified porcelain stoneware allows you to work with it more comfortably. But, again, subject to the start “for health”. Then the ending “for repose” will be avoided.
The potential difficulties described concerned the seams. However, joints are not the only problem for tilers. Working with rectified material requires a very even base. Edged tiles are a product whose edges are processed. But plane errors do not disappear anywhere. If ceramic granite is made with a “propeller” (even if not very noticeable), this will inevitably affect the quality of the finished coating. The seams, despite their apparent dimensional insignificance, are able to smooth out the influence of the curvature of the material. Laying joint-to-joint instantly exposes the problem, negating the advantages of the ideal contour geometry.
Therefore, you should be very careful when choosing a manufacturer of rectified porcelain tiles, giving preference to those who have extensive experience in production and experimentation with technologies. So far, Europeans differ for the better from our compatriots. Perhaps in the future the situation will level out, but today, striving for excellent cladding, it is better not to take risks.
Surface preparation before installation
Work at this stage must be carried out with maximum precision. The quality of the preparatory work will greatly affect the results of subsequent stages of work.
- Remove old cladding material from walls or floors.
- Collect the remaining construction debris, clean the surface from traces of paint and greasy stains. Remove any remaining cement dust using a vacuum cleaner.
- Using putty, cover all chips, irregularities, holes from old fasteners, level all bumps, bulges and depressions on the surface to be prepared.
- To get a perfectly flat surface on the floor of the room, you need to make a concrete screed for the base. This will simplify the installation process and allow you to achieve a work result close to the standard one.
Before laying tiles, you should carefully prepare the surface. - When preparing a cement-sand mixture for pouring a screed, it is necessary to sift the sand before adding it to the mixture. Use a mixer or screw attachment on a drill to achieve a smooth, lump-free mixture.
- To make the mortar, buy only “fresh” cement with the earliest date of manufacture. “Old” cement loses its performance characteristics, clumps and mixes poorly. Good quality cement has a uniform texture and is easy to pour.
Laying tiles on a wooden base is strictly prohibited.
Under no circumstances should you lay seamless tiles on a wooden base, no matter how ideal it may be. Wood is a material that is sensitive to changes in temperature and humidity, so it will absorb and release moisture while in the process of constant deformation, which will accordingly lead to deformation and cracking of the tile adhesive applied to it.
Walls and floors must be perfectly level
The process of laying porcelain tiles
The cladding is carried out using special means, as well as using standard materials using which ceramic tiles are laid.
Before you start working with porcelain stoneware, you need to draw up a laying diagram. From the many existing schemes, you need to choose the one you like best. Some choose regular rows, others choose a mosaic layout.
Many installation methods are carried out in such a way that there must be seams between the slabs. And there are methods where seams are not provided. When purchasing porcelain stoneware, you must follow the recommendation - you should purchase more of it than required.
If you purchase it from different batches, the material will differ in tone, so it is purchased from one batch. The choice of ceramic granite is based on its purpose. The bathroom is usually tiled with tiles with a rough surface.
Before you start laying the goods, you need to carefully prepare the base. The base on which you plan to glue the ceramics must be smooth and free of any flaws. If the material is used on an uneven surface, the load on the floor will be unevenly distributed.
Which will lead to the formation of cracks. And besides, ideal floor covering with Italon porcelain stoneware, whose base is poorly prepared, is unlikely to be possible.
Seamless tile laying technology
Having worked thoroughly on the surface for laying the tiles and waiting until it has completely hardened, you can move on to the next stage of work - the actual laying. Seamless installation will take place in several main stages.
- Marking the covering area for the first row of tiles without seams. Space the slabs to minimize the amount that needs to be cut.
- Prepare the adhesive for seamless tiles in such a quantity that it does not have time to harden before you apply it to the surface.
- The back side of the tile without seams should be moistened with water before applying the adhesive; this will increase the adhesion force between the adhesive and its surface and will prevent moisture from seeping into the floor or wall until the adhesive is completely bonded.
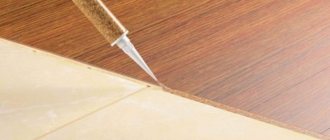
- The adhesive is applied to the tiles using a notched trowel, similar to laying regular tiles.
- Apply the slab with glue spread over it to the intended place, press down so that excess glue comes out. Align the tiles horizontally and vertically, if necessary, knocking them to the desired position with a rubber hammer. Then remove excess glue from the front surface using a regular spatula.
- Glue the cut slabs with the cut side to the joint between the floor and the walls, and join the whole sides to other slabs.
- Holes for pipelines, electrical wiring, sockets and other elements of utility networks coming out of the walls and floors should be cut in the tile sheet before gluing it to the surface.
Laying this way requires experience.
Laying seamless tiles is a process that requires some skill and experience in this type of activity. Therefore, if you have decided to lay the tiles yourself, there is a reason to start practicing in rooms where the mistakes of the first experience of seamless installation will not be obvious, for example in a garage or basement.
If you are not confident in your abilities, you can use the services of a specialist
What porcelain tiles can be used for seamless installation?
Tiles with any surface are subject to rectification. It can be matte, polished, satin or structured porcelain tile cladding. There are strict rules that must be followed so that the seamless laying of porcelain tiles looks impressive and does not spoil the interior of the room:
- It is necessary to select the facing material in accordance with the spatial parameters of the room. You should not choose pompous or dark colors for an office or small room. Pompousness is inappropriate in a small room, and a dark surface will make it visually even smaller.
- When laying rectified porcelain tiles in a seamless manner, sometimes difficulties arise with selecting a pattern, so if it is not possible to purchase material with a good supply, it is better to choose an abstract design or a plain one. A material that imitates natural wood, stone or leather is also suitable.
- Floor surfaces must be finished with a material whose characteristics meet the requirements for floors in a particular room. For example, for a kitchen or bathroom you should give preference to a matte, rough surface. When tiling floors in saunas, massage parlors, and swimming pools, where water and other liquids may get on the floor, you need to choose porcelain tiles with an anti-slip surface.
- It is better to cover the floors of industrial enterprises and production workshops with rectified technical porcelain stoneware with a matte surface, which is characterized by high strength characteristics, wear resistance, durability and ease of maintenance.
- The material is selected according to format and caliber, as well as in accordance with the dimensions of the surface to be tiled and the design of the tile layout. It is advisable to purchase cladding with a small margin, since tiles from other batches may differ in shade or caliber.
- The format, color and type of surface of the tile depends on the developed design. Following the calculated consumption, you should buy all the components of the future cladding, including decorative porcelain stoneware inserts with the appropriate pattern. You also need a small supply of each type of tile.
Tile adhesive for rectified tiles
The composition and brand of adhesive for seamless laying of porcelain tiles is selected taking into account the size and properties of the tile material without seams. The main requirements for the adhesive composition will be high adhesion, moisture resistance and elasticity after complete curing. The current variety of adhesive mixtures for ceramic tiles and porcelain stoneware allows you to select a composition suitable for any base and slab material. For example, the following brands ideally meet the requirements for mixtures for laying tiles without joints: Knauf Flisen, Litoflex K80, Unis 2000.
There are a lot of mixtures on the market for laying seamless tiles
Seams and grouts
The width of the joint may vary depending on the size of the tiles and the purpose of the floor. It is not recommended to lay porcelain stoneware without jointing; installation should be done with a minimum seam of 2-3 mm (this type of installation ensures good adhesion of the grout to the side edges of the slabs, the greatest absorption of base displacements and compensation for thermal expansion of the slabs). In large areas, it is absolutely necessary to provide temperature-shrinkage joints with a certain uniformity; while in small rooms it is enough to leave a small distance between the tiled surface and the perimeter walls. The plinth will close this distance and give the surfaces a finished look. However, you should adhere to the advice and instructions of the designer or construction site manager.
When using epoxy-based grout, grout with added resins, etc. It is recommended to first check the actual quality of their cleaning. To achieve the best aesthetic result, it is recommended to use grouts that match the color of the tiles to avoid contrast between them (for example, white tiles and black grout), especially when installing partially polished and polished ceramics. After grouting porcelain tiles, it is very important, while the grout is still fresh, to immediately and thoroughly remove excess grout with a sponge and plenty of water.
A few days after laying the tiles, it is necessary to thoroughly clean the surface with an acid composition (see instructions for cleaning tiles after installation) in order to dissolve and completely remove all materials used in the work. The following compositions can be used:
Laying tiles in the bathroom without seams
Having become familiar with all the nuances of laying tiles without seams, let’s briefly consider the process using the example of a bathroom.
- We dismantle the walls and floor and take out the old facing material.
- We remove the remaining traces of the old primer, paint and other stains, and collect the remaining construction dust with a vacuum cleaner.
- We level the walls, cover up all the unevenness and cracks.
- We make a cement floor screed.
- After the cement mortar has dried on the walls and floor, we apply a waterproofing compound to their surface. We perform this procedure at least twice. Apply the next layer only after the previous one has absorbed and dried.
All work should be carried out strictly according to plan - After the last layer of waterproofing has dried, you can begin marking the first row on the surface where the tiles will be installed. We start marking from one of the walls.
- We dilute the brand of glue you have chosen. Apply the adhesive to the back of the tile using a notched trowel, after wetting the surface with water.
- We apply and press the tile, as described above, and remove excess glue.
- After completing the installation on the walls, we proceed to installing porcelain tiles on the floor.
- After the glue has completely cured, you can begin installing plumbing fixtures and installing sanitaryware in the bathroom.
How to make small seams when tiling with porcelain stoneware
Seamless cladding has its own new technology. Therefore, professional advice should be strictly followed:
- The slabs are laid on a floor that has a flat surface.
- The size of the product used should not be too small. When using large tiles, there will be much fewer seams.
- Finishing with porcelain stoneware is carried out if the temperature is no more than 30 degrees and no less than 5.
- You should also use the appropriate brand of adhesive for the specific type of tile.
Here are some recommendations on how to properly glue porcelain tiles:
- If the tiles have a symmetrical pattern, finishing begins from the central point of the room.
- The special glue is leveled on a small area of the room using a spatula. And the slabs are placed on the surface with glue applied.
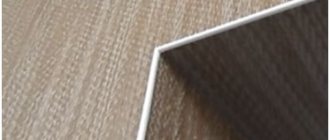
- Using a building level, make sure that the surface is laid out evenly.
- If seamless technology is used for gluing, then the porcelain stoneware tiles should be located at a distance of one millimeter from each other.
- After completion of the work, the floor dries in three days. Then they begin to rub the seams. Usually, the grout is selected according to the color of the tile.
Valery asked a question:
I was advised by friends to put seamless porcelain tiles on the floor in a living room with heated floors. I was interested in their proposal for many reasons. Firstly, I wanted a coating with good thermal conductivity, durable and beautiful.
I was very happy with the porcelain tiles. The only thing that bothered me was the presence of seams. They give the cladding the appearance of some kind of tiled covering.
This is quite acceptable in the bathroom, but in the main room with an expensive interior I would like something more impressive. Can you tell me what seamless laying of porcelain tiles is? How is it made?
Tiler's answer:
Indeed, I already had experience when I had the opportunity to lay tiles without seams. But, I’ll tell you right away that not every material I laid was suitable for being installed without seams. A couple of decades ago, you could only buy ordinary tiles.
This material has a high coefficient of thermal expansion. Therefore, if it is laid without a technological gap, then when it expands from heating, it will break off each other from the surface. Therefore, simple ceramic tiles are not suitable for this type of cladding.
But this material also needs special material - with very good calibration and cut edges. They are cut just to get rectangular ends that can fit together almost imperceptibly. Such porcelain tiles are called rectified.
In regular tiles, the edges are slightly rounded. This happens during firing and cannot be avoided. Moreover, at high temperatures the composition of the ceramic mass is also slightly deformed.
Different batches with the same composition may have, albeit slightly, different sizes. This is another reason why finished products are trimmed. After this treatment, the tiles have almost ideal sizes and edges, which upon contact can create the illusion of a monolithic surface.
I would like to draw your attention to the fact that laying porcelain tiles without seams, even from rectified ones, will also require a responsible approach. Not every manufacturer makes such high-quality products that there will be no seams at all. You should still be prepared for the fact that the contact point between the coating elements will be noticeable.
The surface on which rectified porcelain tiles will be glued must be smooth and even. Using an adhesive composition to smooth out surface imperfections is unacceptable with this type of installation.
But don't worry, I can do the job properly, resulting in a floor without a single crack. This is good not only from the aesthetic side. When installing joints, the grout becomes dirty over time or, worse, spills out of the seams.
This requires, although rare, regular cleaning of the seams and their restoration. With seamless installation, there will be nowhere for dirt and moisture to get stuck. And the material itself is rectified only of elite varieties.
To save a little money, I recommend buying a small amount of product to place such a covering in the very center of the room, where it will be visible. Such a plot is usually a maximum of 5-6 square meters. m.
. The rest of the covering can be laid from a type of tile similar in shade and texture, or you can create a contrast not only with the seams that appear, but also with a completely different type of paving and texture. Overall, it will be impressive, especially since furniture and other interior items will almost completely absorb the appearance of the non-rectified coating.
The second important point why you should listen to this advice is the presence of a heated floor. Although porcelain stoneware has a low degree of expansion, this factor is still present. In small areas, the amount by which the coating will increase when heated will be minimal and will not cause the tiles to peel off, and the seams that are supposed to be hidden by the interior will help to avoid unpleasant situations during the entire life of the floor.
After all, the floor temperature will probably be inconsistent. Perhaps, even due to a boiler breakdown or in order to save money, you will want to temporarily turn off the heat supply to the heated floor during the cold period, and then turn it on. Such fluctuations always create a certain risk.
For seamless installation, I will also be forced to charge you more, since such work requires more time, responsibility and experience.
05/07/2011 Glossy monolithic surfaces made of polished porcelain stoneware laid in accordance with the rules of seamless technology look beautiful and elegant. Laying porcelain tiles without seams makes it possible to create various modular floor surface designs. The visual absence of tile joints does not spoil the design and provides the opportunity to lay out interesting patterns or mosaics.
Seamless laying of porcelain tiles on the floor is possible only in one case - when using rectified tiles. The peculiarity of this type of material is that after the firing process the tiles are trimmed. As a result of this process, the correct edge shape and absolutely accurate dimensions of the material are achieved. It is this type of tile that can be laid with a minimum gap that does not exceed one millimeter.
Advantages and disadvantages of seamless cladding
- an attractive visual effect is achieved due to the absence of seams on the canvas;
- for the same reason, the development of fungus and the formation of contaminants are excluded at the junctions of elements.
Disadvantages of the technology: serial production leaves an imprint on the evenness of the front surface of the elements, so they must be adjusted to shape by grinding. This involves spending more time and effort on the entire finishing process. In addition, if any of the elements fall out of the overall fabric during operation, the entire coating is damaged.
How to choose finishing material?
Tiles are selected not only in accordance with their preferences, but also in accordance with their intended purpose - slippery polished tiles are not suitable for the bathroom, but only for the hall. For the kitchen, you also do not need to choose slippery tiles, only rough ones, so as not to accidentally slip with warm water. To fill the joints, silicone and epoxy grout, silicone sealant or sealant are used.
The size of the tiles is selected in accordance with the dimensions of the area - it is necessary that a certain amount of tiles fit into the perimeter of the area without cutting. If a couple of cm are not enough, they can be hidden under the baseboard and border, and cutting off the excess 1-2 cm from porcelain tiles is problematic. When purchasing, always check the lot number to ensure that the pair of packages matches. This is the only way to guarantee consistency in color and size.
Porcelain tiles, like any tile, are always purchased with reserves, taking into account:
- Detection of defects in packaging;
- Some of the tiles may become damaged when cutting;
- Adjustment will be needed.
If you are planning a colored mosaic installation, then before laying the tiles without seams, at the purchasing step, ask the hardware store about the remnants from other batches. It is quite possible that you will be able to choose a good material for a socket or panel, and at the same time you can save a lot. Prices for leftovers are reduced by up to 40%, but these must be suitable rectified tiles of the first size. But you shouldn’t buy leftovers from another batch; most likely, you won’t be able to match the tiles exactly by color and texture, other than dark or snow-white.