With a minimum budget for finishing work, laying porcelain tiles on the floor should provide the highest possible decorative value to the interior. To do this, it is necessary to select the best option from several layout methods, technologies for applying the adhesive mixture, and methods for controlling the flatness of the facing layer of cladding.
Laying porcelain tiles on your own includes the following sequence of actions:
- leveling the concrete slab with screed, self-leveling floor (if necessary);
- treatment of the base with deep penetration soil;
- choosing a layout scheme and counting the number of tiles;
- tool preparation;
- determining the method of applying glue;
- calculation of seam width;
- choosing a method for controlling the plane of the front surface;
- laying with trimming in places adjacent to the walls;
- seam design.
There is no single, universal technology for finishing floors with porcelain stoneware for any conditions. Even in neighboring rooms of an apartment, different techniques may be used to reduce the labor intensity of work, the repair budget, increase productivity, and the artistic value of the interior.
Preparing the base for laying porcelain stoneware
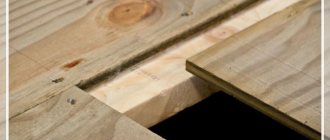
Tile adhesive is applied to the base and tiles with a notched trowel positioned at right angles to its surface. Therefore, the better the concrete screed is leveled, the easier and faster the porcelain tiles will be laid and leveled.
Leveling the base with tile adhesive is, firstly, expensive, secondly, inconvenient, and thirdly, long.
To properly prepare the base of the floor for finishing with porcelain tiles, you need to additionally cover it with a layer of deep penetration primer. This will reduce the consumption of glue and the absorption of moisture from it by the screed, increasing the adhesion and durability of the coating.
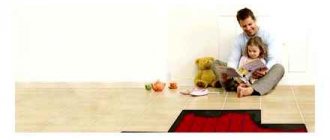
At the same stage, TP elements are installed - film mats, water pipes, SIP cable.
Preparation of the solution
In order for the floor to be poured successfully, it is important to mix the mixture correctly. In this regard, take the time to carefully study the instructions for the selected building mixture. For example, the amount of water in the solution must fully comply with that specified by the manufacturer. If there is excess liquid in the solution, this may cause low strength of the finished coating and its further cracking. Take a large, clean container and pour the required amount of water into it, only then can you gradually add the mixture into the water, stirring constantly. The solution prepared in this way should be mixed using a special attachment on a drill or hammer drill. Mixing is best done at low speed until the mixture becomes homogeneous. Next, leave the resulting solution for a few minutes and mix thoroughly again. You should also not leave the mixture for a long time; in this case, it may harden and become unsuitable for use.
Tools
Porcelain tiles are laid on the floor using standard and special tools:
- mortar container - usually a plastic bucket 15-20 l;
- trowel or spatula - for laying the adhesive mixture;
- notched spatula - for uniform distribution of glue;
- mixer or attachment for a drill/hammer – for stirring the glue;
- roller, brush - for applying primer;
- level – for horizontal control;
- crosses - to create seams of the required size;
- tile cutter - manual, electric or angle grinder (“grinder”) with a diamond blade;
- primer;
- tile adhesive - any domestic/foreign brand.
When using SVP tile leveling systems, experts recommend “3D crosses” with green “fungi”.
The wedge here is double, which prevents the cladding from warping.
The lower element, embedded under the tile, firstly, has a soft ring on top, which allows you to level out errors of excessive tightening force, and secondly, it is guaranteed to break off in the middle of the height of the tile, as in the bottom photo.
This facilitates the grouting process, since the master does not need to additionally trim the body of the plastic element that sticks out too much from the seam.
Ending the process
Accordingly, 3 days after the porcelain tiles have been laid out on the floor, you can begin the grouting stage. This procedure is performed using a composition of a certain color.
There are some nuances to this type of work:
- contrasting shades will highlight the pattern on the surface of the tiles;
- a single-color composition will make the coating neutral and uniform.
Options and installation methods
At the initial stage, a porcelain stoneware layout scheme is selected from the following options:
- diagonal;
- staggered by analogy with brickwork;
- joint to joint;
- "herringbone";
- mosaic.
Next, a decision is made on the presence and width of the seams. The seamless method is usually used to install large-format porcelain tiles in bathrooms and toilets. In other cases, a seam 1–5 mm wide is used by installing special crosses.
Then you need to decide on the technology for controlling the plane of the newly created coating. The first tile is always installed horizontally in two directions at right angles to each other. Then the options are:
- each subsequent tile is checked by level;
- The short 1m rule applies;
- SVP system is used.
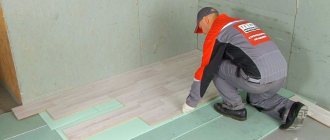
The classic installation method is to fill the subfloor space with solid elements on the first day, trimming and gluing all the pieces of porcelain tile the next day. However, for small volumes of work, trimming can be done for each row.
What is rectification
The rectification process involves additional leveling of the edges of the finished ceramic tiles using diamond cutters using high-precision equipment.
Rectified porcelain tiles are tiles with cut ends.
To rectify the material, pressed and fired elements made from porcelain stoneware undergo a trimming process to give them a perfectly even rectangular shape. This technology is intended to produce a monolithic ideal floor or ceiling surface from ceramic elements used during cladding work.
Externally, it differs from the usual one in the absence of chamfers on the sides.
Calculation of the number of tiles
To determine the amount of cladding, it is necessary to take into account the layout pattern and the width of the seams:
- in rooms without furniture (corridor) and with a minimum amount of furniture (hallway), the size of the cut tiles near the walls should be more than ½ of its original format;
- if there are plumbing fixtures in the bathrooms, furniture in the rooms, only the visible part of the floor is taken into account; any size of trimming near the walls is allowed;
- laying diagonally allows you to partially hide the non-parallelism of opposite walls, but the amount of trimming, the consumption of finishing material and the labor intensity of the work are maximum here;
- if the work needs to be completed in one day, finishing the floor should begin from the far corner towards the doorway;
- with a perfectly level screed, porcelain stoneware can be laid out dry, trimmed, then all rows can be laid as a whole;
- if the cladding is used in several rooms, the seams must be continuous;
- when tiling one room, the joint is located in the middle of the doorway under the threshold or the lower element of the interior door frame;
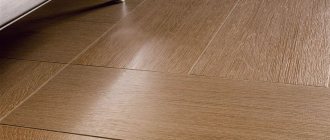
- Porcelain tiles of a rectangular elongated shape, usually imitating a parquet board, are laid, if possible, perpendicular to the wall with a window opening, so that the natural light flux falls along the seams.
For the “seam to seam” layout pattern and with offset transverse seams, the amount of porcelain stoneware is determined as follows in stages:
- the length of one wall is divided by the size of the tile along with the width of the seam, for example, 360 cm / (60 cm + 0.2 cm) = 5.98;
- for the second wall, similar calculations are made, for example, 173 cm/(40 cm + 0.2 cm) = 4.3;
- both values are rounded up and multiplied - 6 x 5 = 30 pieces.
The video below shows the main nuances of flooring layout:
This will allow you to perform symmetrical trimming on four sides of the room, gluing the tiles from one wall, and not from the middle, which is more convenient for non-professionals. When choosing a herringbone pattern and a diagonal layout, the area of the room is calculated, and porcelain stoneware is purchased with a margin of 15 - 30%.
Level measurement
Even a properly made screed for porcelain tiles will not provide a right angle of inclination of the floor if the building is built with a minimal slope to one side. In this regard, it is necessary to use a building level during the installation process, which will make the coating perfectly even.
The slope of the tiles themselves can be adjusted within 10 minutes, and then the adhesive composition will begin to dry out, and the created coating may be damaged. Porcelain tiles tend to settle some time after installation, and accordingly, it is worth avoiding stopping during the installation process of at least one floor line in order to avoid differences in the levels of the adhesive tiles.
There are other nuances of adhesive:
- it is necessary to ensure that the adhesive for laying porcelain tiles on the floor is applied in a high-quality, solid layer, since if there are voids under the tiles, they may crack during use;
- It is worth knowing that the glue dries within 24 hours, and complete drying is achieved within 3 days.
Glue
The cladding is always attached to the base with tile adhesive. However, the technology has five varieties:
- glue is applied only to the base with a “comb”;
- the adhesive is applied exclusively to the tiles with a notched trowel;
- in addition to the first option, the tile is puttied with a regular spatula on the back side;
- Options 1 and 2 are combined (preferred, but time-consuming method);
- The glue is applied to the base with a smooth spatula, onto the tiles either by rubbing or with a comb.
The latter method is currently used extremely rarely, except perhaps on top of underfloor heating elements.
The most labor-intensive is the third method, when the mortar is leveled with a comb on both the base and the cladding. Therefore, it is used for large uneven screeds.
The first option is considered the most technologically advanced and least labor-intensive. The glue is leveled with a notched trowel under several tiles or rows at once, which dramatically increases productivity and reduces finishing time.
In the third method, the back rough side of the porcelain stoneware is puttied with a spatula. The technology is called “rubbing” and is used for cladding with non-ideal geometry.
For example, if the tile is large, its edges may be slightly bent inward, and the middle, accordingly, bulges in the opposite direction. In this case, the thickness of the product is the same in all areas, and the angles can be absolutely even 90°.
Therefore, the cells on the back side of the cladding are filled with glue, since during normal installation there is a high probability that the surface in this place will not come into contact with the adhesive layer.
More details about these technologies in the video:
We wrote in detail how to choose glue here.
Choosing a mixture
Which mixture to choose from all the variety is a serious question. The answer to this is individual in each specific case. Here everything depends on the characteristics of the base, the format and weight of the tiles, on whether the work is being done externally or internally (and the season also plays a role here). Do not forget about the time allotted for cladding, as well as the qualifications of the tiler. In general, if in doubt, it is better to get advice from a specialist - searching on the Internet is good, but there is always a risk of receiving “bad advice”.
cutting
Unlike tiles, porcelain tiles are fired in a kiln twice, at a higher temperature. There is a hardened layer inside the material, which makes it difficult to cut using conventional methods.
For example, after cutting a line with a regular roller tile cutter, the corners often break off spontaneously. In addition, the size of the floor cladding reaches large values; it may simply not fit into the tile cutter. Therefore, the following cutting methods are used:
- Angle grinder - available in the arsenal of most home craftsmen;
- dry electric tile cutter - portable machine;
- “wet” network tile cutter is expensive, used only by professionals.
By analogy with walls, external corners can be found on the floor. Most often, they occur at the junctions with the balcony steps. Here, cutting the edges of two facing elements at an angle of 45° is usually used.
For the “grinder” you will need a special device. Dry, "wet" type machines usually have the ability to cut at an angle.
Learn more about cutting porcelain tiles here.
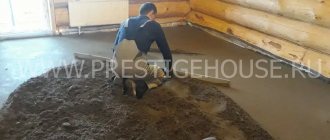
Pouring the floor
The resulting solution from the container should be poured evenly and carefully onto the base of the floor, gradually leveling it using a wide spatula or trowel. For example, a master can handle filling a small room (bathroom, pantry, etc.) in one go, even without outside help. But for processing larger rooms, it is best to invite an assistant. Next, the poured layer of mortar should be rolled using a special toothed roller - this allows you to remove small air bubbles from the mixture, which can have a negative impact on the future strength of the coating. If you are pouring the floor in a large room, it is best not to prepare the entire volume of the required solution at once. Here it is better to fill in parts, this way you will avoid drying out of the polymer mixture, because after preparation you can work with it for no more than 20-30 minutes. The work should be done quickly enough so that there are no seams on the monolithic surface from working in parts. Whatever one may say, a self-leveling floor is a seamless coating.
After you have poured the mixture, leveled it and rolled it with a needle roller, all that remains is to wait for it to dry completely. It will be possible to walk on a floor filled in this way after about 24 hours, but its complete hardening will not occur earlier than in a week. Only after this period will it be possible to carry out any other repair or construction work on the premises.
Seam width
It is not recommended to cladding a concrete screed without seams for any size of porcelain tiles for the following reasons:
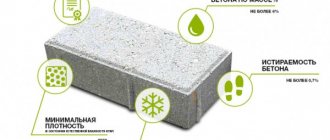
- the material has a linear expansion coefficient of about 6.5 units;
- the tile may have geometry defects, which are compensated by gaps between the edges of adjacent elements.
The first reason is especially relevant for floor coverings with heating elements. A warm floor heats up the porcelain tiles; with a seamless installation method, the tiles may fly off.
If the tile has a discrepancy in length/width dimensions of at least 0.2 mm, on the tenth row this will lead to a shift in the overall pattern by 2 mm, which is unacceptable for the interior of the room.
Therefore, the correct option is 1 mm joints for large 60x60 cm porcelain tiles without TP or 2 mm for coverings with heated floors. For small tile sizes, for example, 30 x 30 cm, installation is carried out with seams of 0.5 mm and 1 mm, respectively.
How porcelain tiles are made
The production of porcelain stoneware imitates the process of stone formation. Quartz sand, feldspar, clay and dyes are mixed dry. They are pressed, dried, and then fired. The result is a durable, non-porous material that is highly hard (harder than natural granite) and durable.
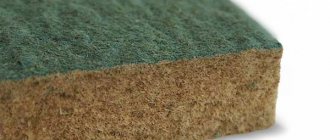
There is porcelain tile, similar to ceramic tile. Look at the cut. If the material is dense, without voids, it is definitely porcelain stoneware
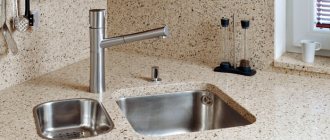
Modern porcelain stoneware can either be immediately molded into slabs of the required size, or produced into blocks, from which slabs of the required format are then cut. In the first option, the material really looks more like tiles, in the second - like stone cut into layers. The appearance is varied. There are types that imitate wood, there are those that look like natural stone or marble, and there are those that look like nothing else. Here everyone chooses what he likes best.