A significant proportion of household vacuum cleaners in use are designs that use a flexible corrugated hose. When cleaning a room, it is exposed to loads of various types, which does not exclude the possibility of damage to this part of the vacuum cleaner, right?
Have you had a similar problem, but you don’t know how to fix a vacuum cleaner hose with your own hands? We will help you deal with this problem.
The article discusses the most likely causes of a corrugated hose defect, and also provides detailed instructions for restoring the integrity of the part. The methods we propose to fix problems are quite simple, so any home craftsman can carry out the repairs.
The hose from the vacuum cleaner breaks, what should I do?
The most common cause of hose failure is a break. It can break:
- at the base of the vacuum cleaner - due to frequent twisting and improper storage;
- in the middle of the corrugation - if used incorrectly (if sharp objects get into it during cleaning or if sudden movements are made when using a vacuum cleaner).
Repairs can be performed in the following ways:
- using a simple cut;
- applying a bandage;
- thermal method.
Below we will look at these methods in more detail.
How to disassemble a rain shower
In addition to the classic watering can, a rain shower can be installed in the shower stall. The popularity of this type of plumbing is due to its properties: the ability to have a soft or, conversely, invigorating effect on a person. Rain showers can also break.
Breakage occurs due to the fact that the body is gradually clogged with limescale. Unable to withstand strong water pressure, with a sharp increase in pressure, the tropical shower becomes unusable and requires urgent repairs - a complete replacement of the watering can. But the malfunction can be eliminated without radical measures. It is enough to disassemble the structure.
For this:
- Outside, on the cabin roof, unscrew the nut that secures the water supply hose.
- Remove the nut that secures the rain shower inside the cabin.
- Unscrew the top block. There is a switch cartridge inside.
- Disassemble the cartridge and descale it.
Reassembling the rain shower is carried out in the reverse order.
Vacuum cleaner hose extension
In some cases (cleaning large rooms, hard-to-reach areas), the hose may not be enough. Then it can be extended up to 5 m. In order to do this, you need to select the same diameter and pitch of the coil. Prepare the ends to be joined in advance: sand and degrease. Lengthening can be done in three ways.
- Using a bicycle camera. Cut a piece of 5-6 cm from the camera and put it on the surfaces to be joined. Fill the places of contact with the corrugation with cold welding or rubber glue.
- Using a simple corrugated pipe. Take a 10 cm piece from the corrugated pipe and, cutting it lengthwise, put it on the junction of two hoses (you can screw one hose into the other). Wrap this place with tape or tape.
- Using a half-liter plastic bottle. Cut the bottle on both sides to create a sleeve. Place it on one end of the hose and attach the other so that the bottle is in the center of the connection. Warm up this place with a hair dryer. The plastic will shrink and seal the joint tightly.
Possible problems
Difficulties in restoring a hose depend on the model, degree of wear, and location of the break. A vacuum cleaner with adjustable suction power cannot be repaired if the corrugated tube breaks closer to the middle, which makes it impossible to connect the wires. Often such hoses have a non-separable end in the body, where the connection is made with glue.
When removing the damaged area close to the handle, there may be residues of dried glue on the threads. For a tight and airtight connection, it must be removed without damaging the plastic coupling.
Why is the hose whistling?
When choosing a hose, special attention should be paid to checking its internal part: it should be smooth, without protruding ribs. If the surface is ribbed, then when cleaning, air clings to the ribs, forming turbulence inside the pipe, which causes a whistle. This can also happen when cellophane or other objects get inside. You need to unscrew the hose and check if there are any blockages inside it. If there is, clean them using a wire hook, the rounded end of a ruler or cable.
When is it better to seek help from a specialist?
Eliminating small problems allows you to reduce expenses from the family budget. But there are times when it is more advisable to seek qualified help. It will cost less in the end.
So, a trip to the workshop is mandatory if the following signs of serious damage are noted:
• when the engine is turned on, extraneous noise, hum, vibration is heard;
• overheating during short-term operation of the vacuum cleaner;
• the smell of burnt wires;
• automatic shutdown of equipment;
• with pops, sparks and other third-party sounds.
If a suspicious sign is detected, you should immediately turn off the vacuum cleaner by disconnecting the power cord.
Applying a bandage
Such repairs are performed for punctures, ruptures, or cuts in the hose. A bicycle inner tube is used as a bandage, as it can stretch well.
Repairs are carried out in the following order:
- Cut off the damaged area.
- Clean and degrease the cuts.
- Prepare a piece of bicycle tube 80-100 mm.
- Place this piece further than the damaged part.
- Apply glue to the ends of the cuts and the surface at the junction.
- Put the camera on, completely covering the joint.
Purchasing at a company store
All Miele household appliances are manufactured using high-quality materials and innovative technologies. All of the above types of vacuum cleaners are available for order in our online store. Multifunctional equipment can handle cleaning hard and soft surfaces from dust, dirt and animal hair. HEPA AirClean filters remove fine dust and other allergens from the air.
On our website you will find vacuum cleaners for solving household problems of any complexity. Models from the Classic, Complete, Scout, Blizzard lines are equipped with all the necessary brushes and attachments. In the company store you can purchase other premium appliances for the kitchen and home. All products are provided with an extended warranty from the manufacturer for a period of 24 months.
Delivery of goods is carried out in Moscow, St. Petersburg and other regions of Russia. An individual approach to each client, a large number of showrooms and service centers in different cities guarantee a consistently high level of service.
Vacuum cleaner hose diameter
Hoses for modern vacuum cleaners have the following internal diameters: 32, 36, 38, 50. The hose connection can be connected to the inlet of the vacuum cleaner with a thread of dimensions, mm:
| Outside diameter | 44 + 0,3 (+0,1) |
| Inner diameter | 38 + 0,3 (+0,1) |
| Thread pitch | 6 + 0,1 |
The vacuum cleaner hose is a very important component. If it breaks, the vacuum cleaner may become unusable. The hose may break due to improper storage or use. Buying a new hose is not always possible due to the lack of components for this model of vacuum cleaner or the high cost of a new hose. In some cases, you can repair the hose yourself in various ways: using a simple cut, applying a bandage, or the thermal method. After such repairs, the hose can last for several more years.
A significant proportion of household vacuum cleaners in use are designs that use a flexible corrugated hose. When cleaning a room, it is exposed to loads of various types, which does not exclude the possibility of damage to this part of the vacuum cleaner, right?
Have you had a similar problem, but you don’t know how to fix a vacuum cleaner hose with your own hands? We will help you deal with this problem.
The article discusses the most likely causes of a corrugated hose defect, and also provides detailed instructions for restoring the integrity of the part. The methods we propose to fix problems are quite simple, so any home craftsman can carry out the repairs.
Troubleshooting
When operating a Samsung vacuum cleaner with clogged filters, dust is not sucked in. A few minutes after it starts (from 1 to 15), the power is automatically reduced. In this case, if there is automatic safety equipment, the emergency thermostat will turn it off, and if it is absent, the device will burn out. Typical signs of clogged vacuum cleaner filters are poor draft, strong hum and heating. Before you begin disassembling the device, you should check all the filters, replace them if necessary or clean them (certain types need to be washed) and refill them.
If you cannot remove dirt, you need to remove these elements and turn on the vacuum cleaner without them to make sure that the suction strength is normal. If it is small, you will need to clean the impeller of accumulated small debris, and then check the condition of the turbo brush and engine commutator. Unusable brushes must be replaced, and the commutator will need to be cleaned with fine sandpaper N0 or N00.
If the vacuum cleaner is used for a long time, the fuse may blow and the device will not turn on. In this case, it should be inspected and replaced before starting. The next common failure is a broken network cable. The vacuum cleaner will not work if it has a faulty switch. To identify this defect, you will need an ordinary wire tester to determine the location of its break. First you need to make sure that the temperature sensor in the vacuum cleaner has not tripped, which could forcefully cut off the power to the engine. You can eliminate such a malfunction using a soldering iron in a few minutes. The vacuum cleaner will cool down and turn on automatically.
If during operation the device begins to vibrate, make unpleasant cutting sounds, or grind, this means that the bearings should be lubricated or replaced with new ones. Such signs indicate wear of parts.
Also, the power wire may not retract. This occurs due to the weakening of the spring in the winding drum or the tightening of the cord. To fix the problem, you need to remove the drum, inspect it and solve the problem by rewinding the cord. If the pressure roller does not work, you must contact a specialist. Reassembling the vacuum cleaner is done in the reverse order.
Hose design features
Most corrugated hoses for cleaning equipment are a tube made of elastic material (polypropylene).
The tube is usually no more than 1.5 meters long. Thanks to the corrugated surface, the accessory has the ability to stretch within small limits.
One end of the flexible conduit ends in a short piece of rigid plastic tubing. This part is a connection link with the extension rod or directly with the working nozzle of the vacuum cleaner.
The opposite end of the hose is equipped with a short locking pipe, through which a locking connection is formed with the vacuum cleaner module. This lock pipe is actually also a continuation of the corrugated tube.
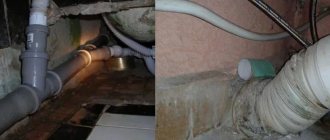
The practice of using vacuum cleaners notes that it is along the junction lines of the elastic corrugation with the end rigid elements that most often a rupture occurs, and a breakage of the hose is considered one of the most common breakdowns of a vacuum cleaner.
Meanwhile, the formation of even a small rupture in the hose leads to a significant loss of efficiency of harvesting equipment.
Description
A vacuum cleaner is a multifunctional device that helps clean any room.
This device consists of the following elements:
- main body with motor, dust collector and filters;
- corrugated hoses and pipes, which can be either external or internal;
- nozzles for collecting dust and debris.
A vacuum cleaner hose is a corrugated tube made of polypropylene, rubber or plastic. Many devices have inserts made of iron rods, which give the structure rigidity and strength. Distinctive features are a high level of elasticity and the ability to increase its length. The standard hose length is 150 cm.
There are a number of basic parameters that influence the choice of hose.
- Diameter is an important indicator on which suction power depends. For each vacuum cleaner model, the manufacturer independently selects the diameter of the corrugated tube.
- Length is an indicator that affects the convenience of cleaning and the maneuverability of the device.
- The material of manufacture is the main parameter that corresponds to the model of the vacuum cleaner, as well as the method of cleaning (dry or wet).
- Design is an indicator that is influenced by the purpose and features of the vacuum cleaner. Hoses for washing devices have additional water tubes and triggers, which are secured with a special latch. To regulate the suction, control panels with a power source are installed.
- The price range is the main indicator that affects the service life of the device and its quality.
- Elasticity is a property of a hose that affects durability and ease of cleaning.
The most common areas of deformation:
- near the handle and at the junction with the main body;
- in the middle of the tube.
Causes of defects
Cracks, tears, and punctures on the body of the vacuum cleaner hose can appear for various reasons. However, the main reason, of course, should be considered improper handling of this part.
What user actions lead to the appearance of defects on the body of the corrugated tube?
- Towing a vacuum cleaner from place to place via a hose.
- The tube is bent at unacceptable angles during the cleaning process.
- Inaccurate use when cleaning objects with sharp edges.
- Storage not according to instructions.
The natural cause of the formation of defects should also be considered the expiration of the product’s service life, wear, and poor quality of the material.
Towing a vacuum cleaner from place to place by pulling the device by the working hose is a fairly common practice.
At the same time, many owners of vacuum cleaners perform such “tricks” completely unaware of the impending consequences. Meanwhile, the instructions for any vacuum cleaner clearly state that you cannot do this!
Bending of the pipeline at an unacceptable angle can occur when the owner of a vacuum cleaner, in the heat of cleaning, seeks to reach areas that are theoretically inaccessible due to the operational and technical parameters of the cleaning equipment.
Several times such attempts can end quite successfully. However, the strength of the material with respect to unacceptable loads is not unlimited. Therefore, at the most inopportune moment, the pipeline will simply burst in the place where there was an unacceptable bend.
Cleaning work can be carried out under different conditions. For example, when cleaning furniture whose frame has metal parts with sharp edges. If the hose is handled carelessly under such conditions, there are all the prerequisites for cuts to appear on the body of the corrugation.
Finally, the rules for storing cleaning equipment, specifically described in the vacuum cleaner instructions, also cannot be violated, since violation here is one of the reasons for the malfunction of the vacuum cleaner hose.
Thus, storing the device together with accessories, or separately accessories, at a temperature below the recommended one leads to a decrease in the strength of the corrugated tube material.
Sudden temperature changes, loaded conditions, and unacceptable bends are also critical for the hose material.
How to fix a vacuum cleaner with your own hands: the most common breakdowns and their repair
Many people claim that the telescopic tubes of vacuum cleaners are not dismountable; of course, you can try, but it is hardly possible without breaking the latches. Even heating, which is often used by motorists when removing various clamps, will not help with the vacuum cleaner tube. These are two tubes, an outer tube and an inner tube, which have one or more locking elements that lock into slots in the inner sleeve and are therefore held inside.
The fixation is ensured by a spring. And I also read that there are several patents for the invention of this device and preference was given to the one that is assembled faster into equipment. That is, once it latched, which means that it is unlikely to open. There, the spring element is designed as a curved ring of a rod spring.
There are also various one-piece ring caps and teeth. My Zelmer vacuum cleaner tube has long ceased to be fixed, which led to discomfort when working with the vacuum cleaner. Thanks Alex for the advice and photos. I improved his method a little. Instead of cutting off part of the locking button, I simply drilled a hole in it to remove the screw.
By slightly pulling the button away from the tube, you can see where the screw is located, which will allow you to aim the drill. Then everything is the same as with Alex, but in my case nothing was broken and simply disassembling and further reassembling helped.
Perhaps the mechanism is simply clogged or the locking rod has come out of its groove. Well, for reference, the locking button is a view from inside the tube. You can see the hole for the screw, the spring and the guide of the locking button:. There is nothing that cannot be taken apart, but as always, after disassembly they remain; either unnecessary parts, or a product that can no longer be restored. Not only the telescopic tube of the Elenberg vacuum cleaner, but most of these tubes are made, roughly speaking, for one-time use due to savings and in order to reduce costs.
The pipes are so thin that they basically just bend under a small load. I also thought about restoring such a tube, half a year ago, but in vain. Then I took and sharpened a piece of wood 20 cm long. If your fingers are strong, just pull it away from the tube by the middle of the sliding button, or help your fingers with a flat screwdriver or a knife on the long sides of the button. The problem was solved simply. He pulled back the sliding button, unscrewed the screw and disassembled it into two tubes and a plastic sleeve with a locking mechanism.
DIY repair instructions
If the flexible hose of a vacuum cleaner is damaged, this is not a reason to make a decision regarding changing household appliances.
As user experience shows, it is quite easy to restore a defective corrugated vacuum cleaner hose to normal working condition. And it’s quite easy to do it yourself. Let's consider the options.
Option #1 - repair with a simple cut
Most often, gusts form at the junction of the flexible hose with hard plastic end pipes.
It does not matter in which part the rupture occurred - at the point of connection of the tube under the rod or at the point of connection of the pipe-lock. The repair principle is the same in both cases.
For repairs in such cases, the only tool required is a sharp knife.
Work progress:
- Make an even cut of the hose slightly away from the gust.
- Carefully remove the residual corrugation material from the inside of the end cap.
- Treat the cleaned interior area with sealant.
- Carefully screw the end cap onto the cut end of the hose.
As a rule, the end plastic parts have a screw landing track inside.
Therefore, the evenly cut part of the corrugation is screwed well into the inner area of the end cap, and by coating the “thread” with sealant, the connection is sealed and quite strong.
Many modern vacuum cleaners, for example from Samsung , are equipped with hoses with collapsible ends. Inside of which sits a nylon bushing with a thread into which the end of the hose is screwed. The nylon bushing is secured inside the end switch pipe with an annular plug with clamps.
The principle of repairing such assemblies is similar. You only need to release the clamps, remove the ring plug and the nylon bushing with the torn piece of hose.
Then remove the torn part from the bushing, cut the hose, screw a nylon bushing onto the cut end and assemble everything in the reverse order.
Option #2 - using the overlay bandage method
Defects of this kind usually appear as a result of damage from mechanical hard objects and often through the fault of the owner of the equipment. Moreover, the damage may take the form of cuts, tears, or punctures.
Here, a rather practical and effective way to restore the functionality of the corrugated hose of a vacuum cleaner is to use a piece of a bicycle rubber inner tube as a repair material.
- Exactly (perpendicularly) cut out the damaged corrugation segment.
- Clean (degrease) the ends of the cuts well.
- Take a solid piece of a bicycle tube 80-100 mm long.
- Place a piece of the camera on any of the corrugated sections and stretch it a little further than the cut point.
- Apply Moment type glue to the ends of the cuts and connect the hose sections.
- Treat the surface of the corrugation in the joint area with universal glue.
- Pull a piece of the chamber in the opposite direction along the hose until the rubber completely covers the connection point.
The rubber of a bicycle tube has good stretching properties, so pulling it through the hose is not difficult.
At the same time, the slightly smaller diameter of the chamber allows for a fairly tight fit of the hose corrugation at the connection point. The applied adhesive enhances the tensile strength.
In this way, a neat connection is obtained that does not actually violate the elastic properties of the corrugation.
Option #3 - using the thermal method
There is another technique, more complex than the methods noted above, but the quality result can be obtained at the level of factory execution. We are talking about a thermal method for restoring a defective vacuum cleaner hose using a heat-shrink tube and a hair dryer.
It should be noted: in this option there is no need to cut (shorten) the hose, which has its advantages.
The work instructions are as follows:
- Select the heat shrink tube according to the color and corrugation diameter size.
- Disassemble and dismantle the end switch on the entire part of the hose.
- Place a heat-shrinkable tube through the freed end and stretch it to the point of the break.
- Cover the damaged area with heat-shrink tubing with a margin of a few centimeters on both edges.
- Use a hair dryer to heat the heat shrink, gradually moving the tool along the entire length of the patch.
This method is also good for repairing punctures and cracks in any part of the corrugated pipe.
Another question is that a hair dryer or similar tool is a rather specific technique and may not always be at hand.
Option #4 - repair of corrugation with internal conductors
Another task that is quite complex from a technical point of view is the repair of a vacuum cleaner hose, the design of which contains an electrical switching line.
A similar system is usually used on accessories complemented by a handle with an airflow control panel, for example, Samsung SC6573 .
The difficulty of repair lies in the fact that to eliminate the break, it is necessary to cut off the defective piece, and along with it, it is inevitably necessary to cut the commutating line, consisting of two conductors. The cut wire is subsequently re-soldered onto the working contacts.
If you own a Samsung vacuum cleaner, we recommend that you familiarize yourself with the information about typical breakdowns of equipment from this brand, which is presented in this article.
The instructions in this case are as follows:
- Disassemble the housing of the lock pipe.
- Unscrew the pipe from the hose counterclockwise.
- Cut off the defective part, taking into account the sufficient length of the wires.
- Resolder the contact pins onto the conductors.
- Assemble the housing of the lock pipe.
Bursts on such systems can also appear on the opposite side, at the junction of the hose with the control handle. There may also be a defect only in the breakage of the wires without destruction of the hose.
In this state of affairs, repairs become even more complicated, since we have to solve the problem of restoring the functionality of the contact mechanism of the communication line.
Option #5 - temporary recovery technique
Quite often, vacuum cleaner owners resort to the simplest methods of repairing a hose when a rupture, puncture or crack occurs. To carry out repairs, adhesive tape, insulating tape or plumber's tape are usually used.
Troubleshooting
In most cases, the reason that the vacuum cleaner fails is the engine. Such a breakdown occurs with almost all brands and models of the device, regardless of the manufacturer. Based on the characteristic signs and operating features of the device, you can diagnose the problem and try to repair the vacuum cleaner yourself.
- The first sign of engine malfunction is a hum and the appearance of a dust cloud during operation of the device.
- Insufficient suction power or its complete absence indicates that the hose has failed. Another sign that the hose seal is broken is the quiet operation of the device. In addition to a breakdown in the corrugation, the receiving brush may be damaged.
- Low suction speed and a drop in operating speed may be a consequence of bearing failure. Proof of the failure of these particular components is the periodic restoration of operation to normal mode.
- Excessive noise when operating properly indicates that the engine has failed. In most cases, malfunctions in the motor directly affect the strength of the air suction power.
Do-it-yourself microwave oven repair at home
Conclusions and useful video on the topic
In the video below, the technician will demonstrate how to repair a hose containing a communication line inside:
Repairing a vacuum cleaner hose often does not cause any particular difficulties for the user. The main criteria for making independent hose repairs are the ability to hold a plumbing tool in your hands and, accordingly, a creative impulse to carry out repair work. Without both, the quality of the repair is not guaranteed.
Do you have anything to add or have questions about repairing a flexible corrugated hose? You can leave comments on the publication, participate in discussions and share your own experience of fixing this part of the vacuum cleaner. The contact form is located in the lower block.
Author: Julie · Published 02/25/2012 · Updated 10/30/2015
If your breaks , then do not rush to throw away the vacuum cleaner and buy a new one, especially if you are completely tired of the old vacuum cleaner: excellent suction power and the engine works without failures. Usually the hose breaks in the places where the strongest bends are made - this is either in the place where the hose is attached directly to the vacuum cleaner itself, or in a place near the handle of the hose holder. I have repeatedly seen how a torn hose is wrapped with electrical tape or tape. But in this case, such repairs are usually short-lived, and they look somewhat rough and shabby.
The hose can be repaired by cutting off the torn part. In this case, it will be 3-5 centimeters shorter, but will look and work like completely new .
For repairs, we took a hose with a power regulator on the hose handle:
This hose differs from the usual one in that it uses two insulated wires as a spring, through which voltage is supplied to the switch and power regulator (rheostat), located on the handle of the holder. As expected, the hose broke where it was attached to the vacuum cleaner:
Since this hose has wires, it has two contacts in the form of a plug for an electrical outlet, which close the electrical network when connected to the body of the vacuum cleaner:
First you need to disassemble the mount to access the hose wires. To do this you need to use a Phillips screwdriver. Unscrew the two screws on the holder mount:
There are round technological holes on the end side of the hose holder for easy removal of the fastener. Using the same screwdriver, gently press deep into these holes and at the same time upward to remove the spring fastening mechanism
Thus, the spring fastening mechanism of the hose opens slightly:
After this, the fork with the spring mechanism for fastening the holder is removed:
Carefully remove the spring latch:
Next, unscrew the plastic hose guide:
Unscrew it counterclockwise towards yourself. It holds quite tightly, but after a few seconds it gives in:
and then removed:
The wires are released, and by the same twisting the hose itself is removed from the vacuum cleaner nozzle:
The plastic flexible shell of the torn part can be easily cut off with ordinary scissors:
We remove the wires glued to the sheath and cut off the excess part with side cutters:
When cutting wires, note that it is better to cut a whole number of turns (one, two, three, etc.). This is necessary so that when assembled in a natural position, the suction end of the hose is directed downward, as before, and not somewhere to the side or upward.
Next, we will use a soldering iron to solder the ends of the wires that were previously soldered to the wire - the spring, which were cut off:
You need to solder them again. To do this, you need to clean the new ends of the wires from insulation (you can use a regular construction knife):
For better adhesion with solder, it is better to treat the cleaned ends with rosin:
Then we solder the ends of the wires with pins to our cut part. They should not touch bare wires - pay special attention to this !
All is ready. Now you can reassemble what was disassembled. When assembling, first screw in the vacuum cleaner nozzle:
When installing wires, it is convenient to use electrical tape to secure the wires:
Also, when assembling, it is better to first install a holder with a spring fastening, and then put on the plastic hose guide, since it goes on top of the holder:
Next, screw the screws back in. That's all. We are getting an updated hose. The whole job took 30-40 minutes, no more. Of course, the mounts for different brands of vacuum cleaners are different, but the principles are common to all.
Lastly about electronics
It must be said that the electrical circuits of vacuum cleaners, except for the most expensive ones with microprocessors, are not particularly complex. The electrical circuit diagram of the vacuum cleaner, which can be considered close to typical, is shown in Fig. below. The network voltage in this case is 110 V. For a voltage of 220 V, the resistance of R1 is increased to 150 Ohms and its power to 2 W. R5 takes 330 kOhm, VR1 and VR2 each take 470-510 kOhm, R3 – 24 kOhm 2 W. The operating voltage of all capacitors is 630 V.
Electrical circuit diagram of a vacuum cleaner with power control
R3 sets the maximum power of the vacuum cleaner; it can be changed within 12-47 kOhm. VR1 is the operational power control, and VR2 is set to its minimum value, and here you need to be careful. The fact is that if the motor armature stops, every half-cycle of the mains voltage a starting current equal to 3-5 working currents will flow through it, and an expensive powerful triac (TRIAC according to the circuit) will burn out
Therefore, when setting up the circuit, the VR2 engine is first set to minimum resistance, then a voltage of 175 V is given from the LATR and VR2 very carefully, without overshoot, reduces the motor speed to 700-800 rpm
Thermal protection in such a circuit is also easy: a 1-1.5 MΩ thermistor (for a 220 V mains voltage) with an inverse logarithmic temperature characteristic is connected in parallel to C3. Physically, the thermistor must be in thermal contact with the motor housing, but be electrically isolated from it. A “cold” thermistor (at room temperature) does not affect the operation of the circuit, but when heated to 70-80 degrees, its resistance will drop to 1-0.5 R3, C3 will charge more slowly during the half-cycle, the low-power DIAC triac will open and open the TRIAC later , and the engine power will decrease by half or four. In approximately the same way, it is possible to modify most vacuum cleaners with power control, but without automatic protection.
***
2012-2020 Question-Remont.ru
Display all materials with the tag:
Go to section:
Components of the mechanism
Repairs to microlift breakdowns are not delayed. If you do not deal with the issue of restoring the functionality of the mechanism for a long time, then in the future it will be even more difficult to do so. Repairing the part will be problematic.
Knowledge of internal elements will speed up repairs. Each element of the mechanism has its own functions:
- the fastening element for the cover is a rod;
- the balance of the plastic structure is maintained by a weak spring;
- the hinged structure represents the microlift mechanism;
- toilet seat with lid.
The smooth lowering and raising of the plastic product is carried out by a micro-lift hinge mechanism and a spring. In an expensive mechanism, the main elements are called cylinders and pistons. It is impossible to disassemble such a mechanism.