How to make attachments for walk-behind tractors with your own hands
In principle, most equipment is very simple in design and can be easily made from what is at hand. However, you still have to buy a hitch for awnings. And you can make other devices like a potato planter, potato digger, lugs, seeder, hillers yourself.
Homemade hiller for walk-behind tractor
To make homemade hillers for a walk-behind tractor, you need to take two metal disks 2 mm thick and place them opposite each other so that they open outward.
When we have selected the correct angle of the disks, we need to secure the hiller with bolts or simply weld it.
Now we need to secure it to the hitch we bought to the walk-behind tractor and off we go!
Homemade potato planter
The structure of a homemade potato planter is somewhat reminiscent of a hiller. Here, too, there are two disks at the bottom, but on top there is a special bowl into which potato tubers are poured. From a hole in the bowl, the tubers fall into the ground, and the discs of the potato planter are designed to bury them with each step.
In order to make a homemade potato planter, we need to assemble the frame, wheels and wheel axle, steel pins, tuber hopper, sprockets and adjustment mechanism. When making a canopy, pay close attention to the frame, because this is the main organ of the potato planter.
All other organs are attached to it. Cover the front wheels with a metal plate; without it, the potatoes will fall out of the hopper when we don’t need it.
Correctly select and configure the adjusting device of the potato planter. This is necessary in order to correctly distribute the planting material in the soil. Tighten the bottom of the hopper with rubber so that the potatoes do not fall out in vain. The potato planter can operate on a variety of wheels.
How to make lugs for walk-behind tractors with your own hands
In order to make them yourself, you need to have several blanks, a grinder and a welding machine.
To make lugs, you can use old car rims. Take out the steel corner, it will then become our teeth on the lugs. Take the axle shaft and attach the bearing to it.
Weld a square plate into the center of the wheel rim so that its corners touch the edges of the rim. To be sure, we make holes in the plate and additionally bolt it to the disk. We attach the axle shaft from the inside of the disk to our plate.
When our wheel is ready, let's work on the hooks for it. We said earlier that you need to buy a steel angle in order to then remake it by hand. So, we cut the corner into pieces with a grinder, fold each two pieces into a corner and fasten them with a welding machine.
The hooks that we have obtained must be placed on the rim of the disc at a distance of 15-20 cm from each other.
The second method of making homemade lugs
There is another way to make wheels with lugs. It will come in handy if you have an old unnecessary gas cylinder and no lugs. We cut a circle (rim) from the balloon with a width of five to seven centimeters, the circumference of the rim should be 30 cm.
After this, we make hooks from a 40 mm metal plate and, just as in the previous version, fasten them at a distance of 15 cm from each other. In addition, we weld an additional plate to each hook in its center, which creates an additional “tooth” of the lug.
We add another 60 cm to the edge of each hook - this is for greater penetration into the soil. We weld a square plate to the rim of one of the metal disks, on which there will be a lug axis.
Homemade trailer for walk-behind tractor
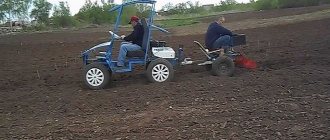
Now let’s look at the design and capabilities of a homemade trailer for a walk-behind tractor. Sometimes manufacturers themselves do not make them for the walk-behind tractor they sell, or they make them of poor quality; they often bend when transporting cargo, where the trailer connects to the wheels. The best thing is a homemade trailer for a walk-behind tractor; it will be 2-3 times cheaper and, accordingly, more reliable.
First, we make the body of the future trailer. To do this, we take steel pipes with a rectangular cross-section or we can use corners as in the case of lugs. We need to use a grinder to cut the pipes at right angles and then we can sheathe the body with wood or metal. We attach a driver's seat to the front. This way you can operate a walk-behind tractor with a trolley while sitting and holding it by the walk-behind tractor control handles.
When our body is ready, it’s time to think about how our cart will ride. We need to make a wheel axle by taking the rear axle from a passenger car and removing the gearbox from it. You can also use a metal rod turned around the edges as an axle so that you can put on the wheels for the cart.
When the trailer is ready, you still need to attach it to the walk-behind tractor. Hitch the trailer to the walk-behind tractor using a swivel unit. To make it, we take a pipe with a rectangular cross-section and weld it to the lower edge of the cart so that a regular triangle is formed, and the edge of the body is the base of this triangle.
We also mentioned the manufacture of a rotating unit. It is a cylinder with a console on two bearings. This design of the device allows the wheels of the cart and walk-behind tractor to move independently of each other.
Below you can see drawings of a standard trolley for a walk-behind tractor
Homemade attachments - cutters and plow
One of the main attachments for a walk-behind tractor are cutters and a plow. Only cutters are used only on soft and constantly cultivated soil, and the plow is used on virgin soil. Also, the plow is more expensive and not every summer resident can afford it. But, in principle, this article itself was created for those who want the entire set of attachments and do not want (or cannot) pay for it.
For a homemade plow, take a metal plate with a thickness of 3 to 5 mm and a pipe, the walls of which should be 5 mm thick. We will also need to make the body of the plow.
First, we take a metal plate and sharpen it as if we were sharpening a scythe. Let's make a blade out of the plate. To do this, you need to cut it out with a grinder. The ploughshare looks like a trapezoid; you can see a sample of it below. Now we attach the pipe. And we also need a homemade ploughshare. We will replace the purchased one with a circular saw blade. All the parts we have made are now attached to the plow body and connected to the walk-behind tractor via a hitch.
Adjusting the depth of the coulter.
The coulter is a mechanism for adjusting the depth of soil cultivation. It has several through holes, which are located at different heights relative to each other. When installing the opener in the holder, you need to secure it through one or another hole using a cotter pin.
The choice of hole depends on the depth of cultivation you need. If you want to set the minimum depth, you should install the coulter on the holder through the lower hole. Through holes, which are located slightly higher, are intended for deeper cultivation of the land.
What other factors should you pay attention to for correct and high-quality installation of the coulter? If your plot of land has fairly heavy soil or you applied organic fertilizers shortly before cultivation, then you do not need to bury the coulter too deeply into the soil. In such cases, it is strongly recommended to install the opener through the first hole so that the tillage is not too deep. If you install it through the second and above the second hole, then when cultivating the soil, the milling cutters will be buried in it (exactly the same negative effect will occur as when sharpening the cutters).
Making a reversible plow for a walk-behind tractor with your own hands
Previously, we considered the possibility of using a plow (homemade) instead of a milling cutter as an attachment for a walk-behind tractor. Both the cutter and the plow perform similar functions, but differ in the quality of processing. The reversible plow also differs from the standard one.
This plow has a complicated design, in which the body on top is equipped with a curved feather. Thanks to this structure, the reversible plow not only plows the ground, but also turns over the layer of soil that it plowed. This can be useful when working with heavy soil. The design of a reversible plow is much more complex than that of a conventional one, and only a professional can make a reversible plow on his own. It can be very difficult to choose the right quality workpieces and not make a mistake anywhere in the process.
In order to assemble such a plow yourself, you need to know what to assemble from, that is, what parts you need to make first.
To make a Zykov plow with your own hands, you need to make a stand with which you will attach the plow to the walk-behind tractor, a plow body with a ploughshare, a field board (thanks to it the plow becomes more stable) and a feather with which to turn the earth. The blade of this plow is made from a pipe half a meter in diameter with a wall thickness of 5 mm. We turn on the welding machine to cut out the blade, which we then grind with a grinder. For the birch body, a steel plate 2-3 mm thick.
Motoblock "Oka". Replacing belts and adjusting. at the request of viewers.
Walk-behind tractor "OKA". Replacement of belts and adjustment. At the request of viewers. More details
Adjusting the belts of the old walk-behind tractor MB - 1 (loop catcher) More details
Replacing the forward drive belt on an Oka walk-behind tractor. More details
Selection ADJUSTING BELTS on a walk-behind tractor part 1 Read more
On the MB-1 walk-behind tractor we install and adjust the drive belts. More details
Replacing the belt;Adjusting the clutch of the weima 1050 walk-behind tractor (favorite clone) More details
Why does the 1280 belt on the Neva MB 23 walk-behind tractor wear out quickly? More details
Refinement of walk-behind tractor No. 2 Read more
Motoblock OKA series MB-1 features and advantages - Garden Mechanisms Read more
(1) How to make reverse speed, NEVA 2. Read more
Do-it-yourself walk-behind tractor lever for reverse speed Read more
Zhiguli wheels on the OKA walk-behind tractor and homemade unlockers. More details
Motor cultivator Sadko M500 clutch belt tension More details
How to change the belt 1280 to a lower one, Neva mb23 Read more
Neva MB-2 walk-behind tractor belt looper Read more
Light walk-behind tractor clutch (BELT) More details
Changing the oil in the gearbox of the Oka, Cascade, Luch walk-behind tractor. Replacing oil seals Read more
Forward spring of Tselina walk-behind tractor. More details
Maintenance of the NEVA MB-2 walk-behind tractor // Replacing the drive belt and clutch cable // Part 4 Read more
“This belt will suit you 1180” - that’s what they said in the store where I bought the Neva walk-behind tractor Read more
How to properly work as a cultivator in the garden?
Cultivator
should move smoothly and evenly. If it buries itself in the ground, then it is necessary to adjust the position of the wheels or swap the cutters. After using the unit, wipe all metal parts with a cloth. If necessary, rinse the cutters and then wipe them dry.
Interesting materials:
Can primer be applied to a damp surface? Can acid primer be applied with a brush? Is it possible to apply plaster to Penoplex? Can plaster be applied to tile adhesive? Is it possible to feed cucumbers with ammonia? Is it possible not to dig up irises for the winter? Is it possible to break off lilac branches? Is it possible to update the countertops in the kitchen? Is it possible to update the countertop? Is it possible to do without a foundation?
Hillers
These are devices designed for hilling potatoes and other crops, as well as for weeding and plowing rows. There are three types of hillers that can be hung on a walk-behind tractor.
Dental. These nozzles can be single-row or double-row. The teeth are rigidly fixed to the frame and are located clearly on the axis of the walk-behind tractor wheels. During operation, the tines weed between rows, simultaneously covering potato bushes or other crops with soil. Typically, the width between the teeth (for two-row models) is 25 - 30 cm. Units with a capacity of 4 - 6 liters are mainly equipped with such attachments. With.
Disk. Here the discs are similar in design to those on a disc harrow. This hiller copes well with weeds and covers the bushes with soil. Some hillers have nicks on the discs. Serrated discs work well in thick weeds. The distance between the discs can be adjusted depending on the width of the bed.
Rotary. Unlike the two previous types of hillers, rotary hillers are active, that is, they do not require a hitch - they are installed instead of the wheels of a walk-behind tractor. They are excellent at loosening the ground, hilling up beds and cutting off weeds. But, in our opinion, they are less convenient, since to install them you need to remove the wheels, which takes time.
Homemade sawmill with a walk-behind tractor engine
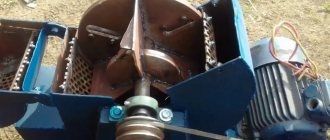
A home sawmill is indispensable for construction. You can make such an invention using an engine from a walk-behind tractor. The motor should have quite a lot of power - from 13 hp. You can make your own sawmill with a band saw. The convenience of this design lies in its small size and mobility; it is easy to assemble and disassemble.
The basis is a frame and 2 guide pipes on which the carriage is installed. Impellers are attached to it, one of which is driving (a belt drive is installed on it). The motor is also mounted on the carriage. At the very end, the band saw is tensioned using a tensioner.
The design is small-sized, but quite powerful. The thickness of the cut is adjusted manually. The main advantage of a homemade sawmill is its price.
Source
Required materials and tools
First, you need to accurately determine the technical characteristics of the design: the type of transmission, its gear ratio, the distance between the shaft and the axle of the wheelset. The following tools will be needed for this work:
- welding machine;
- electric drill;
- a set of files and needle files;
- measuring instruments (calipers, ruler);
- yew;
- hammer.
The tool must be visually inspected and checked.
Important! It is strictly forbidden to use a faulty tool to avoid causing accidental injury to yourself and others.
Improvement of the chassis
The first thing users of a walk-behind tractor think about is how to make a cart with a seat for it. Using equipment in normal mode using levers requires the application of great physical effort. However, the use of a trailer reduces the stability of the vehicle.
This problem can be eliminated by extending the wheelbase. This is done using extensions that are attached to the axle shaft with pins or bolts. Having solved the stability problem, the operator is faced with another issue: the unit is poorly controlled. The differential for the walk-behind tractor helps to give it good maneuverability.
The low weight of the walk-behind tractor causes poor traction between the wheels and the ground. Slipping is a common occurrence when lifting virgin soil, working on wet ground or driving in snow. To avoid slipping, weights are attached to walk-behind tractors.
These devices are divided into the following categories:
- Wheeled. They are discs that are mounted on wheels or hubs. Disks are made monolithic from metal, concrete or hollow, filled with sand. The weight of wheel weights can be 30-70 kg.
- External. Made from any heavy material (steel, lead, concrete). Attached to the body using hooks or bolts. Some craftsmen weld a frame from a corner to the body. Sandbags, bricks, scrap metal and other heavy objects are placed in it.
You can improve the cross-country ability of a walk-behind tractor by installing lugs. The easiest way to make lugs is to make a rim from a strip of metal and weld blades onto it. The rim diameter should be larger than the rims and smaller than that of the tires.
You can improve the transmission by installing a homemade variator on the engine. The system of belts and discs will allow you to smoothly change the speed of the unit, without jerking or vibration.
"oka", "salute", "cascade"
Mini tractors made from the Oka walk-behind tractor are equipped with a reversible gearbox, including two speeds.
When converted, they are equipped with a frame and all-wheel drive, making all wheels driving. The engine is mounted at the front and has a factory hood to protect it. The transfer case is located in the rear. The drive of both axles with chain gearboxes is also located there. Engines from leading brands are installed in Salyut walk-behind tractors. Their power usually varies between 6–7.5 l/s. The gearbox is equipped with two main gears and an additional reduction gear. The kinematic scheme involves the use of two V-belts, due to which:
- the quality of torque transmission improves;
- the risk of dangerous slippage that can occur under active loads is reduced;
- the useful life of the machine increases.
If you make a mini tractor from a Salyut walk-behind tractor, it is advisable to increase the wheel track of the rear and front axles to 1200 mm. This manipulation will increase the stability of the vehicle. For the drive wheels, and there can be either two or all 4 of them, only standard tires are used.
When making a mini tractor yourself from “Cascade” walk-behind tractors, you can use “stockings” from old rear-wheel drive “Muscovites” or “Zhiguli” in the design of its rear axle. During operation, the “stockings” are shortened, which optimizes the wheel track parameters.
How much does it cost to plow 1 hectare of land with a walk-behind tractor?
Prices for plowing land in the Moscow region
| Plowing services | Unit change | Price per hundred square meters |
| Plowing the land with a walk-behind tractor (large fraction) | weave | 1800 rub. |
| Plowing land with a tractor (large fraction) | weave | 4000 rub. |
| Plowing virgin soil with a walk-behind tractor | weave | 2500 rub. |
| Plowing virgin soil with a tractor | weave | 5500 rub. |