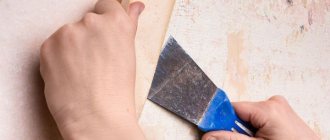
Decorative coating is a material that is gaining popularity, which is quite simply applied to the surface, creating an interesting effect. But the time comes and you want to change the decorative finish to a new type of plaster, hang wallpaper or simply paint the walls. To do this, you need to remove the decorative coating. Smooth paint and silk-effect paint for walls under embossed plaster simply need to be cleaned with sandpaper, primed and can be repainted immediately.
When you only need to change the color of previously applied textured plaster (Intonachino Minerale, Marmorino Classico, Marmo Antico, Canalgrande, Concrete Art, Rilievo), you can leave the texture and paint it with paint, pearlescent paint Cadoro or matte paint Armonia is suitable.
If the relief plaster is changed to smooth, the old coating is completely removed and here you cannot do without the recommendations of professionals.
Is it possible to glue wallpaper onto decorative plaster?
It is, in principle, possible to paste wallpaper onto decorative plaster if it is a Venetian mixture. The technology of its application provides for ideal smoothing of the surface, up to a glossy or matte shine. In this case, puttying the surface to level it will be completely unnecessary.
Interesting materials:
How to remove a picture from a laptop screen? How to remove the taskbar on a laptop? How to remove the password on an Acer laptop? How to remove the password when turning on a Lenovo laptop? How to remove password from Lenovo laptop? How to remove password from laptop after sleep mode? How to remove a password from a laptop hard drive? How to remove key bindings on a laptop? How to remove overclocking of the processor on a laptop? How to remove sticker marks on a laptop?
How to apply decorative paint with your own hands: simple instructions
Having learned about the methods of preparing the mixture, you can begin to apply it, and here you need to arm yourself with a few tips and instructions that will help you make an even and beautiful coating with your own hands.
Mixing putty
The main thing to remember is that dry mixtures are first added to a plastic container, which are only then mixed with water, not the other way around. This order is important because it will help prevent the formation of lumps (which lead to the appearance of bumps later).
When mixing the putty, make sure that all components are clean, without any additives or debris. This can ruin the appearance of the decorative finish.
It is recommended to prepare in advance the materials that will be required during the work:
- several spatulas,
- rollers,
- stencils and others.
Applying the base layer
For the starting coating, use mixtures containing quartz chips. The fact is that they have excellent adhesion and good adhesion to the wall surface, due to which they do not peel off and do not lag behind it over time. This will help create an excellent base for subsequent decorative layers.
Whether to add color or not is up to you. The base coat can be completely left white, since most often it is covered by the topcoat. However, keep in mind that each subsequent layer increases the thickness of the finish, as well as its weight and load, so a coating that is too thick and massive may crack over time. This can be avoided by thinking through the finishing concept in advance and reducing the number of layers of decorative plaster.
Creating a decorative surface
Here you can give free rein to your imagination. Using mixtures with different components (crumbs, aluminum powders, etc.) and applying them layer by layer, you can achieve an amazing effect.
Decorative plaster is good because it allows you to create a luxurious coating without the need to carefully prepare or decorate each layer. On the contrary, careless strokes and broken lines will help create an original and unique pattern on the wall.
Interior solutions
If you have previously worked primarily with wallpaper or paint, then most likely plaster appears to be an inconspicuous cement mortar that can hardly be used in finishing.
Let's dispel the misconception.
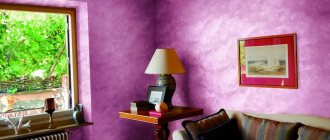
"Silk" on the walls
- Mother-of-pearl coating, differences in degree of gloss and grain. Adding sophistication to the room. Various application methods, use of almost any color scheme. All of the above is a brief description of this type of decorative plaster.
- Its composition includes rayon, cotton and cellulose fibers, as well as water-soluble glue flakes.
- This is a unique material that imitates a silk surface, while creating the illusion of transparency of the walls. You can definitely create a stylish design, you just have to remember to carefully prepare before application.
Sandstorm effect
- Externally it resembles sandstone. Apply with a brush. The technique is different, so the drawing depends on your hand. Ideal option for interior decoration.
- The composition most often includes quartz sand, but river sand can also be included. For a sparkling effect, finely crushed shell particles are added. There is a coating with reflective beads. In the interior it looks impressive and unusual.
- Textured sand is resistant to dampness, and the fine quartz included in the composition protects against fungi.
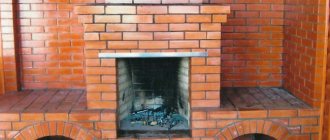
"Travertine"
- This decorative plaster imitates the calcareous tuff used for construction in Ancient Rome. Can be applied smoothly to walls or rubbed in until glossy. The thickness of application is determined by the size of the fraction.
- It contains marble powder to create shine, pigments, binders and slaked lime. The material itself is durable and acts as protection for the wall.
- It can be used to create various designs, such as a world map.
"Texture"
- Masks unevenness and other wall defects. A universal material that is suitable for those who do not want to waste time on perfectly leveling the wall. Can be used to imitate natural materials.
- The composition includes small stones, elements of granite or marble chips, and sometimes cotton and flax fibers are present. Coarse fillers are placed in a thick layer, due to which all defects are covered.
- When applying, stencils, structural rollers are used, and artistic modeling is performed.
"Bark beetle"
- Currently one of the most popular decorative plasters. The material is used not only for interior decoration, but also for the facades of the house. For this, different factions are taken. The interior looks restrained and sophisticated.
- Consists of mineral filler, granules (of different sizes) and liquid.
- Several application methods: horizontal, vertical, circular.
"Fur coat"
- Acts as a protector against sudden temperature changes. Otherwise called pebble plaster. Most often this coating is used in the bathroom and kitchen. Can be applied to concrete, stone, gypsum and cement plaster, drywall.
- Acrylic, cement, silicate are the main components. Texture is achieved through mineral chips.
- Small price. Anyone can handle this finishing method, so professional help is not needed.
"Home Venice"
- Venetian decorative plaster is a complex and capricious material. However, it can be found in the interior with noticeable frequency. It will be difficult to recreate this type of coating without experience, but the result is worth it.
- Three important components: stone dust, slaked lime and pigments to give color.
- This coating can be single-color or multi-color. It replicates marble with a glossy surface. Sanding can be done by hand or using polishing equipment.
Imitation from tile adhesive
The coating will be more textured and deliberately rough - as if created for a loft.
You will need:
Tile adhesive, varnish, spatula, enamel or paint.
Preparation and application:
Apply a layer of glue 5 mm thick and work with a spatula in successive circular movements. You can use a hard, wide brush to create texture. When the surface dries, lightly rub it with fine sandpaper, prime it and cover it with paint or enamel, and then with varnish.
Patterns, embossing, roller textures
Now we have moved on to the final stage of decorative finishing with plaster, which we prepared ourselves. At this stage you will apply the finishing coat and decorate it as you choose. We will tell you how and how to do this later.
Roller
We are talking about an ordinary paint roller. It has a large pile that naturally presses through the plaster, leaving an intricate pattern on it. This is the simplest and most affordable option.
You can buy a special textured roller, the rubber surface of which has neat patterns. This option will help create a beautiful and stylish relief on the wall.
After coating and drying the decorative plaster, you can paint it in the desired color. If you used several layers with different shades, then squeezing the pattern in itself will create a stylish effect on the wall surface.
Spatula
There are no less opportunities for realizing creative ideas. If you use a ribbed plastic or rubber spatula, you can easily make straight lines, waves and various geometric patterns and transitions. Ever heard of Japanese rock gardens? You can recreate a similar texture on your wall.
An important advantage of the spatula is that it covers a larger surface. If desired, you can make an arbitrary ornament by applying small vertical or horizontal strokes.
Other options
There are many other professional tools that will help you create decorative finishing. A trowel is perfect for this. It is much lighter and simpler than a spatula, and thanks to its pointed end, you can effectively squeeze out small hollows in the surface of the wall.
Another interesting option is ready-made rubber molds. They are good because they help give the surface the appearance of brick or stone masonry, and at the same time significantly speed up the work of decorating the surface.
Improvised devices for creating relief
If you are passionate about the creative process, then you can use decorative plaster to decorate the wall:
- an ordinary kitchen sponge,
- porous sponge,
- crumpled plastic bag,
- comb,
- with a nail.
Alternatively, you can put on a rubber housekeeping glove and make patterns on the wall with your hands, running your fingers over the thick putty. Craftsmen often resort to this method and create stunning designs.
Now you know in detail about all the techniques for interior design using decorative plaster prepared from a regular mixture, which is available in every hardware store. This will help you make the amazing renovation you've always dreamed of.
How to find out if a material needs repair work?
By characteristic signs you can determine whether the plaster needs repair. Among them are the following:
- Color change . Faded stains of greasy composition are visible. Rust stains appear, and sometimes soot appears.
- Serifs and protruding fragments appear . The wall does not crumble, but it bulges greatly and its appearance is lost.
- Fragments of plaster begin to peel off from the wall . The walls are crumbling, the floor has to be washed or vacuumed every day.
The appearance of the plastered wall changes greatly; flaws and faded areas become clearly visible. If defects cannot be immediately noticed even visually, then a simple tape measure and a bar with a level can come to the rescue. These tools are used to inspect surfaces. Any deviations in level lead to conclusions about an incorrect or outdated external façade.
If misfires and defects are detected, you should think about whether the surface needs to be radically repaired. Simple calculations will allow you to do without complex manipulations if the defects are minor. For example, if the plaster is peeling off in one place, you can stick embossed wallpaper . This simple solution saves time.
You can level the old layer, but most often you will have to tear off the surface layer and apply a finishing base. You can do this yourself. You just need to select the materials and mix them well together.
Expert advice
Experts in the field of decorative plaster repair advise adhering to the following tips:
- If repairs are made using a cement-sand mixture, then the rule must be followed: the thicker the layer required, the larger the sand grains contained in the mixture.
- To prevent the prepared mixture from drying out prematurely, it is kneaded in small portions. For thin layers, you can use a liquid solution. To make it more dense, you can make the composition thicker.
- Peeling occurs when plastering a very dry surface. To eliminate this defect, it is necessary to dismantle the plaster on the damaged area and reapply it.
In rooms with high humidity it is better to use cement plaster, and for wooden surfaces use limestone material.
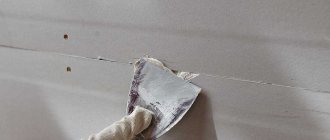
- To repair old plaster, you need to clean the seams by 5–10 mm, sweep away dust and dirt from them. Then they are thoroughly cleaned with a metal brush and treated with warm water so that the new layer of plaster adheres tightly to the old one.
Decorative plaster is easy to repair. To complete it, you need to calculate the amount of material required and take the correct measurements. The solution must be mixed in strict proportions to obtain a quickly hardening mixture.
Application process
The finished plaster is applied using a wide spatula in the air. Since mixtures are viscous, the spatula should be pulled with both hands for convenience. Minor irregularities in this case do not matter, since further finishing is not expected.
A notched or even trowel should be pulled from the bottom up in inclined or vertical stripes. Decorative plaster, unlike ordinary plaster, can be applied with rays on different sides or by driving the rays towards the center to obtain a more aesthetic effect. The spatula is pulled out in light waves, rocking a little crosswise so that the mixture sticks to the wall better.
Painting
Often the walls are painted in one tone. In the case of the types of finishing described above, it is better not to use such a simple technique, since all the protrusions and depressions are simply lost. Therefore, having finished the wall using the first or second method, you need to choose one of two methods: “dry brush” or “wash”. By the way, if a surface finished to resemble a rock can be painted using any of these methods, then only the latter is suitable for simulating rain, since there are no protrusions here, only depressions.
Let's start with the dry brush. To paint, you need to buy two paints of different tones. The one that is darker (by one or two tones) is applied first. After the layer has dried, you can begin applying the second one. To do this, the brush is immersed in the bath, and then thoroughly wiped both its sides and the cardboard. This is done so that a minimum amount of paint remains on the fibers. Then, with chaotic movements, the brush is wiped on the wall. In this case, you need to keep it parallel to the surface and touch it quite a bit. To avoid any streaks left from the tool, movements should be made in different directions.
Now let's move on to the "blur". Here you also need paints of two tones, only the one that is lighter is applied first (as a background). By the way, it must be moisture resistant. After the background has dried, a dark layer is applied to it. For it, it is better to purchase paint that is not moisture resistant. When the second layer dries (it won’t dry completely!), you need to take a damp cloth and lightly wipe the wall, the top layer will “whiten”. As a result, the dark coating will remain only in the depressions.
The second method is more expensive both in terms of finances, time and effort. But the process is easier to control: if more paint has worn off than necessary, it can be applied and wiped off again.
Ways to create relief
You can update the rooms yourself; to do this, you should choose the appropriate finishing option. When working with embossed options, you can update the design in one of the following ways:
- If there are a lot of chips and cracks on the surface, it is recommended to carry out repairs. In this case, all defects are repaired, after which a painting composition or an additional layer of relief plaster can be applied to the wall.
- For a small number of defects, it is sufficient to perform local restoration followed by changing the color of the material.
- Another fairly simple method is to replace the relief base with a thin-layer coating.
Preparing and mixing the mixture
The manufacturer took care of the ease of creating the batch, providing it to the consumer already in prepackaged containers. Outwardly, it is a bag with a dry composition that resembles sawdust and contains the necessary components. It is enough to dilute it with water at a warm temperature (40 degrees), constantly stirring until a medium-thick consistency is formed. For 1 sachet – 6 liters of water.
The mixture consists of the following components:
- Cellulose and silk fiber base
- Decorative fillers
- Dry glue KMS
They are sold already mixed, or less often - you need to mix them yourself. You can mix one sachet of each component at a time without doubling the quantity or volume of water. It is also undesirable to separate the components into parts, reducing the finished result; you can get confused with the proportion of the mixture and the amount of water.
When mixing, you should observe the proportion and sequence of mixing. Water is first poured into the container, and then powder is gradually added. This will make the kneading process easier.
The solution itself is mixed exclusively by hand, otherwise, resorting to auxiliary tools (mixers or drills) can unintentionally change the structure and ornament. The composition does not contain harmful substances that would damage the skin of the hands. The solution is infused for 6 to 12 hours. It is checked before use. Sometimes it hardens so much that it becomes excessively thick, then a little 1 liter of warm water is added to it and gradually mixed.
To save time and speed up the process, the preparation of walls and mortar is combined. This can be done if the condition of the walls is close to satisfactory.