The ceiling in the interior has never received much attention. This is often a plain, white canvas. Stretch ceilings have also become popular; in a few minutes of work they can immediately hide all imperfections and perfectly level the surface. Those who want to create a unique, creative design for their home are not afraid to spend time and effort, so the topic of whitewashing, painting and other types of finishing remains interesting. What if the concrete ceiling is left without finishing at all, or rather, to simulate its absence? And this idea has recently taken place.
Among designers, this type of decoration is gaining popularity due to the spread of modern styles loved by young people: loft, minimalism, industrial, etc.
In combination with a natural wood floor of any shade, concrete looks especially stylish and unusual. Strictness and elegance – these are the main parameters that those who want to follow this new trend in the world of interior design are guided by.
The ceiling is covered with transparent varnish to highlight it favorably
You should also be aware of the problems that may arise:
- not suitable for very small rooms, because... visually narrow the space;
- Difficulty with choosing lighting fixtures, because... not everyone will fit.
At the same time, this type of finishing has a number of positive qualities:
- resistance to mold and fungi;
- soundproofing;
- environmental friendliness;
- cheapness;
- fire safety.
This ceiling material has the peculiarity that it sets the overall tone of the overall design. It seems that there is nothing easier than choosing the color of the walls, floors, and accessories for such a ceiling. In this case, selecting the style of other interior items is a more difficult task. Cool shades, minimalism and versatility, simplicity of form should be the main factors of choice.
An important role is played by the lighting of such a ceiling: well-chosen, correctly placed, directed so as to emphasize the structure and weight the design.
Ready concrete ceiling
Ceiling design in loft style
The loft style has earned its place of honor among the most popular styles today. It is characterized by industrial motifs, rough finishing or lack thereof. Concrete ceilings will not only be appropriate here, but also the most beneficial. The room looks more damp and the renovations are unfinished. This is the effect designers strive for.
Lamps designed in the appropriate style will help to emphasize the ceiling material:
- incandescent lamps without shades;
- lamps - fans;
- lamps reminiscent of street lighting fixtures;
- in the style of industrial chandeliers;
- halogen lamps.
The loft style is not characterized by hidden communications, beams, or ceilings.
For a living space, leaving a concrete ceiling completely unfinished is not entirely correct. Therefore, the ceiling is still covered with transparent varnish in order to highlight it favorably.
Pros and cons of using epoxy grout
Positive traits:
- strength, under the influence of increased mechanical loads the layer does not deform;
- versatility: the mixture can be used to decorate coatings made of different materials outside and inside the object;
- working with epoxy grout is done without much effort, it does not require experience to prepare the mixture, you do not have to calculate the number of components, since they are already specified by the manufacturer;
- long-term operation;
- resistance to ultraviolet radiation;
- the material retains color throughout its entire service life;
- ensuring waterproofing of seam joints;
- large selection of shades;
- high adhesion;
- the coating is much easier to clean from contaminants during operation, this is due to the smooth surface of the epoxy layer and the absence of cracks;
- resistance to alkalis and acids, which allows the mixture to be applied in rooms where there is a high risk of contact with such substances (bathroom, kitchen).
Grout can be used for different purposes. It improves the appearance of the coating and gives it completeness; allows you to hide minor defects on the surface; protects against moisture; It is used in the same way as glue, which allows you to further strengthen the coating. However, there are also disadvantages to this type of material:
- the mixture instantly hardens, therefore it requires increased care and quick reaction, since it is necessary to immediately remove excess substance from the tile;
- special tools are prepared for the work and special chemicals are used;
- difficulty in cleaning, due to increased adhesion and strength of the material;
- high cost of the mixture.
What kind of grout will you use?
Epoxy Cement
Concrete ceiling finishing options
There are various ways to emphasize the relief and structure of the original look. You can also paint, whitewash or wallpaper the ceiling, preserving the beneficial properties of the material as such.
Painting a concrete ceiling
Depending on the design of the room or for practical reasons, the following types of concrete ceiling finishing are chosen:
- whitewash;
- painting;
- lining;
- wallpaper;
Wallpapering a concrete ceiling - tile;
- suspended, tension structures.
Puttying a concrete ceiling with plaster
Choosing the appropriate composition
First of all, you need to pay attention to the type of main components that the epoxy-based grout contains. The composition of such materials may include cement, various additives that increase elasticity and improve other properties. The cost of grouting will depend on this. Another factor is brand. Common options:
- Mapei Kerapoxy Design;
- Litokol Litochrom Starlike;
- Diamond.
The cost varies between 900-1100 rubles. per 1 kg of substance. The grout does not have to be updated regularly, since it does not lose its properties throughout its entire service life.
By comparison, the cement version quickly deteriorates. This substance loses strength, over time it begins to absorb moisture more strongly, and cracks form on the surface.
You also need to calculate the volume of grout required to finish the wall or floor. In this case, information from the manufacturer is taken into account. In most cases, the label indicates how much substance is consumed per 1 m². Based on this, you need to calculate the total amount of grout per area to be treated. If you immediately purchase the required amount of material, you can reduce the surface finishing time.
Features of whitewashing a concrete ceiling
The most ancient method, but not the easiest if the surface is not perfectly flat. It is necessary to know the features and stages of preparing a concrete ceiling for whitewashing.
- Completely remove old, swollen material. Lime is easily removed with water.
- Primer treatment. This is necessary not only to strengthen the concrete surface, but also to ensure a better degree of adhesion of the solution applied in the future.
- Fix the flaws. The putty is diluted to the required thickness and applied to the defects with a spatula.
- After the putty has dried, the ceiling is perfectly leveled using sandpaper.
- Before whitewashing, the surface is primed again.
- Dilute the whitewash solution according to the product instructions. Spraying with a special spray bottle is better than applying with a brush or roller. In this case, the substance will be distributed evenly and will not streak.
The final result is evaluated. Sometimes it is necessary to apply the solution in two layers.
The whitewashed ceiling needs to be updated every 2-3 years
There are two types of material used for work: chalk and lime. Each has positive properties: the first gives greater whiteness, the second has a bactericidal effect.
The process is labor-intensive, but one cannot fail to note the advantages of whitewashing the ceiling:
- environmental friendliness and health safety;
- cheap material;
- possibility of independent implementation.
The whitewashed ceiling needs to be updated every 2-3 years. Such a finish cannot be called durable. Over time, it turns yellow and swells. After work there is a lot of dirt. Therefore, despite all the advantages, many prefer other ceiling design options.
Before whitewashing the ceiling, be sure to clean it
Briefly about the main thing
Plastering the ceiling can be easily done with your own hands. To ensure proper results, 3 main conditions must be met:
- Purchase a high-quality finishing mixture.
- Stock up on a set of necessary tools.
- All work should be carried out in strict accordance with the technological map given above.
Immediately after installing the plaster, it is necessary to check compliance with the horizontal plane using a building level. When carrying out work, it should be taken into account that plastering the ceiling is a dirty and dusty process, and therefore it is necessary to take care of personal protective equipment - masks and respirators.
Painting a concrete ceiling
This option is also more affordable, like the first, but compared to the previous one, it has some advantages: a variety of colors, a better composition and good wear resistance. With the help of such a rich palette you can create interesting designs for apartments and houses. It can be matte or glossy. Matte looks appropriate in modern design (high-tech, loft, minimalism). Glossy requires a perfectly flat ceiling and will look better in a classic or baroque interior.
The peculiarity of painting the ceiling is that all work must be done quickly
To work, you will need to buy paint for interior work. It is divided according to its chemical composition into:
- acrylic;
- latex;
- silicone,
- silicate
Acrylic paint is most popular for its practical properties:
- rich palette;
- does not fade from the sun, does not change shade;
- penetrates into small cracks and masks them (up to 1 mm);
- easy to clean and not washable;
- lies flat;
- durable;
- inexpensive in cost;
- has no odor;
- non-toxic;
- applicable to any surface.
Acrylic paint is truly durable, but only if all the requirements for working with it are met: proper surface preparation, following the instructions when diluting and applying. Basically, two coats are required to achieve the desired color saturation.
Acrylic paint is very durable
Latex paint, like acrylic, consists of rubber, but only of a synthetic nature. Latex paint is richer and can be used in just one coat. It has the same positive properties as its previous brother.
Latex paints are less resistant to low temperatures, so their use is advisable for well-heated rooms.
The general disadvantage of the listed paint options is that they are susceptible to the formation of fungus even despite their moisture-resistant qualities. Modern, improved products on the shelves promise protection against this disease thanks to the addition of special components. Practice shows that this does not add much to their effectiveness. You still have to prime the surface before each coat.
Silicone paints are considered improved in this regard. They tolerate large temperature changes, high humidity, and are resistant to fungus and mold. Combining all the advantages of the options already listed, silicone paint has one drawback - high price.
Silicate paints will be an excellent solution for decorating ceilings in the bathroom, kitchen, and swimming pool. Of all the options, they are the most durable, moisture-resistant, dirt-repellent, and antiseptic. The products are slightly toxic and require additional protection when working with them.
You can also find unusual types of paints on the market: textured, embossed, textured. They are made on the basis of aqueous acrylic dispersion and marble chips. In terms of quality characteristics, it is not inferior to other popular types. You can create interesting designs with them. Not everyone can afford them. The price is quite high.
To paint a concrete ceiling, it is important to choose the right tool:
- special sprayer;
- brush;
- roller
It is best to use several devices at once.
The correct solution would be to use several devices at the same time. Use a brush to carefully paint corners and areas near the wall. At a short distance from the wall they use a small roller; for a larger area they work with a larger tool. To prevent the paint from splashing too much (it is very difficult to wash off), you should hold the rollers at an angle of about 45 degrees and do not press too hard.
For convenience, special nets are pulled to squeeze out the rollers. This allows you to avoid excess dirt and apply the paint evenly.
The same rules apply to brushes. Apply the product, lightly squeezing out the excess.
A special sprayer - an electric spray gun - is more difficult to use. Before starting work, you need to study the instructions. The paint is diluted to a certain thickness. You constantly need to monitor the location of the tool. It should always be at the same distance.
The peculiarity of painting the ceiling is that all work must be done quickly. Modern paints are made to dry quickly for practical reasons. In this case, the master is required to have good skills in finishing work.
The question of how to paint a concrete ceiling so that the coating lasts for more than one year is solved by observing all stages of preparation for work.
- removal of old paint, whitewash, etc.;
- polymer primer treatment;
- putty;
- polishing with sandpaper for perfect alignment;
- re-priming;
- painting;
- Applying a second coat (if necessary).
You can often come across statements that a more or less even ceiling does not need to be puttied before painting. But the point is not even a flat surface, but the fact that the paint in this case will not last long, even if there are no visible flaws.
What materials are used for waterproofing seams and joints
- Waterstop - This is a special waterproofing tape made from plasticized PVC or polymer materials. Waterstop is used mainly in monolithic construction and is laid in cold and expansion joints in order to serve as waterproofing.
- Bentonite swelling cord is a flexible rubber or rubber waterproofing profile that swells when exposed to water or moisture. When the bentonite cord swells, it serves as a waterproofing barrier, preventing water from passing through. Bentonite or swelling cord is designed for waterproofing cold concreting joints.
- Waterproofing tape - waterproofing TPO tapes withstand the dynamics and movement of seam walls in various directions, while maintaining a high degree of sealing.
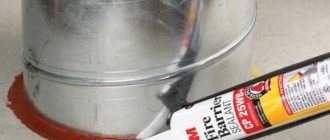
- Sealants – when it comes to sealing joints, non-shrinking and expanding sealants are mainly used. When moisture enters, expanding sealants have the ability to expand, preventing moisture from passing through.
- Injection waterproofing - Injected into the seam under pressure using equipment, through packers or pre-prepared tubes inside the seam. It is used to fill all voids, microcracks and pores of concrete.
You can read more about injection waterproofing in the article - Injection waterproofing.
Wallpapering a concrete ceiling
Wallpapering will be the solution if you don’t want to bother with putty for a long time due to minor defects. Modern wallpaper has excellent performance characteristics and allows you to quickly make repairs. When choosing quality products for the job, longevity is assured.
Non-woven or vinyl wallpaper is suitable for the ceiling
Non-woven or vinyl wallpaper is suitable for the ceiling. They are dirt-repellent and easy to maintain. In the hardware store there are options that indistinguishably imitate decorative plaster.
Before starting work, you need to prepare everything:
- cut the wallpaper into pieces along the length of the ceiling;
- dilute the glue;
- eliminate prominent irregularities;
- close all windows and doors to prevent drafts.
Glue parallel to the rays of light from the window. The seams do not need to be rubbed too hard. They need to be joined with your fingers and rolled with a rubber roller.
Flooding (then the wallpaper will simply fall off completely) and high humidity can be detrimental to the wallpaper on the ceiling. To avoid mold and mildew, when purchasing glue, you should pay attention to the antiseptic component or be sure to use a primer before gluing.
Popular sealants for sealing joints in concrete
Compositions for sealing concrete structures can be manufactured in accordance with GOST 25621-83 “Polymer construction materials and products for sealing and sealing”, or according to specifications developed by manufacturers.
The list of sealing materials that have proven themselves on the Russian market includes:
- Parabond Construction is a one-component polyurethane sealant for sealing joints in concrete. The consistency of the material allows you to fill seams of any type - horizontal and vertical, connecting, movable. Suitable for exterior and interior use.
- Dow Corning 791 is a non-shrink, one-component, silicone-based sealant material. Designed for outdoor use, for filling joints prone to movement.
- Accent 117 is an acrylic one-component sealant. This is a non-shrinkable, frost-resistant material for sealing expansion and interpanel joints. When hardened, it has a rubber-like structure.
Installation of tiles on a concrete ceiling
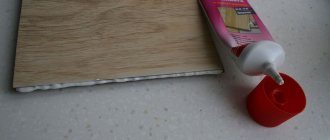
Due to its low cost, quick installation and the ability to quickly repair in case of damage, this finishing method has become very popular. Options with different patterns and textures are sold. Expanded polystyrene tiles are attached with special glue.
Installation of tiles on a concrete ceiling
Before starting work you need to know the following:
- gluing begins from the center of the ceiling;
- immediately assess where large defects are located and calculate the placement of the tiles so that the entire part completely covers the defect;
- Whole tiles will have to be trimmed when the distance to the wall becomes small. Before gluing, markings should be made in advance so that for the most part whole tiles fit. Trimmed options are best placed in places where they are least noticeable (under a curtain, doorway).
Despite the fact that the tiles are glued easily and quickly, one cannot help but note the disadvantages:
- fragility;
- lack of a single canvas, which is not always aesthetically pleasing;
- rarely used in modern interiors;
- not resistant to fungi, mold;
- lags behind at high humidity.
Types of seams, joints and junctions
Concrete is an important building material, it is durable, strong and can be formed into a variety of architectural shapes. Design considerations are necessary to ensure proper operation of the structure. Generally, any structure that is expected to be deeper than 6 meters underground will experience movement and dynamics.
Concrete must be designed and constructed to accommodate dynamics and movement: Types of dynamic load and movement:
- Shrinkage is initially rapid, less pronounced as the concrete ages.
- Creep is a phenomenon that causes a redistribution of stress away from points of intensity.
- Thermal movement is the expansion and contraction of a structure as temperature changes.
- In order to adapt the structure to movement, the structures are designed with “joints”. These joints are placed into the concrete slabs at regular intervals to prevent further development of cracks. The design of the joint is important to the functioning of the overall structure - Sealing these joints is a necessity.
Based on the above, various seams are formed in concrete and other structures.
There are different types of seams and joints:
- Expansion joints are separations between adjacent parts of a structure to allow movement during the dynamics of the structure.
- Control joints – designed to prevent accidental cracks in concrete to facilitate filling after curing.
- Construction, cold, process or concreting joints are stopping points in the construction process where new concrete is poured against existing concrete.
- Installation joints are installation gaps or junctions that must be filled with insulating materials.
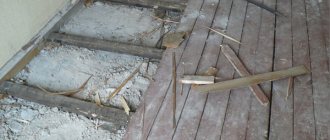
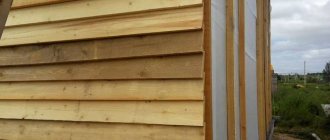
Finishing a concrete ceiling with clapboard
This is a suitable option for large rooms with high ceilings. They especially like to use this finish in dachas and country houses. Natural, natural material immediately sets a special atmosphere of comfort.
Before covering, all necessary communications should be laid in advance. Before use, the wood should be thoroughly dried and treated with a special antifungal and moisture-repellent agent.
All necessary communications need to be laid out in advance.
Characteristics of epoxy grout
The material consists of the main components: epoxy resin and hardener. Based on this, the grout is called two-component. The mass also contains quartz sand and pigment. These are auxiliary components.
Resin and hardener - these substances are contained separately, because they immediately react, resulting in a material that has a limited period of use, because it dries quickly.
Two-component tile grout has a number of technical characteristics:
- increased strength;
- resistance to aggressive chemicals;
- the material is non-hygroscopic (does not absorb moisture);
- the surface of the coating is smooth;
- high wear resistance;
- there is no shrinkage when applied to the surface to be treated;
- cracks do not appear as the material dries;
- high adhesion;
- wide range of operating temperatures: -20…+100°С;
- a large number of flowers.
The listed properties appear only after combining the epoxy resin with the hardener. Separately, these substances are not used for grouting tiles. When epoxy resin and hardener are combined, a cross-linked polymer is formed. This results in excellent waterproofing and strength characteristics.
Stages of work
- Old material is removed from the ceiling.
- Using dowels, a metal profile or wooden beams are attached at a distance of 40-60 cm from each other.
- Cladding with clapboard using a stapler, nails, screws, self-tapping screws.
- Protective varnish or painting.
Painting a wooden ceiling is necessary not only for beauty, but also to protect it from rotting, odors, indelible stains, and parasites.
To preserve the beautiful wood texture, choose water-based paints or special ones based on aniline.
Before starting work, the wooden surface is sanded using sandpaper and treated with stain or special impregnation to preserve the natural properties of the wood.
This coating is durable if all preparation requirements are met. It is easy to care for. The difficulty lies in installing lighting with such a wooden ceiling finished.
Waterproofing seams prices, price and cost of 1 linear meter
| Name of works | Unit | Price in rubles |
| Waterproofing of cold joints: - Work on installing a groove - cleaning the groove - layer-by-layer compaction with a non-shrinking composition | m.pog | 600 |
| Waterproofing of interblock seams: - Work on installing a groove - cleaning the groove - layer-by-layer compaction with a non-shrinking composition | m.pog | 400 |
| Waterproofing of expansion joints: - Work on installing a groove - cleaning the groove - sealing an elastic profile - sealing a non-shrinking composition - a set of injection works | m.pog | 4900 |
| Waterproofing expansion joints using waterproofing TPO tape: A device for sealing the contour of an expansion joint using elastic tape with epoxy adhesive | m.pog | 990 |
| Injection waterproofing of seams / shut-off waterproofing - Work on installing a groove - cleaning the groove - layer-by-layer compaction of a non-shrinking composition - Work on constructing boreholes and installing packers - a set of injection works - dismantling packers and sealing injection holes | m.pog | 1200 |
| Cement-mineral waterproofing | m2 | 600 |
| Waterproofing of communication entry points: - Work on installing a groove - cleaning the groove - layer-by-layer compaction with a non-shrinking composition - Work on constructing boreholes and installing packers - a set of injection works - dismantling packers and sealing injection holes | PC | 6900 |
Cost calculator for waterproofing joints
Click to open the calculator and calculate the cost of work
Calculation of the cost of injection and suture waterproofing
Colors
Epoxy material is available in a large number of shades, ranging from light to dark. A common option is to use glitter. If desired, you can purchase a metallized mixture. There are colorless polymer grouts. The choice is made taking into account the shade of the treated coating, the color scheme of the interior and its style.
Using this mixture you can make the surface of the floor/wall more neutral. In this case, use grout 1-2 shades darker/lighter.
To get the appearance of a solid coating, select a material of the same color as the tile.
Another common option is to use grout that contrasts with the base coat. In this case, caution must be exercised, since creating accents in a room where they already exist is not recommended. As a result, the interior design deteriorates.
Why treat seams in a panel house?
Sealing seams in a panel house is an important stage in the construction of buildings. It involves the process of filling the voids that exist between vertical and horizontal slabs. Also, sealing must be done in the future, especially when the residential building is old, because the seams are gradually damaged, lose their integrity and require restoration.
If this procedure is not carried out, moisture and air will begin to enter the area between the tile joints, and condensation will begin to form. This will lead to freezing of the walls and the colonization of harmful microorganisms. In addition to dampness and mold, the rooms will have a lower temperature. Sometimes the percentage of heat loss for this reason reaches very impressive values. There is also an aesthetic component to the need to seal the joints between the slabs: wallpaper does not adhere well to cold walls, inevitably peels off, the plaster turns black, which looks very unsightly.
Depressurization of the facade can happen at any moment in the “life” of the house. It can be caused by:
- incorrect building design, deviations from SNiP,
- displacement of panel blocks due to uneven shrinkage of supporting structures,
- deformation of blocks from strong temperature changes, intense precipitation,
- violations during the construction stage,
- use of low-quality materials,
- a combination of materials with varying degrees of elasticity,
- excessive tension of sealing self-adhesive tapes.
Saving Tips
The main recommendation for reducing costs is the need to mix small amounts of the mixture. If you prepare a lot of solution, most of it will dry out immediately. You will have to mix the ingredients again. At the same time, the cost of purchasing another container of epoxy grout increases. Considering that the material is expensive, such actions are considered inappropriate.
It is necessary to move the solution from the container in which the kneading was made to another clean one. Thanks to this, it becomes possible to fill the seam with high-quality material. Then you won’t have to deal with coating repairs in the near future.