Plumbing in a dacha is a luxury that not everyone can afford. Difficulties in supplying water to the site can have different sources: the distance of the main water supply from the dacha, the impossibility of laying pipes, the high cost of equipment/plumbing, and much more. But in a summer cottage there is a constant need for water - to rinse your hands, to wash your face, or to wash the dishes. And the salvation in this case is a small country washbasin, which, by the way, is quite easy to make with your own hands.
DIY country washbasin
Features of country washbasins
A washbasin that can be used for a summer residence is generally a small structure that does not have a connection to water supply or sewer pipes, but performs simple functions that enable the user to maintain the proper level of hygiene of the body and home. So, usually the structure of a washbasin consists of only a water tank and a small sink (and in some cases there is none). The latter can be hung on the wall or installed on a cabinet. The water container can have different volumes - this will determine how often you will have to fill the tank in order to use the washbasin. However, such designs are not particularly large in size.
Design of a self-assembled country washbasin
Washbasin for a summer residence with a drainage channel
Typically, the washbasin tank is filled with water as needed. To use it, you need to open the tap or press a special lever, and the water will flow. Once the tank is empty, you can refill it with water and use the sink.
Original heated country washbasin
On a note! Typically, country washbasins are installed on the street near the house or bathhouse. But some design options can also be installed indoors, provided that proper drainage of used water is organized.
A dacha is a great place to relax, but don’t forget about gardening work.
You can use a dacha washbasin in the following cases:
- the need to rinse your hands after dacha work;
- washing hands and face to maintain hygiene;
- washing dishes;
- rinsing small items.
Heated washbasin for a summer residence
Due to its small dimensions and small volumes of water, it will not be possible to use a washbasin for larger purposes (for example, taking a shower).
Washbasin for a summer residence - decor
Advantages of a country washbasin:
- ease of installation anywhere;
- ease of making with your own hands;
- small dimensions;
- simplicity and ease of use;
- mobility - the washbasin can be easily moved to another place if necessary;
- the water in it quickly heats up under the rays of the sun - you can use warm water. However, there are country washbasins with the ability to heat water.
Simple plastic washbasin (washstand)
Disadvantages of this design:
- the need to frequently collect water;
- in cold weather, the water in the sink will remain cold;
- for the winter it must be emptied and removed from the street, otherwise it may be damaged;
- impossibility of full connection to the water supply and sewerage system.
The cheapest and easiest way to make a country washbasin
Simple washbasin with cabinet and sink
Which technology is easier to master on your own?
If we talk about making it ourselves, the easiest way is to make a tabletop from cast acrylic. True, if you use ready-made mixtures, the price will be almost the same as when ordering from a company. The next most complex process for making countertops is from agglomerate. Since there is only a small amount of binder, achieving a smooth front surface is not so easy. If you don’t mind long grinding to get a normal result, you can try to master this technology. A countertop made of artificial stone based on agglomerate is the best choice in terms of durability and appearance.
DIY artificial stone countertop
The latest “lightest” countertop manufacturing technology is made from sheet stone. A lot of precise cutting, gluing parts and sanding. You need professional tools - a circular saw with guides, a jigsaw, a disc grinder with a set of polishing discs. A lot of clamps are also required to attract and fix the glued fragments.
Types of designs
Despite the fact that when most people mention the phrase “country washbasin,” they imagine a small tank installed on the wall of the house, there are a lot of varieties of this type of design. And they differ not only in the color and material from which they are made, but also in size, appearance and even a number of design features.
On a note! Among country washbasins, there are the most primitive options and, at the same time, complex designs that have the function of heating water or unusual decorative design.
Outdoor washbasin
Table. Summary table of types of washbasins.
| Type | Short description | Subspecies |
| Street | Such washbasins, as you might guess, are installed outdoors. Usually these are suspended structures, fixed to a wall or some kind of support, and may not have a sink (in this case, the water simply flows to the ground). They are small in size and easy to use. There is no water heating function (warm water can only be used on sunny days, when the liquid is heated by the thermal energy of the sun). | They have one standard option - the one that hangs on the wall. The only differences here can be in the materials, shape, dimensions of the product and the method of water supply. |
| Home type | These washbasins are installed indoors - in a bathhouse, at home, on a veranda, etc. They usually have a more complex design, since here it is necessary to think through a water drainage system (it can be discharged either into a container, which is then emptied, or into a pipe, connected to a cesspool or taken outside the house to the site). Also, this version of washbasins suggests, in some cases, the possibility of supplying water to the container to be filled and the possibility of heating the liquid. | Such washbasins can be divided into 4 categories: on a counter, with a cabinet, with a filling system, and with a water heating function. |
Washbasin with heated water for a summer residence
As for the materials used to make washbasins, plastic, stainless steel and sometimes wood are usually used. The latter is used less and less, since two other materials surpass it in performance characteristics. For example, a steel washbasin can last for many years without damage, plastic is absolutely not afraid of water, etc. When choosing a material, you should focus only on your own preferences and wishes in general. Below we will take a closer look at some types of washbasins.
The washbasin can be placed next to the beds Do-it-yourself washbasin from scrap materials
Self-leveling washbasin
This option can also be called hanging. This is the simplest model, consisting of a small water tank, fasteners and a tap for the ability to turn on or off the water. This type of washbasin works like this: the tank is filled with water manually, then you just need to open the tap or use the pressing mechanism, and the liquid is ready for use. Caring for the tank is extremely simple - you just need to regularly clean it from the inside to remove sediment and remove it from the street for the winter.
Plastic wall-hung washbasin
On a note! The capacity of such a washbasin usually does not exceed 3-5 liters of water. You can mount it on a house, on a tree – in general, on any vertical surface.
This option is excellent for ensuring a primitive level of hygiene - rinsing hands and washing. It is usually mounted outdoors in an accessible place for use. Installing it couldn’t be easier, and such a tank costs mere pennies. By the way, you can ensure the presence of such a washbasin in your dacha even without going to the store - it’s very easy to make it yourself.
Scheme of a washbasin made from a plastic bottle
A simple pour-over washbasin can be made from a plastic bottle
The drain can be organized in any way you like: install a sink, and under it an old bucket, run a pipe, or simply allow the water to flow to the ground. By the way, it is recommended to pour gravel into the place where water will seep underground.
There are pour-over washbasins and much larger volumes - up to 18 liters. There is enough water in them, including for washing dishes. They can have different shapes, are usually made of plastic or metal, and always have a valve to prevent sudden leakage of water. You can install such a tank in the house or on the street, the main thing is to securely fasten it on a vertical surface.
A canister washbasin is a great option for the garage
Washbasin with cabinet
The head of the washbasin and the commander of the washcloths... That’s right, this type of washbasin, equipped with a cabinet, is popularly called “Moidodyr”, which Korney Chukovsky once wrote about. Such a washbasin looks massive and stable, and it can be installed both indoors and outdoors (you can see it more often in the house). The design is a wooden cabinet equipped with a sink and a water tank. There is also a small cabinet where you can store personal hygiene items.
Country washbasin with cabinet
The water tank of such a washbasin usually has a good large volume. You can fill it either manually or supply water through pipes. You can install a bucket inside the cabinet to collect used water. It's important to remember to take it out. The main advantage of this “Moidodyr” is the ability to conveniently wash dishes, and not just wash or rinse your hands.
Attention! If “Moidodyr” is located outside, then it is important to put it indoors for the winter so that the wood from which the cabinet is made does not become unusable. Also, you should not place such a structure in direct sunlight - the material may dry out and become deformed.
In a summer cottage, even with water supply, a washstand is a vital thing
Washbasin on counter
This is a greatly simplified version of “Moidodyr”, it is a structure of a support, a tank and sometimes a sink. The tank and sink are simply fixed on a stand, usually metal. The legs of the support are dug into the ground. The advantage is that you can install such a structure anywhere in the garden.
Washbasin on a counter from an old washing machine
Country washbasin idea
This version of the washbasin is used outdoors. It is stable and easy to use. The volume of the water tank is up to 15 liters. Usually the tank itself is equipped with a valve, so washing your hands using such a washbasin is very convenient.
Do-it-yourself washbasin for your dacha. Making a simple and convenient drain
Washbasin with heating
This option is the best from a landscaping point of view. After all, you can use not cold water, but heated and even hot water. Such washbasins are equipped with special heating elements that heat water and operate on the principle of a boiler - the tank must be filled with liquid and the equipment must be plugged into the network. After a while the water will warm up and it can be used
The heater can be immersed in water or located in a separate pipe in the tank. Cheaper is option number 1, and therefore it is used more often. But in this case, the tank will have to be descaled, and you need to use the washbasin carefully - the structure may cause an electric shock if it is damaged.
Country washbasin with cabinet and water heating
How to make a sink with your own hands
If you have even a little carpentry experience, you can make a sink from natural wood yourself. In most cases, the knowledge gained in school labor lessons is sufficient. In this case, the resulting result will personify your imagination and creativity.
The simplest version of the product is to cut out a sink from a single piece of wood or from beams glued together.
Following simple instructions will greatly simplify the work process:
- First you need to decide on the dimensions of the future device. To do this you need to know its width and depth. These options depend on personal preference and the space available for installation.
- Prepare a drawing of the sink and the necessary materials. Then sand the wood and carefully transfer the sketch to its surface.
- Using a circular saw, carefully cut a recess along the edge of the future product. It is important not to forget about the depth of the sink - otherwise, you can saw through the wood.
- Use a chisel to remove unnecessary pieces.
- To make the surface smooth, use a grinding wheel. They need to carefully treat the entire area of the future sink.
- In the marked place, make a hole for drainage of liquid.
- To increase service life, the product must be coated with a layer of epoxy resin, and then a special polyurethane coating must be applied.
- After the varnish has completely dried, you can begin installing and connecting the product to the water drainage system.
Product selection
Everything is simple here - you need to choose products depending on the specific needs of a person for clean water. For installation in a greenhouse, the simplest washbasin is sufficient, which you can even make yourself. But in the house, if funds allow, it makes sense to install a washbasin with the ability to heat water - washing and washing dishes will be much more pleasant.
Wastewater disposal
As for the volume of water consumed, you need to take into account the number of people who will use the washbasin, as well as the frequency of use. So, for one summer resident a small washbasin with a capacity of 5 liters is quite enough, but if several people live in the house or work on the site at once, then it is recommended to install a structure with a volume of at least 10 liters.
Choosing the best washbasin for your cottage
As for the material, you should focus on your preferences. The metal is stronger, more durable, does not fade, but will rust over time. Plastic is not subject to corrosion, but is more fragile and can fade under the sun. But it is quite inexpensive. Wood is used if a cabinet is needed under the washbasin. It is not recommended to make a tank out of it.
The photo shows another version of the cabinet, in the manufacture of which wooden boards were used
The most convenient types of washbasins for the dacha are portable models
To the question “Make or buy?” everyone must answer for themselves too. So, the simplest washbasin can either be bought for little money in a store or made from some container in an hour. But complex designs with a cabinet are easier to buy. Although, if you wish, you can do them yourself. Below we will look at several options for creating simple washbasins for your dacha.
Decorating a country washbasin
On the counter
A more complex option is a country washbasin on a counter. They are containers mounted on a “leg”. This option is convenient to move and install around the site.
Some designs have a baffle on the vanity support, making installation easier by pressing down on it with your foot. Those parts of the installation that are immersed in the ground must be insulated from moisture.
Making a washbasin from a plastic bottle
Step 1. First, you should take everything you need to create such a simple washbasin. This is a large 5 liter plastic bottle, marker, scissors, water-resistant glue, plasticine, hose connector.
Tools and materials needed to make a washbasin
Step 2. Next you need to modify the hose connector. Its valve needs to be weighted. In order to do this, you need to take the marker, disassemble it and leave the marker body. Meanwhile, you need to remove the valve itself from the connector and remove the rubber seal from it.
Disassembled marker and valve from connector
Step 3. The marker tube needs to be filled with plasticine and compacted well. This is necessary so that the valve itself in the future washbasin shuts off the water well. You then need to insert the valve itself inside the marker body, gluing it with waterproof glue.
A valve is inserted inside the marker
Step 4. Next you need to take a bottle - the future water container - and screw off the lid. The connector will need to be built into the cover by cutting a hole in it with the same diameter as the connector thread. The thread must be coated with sealant or glue and screwed into the lid. The thread must be inside.
The thread is lubricated with sealant
Step 5. The hose connector nut must be screwed on from the inside of the cover and the glue must be thoroughly dried. Next, you can insert the valve into the connector and install the rubber seal in place.
Now you can insert the valve
Step 6. You need to cut a hole in the bottom of the bottle-container to fill the water. The easiest way to organize this place is to take a plastic bottle of a smaller volume and cut off the top of it, which will serve as a funnel and lid for the washbasin.
The top of the smaller bottle is cut off
Step 7. This washbasin was mounted on wood. It can be tied to the support using twine, which can be secured with tape on the tank itself. You can also wrap the bottle with twine and use it to hang the washbasin on a nail on the wall.
The twine is fixed with tape
You can also wrap the bottle with twine
Step 8. The bottle cap with the valve must be screwed to the tank, secure the latter to the support, and the washbasin is ready for use.
Screw on the lid with valve
Materials
Wood is a natural material. Like all living things on the planet, it is associated with water. From seed growth to wood processing, water is always present somewhere nearby. In the old days, ships were built from wood, wood was floated down rivers, and some types of wood were processed by soaking or flooding. For example, oak gains special strength after prolonged soaking, so the myth that wood cannot be combined with water does not stand up to the test of facts.
Over time, craftsmen experimentally determined which tree species are most suitable for interacting with water. Nowadays, sinks are made from the following materials.
One of the strongest types of wood, which gains additional strength from water. It was from it that the first water pipes were made in medieval Europe. Oak has a wide range of shades, which allows you to choose the perfect option for every taste.
Valuable material that has a high rubber content. Thanks to this property, teak sinks have additional water-repellent properties. The oily substances in this wood prevent the formation of fungus and mold. When exposed to water, wood does not darken over time, maintaining its original shade.
Bamboo
Durable material with a wide range of colors from the lightest to richest dark shades. Bamboo is somewhat cheaper than oak and teak, since it does not fully fall under the definition of “wood”.
Washbasin made from a bottle and syringe
An even simpler option is to create a homemade washbasin from an ordinary plastic bottle.
Step 1. First of all, you need to unscrew the cap from the bottle and cut a hole in it with the same diameter as the syringe you took. A 2.5 cc syringe is ideal.
You need to cut a hole in the cap for the syringe.
Step 2. Next, you need to cut off the spout of the syringe on which the needle is placed. Moreover, not only the spout itself needs to be removed, but also the entire upper part.
The syringe tip needs to be cut off
Step 3. Then the syringe must be inserted into the hole in the bottle cap. It is important that the syringe barely fits into the hole, otherwise it will have to be sealed with sealant to prevent water leaks.
Syringe inserted into hole
Step 4. The stopper with the syringe can be screwed back onto the bottle. The bottom of the container must be cut to allow it to be filled with water.
The cap screws onto the bottle
Step 5. Now the washbasin can be installed and used. To shut off the water, the syringe plunger must be pulled out.
The syringe plunger is pulled out
And in this position of the piston the washbasin can be used
Attention! Large bottles are not recommended in this case. Otherwise the design will be unreliable. A volume of 2-3 liters is quite sufficient.
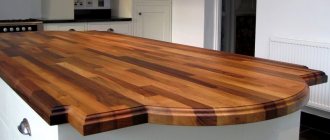
Wood
Wooden models of washbasins are very popular. They look more elegant and can be used as permanent structures. To make it more convenient, you need to use a different water supply system.
You can purchase a faucet for a country sink at any specialized store. Inserting it into a wooden frame is quite simple.
You also need to remember to put a lid on top so that you can add water to the container. Such models can often be found in the garden, on verandas, and in summer kitchens. They are very beautiful and comfortable, they are easy to make with your own hands.
In the form of a bucket
Styling to match various objects allows you to maximally adapt the washbasin to the specific style and design of your summer cottage. For example, in the bathroom you can only use wooden objects, because steel objects overheat very quickly, and plastic ones lose their shape.
To make a bucket-shaped washbasin, you will need a wooden bucket itself, which can be purchased at a specialty store. Next you need to drill a hole from the bottom. A plastic faucet for a country sink needs to be built in there.
Washbasin made from an oil canister
Another simple washbasin option that motorists can make without throwing away the oil canister and purchasing a water bottle with a shut-off valve plug.
Step 1. The first step is to take a metal canister and rinse it well.
The canister must be rinsed thoroughly
Step 2. You will also need to take the neck of a plastic bottle. It needs to be attached to the canister in the place where the water outlet will be organized, that is, the tap, and circled with a marker.
The neck of the bottle is outlined with a marker
Step 3. Using the resulting contour, you need to cut a hole in the tank. You can use a drill and drill a few holes to make the cut.
Holes are drilled with a drill
Cutting a hole in the canister
Step 4. The sharp edges of the hole need to be sanded with a file.
The edges of the hole are sanded
Step 5. Using cold welding, you need to attach the plastic neck of the bottle, which was previously used to apply markings, to the tank by inserting it into the hole.
Plastic bottle neck The neck is inserted into the hole
Step 6. Now you need to screw the bottle cap, equipped with a valve, onto the neck - this will be the tap.
The future faucet of a country washbasin
Step 7. Having filled the tank with water, you can use the washbasin by opening and closing the water using the valve.
Ready-made country washbasin from a canister
Classical
As a classic washbasin, a metal container is used, in which a sufficient hole is made on top to pour water inside.
A hole is also made from the bottom for the valve; by pressing on it, water will flow out through the hole. The simplest design is hung on hooks on the wall, it is very easy to make yourself in just 15 minutes.
Benefits of concrete
So, let's look at the main advantages of this material and what sinks can be made from it.
The first is its low cost. This building material is available to almost everyone.
Secondly, high strength and reliability. Concrete consists of components such as cement, sand, crushed stone, and special additives (for example, marble or quartz chips). All these components give the material stability and durability.
The third quality can be called versatility. Concrete sinks fit equally well into any design style. This is especially true for loft, hi-tech, minimalism, and grunge styles.
Execution options
There are no restrictions on the shape - rectangular, square, round, with curves... Order a washbasin with or without a countertop, with one sink or with another required quantity. The base for the tabletop is made from any material that you can independently find elsewhere or purchase from us.
Advantages of the countertop sink from the Bershovo workshop:
- Stylish design that will harmoniously complement the interior of the room.
- The monolithic design guarantees protection against leaks.
- There is additional space for placing the necessary items.
- if you want to visually expand the space, choose narrow and long models,
- To fill spacious rooms, massive options are used (thick and wide countertop with 2-3 sinks).
You can buy a bathroom table with a countertop by calling the number listed in the “contacts” section. The company's consultants will answer your questions.
Loft is now more fashionable than ever. And that’s why everyone wants to replace even the usual earthenware sink with something more “lofty.” There are eccentric solutions, for example, a copper basin with a hole in the middle or a galvanized bucket, but such ideas are difficult to combine with a modern interior, and are not very convenient to use in everyday life. If you don’t want to complicate your life, then a sink made of real concrete will become the highlight of your loft and cannot be compared with any other option, in all respects.
Concrete is still not earthenware, but that’s why we’ve gathered here, to find out all the pros and cons.
It's at least original.
This is exclusive - each of our sinks is made by hand and can be considered a work of modern art
It is durable - a high-quality concrete sink will last for centuries, and maybe even thousands of years))
It is reliable - breaking off a corner is as difficult as with a faience sink
This is unique - the picturesque texture of concrete cannot be imitated by any other material
Now about the cons:
Vulnerability. A concrete washbasin can be either varnished or protected with impregnation. In the first case, it is well protected from dirt, but the coating is easier to scratch than earthenware enamel. In the second case, it is difficult to scratch, but it is necessary to constantly (once every 2-3 months) renew the impregnation, and if this is not done, then sooner or later stains may appear, which only sanding will help get rid of.
Price. Setting up a sink production process on an assembly line is very difficult. Therefore, if we are not talking about a piece of foundation weighing 200 kg, but about a sink made of high-strength and beautiful concrete, weighing an acceptable 20-40 kg, then this is painstaking manual labor with a large number of stages, complex technology and expensive materials.
Since all over the world, concrete sinks are much more often protected with varnish, we will tell you about it in more detail. Varnish for concrete in the interior meets several requirements:
1) it must be non-toxic;
2) lay down in a beautiful matte thin layer so that it is difficult to identify as something foreign;
3) do not allow water to pass through, because if the varnish allows water to pass through, it will also allow contaminants to pass through
4) be as scratch resistant as possible
Only one type of varnish meets all these requirements to the maximum - polyurethane, and even then not just any one. We conducted many experiments to choose the best varnish, but, unfortunately, we never found the perfect one in all respects. So when purchasing a concrete sink, prepare to be treated with care.
Don't expect miraculous performance and practicality from concrete or you will be disappointed. Although if you take care of such a product properly, then there will be no problems with it. Do not use aggressive acidic or strongly alkaline cleaning agents or abrasive sponges.
PS: And for lovers of everything real, I recommend bare concrete without coating. In this design, the sink will be as natural as possible. And over time, becoming covered with patina during use, it will only get better.
Stages of work
Regardless of the product being manufactured, you first need to find out its size and shape. If you are replacing an old countertop, you can use its measurements.
If a completely new product is being manufactured, then it is worth taking measurements of the base, and also taking into account the existing requirements for the selected room
In order to have a template before your eyes, you can try to make a drawing of the tabletop on paper; you are even allowed not to make marks for different types of holes. Next you will need a full-fledged life-size template. To do this, you need to take a sheet of thick cardboard, of such a size that you end up with a full-fledged template. If the cardboard is small, then for the actual volume of the product you will have to glue the parts together. If you have large cardboard, then simply cut out the required layout. When the template is ready, you need to check that it fully matches the dimensions. To check, you should place it on the desired area and make sure that everything is accurate and there are no distortions. After such checks, the concrete countertop will be completed quickly and easily. Now you need to divide the template into separate parts. Once you have ready-made detailed templates on hand, you can begin production of the product itself.