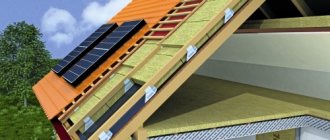
Metal entrance doors have two main tasks: to reliably protect owners from intruders and to create comfortable living conditions. Comfort, in turn, is always associated with warmth in an apartment or house. Therefore, insulating the doorway of the front door is the owners’ primary goal after installing a new door block. After all, it, along with windows, is the main conductor of cold into the room. It is necessary to insulate the frame, door leaf and slopes.
In this work, we will consider in detail all the stages of thermal insulation of the frame and door leaf. The nuances of the process of insulating slopes are discussed in detail in the material “Finishing the slopes of the front door,” which makes it possible not to touch on this topic here.
What causes heat loss?
A modern metal entrance door is actually a complex structure, where iron is just a shell. The cavities of the leaf can be filled with insulation, since the main function of the door is to retain heat. But there are often heat leaks, not only in private houses, but also in apartments. In addition, inexpensive metal doors have ordinary tin as a body, and cardboard honeycomb instead of insulation.
Reasons for heat loss in the house:
- Thin walls. Walls built in the classical way several decades ago, which do not have insulation, begin to freeze over time. As a result, the thermal insulation of the house deteriorates.
- Cracks and crevices. When a heavy structure shrinks, cracks form on the walls, which over time, if you do not pay attention to them, turn into huge gaps. Such gaps are also called cold bridges.
- Technical openings (old doors and windows). Over time, the wood dries out, thereby forming colossal gaps where the boxes are installed. Windows that are not properly insulated are one of the key sources of heat loss. And a door, if it is made of sheet metal and does not have the necessary insulation, or is of poor quality Chinese construction, with cardboard inside instead of a heat insulator, this is the direct cause of colossal heat loss.
A metal door that does not have proper insulation is a direct source of cold in the house.
Therefore, door insulation is an important component of the thermal protection of the entire house. But before you implement your idea, find out the exact reasons for the loss of heat, so that you don’t end up wasting time and energy on insulating the doors, and the reason for the uncomfortable microclimate lies in the cold bridges formed through the cracks in the house.
Important! The thickness of the iron door leaf is not an indicator of the thermal insulation of the door. A thick layer of metal is, first of all, protection against penetrations and only then a heat insulator (provided that there are no cracks in the structure).
Sometimes heat can be lost not through the leaf, but through the cracks of the iron door frame
Installation instructions
Installation of the product requires a clear sequence of actions. Step-by-step instructions will allow you to get an overall picture of the entire scope of work and not lose your way. Installing a metal door consists of four stages.
Metal door installation diagram
Preparing the opening
The locations of openings in the building are provided for by the design. They are made at the construction stage or cut out with a chainsaw after the house is built.
During construction, an opening for the door is cut out
The width of the opening should be 150 mm larger than required by the door structure. This is necessary to install a casing box with a width of 65 mm. It is also necessary to leave a gap of 15 cm at the top, which will be closed over time by the settled crowns.
When replacing an old frame door, preparation of the opening begins with its dismantling. Disassembling the structure will not be difficult. To do this you need:
- Remove the canvas.
If it was held on collapsible hinges, then open the door and lift it with a crowbar. If the hinges were not removable, use a screwdriver to unscrew the screws holding the sash in the frame. Removing the old door - The easiest way is to disassemble a wooden box with your own hands.
To do this, unscrew all the fasteners or saw the racks on the sides and tear them off with a crowbar. The metal box is usually sawed off with a grinder. Removing the door frame - Clean the opening from worn-out insulation, remaining fasteners, and pieces of plaster.
Assembly and installation of casing
The frame or casing is the name given to the bars around the perimeter of the opening, which form a rigid base for fastening the door. It does not prevent the shrinkage of the wooden structure, but at the same time protects the openings from distortions that appear under the influence of settling crowns. When installing the casing, a groove is made at the ends of the opening using a router.
To install the frame, you need to cut a groove at the ends of the opening
Then a beam is inserted into it. It is also called a sliding bar, along which the entire house settles. The contours of the opening remain unchanged.
A sliding bar is installed in the groove
It is also possible to use other casing structures that perform exactly the same function. The choice of connection type is a matter of taste.
Casing options
A cross-bar is installed at the top, and soft insulation is placed in the gap. The beams are extended on the sides with boards, the width of which is equal to the width of the end. As a result of these actions, a rough frame is obtained to which the iron door will be attached.
The door casing is arranged in a similar way to the window casing. Finished casing
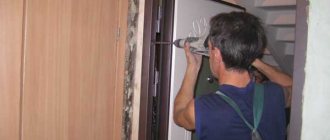
Installation of box and canvas
For buildings made of wood, frames with a high degree of rigidity are usually chosen. As a rule, this is a welded mechanism made of sheet material with a thickness of at least 2 mm.
Before inserting the front door frame into the opening, it should be insulated with mineral wool and thereby seal the joints. Often there are products with an insulated box. In this case, no additional manipulations are required before installation.
The gap between the door frame and the casing should be in the range from 1.5 to 3 cm. It is filled with polyurethane foam.
Once you have managed to place the iron box in the opening, align it and secure it. To ensure that the load is evenly distributed over the entire wall, it is recommended to increase the number of fastening points.
After installing the box in the opening, it is aligned and fixed
The next step is hanging the sash. There are 2 fastening methods used in iron doors:
- Welded external hinges. To put the fabric on, you need to lift it and place the top of the loop on the pin. This fastening is considered unreliable, since the loops are easily cut off.
- Hidden loops. They are inserted into the sash or hatch and are considered burglar-proof. To carry out installation, you will need a hex key, which is used to tighten the fittings.
By opening and closing the door, check that it is hung correctly
The correctness of the door hinge is checked by opening and closing it.
Filling cracks with foam
After installation is complete, it is necessary to foam the cracks around the iron box. If you don't want traces of foam to remain on the frame, cover its edges with masking tape.
After the polyurethane foam has hardened, its excess is removed. As a decoration, the metal door is framed with platbands. The overhead strips are not attached to the wall, but to a steel frame.
Choosing insulation
The insulation on the door not only protects the room from the cold, but also insulates the rooms from extraneous noise, which is quite important in apartment buildings. Therefore, when choosing a ready-made door structure, you should inquire about its contents.
Penofol
Penofol is equipped with a foil layer with reflectivity, thanks to which all the heat remains indoors. But, as a rule, it is used only as an auxiliary insulating material.
Rigid (sheet) insulation
Sheet heat insulators (penoplex, polystyrene foam, etc.) are easy to install and low in cost. Since the material is not hygroscopic, it is not necessary to attach a vapor barrier and moisture-proof membrane when installing it.
When choosing rigid insulation, give preference to expanded polystyrene (penoplex). It is much denser and stronger than polystyrene foam, and also insulates more effectively.
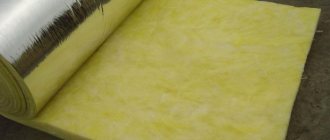
Soft (rolled) insulation materials
Rolled or sheet soft thermal insulators include glass wool and mineral wool. They differ only in the base; their thermal insulation characteristics are approximately the same. The material is environmentally friendly, non-flammable, and allows you to independently choose the installation height, eliminating additional trimming. These advantages make cotton insulation especially popular.
Illustrative examples of heat loss
The material is sold in rolls or slabs. Elements of any shape and size can be cut out of rolled wool, and to reduce the thickness of the insulating layer, simply press and fix the material.
The disadvantage of cotton wool is its high hygroscopicity. The material is afraid of moisture and if the insulation absorbs water, it loses its heat-protective properties. Experts do not recommend using this insulation for doors, since with a high contrast of external and internal temperatures, the likelihood of the insulation getting wet is extremely high. However, the option is quite acceptable for the entrance door to an apartment.
Inflatable (sprayed) insulation
Polyurethane foam fills all the cracks without being particularly expensive. You can spray it yourself, using a foam gun or inviting the help of a specialist using a special sprayer.
Luxury entrance doors
doors are insulated with three types of heat insulators:
- key insulation – polystyrene foam;
- penofol is an auxiliary protection;
- The cavities of the door frame and stiffeners are filled with polyurethane foam
In construction markets you can often see insulation kits for entrance doors. The insulation and finishing material have already been measured and cut according to the standard, but such sets are of little use, since they include thin-layer padding polyester or foam rubber and leatherette.
Reasons for freezing doors in a private house
If you use the door incorrectly, the inside will become covered with frost.
If the temperature outside is minus and the temperature inside is positive, then no matter what measures are taken, the surface will still be covered with frost.
When do you need double doors?
Under certain temperature conditions, the resulting moisture condenses both outside the canvas and on the inner surface. As a result, the insulation will absorb moisture, which will lead to the following consequences:
- loss of thermal insulation characteristics;
- formation of voids as a result of subsidence;
- the occurrence of corrosion spots on the coating from the inside;
- the occurrence of mold.
There are many products on the market from China that are made of light steel. Therefore, when choosing, it is better to give preference to insulated options.
Tools and materials
In addition to insulation - the main material, you also need fasteners, cladding, etc.
Polymer seal for entrance door
Table 1. All necessary materials and tools
| Materials | Tool |
| Any selected insulation | Mounting tape |
| Polyurethane foam | Square |
| Hardware, liquid nails or polyurethane foam (for installing rigid insulation) | Pencil |
| Wood-based sheet materials or lining (for covering a non-removable door) | Long ruler or rule |
| Scotch tape, hydro- and vapor barrier membrane (in the case of using soft insulation) | Jigsaw or saw |
| Dermantin, MDF or plastic (as a decorative finish) | Screwdriver |
| Rubber or silicone polymer seal | Spatula and container for putty mixture |
| Universal assembly adhesive (has good ability to adhere to surfaces of different textures) | Foam gun |
| Putty for insulating door frames | Stapler |
| Staples or furniture nails | Hammer |
| Dry wood beams for making the internal frame of the door leaf in case of its absence | Construction knife |
Prices for popular models of screwdrivers
Screwdrivers
Important! If glass wool is chosen as the main insulation, do not forget to take care of protecting the skin of your hands, eyes and breathing organs by using glasses, gloves and a respirator. When working with the material, dangerous microparticles (fiber fragments) are released, which, penetrating into the respiratory tract, can cause long-term irritation of organs.
Video - A simple process of insulating a non-removable Chinese door
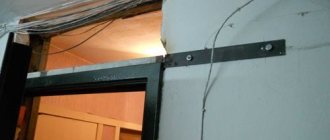
We insulate the door frame
The frame of the metal door leaf is made from an iron angle, which is secured in the opening with anchors. After removing the old door structure, large gaps often remain between the mounted door frame and the load-bearing wall or partition. When installing, builders blow them with polyurethane foam, but it has a certain drawback: the material is afraid of sunlight. If sections of the foam are not protected from ultraviolet radiation in time, it will crumble into dust over time.
If the foam on any surface turns yellow or brown, the material is beginning to deteriorate.
The old deteriorating foam from the box must be removed and insulated again
How to do it correctly:
- We clean the wall adjacent to the doorway from the remnants of the polyurethane foam, spread the plaster down to the brick or concrete and remove the dust.
- Spray the surface with plain water and foam the visible indentations. The foam will stick better to the wetted wall.
- When the material hardens, cut off the excess.
Prices for polyurethane sealant
Polyurethane sealant
After this, plaster and paint or whitewash can be applied around the box.
We insulate the door leaf
Before insulating an iron door, the structure must be disassembled. To do this, remove the peephole, door handles, locks and linings.
Before insulation, the iron door must be prepared by dismantling all unnecessary
When the canvas is completely prepared, do not forget to wipe it from dirt and dust before starting work.
Step-by-step algorithm for door insulation
Table 2. We insulate the door
| Steps, description | Photo |
| Step 1. If the canvas does not have additional stiffeners creating an internal frame, the skeleton must be assembled from wooden slats. The frame is attached around the perimeter of the door and along the crossbars using self-tapping screws. It is important to choose the thickness of the beams so that they are not wider than the protruding elements of the door leaf. | Internal door skeleton |
| Step 2. We put insulation between the frame beams in the resulting cells. Consider the characteristics of the material and the need for additional membrane insulators. |
|
| Step 3. You can attach the insulation with glue directly to the door or directly to the bars. The most reliable fastening will be provided by combining both methods. We lubricate the door leaf with adhesive, apply insulation to it and press it tightly. If the insulation fits tightly into the frame cell, it means that it will be securely fixed in place. |
|
When the glue dries, do not forget to check the door for cold bridges. the gaps formed between the insulation and the frame with foam, not forgetting to cut it off after hardening.
When insulating a metal door, it is important to cut the insulating material in such a way that the gaps between the heat insulator and the frame elements are minimal or completely absent
Prices for mineral wool
Minvata
Without dismantling
Insulation without dismantling is carried out in three ways. The first is suitable for metal doors with removable panels. To do this, unscrew the screws, starting from the bottom, moving to the top of the canvas. We do not unscrew all the screws and place the metal door on a stand. Carefully advance the insulation treated with glue (liquid nails) and fix it. Foil-coated isolon is suitable for this method. We screw in the screws. The door is ready.
The second method is suitable for solid metal doors. We make holes on top, after making sure that there are no more holes or gaps. We take any crumbly insulation (non-flammable bulk wool, granulated polystyrene foam, vermiculite, sawdust). We pour it into the holes and tap the door to ensure that the cavity is completely filled. This method is completely unsuitable for doors with deadbolt locks. After filling, put plugs on the holes.
The third method is external insulation. We completely follow the step-by-step method of fastening using the external method. You can stick insulation on the inside surface of the doors.
Clearance seal and door interior trim
Decorating the front door from the inside performs several functions. This is protection of insulation from mechanical influences and other damage, additional heat and noise insulation, as well as a decorative component.
An example of a metal entrance door trimmed with clapboard after insulation
There are a number of requirements for the interior decoration of the door leaf:
- strength,
- moisture resistance,
- durability,
- density,
- external attractiveness.
In most cases, a metal door is sheathed from the inside with laminated chipboard or MDF, plastic or lining, wood or metal, plywood or OSB in combination with leather or dermantine.
External view of the interior decoration of a metal door with plywood and dermantine
Let's consider the algorithm for the internal design of an insulated iron door using the example of using solid sheet materials:
- We cut out a fragment from the sheet to the size of the perimeter of the door leaf frame. It is important that the material does not protrude beyond the sheathing.
- We cut out holes for the peephole, handles and lock secrets in the resulting fragment.
- If you plan to additionally cover the sheet with leather or dermantine, then it is recommended to first upholster the sheet, and then attach it to the door. It is more convenient to carry out upholstery work when the base is in a horizontal position.
- We cut out a solid piece of leather fabric to the size of the base, adding 10 cm on each side.
- We bend the allowances inward and thus attach the material to the base using a stapler. In addition, you can secure the leather with beautiful furniture nails.
- When attaching the fabric to the base, it is important to stretch it well so that unsightly folds do not form. For additional thermal insulation, a small layer of foam rubber or synthetic padding can be placed under the skin. It will also fill the void between the skin and the base and add more appeal to the design.
- When the plywood fragment is completely formed, we coat the door frame with universal glue, apply the plywood to it and fasten it with self-tapping screws with decorative heads (it is important that the self-tapping heads are harmoniously combined with furniture nails).
- We install door handles, locks, peepholes and plugs.
Insulated metal door, covered with plastic after insulation
The final stage is the installation of a polymer seal to prevent drafts from penetrating through the cracks around the perimeter of the door. To do this, the surface of the door leaf and frame is degreased, the protection from the adhesive layer of the seal is carefully removed, the material is applied to the door and pressed. It is important to be careful when installing the seal, as the material is very thin and requires patience during installation.
Video - A budget way to insulate a cheap Chinese door
Step-by-step technique for thermal insulation of street doors with foam plastic ↑
Thermal insulation of street doors made of two-millimeter metal sheet and profile pipe is carried out both from the inside and from the outside. If forging elements were used when finishing the door leaf, then the insulation of the metal entrance door is done with your own hands only from the inside. In this case, various heat-insulating materials are used: insulation and sealants.
Weaknesses in the thermal insulation of iron doors
They begin work with preparatory activities related to measurements of individual structural elements and the acquisition of necessary materials:
- The depth of the cells formed by stiffening ribs made of a profile pipe is measured.
- Buy polystyrene foam of a thickness suitable for this measurement.
- All cells are measured in length and width.
- Foam blanks are cut into rectangular tiles, sparingly using the area of the entire sheet. The slabs are deliberately prepared slightly larger than the measured values to ensure a tight fit of the material into the cell between the profiles.
- Insulation blanks for an iron door are numbered so that you don’t waste time choosing the right part.
Comparison of foam plastic
Next, they begin to lay the cut pieces of foam plastic in the cavity of the “skeleton” of the door. To securely attach the heat-insulating material to the iron sheet, polyurethane foam is used.
Applying foam with a gun
The work is carried out in the following sequence:
- Take a can of polyurethane foam and shake it vigorously.
- Turn the can upside down and begin to apply foam using a special gun, first around the perimeter of the cell, and then make several parallel foam lines inside it.
- Insert the workpiece with the required number into the cavity, pressing it against the applied foam.
- Move to the next cell, repeating all operations again.
- Then all the cracks and joints between the insulation and the profile, as well as between the composite pieces of foam plastic used to save money when insulating a cell with a door lock, are foamed.
Laying foam plastic slabs in cells
Installation procedure:
- The insulated door leaf is covered from the inside with a single-cut sheet of moisture-resistant plywood, which has a beautiful dark glossy surface that does not require additional finishing.
- To install the plywood sheet, the door is removed from its hinges and placed horizontally on two supports.
- A special U-shaped strip with a pocket into which a plywood sheet and an MDF sheet will be inserted is screwed to the iron frame on three sides (sides and bottom). The size of the pocket is calculated based on the thickness of the plywood, MDF panel and the height of the protruding screw heads.
- Cut from a standard size sheet of plywood and MDF panels of the required size. Insert them into the side U-shaped slats and push them to the bottom pocket, making sure that the sheets fit tightly and evenly into it.
- The top bar is made removable so that, if necessary, you can easily remove the damaged MDF sheet and replace it with a new one.
- The top strip is glued with silicone glue, applying it with a gun to the side of the plywood sheet and MDF panel.
See more details about the method of insulating the door leaf in the video.
Video: How to insulate the front door
Thermal insulation diagram
Here's how to quickly and easily insulate an iron door from the inside, making it an integral part of the hallway interior.
Before hanging a sheathed and insulated door on its hinges, do not forget to make a slot for installing the door handle, and it is better to install the accessory itself in advance. Otherwise, you can slam the door and remain closed in the room.
Please note that outdoor insulated metal entrance doors are thicker than the original version. This may result in the key not being long enough to open the lock. The problem is solved by lengthening the key. If you have a lever mortise lock, then the key should be long enough.
Due to the thickening of the door leaf, the square on the latching handle is also lengthened. The connecting rods of varying lengths required to install door handles on both sides are sold as separate door hardware items.
Standard thermal insulation pie
To prevent doors from blowing through the gap, D-shaped self-adhesive rubber seals are used. Before gluing the sealant, degrease the surface by wiping it with white spirit. Then remove the protective film and press the seal against the door frame around the entire perimeter.
An overlap of two seals is made in the corners, and then both materials are cut at an angle of 45 degrees with a sharp knife. Remove excess pieces by carefully gluing together the edges of the seals that meet in the corner.
Features of insulation of a metal split door
The algorithm for insulating a metal split door is not much different from the process of thermal insulation of a conventional iron door leaf. The design feature of the door plays a key role here.
Sectional view of a metal split door
The door is removed from its hinges, laid on a horizontal surface, all functional and decorative elements in the form of a peephole, handles, locks and plugs are dismantled, then the internal lining is dismantled (if the product is not monolithic, then the trim is attached with self-tapping screws). In the case of insulation of a non-removable door, the inner lining can be carefully cut with a grinder. When the product is disassembled, cardboard is removed from the cavities and the door is cleaned of any remaining debris and dust.
If there are stiffeners inside the door leaf, drill holes in them at a short distance from each other and fill the voids with foam.
Next, a water barrier is installed, the insulation is cut and attached (remember that some materials do not require moisture protection). The insulation process itself is as simple as in the example with a one-piece door.
The overlay is installed in place. If it becomes unusable after dismantling, the interior design of the door can be replaced. Then the peephole, locks and handles are put in place and the product is installed in the box.
In order not to spoil the integrity of a non-removable Chinese door, it is insulated over the skin
In the case of a monolithic door, if there is no particular desire to spoil its integrity, you can insulate it on top of the existing casing. To do this, a lathing made of timber is attached to the demonstrated and disassembled door leaf from the inside and outside. All further actions are practically no different from the previous algorithms.
How to insulate
Internal thermal insulation
A classic door is a sheet of steel reinforced with rigid ribs. Primitive versions consist of one single sheet of thick iron.
To insulate a door with your own hands, you should remove the door leaf from the fittings. Measurements are taken from each segment between the stiffeners. Based on them, insulation sheets are cut out and laid in empty sections.
Important! The edges must be tightly adjacent to the stiffeners.
The joints are treated with sealant or polyurethane foam to remove cold bridges.
Things to consider
In addition to the thermal insulation of the door leaf itself, the process of door insulation includes other important nuances.
For a better fit of the door leaf to the steel frame, use rubber seals
Polymer sealing tape will help improve the quality of thermal protection of the door. This material is supplied in rolls and sold by the meter. Installing the tape is extremely simple: the seal has an adhesive edge, which attaches it to the door and frame.
Important! Before gluing the tape, do not forget to degrease the surface for better adhesion of the material to the surface.
If the design of the door frame allows, the seal can be glued in several layers
Insulating the doorway itself with polyurethane foam is also very effective. This can be done even if the cavities show no signs of material degradation. Blowing out the voids with foam and then plastering the wall will not be difficult, but will significantly increase the efficiency of insulation.
Also consider the weight of the structure. The weight of a metal door is quite large, and if you add additional insulation and cladding to it, the hinges may not withstand it
The thickness of the door insulated from the outside, as a rule, increases. Take this fact into account when installing locks: they may need to be replaced with designs with extended keys.
The slopes of the metal entrance door also need insulation
Another source of heat loss is indoor door slopes. If they are not completed or sewn up “in a hurry,” they should be given attention. Remove the old finish and fill the cavities with foam. If the space is large enough, fill it with other insulation and secure the trim.
Prices for entrance doors
Entrance doors
First stage: sealing the box
Insulating the door will not make sense if the frame is not sealed first. Due to the presence of cracks, the door will allow cold to pass through. Sealing can be done using these materials:
- polyurethane foam;
- sealing tape;
- silicone sealant.
To eliminate cracks at the junction of the wall and the frame, it is important to use polyurethane foam, which is applied simply and serves for a long time without losing its qualities. To eliminate minor imperfections and gaps, a transparent silicone sealant is suitable, which is almost invisible after application. Lastly, it is necessary to seal the gap directly between the frame and the door. Often, ready-made structures are sold with an already glued sealing layer of foamed synthetic material or rubber. If this seal is not enough or is not included in the factory assembly, you can glue it yourself. Instructions for gluing the sealing tape are given below.
- It is necessary to thoroughly wash the surface on which the seal will be glued.
- Then dry with a dry cloth and clean using Scotch Brite for reliability and increased adhesion.
- Remove the protective layer if the tape is self-adhesive.
- Apply to the surface, pressing with your hand for reliable fixation.
- If the tape was produced without an adhesive layer, it is necessary to take moisture-resistant assembly adhesive and distribute it evenly along the entire length.
- Immediately place the seal onto the glue and press down.
After the glue has completely dried, it is necessary to check the effectiveness of the sealant.
Attention! It is better not to use adhesive-based sealing tapes, as they are very short-lived. The adhesive used for such material is not resistant to moisture and fluctuations in air humidity
During the season you will have to re-glue the torn areas at least 2-3 times.
Common Mistakes
Anyone can stumble: both an experienced installer and a novice home craftsman. When insulating a metal entrance door, there are a number of common mistakes that are most often made.
It is better to insulate a metal door that can be easily opened with a can opener without disassembling it, on top of the inner lining
What to watch out for:
- Season. During the cold period, it is better to postpone door insulation until later, even if there is a very warm entrance or dressing room.
- Ignoring details. The gaps between the frame and the material during insulation, the door frame and slopes also need thermal protection, just like the canvas. If you only insulate the door, the room will not become much warmer.
- Saving. When using natural insulation, you should not ignore membrane films, because otherwise the cotton wool will get wet and become useless. In addition, wet insulation will significantly increase the weight of the door, which can lead to deformation of the fasteners.
A metal door insulated in accordance with all the rules, in addition to providing armor against evildoers, will also reliably protect the house from extraneous noise and pervasive cold. In addition, insulation protects the canvas itself from corrosion and, accordingly, increases its service life. Use the materials that are available to you and don’t be afraid to make mistakes, because only those who do nothing make no mistakes.
Some models of metal entrance doors are already insulated from the factory
Note! If your door has already used up its lifespan, instead of insulation, you should think about a modern solution in the form of a door with a thermal break.
Beautiful ideas
The appearance of the front door always emphasizes the status of the owner. Therefore, in a private home the requirements are especially high.
Here it is important to take care of a decent image. The metal door market is saturated with a variety of products
Another good thing is that doors can be ordered according to a personal project.
And yet, how nice it is to work on the design yourself! We offer several ideas for decorating metal doors with your own hands. The design of a door in an apartment is interesting because the outside can be decorated so as not to attract other people's attention. The simplest, most affordable way is to decorate a metal door with bright fittings. You can attach new numbers to the outside, add stylized handles, hinges, and locks.
For those who prefer natural materials, we can recommend covering the inside of the door with MDF panels or simple wooden slats. The design and color of the metal door of a private house, as well as the shape, depend on the style in which the house or cottage is built. For fittings, you can use forged parts, stained glass windows, glass inclusions. And instead of a modern bell, you can hang a knocker or gong.
The video below will help you insulate your front door yourself.