Repairs in any room involve a variety of work. This includes wall decoration, floor finishing, and replacement of windows/doors. But in most cases - and this is especially true for secondary housing - various dismantling works are carried out in advance, affecting almost all elements inside the premises. Dismantling the baseboard must be done in order to be able to properly lay the new floor covering, as well as in order to replace old products. The procedure is quite simple, and therefore you can do it yourself.
Dismantling the baseboard
How does the size of the room influence the choice of baseboards for the floor?
When choosing this interior element, it is necessary to take into account such dimensions of the plastic floor plinth as height and thickness. When choosing a height, you can apply the following rule: the higher the ceilings in the room, the higher the baseboard should be. And the thickness of the product is determined based on the area of the room or floor covering.
Skirting in the interior: how to combine colors
The color choice of the product is made, as a rule, to match the floor tone, very rarely in contrast, only in the case of an appropriate interior solution or in case of a complex color scheme for the room. Then the color is chosen according to some dominant, for example, if the color of the door trim is blue, then the baseboard can be blue.
Sometimes the choice of color for a plastic floor plinth can be a compromise between walls and floors that match the color scheme - then an intermediate shade is selected, for example, this option is possible in a high-tech style.
How to calculate the number of required strips for a plinth?
To calculate the number of strips needed, you need to take measurements of all rooms around their perimeter, and then subtract the width of openings such as doors, windows and balcony connectors. To the result obtained, it is necessary to add about 5-10% of the reserve associated with losses during cutting of the plinth. The amount of reserve depends on whether the rooms have only long straight walls or many short sections. In the case of the second option, the plinth trims obtained during installation can be used on short walls, then less stock will be required.
How to install a plastic floor plinth: three installation methods
Do-it-yourself installation of plastic skirting boards takes place in a certain sequence and can be done by anyone who has ever held a drill in their hands.
Connectors and fastenings for plastic floor plinths
For fastening plastic profiles, they usually use: plastic strips or metal clips, which must be screwed along the length of the decor being installed.
Moldings for plastic decor
For almost all types of plastic curtain rods, the elements are connected through special moldings:
- corners - they come in two types: internal and external;
- connectors - they are used to join pieces of planks in a straight line;
- caps, left and right - are intended for decorating the end sections of the plank, say, from the edges of a doorway or furniture located close to the wall.
Advice: it is advisable to buy connectors with a reserve, since it is impossible to completely eliminate the possibility of unexpected trimming.
Installing a plastic skirting board with self-tapping screws
Marking
Marking begins from the corner of the room, which is located farthest from the front door, on the long wall. Place a corner on a plastic plinth and apply it to the selected corner so that the corner fits exactly into it. The first segment is marked at a distance of 50-100 mm from the end of the corner, and the rest - in increments of 250-500 mm. The marks should be located in the center of the bar.
Note: On level areas, the marking step is chosen larger; for uneven areas, the opposite is true.
How to make holes for screws
Making holes
- For brick and concrete walls, holes are drilled at the marked points and dowels are driven in, after removing the debris and dust generated from drilling.
- For plasterboard and other similar materials, screws are driven into the plank without pre-drilling.
Installation of skirting boards
Remove the decorative strip from the baseboard and apply it to the marked wall with screwed-in dowels. They pierce it with an awl in the places where the dowels are attached and insert the screws. They need to be screwed in all the way, but not so much as to dent the bar.
Note: it is recommended not to tighten the screws too much so that the plank can evenly adhere to the wall.
Having secured the first segment, insert a connector into its end, tightly fit the beginning of the next segment and fix it. It is recommended to place the plinth pieces so that the connection is in the middle of the wall.
Installation of skirting boards
Trimming planks in corners
When the wall ends, it usually turns out that the second section is clearly longer than necessary. This means it needs to be cut off. How to do it? Having installed the appropriate plug in the corner, measure the remaining area. The plastic is cut so that it does not reach the corner by about 3–5 mm. This shortfall will “take away” the joining angle. It is better to cut plastic with a hacksaw, after which the cut points need to be sanded using fine sandpaper.
Installation of connecting elements and sockets
The inner corner and the section of the plank must be connected strictly at a right angle. It is pushed into the inner corner and pressed down to the edge of the stop bar, after which the bar is secured.
Important: connectors and other additional elements are put on the baseboard before the screw closest to it is screwed in.
According to this algorithm, the plinth is attached around the perimeter of the room.
If communications are to be laid in the profile, then in these cases, holes for them are carefully cut out in connectors or plugs and sockets are installed.
Installing plastic skirting boards with clips
Clip-on installation is very popular due to its extreme simplicity - they are attached to the wall and the baseboard is snapped onto them. However, such fastening is mainly disposable, that is, the clips can no longer be used after dismantling.
Step-by-step installation with clips
The installation is first carried out “dry”: the baseboard is cut, corners, connectors and plugs are installed. Use a pencil to mark the places where the clips are fixed on the floor in increments of about 30–40 cm or less for uneven sections of the wall.
Tip: press the plinth against the wall with your hand, check if there are gaps there and only then put a mark.
Clips are usually fixed to dowels. For drywall walls, the clips should be screwed through the drywall to the bottom track. After securing the clips, the plinth is applied to the wall and the strip is pressed with force, say, hit with a fist, opposite each clip until it snaps into place.
Installing skirting boards with glue
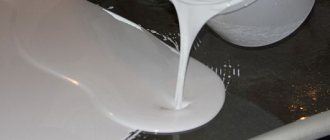
Working with “liquid nails” does not require any skills at all. On the back side, a compound is applied to the bar; it has a fairly thick consistency, and it is glued.
Installation with “liquid nails”
Corners and other accessories are glued in the same way. This method is only suitable for carefully leveled walls.
kak.feedjc.org
High-quality repairs require careful and careful attention to detail. When finishing work with the ceiling, you need to decorate it well - ceiling skirting boards are used for this. As a rule, installing the planks does not cause any particular difficulties; you will have to tinker with the corners. Let's take a closer look at how to cut ceiling plinths in the corners, talk about different methods, and give useful recommendations on the topic.
Ceiling plinths from any material can be cut using one of the methods described below. They are suitable for all except plastic ones: these are designed using ready-made corners.
Typical sizes
Before drawing a design project for a room, and at least imagining in your mind how the baseboard will look in the interior, you just need to know what standard dimensions for the width and height of the profile are on sale.
High plinth combined from different materials
Plastic and MDF laminated
The most popular in modern budget renovations are plastic floor skirting boards; they can be considered universal, since thanks to the huge selection of sizes, colors and textures, moldings can be matched to almost any floor covering. Most often, MDF profiles are used for laminate. and the plastic one is for the bath, as it is not afraid of moisture.
The standard length of PVC plinth is 2.5 m. But in the cross section, the profile dimensions have undergone a major transformation. The width of the floor plinth along the lower leg is from 15 to 23 mm. The height of the bar can reach 150 mm. In standard apartments with a ceiling of 2.7 m, plastic floor plinths are most often installed, the dimensions of which range from 55 to 65 mm in height and 23 mm in width; as a rule, these are planks with a built-in cable channel.
The most popular sizes of plastic skirting boards for floors
Wooden and veneered models
Wooden models are an unchanging tradition and always a refined look for the interior. And it should be noted that the woodworking industry is trying to keep up with the times, and is no longer limited to the manufacture of fillets with a triangle in cross-section. Today there is a large selection of wide and narrow shaped wooden profiles on the market. the standard lengths of which are 210, 230, 250 and 300 cm. The height and width of the wooden planks is determined by the average size of a typical housing. Wide wooden models according to European standards are also produced. The materials and shape largely depend on the manufacturer, but consumer demand coupled with competition sets the standard dimensions for the height and width of the slats.
Wooden plinth, sizes and shape of typical models
Idea: For exclusive interiors, wooden floor skirting boards are made, the dimensions of which are determined according to individual sketches; such planks can reach a width of 300 mm. Manufacturers also offer moldings with a length of 6.0 m
The choice of such planks should be treated with great caution, since wood is not a moisture-resistant material, and with minimal changes in storage and operating conditions, the profile may lead to a situation that is catastrophic at such a length.
Polyurethane, foam, polystyrene
Skirting boards made from modern foam polymer materials have the widest range of shapes, decor and width of the strips. The only thing that can be said with certainty is that with different widths the length of the whip is 2 m.
Attention: As a rule, skirting boards are made of polyurethane. polystyrene foam and polystyrene are used to decorate the joints between the ceiling and the wall, but the polyurethane profile, due to its chemical and physical characteristics, is also in demand for finishing the joints between the floor and the wall. The narrowest plinth of these materials has a cross-section of 15*10 mm; this model is used if it is necessary to close the joint so that the profile is almost invisible in the interior
More often, for modern renovations, the width and height of the plinth are selected based on the dimensions of the room. The table shows the popular standard sizes of ceiling plinths:
The narrowest plinth of these materials has a cross-section of 15*10 mm; this model is used if it is necessary to close the joint so that the profile is almost invisible in the interior. More often, for modern renovations, the width and height of the plinth are selected based on the dimensions of the room. The table shows the popular standard sizes of ceiling plinths:
Room height, m
As for the polyurethane floor plinth, its height and width are identical to their wooden and plastic counterparts, but if necessary, you can increase the size using decorative molding.
Width and height of ceiling fillets made of polystyrene and polyurethane
Other options
In addition to those described above, profiles made of specific materials are now in demand for finishing. So, the best option for tiles is a ceramic baseboard. the width of such a border can vary from 2.5 to 10 cm. For plastic countertops, it is advisable to use a PVC profile with a width of 3.0 cm. For stone work surfaces, the standard plinth height is 3.0-5.0 cm, although if necessary it can be cast or cut any size.
How to get the effect of very high skirting boards?
Skirting boards typically have a height of up to 20 cm. Sometimes it happens that much higher products are installed in the room. As a rule, taller skirting boards must be made to order, and the only material that allows the production of large, stable skirting boards is MDF (wood is not recommended as it can become susceptible to warping over time).
The effect of a high plinth, however, can be achieved without the need for a custom order using one of two methods. The first is the installation of two plinth strips “in bookmarks” ( photo No. 1). The first strip is glued at a height of several centimeters above the floor. Then the second plank is glued to it (it is necessary to install a washer between the lower plank and the wall to which it is glued).
The second method is to traditionally install the baseboard on the floor. Then, above it, a few centimeters higher, you can install one or more planks on the wall (available from the companies that produce these products: NMC, Orac, Mardom, Europlast, Creativa). The last step is to paint the baseboards and the wall that is between them in a single color ( photo No. 2). Thus, at a relatively low price, you can get the effect of even a very high baseboard.
Advice from professionals
The installation procedure for PVC skirting boards is not particularly complicated. But in it, as in any other business, there are subtleties that help get the job done faster and easier. Here are some tips from renovation professionals:
- The work of installing skirting boards can be done alone. But it is much more convenient to work with an assistant.
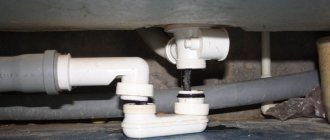
- Before laying the cables in the channel, it is better to grab them in several places in a bundle with tape or special cable ties. To prevent the rigid cable from ripping out of the channel, you can secure it in place with double-sided tape.
We also recommend watching videos in which all stages of work are clearly shown:
Installing PVC skirting boards is not particularly difficult. If everything is done carefully, even a less-skilled repairman can achieve excellent results. And then the room will take on a finished look.
Varieties
Modern skirting boards are made from different building materials. But the largest group consists of products made from wood, as well as its derivatives.
Today, many different skirting boards are produced, each of which has its own positive and negative sides Source masterskayapola.ru
Wood
The classic plank is made of natural wood, is environmentally friendly and high cost. Under the influence of temperature fluctuations and moisture, it loses its shape, rots, and often turns into a breeding ground for mold. The main advantage of such a plinth is its natural attractiveness; it well emphasizes the beauty of expensive parquet.
Veneered
Made from coniferous wood. Thin layers of the latter are glued together, resulting in a material that is quite strong and resistant to external influences. This type of plinth is not considered environmentally friendly because it contains a lot of glue. When purchasing such products, it is important to pay attention to the presence of a quality certificate so as not to purchase a counterfeit containing formaldehyde, which is dangerous to the human body.
From MDF
The plank is made of particle board, covered with decorative paper and natural veneer. It is characterized by sufficient strength, easy to use, and easy to match to a specific interior. Among the disadvantages of such a plinth, it is worth noting poor resistance to moisture, environmental pollution, and difficulty of installation due to its heavy weight. Advantages: wide range of sizes, affordable price.
Features of use in the interior
Most often, the installation of such a decorative element is carried out at the junction of the wall and floor, as well as the wall and ceiling. It can be wide and narrow, smooth and textured. The product with the pattern looks very nice. It is practically indistinguishable from natural gypsum stucco.
A wide floor plinth can be used in any interior design. The main condition for its installation is a high ceiling height. The following products are considered the most popular and in demand:
- Wide white plinth.
- Flexible frame, which is used to decorate columns and complex interiors.
An unusual solution is a wood-look polyurethane baseboard. Looks amazing
What tools are needed?
It all depends on the material used to make the products. Materials such as wood, PVC, gypsum, and polystyrene can be used to make skirting boards. The plinth can be with or without corners, with or without decorative elements.
To dismantle a glued or nailed profile yourself, you will need:
- Mallet.
- A flathead screwdriver or chisel.
- Thin spatula or scraper.
- Wooden wedges.
- Nail puller.
- Stationery or shoe knife.
- Hammer.
Where is it better to mount it - to the floor or to the wall?
The presence of two perpendicular planes determines two options for fixing the floor plinth. The natural preference will be the simplest and easiest method. The easiest way is to attach this finishing element to a surface that will accommodate fasteners with less labor:
- In houses made of timber with concrete floors and cement screed, it is recommended to prefer fastening the plinth to the wall;
- In houses made of foam concrete and brick with a wooden floor, it is wiser to “drive” dowels or nails into it.
In order to attach the plinth to the floor with a concrete screed, to the walls made of foam concrete, you will first have to drill holes for plastic dowels with a hammer drill. The spacing of the points for installing fasteners determines the type and degree of unevenness of the base and the geometric parameters of the slats. The most common distance between the fixation points of both the baseboard itself and the strips or clips for mounting plastic slats is a minimum of 30 and a maximum of 40 cm.
The choice of mounting plane depends on the technical characteristics of the base
If for some reason attaching the plinth to plasterboard or to a chipboard panel is the only possible option, for fixing you need to purchase special self-tapping screws designed to work in this material, or finishing nails with zinc coating.
It is generally advisable to place the attachment points on the metal elements of the frame if it was used as a structural support.
Complex cases
Here we are talking, first of all, about wooden products that are secured with nails or strong adhesives. To successfully remove such a profile, you will have to work hard. Start removing the baseboard from the corner or door.
Putty and strong adhesive
Polyurethane and wooden profiles for floors and ceilings are removed with a mallet and a thin spatula:
- First, run a putty knife along the joint several times to create a small gap.
- Now rest the spatula from below, holding the handle close to the wall.
- Gently tap the trowel handle with a mallet until the tip of the trowel fits between the wall and the lath.
The plinth appears to be cut from the wall.
Nails:
- To begin with, before removing the plinth, unstitch the seams where the profile meets the floor and wall. As a rule, they are filled with varnish and paint.
- Insert the chisel into the gap formed and hammer it in deeper with a hammer.
- Now insert a wooden corner into the widened slot.
- Repeat all manipulations after one meter, gradually tearing off the baseboard.
Important! If manipulations with a chisel are not successful, use a nail puller (crowbar). But do not overdo it so as not to damage the profile.
The force with which you will act on the crowbar is quite large. Therefore, in order not to damage the floor covering, use thin plywood as a backing.
If the wooden profile is to be disposed of, then you can do it even simpler: using a chisel, make a hole near the nail, and then use a nail puller.
Self-tapping screws
To dismantle skirting boards secured with self-tapping screws, it is important to find all their caps. Found it? So, then everything is simple: unscrew them using a screwdriver with reverse or a screwdriver.
Wooden chopsticks
Is the profile fixed with wooden choppers? This mount looks like rounded wooden caps located at the same distance from each other. Wood chips can be removed using a chisel or drilled out.
Installation of PVC fillets and its features
Ease of installation, low price, practicality and a huge range of models make PVC baguettes incredibly popular and in demand today.
It is also worth noting several more design advantages of such products:
- presence of a removable panel;
- cavity for placing wiring;
- increased flexibility;
- ease of cutting.
You should know: thanks to the ability to imitate other materials, PVC baguettes are suitable for any type of floor.
There are three options for how to properly nail a plastic baseboard. We will consider them.
Fixation with clips
This method is especially beneficial if there are several cavities for wires. Also, when using it, there are no visible marks of attachment.
No traces of attachment
Here are detailed instructions for carrying out this method of installation work:
- we adjust the fillets to the required dimensions;
- We apply the inner part to the wall and mark the places for the dowels;
- drill holes with a hammer drill;
- drive in plastic dowels;
- We apply the inner part again and this time firmly fix it with self-tapping screws;
- lay all the necessary cables;
- we install the external part of the decor.
Tip: Make sure the end caps and transition corners are the same color. For cutting, it is best to use a miter box and a hacksaw.
This will help make everything smooth and neat.
Especially if you do the work yourself
This will help make everything smooth and neat. Especially if you do the work yourself
For cutting, it is best to use a miter box and a hacksaw. This will help make everything smooth and neat. Especially if you do the work yourself.
The front panel can later be removed for cleaning or work on the built-in wiring.
In the case where the product does not have cavities for wires, it may be necessary to purchase clips for fastening separately.
Advice: calculate the feasibility of purchasing additional fastening systems in monetary terms. This is not always beneficial or justified.
Installation with glue
The option using glue is easier to use. In this case, we are not interested in how to nail the baseboards, because we will be gluing them.
No additional electrical tools are required here. But you won’t be able to remove the panel either. The frieze is glued once and until new repairs.
- we cut the baguettes to the required length, creating corners if insert corners are not used;
- apply glue to the inside of the panel and the joint on the wall;
- press and hold until hardened;
- We remove the excess liquid released from under the edges with a rag prepared in advance.
Try not to stain the floor with glue during installation.
You can purchase specialized adhesive for ceiling or floor plinths at any hardware store.
Tip: for gluing the frieze, it is recommended to use glue brands such as “Dragon”, “Titan”, “Moment”.
Installation using self-tapping screws and finishing nails
The cheapest way to nail plastic skirting boards is to use self-tapping screws or finishing nails. This option will be quite reliable and practical, but not very neat. The attachment points will be visible even after they are masked.
Now, in order, how to do it yourself:
Using a drill with a diameter of a couple of millimeters, we make holes in the fillets at the same distance of 30-60 centimeters;
Advice: be sure to maintain the same spacing between the fasteners, so that even if they are noticeable, they are at least located symmetrically.
- countersink the holes with a sharpened knife so that the heads of the screws can sink into the surface of the frieze;
- We apply the panel to the installation site and, through the holes made, mark the places for subsequent drilling;
- We drill holes with a hammer drill;
- we hammer in plastic dowels if using self-tapping screws or wooden dowels for finishing nails;
- install the fillet, tightly fixing it with fasteners.
You should take into account the fragility of the material and, at the moment of final fixation, screw in self-tapping screws or drive in nails with special care so as not to press through the surface.
Screwing in a self-tapping screw with a screwdriver
Tip: screw in the self-tapping screw in the area of the panel adjacent to the wall.
Hats are usually masked with special corks or wax, the same color as the baguette.
Stucco molding
It is almost impossible to remove the molding without damaging it. The stucco decoration is removed during renovation when the decoration does not fit into the updated design. In all other cases, it is better not to touch the stucco molding.
You can try to remove it by running a sharp knife along the joints several times, gradually pushing the blade deeper and deeper.
Important! If the mixture on which the decor is held crumbles, then perhaps your attempts will be crowned with success.
However, most often, it is not possible to tear off the molded plinth without damaging it, so it is simply beaten off using a chisel and hammer.
How to choose the right product by size and more.
- Simple decorative panels should cover the area where the floor and walls meet.
- If you place the plinth on a wooden floor, in particular on parquet, then its base should be 2-3 mm larger than the thermal gap.
- The presence of an elastic edge somewhat complicates the calculation of the final installation area.
- The decor should fit into the color scheme of the floor and walls. Depending on the style of the interior of the room and the overall color, the plinth can either visibly delimit them, or visually continue the horizontal surface.
- For some floor coverings, say, carpet, special models are chosen.
- Products with a cable channel will help you organize full-fledged workplaces in the shortest possible time.
Plastic plinth in a modern interior
Thus, the selected plinth must satisfy two conditions:
- fit harmoniously into the interior of the room;
- perform a specific functional responsibility.
How to choose a plinth for your interior?
Skirting boards for the interior can be selected in several ways:
- Skirting matches the floor
Selecting a baseboard that matches the color of the floor is a traditional and safe option. It does not introduce a new color into the interior and thereby avoids a situation where an incorrectly selected shade can ruin the entire effect. The big advantage of this solution is the fact that the plinth, matched to the color of the floor, visually increases the area of the room. Moreover, the higher the baseboard, the greater the illusion of increase will be. It should be borne in mind that such a procedure simultaneously visually reduces the height of the room. It is also worth paying attention to the fact that high baseboards in combination with a dark floor can create an overwhelming effect, so this combination is optimal in the case of light floors.
Unfortunately, it is not always possible to match the color of the baseboard to the color of the floor. This is relatively easy when dealing with popular European wood species (such as oak, beech or ash). They have a consistent color range, so skirting boards will generally work well on the floor as long as they are made from the same species. The situation looks different when dealing with mahogany floors, because this type of wood is characterized by an unstable color range. It can range in color from golden honey to dark brown. Also, some shades range in color from olive-brown to black-brown, although they are most often dark red. In addition, exotic wood, unlike European wood, oxidizes more strongly, so over time the floor can significantly change its color.
Purchasing mahogany flooring and baseboards made by different manufacturers may result in them not matching each other. A similar problem arises in the case of floor colors that have fancy shades. To perfectly match the baseboard color, you need to find a manufacturer who will offer it along with the floor. If the manufacturer does not make the baseboards, then finding products that will match the floor can be quite difficult.
Problems with mahogany floors can be solved by manufacturers of skirting boards made of PVC. They offer a very rich range of colors, but it should be borne in mind that the color of the skirting board can only be similar to the color of the floor. Moreover, PVC planks, due to their artificiality, do not belong to the most aesthetic and prestigious methods of interior decoration, and therefore will not always be in harmony with the rest of the elements in the room.
- The baseboard matches the furniture
A very good option would be to select the baseboard to match the color of the furniture. This combination can be used in rooms where the shade of the furniture matches the color of the floor. and where it only emphasizes its contrast. By using a color that is already present in the interior, an aesthetic, consistent and harmonious interaction is achieved.
Unlike matching the baseboard to the color of the floor, in this case there are no problems with the correct selection of colors. If the furniture matches the floor or contrasts with it, then choosing the appropriate baseboard should not be a big problem. If the furniture is varnished, then you can also varnish the baseboard to achieve the desired shade, or in the case of white, simply purchase ready-made products (however, remember that white can also come in different shades).
- The baseboard matches the color of the wall
Another fairly safe option is to install a plinth, which can have the same color shade as the walls. It is used not only in cases where it is difficult to match the baseboard to the floor or furniture. This is due to the fact that products painted in the color of the walls look subtle and at the same time very elegant. And also, unlike contrasting colors, they do not visually make the room smaller. This solution also allows the use of the most interesting and bold textures and shades in other interior elements without the fear of creating an excessive effect. Very often the baseboard and the wall are painted with colors that differ from each other in one or more tones.
- The plinth has a contrast with other elements
Often an interesting solution is to install skirting boards that do not match any of the elements present in the room. This may seem risky, but in most cases, with prudence, very good results are achieved. A plinth that does not fit the floor, furniture or walls has a pronounced decorative function and in itself can indicate the attractiveness of the interior.
Contrasting finishes include, for example, aluminum and steel products. They are often installed in modern interiors, and even if the color does not match other elements, their character goes well with the style of the room. Another contrasting but safe option would be to install white skirting boards in a room where this color is only present on the ceiling. This shade, due to its neutrality and versatility, looks great in almost all interiors. Thanks to this, today it is a very popular solution, especially when there is a problem with choosing a color. Much less common, but certainly a very interesting solution, is the choice of bright colors. In this case, make sure to carefully select the color scheme and texture of other elements. To achieve a more harmonious and light finish, it is worth placing small elements inside the room that match the color of the baseboard. It can also be helpful to get advice from an experienced interior designer who can help you choose the right colors. Of course, it is worth taking the risk associated with multi-colored skirting boards, since as a result you can create an interesting and unique interior.
White MDF skirting boards
MDF skirting boards are made from wood fiber raw materials - shavings from different types of wood, which are pressed using modern equipment and then glued together using artificial resins. The top of the planks is covered with a durable white film, which provides excellent aesthetic properties.
Advantages:
1. Durable and reliable.
2. The price is comparable to plastic skirting boards in the expensive segment.
3. Easy installation in different ways:
- Easy to cut;
- With smooth walls, it can be mounted using a mounting strip that provides hidden fasteners.
- For uneven walls, you can choose to install with glue or self-tapping screws.
- A hole is drilled for the self-tapping screw; when screwing in the screws, the plinth is pulled to the wall, eliminating the gaps; the remaining recess is puttied and painted over.
Skirting board after installation - the place where the screw is screwed in is puttied, but not yet painted
4. White MDF plinth can also be painted in any color with or without preliminary primer.
5. They do not attract dust and retain their original appearance and whiteness for a long time.
Flaws:
1.Not suitable for bathroom and other wet areas.
2. When buying cheap MDF skirting boards, there is a risk of getting a product with a high content of formaldehyde and a short service life.
Brands of MDF skirting boards with proven quality include Smartprofile Paint, L-Decor.
Dismantling wooden plinths with choppers
It is extremely rare, but still there are skirting boards attached to the base using small wooden choppers. This installation method occurs in 5% of cases. Typically, the technique is used when installing expensive skirting boards made of valuable wood. In this case, the attachment points will be unnoticeable - they may be circles that resemble knots in the appearance of solid wood.
Advice! You can find chopiks by the dark rim around them or by the grain of the wood. The fibers of the baseboard will run along, and the fibers of the chop will run across.
Skirting board with choppers
In this case, the chopsticks are simply drilled out or picked out using improvised means. Sometimes there may be nails or screws underneath them. Then the same crowbar will be used.
Installing plastic skirting boards on the floor with your own hands
How to install a plastic floor plinth? There are several ways:
- using special fasteners,
- using self-tapping screws or dowel nails,
- using liquid nails.
Installation of skirting boards without cable duct using special fasteners
- Mark places for fastenings in the wall. Leave a distance between the fasteners of 30-50 centimeters, and no more than 10 centimeters from the corner.
- Drill holes in the marked places to a depth of no more than 3-4 centimeters.
- Insert the plastic dowel into the drilled holes.
- Secure the fastenings with screws around the entire perimeter of the room.
- Place the inner corner onto the baseboard. It will be more reliable to glue it with plastic glue.
- Install the floor plinth starting from the inner corner of the room.
- Snap the baseboard into the fasteners.
- Place the joint on the end of the installed baseboard.
- Slide the inner or outer corner onto the second baseboard strip.
- Place the corner in the opposite corner.
- Measure the length to the joint and cut the strip.
- Insert first into the joint and then into the corner of the room and snap the baseboard into place.
- Continue further trimming and installation around the perimeter using the necessary fittings.
The advantages of this method include:
- easy dismantling,
- easy re-installation,
- there are no traces of fasteners on the surface of the plinth.
The disadvantages include:
- repeated installation does not provide quality - the plinth is either not fastened at all, or is not fastened tightly,
- Requires perfectly smooth wall and floor surfaces.
Fastening a plastic plinth with a cable duct using self-tapping screws or dowel nails
- Remove the cable channel strip in the baseboard.
- Drill holes in it every 30-50 cm, and no more than 10 cm from the corner with a drill with a diameter of 6 mm.
- Place the inner corner onto the baseboard. It will be more reliable to glue it with plastic glue.
- Place the plinth from the corner and mark the holes in the wall.
- Drill holes in the marked areas to a depth of no more than 4 centimeters.
- Attach the baseboard and insert the plastic dowels into the drilled holes.
- Screw it with screws or drive dowel nails into the holes along the entire length.
- Place the joint on the end of the installed baseboard.
- Slide the inner or outer corner onto the second baseboard strip.
- Place the corner in the opposite corner.
- Measure the length to the joint and cut the strip.
- Insert first into the joint and then into the corner of the room and continue further marking, drilling and fastening.
- Continue trimming and installation around the perimeter using the necessary fittings.
- Insert the required cable and close the cable channel cover.
Fastening a plastic baseboard without a cable duct using self-tapping screws
The result does not look very presentable, but the quality is the most reliable.
- Drill holes in the profile of the floor plinth (hole diameter 2-3 mm, distance between holes 40-50 cm).
- Make a cone-shaped recess in the hole; the easiest way to do this is with a countersink or a large drill (based on the width of the screw head). The cone will help hide the caps.
- Start installing skirting boards from the corner. Press the plinth against the wall and place marks through the holes (it is best to make marks with a very finely sharpened pencil).
- Drill holes at the marks (drill diameter 6 mm).
- Insert dowels into the wall.
- Place the baseboard against the wall and tighten the screws. But at the same time it should not be pressed or wrinkled.
- Repeat these steps for the next sections around the perimeter.
- Cover the screw caps with plastic plugs, inserting them tightly into the screw cap. For extra security, glue them. Match the color of the plugs to the color of the baseboard.
Installing plastic skirting boards using liquid nails
This job does not require any drilling or messy work. First, carefully install the fittings and the plinth cut to size without glue, and then glue them using liquid nails to the selected places, after priming the strip of painted wall with a deep penetration primer.
The disadvantages of this method are:
- impossibility of reuse,
- installation quality requirement.
Plastic
Dismantling plastic skirting boards does not cause any difficulties. As a rule, they are used to close the gap between the floor covering and the wall, screwing them onto dowels. How to remove plastic skirting board from the floor?
- Remove the trim strip.
- Pull the wires out of the cable channel and unscrew the screws.
- Once the repair is complete, simply reinstall the baseboard.
Important! Now let's talk about how to remove the corner of the baseboard. Once you dismantle the bar, it will come off by itself.
Installation instructions
As already briefly noted above, the installation method depends on the design of the plinth. Let's consider the simplest and fastest method of fastening using conventional dowels:
- Installation begins from the corner, cutting off the strip to the required length if necessary.
- Having previously removed the plug, the plinth is applied to the wall, leveled and through holes are made, going deep into the wall at a distance of up to 25 mm. The fastening pitch should be from 10 cm on short sections and up to 50 cm if a whole panel of standard length 2.5 m is used.
- Dowels are driven into the holes, after which the plastic frame is secured with self-tapping screws.
- A suitable additional element (internal or external corner, docking unit or end cap) is installed on the edge of the mounted plank, after which the next panel is tried on and fastened in the same way.
- After completing the installation of the last element, cables are laid in the internal channel and the structure is closed with a plug.
Installing the plinth with clips begins with placing the plank against the wall and determining at what height the fastening elements will be located. As in the previous case, work is carried out from the corner, placing the first clamp at a distance of about 100 mm. To attach it, a hole is drilled into which a plastic dowel is inserted. After this, a clip is applied and secured with a self-tapping screw. The distance between adjacent fastening points is selected depending on the length of the plastic panel - in this case, you can follow the same recommendations that we gave for through installation. To fasten the plinth to the clamps, a small force is enough, sufficient to overcome the rigidity of the steel bracket, into which the protrusion on the back side of the finishing panel fits.
The bottom edge of the clip must rest on the base of the floor, otherwise a gap will appear between it and the baseboard
In principle, we have discussed all the nuances of installing a plastic plinth profile within the framework of this article. But, as you know, it’s better to see once, so we bring to your attention an introductory video:
Materials for making skirting boards
The building materials market offers for sale a large number of skirting boards made from a wide variety of materials:
The material largely determines the operational parameters of the plinth, its design and the possibility of use in certain conditions.
Plastic
Solid polymer baseboards are the most common finishing option. This is due to simple installation technology, practicality, durability and low cost. It also needs to be said about the variety of shapes and wide range of color shades. Lightweight and beautiful PVC products may include cable channels within which wires can be laid.
Structurally, the plastic plinth consists of a fastening and installation part. The first is made in the form of metal profiles and is fixed at the bottom of the wall using dowels. The second is a long plastic strip with a shaped cross-section and is simply fastened to the installed fasteners. The joints, corners and ends are covered with special plugs and connectors.
advantages include :
The main disadvantage of the material is its low mechanical strength and the possibility of accidental damage under loads or impacts.
MDF plinth
These are profiles made from pressed wood-fiber raw materials with a protective layer. Available in two versions - for painting and with a finished finish. In the first case, the surface of the profile is white and can be painted in any color. The finish of the laminated film is already decorated in color or decor, simulating natural wood, and does not require additional finishing.
These are relatively cheap and more durable profiles (compared to PVC). They have an optimal price-quality ratio.
Advantages:
Flaws:
Ideal for floor coverings such as parquet, laminate, floorboards. Mounts directly on the wall or special mounting brackets.
Solid wood
Traditional classic finish. Natural solid baseboards will be indispensable for natural floor coverings. In this case, it is desirable that the type of wood matches the type of flooring.
Products made from oak, linden, ash, walnut and birch are considered the best. The cheapest plinth is made of pine. A relatively inexpensive alternative is veneered products, in which the main mass is made of coniferous species, and the front finish is made of expensive wood veneer.
Pros:
Minuses:
Polyurethane
Polyurethane plinth is sold in the form of a rolled tape. This allows for finishing with a minimum number of connecting joints. Flexible polyurethane strip is great for framing curved surfaces and walls that are not level enough. The front side is white - ready to be painted or covered with film. Some samples have a structured surface that looks beautiful after painting.
The installation method depends on the shape of the profile and can be carried out using an adhesive composition or pre-installed metal fasteners. Adhesive treatment of connecting joints is required.
To give the desired bend, it is recommended to heat the plinth in hot water before installation.
Advantages:
Flaws:
Ceramics
Ceramic skirting boards will be the best solution for finishing baths, showers, kitchens and toilets if the walls of these rooms are tiled. Not so long ago, such a plinth was cut independently from material for wall decoration. However, getting a nice smooth edge was quite difficult.
Now many manufacturers of ceramic products offer customers kits, which, in addition to tiles, include ready-made plinths and strip borders. They are made in the same style and the same colors, and have the same dimensions along the edges. In combination with a tiled covering, this finish looks beautiful and organic, and the technology for laying materials is completely identical.
Advantages of ceramic plinth:
Minuses:
Metal and composite materials
Metal skirting boards are not widely used, however, if desired, they can be found on sale. Aluminum alloys, brass, stainless and galvanized steel are used to make skirting boards based on rolled metal sheets. The metal can be painted, polished and coated with waterproof varnish or polymer materials.
Advantages:
Flaws:
What color should the baseboard be?
In modern design, there are no standards that precisely determine the shade of the baseboard for a particular interior solution. This element can be combined with any interior detail. It is either visually hidden or, conversely, highlighted.
Another obvious solution is a baseboard that matches the color of the flooring. And choosing it is not as easy as it might seem at first glance. That is, the baseboard itself is easy to match to the laminate or carpet. The option will be recommended by both the store salesperson and the manufacturer. Everything is installed well until it comes to the door area, which, including color, is approved by the project. The shades may begin to “fight” with each other, and then something will have to be done. For example, change the door frames to ones that match the color of the baseboard.
You can choose the baseboard to match the shade of the walls. This is an excellent solution when you want to “dissolve” the boundaries of your living space. But the choice of material for this option is the prerogative of professional designers. An amateur who is faced with finishing for the first time is unlikely to cope with such a task. In this case, you will have to additionally determine the shade of the trim, ceiling cornices, as well as window and door openings.
Another option is to paint the walls, doors and trims the same color. And also buy/paint the baseboard to match them. Then whatever geometric shape of this detail is chosen, it will not violate the overall style of the space.
There is another method, loved by modern decorators and designers: color matching the baseboard with window frames. This looks especially impressive when the frames contrast in color with the walls in the room. And in order for the perception of the living space to be holistic, the doors should be designed to match the windows and baseboards.
If the room has stucco elements, it is better to choose the baseboard on the floor in the same color as the stucco decor. Stucco molding generally gives the room good graphics, saturates it, and relieves the dullness of emptiness. And if its color begins to overlap with the shade of the baseboard, this will give the effect of identity of the space.
To “outline” a home by revealing its geometry, it helps to lay panels on the walls (from the floor to a third) and paint the plinth in their color. In this case, a wall molding and a ceiling plinth of the same shade will help create a composition that is uniform in scale and style.
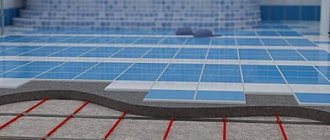
In rooms with difficult operating conditions (high humidity, increased vaporization, etc.), it is better to make the baseboard from the same tiles as the floor covering. This is done in kitchens, bathrooms and toilets.
From a practical point of view, the decision is correct, but it is important that such a plinth really looks like a plinth. That is, it was small in size and preferably with a top in the form of a border, albeit a very tiny one. If collectible ceramic tiles were used to finish the floor in complex rooms, the collection nomenclature should include a set such as a border
You shouldn’t neglect it if you want to get a truly high-quality, aesthetic interior. It is difficult to achieve the desired visual effect with simply cut tiles. Especially if you have neither the skills nor experience in handling this difficult finishing material
If collectible ceramic tiles were used to finish the floor in complex rooms, the collection nomenclature should include a set such as a border. You shouldn’t neglect it if you want to get a truly high-quality, aesthetic interior. It is difficult to achieve the desired visual effect with simply cut tiles. Especially if you have neither the skills nor experience in handling this difficult finishing material.
Which material to prefer and why
When selecting, it is necessary to take into account the purpose of the premises, operating conditions, degree of wall alignment, chosen finishing design, complexity of installation and price. If you have limited financial resources, it is better to opt for PVC or MDF profiles. Ceramics or duralumin are perfect for bathrooms, toilets, and showers.
If you do not have the opportunity to provide high-quality painting, then it is better to buy ready-to-install material with a finished coating.
If you have curved surfaces, you will have to buy polyurethane tape. Solid wood can only be installed in dry, heated rooms. You can also achieve good results by purchasing veneered plinth.
Installation subtleties
If the installation of PVC or polyurethane plinth is carried out using a mounting strip or clips, then the fastening elements are simply fixed with self-tapping screws and dowels at the same height along the wall. The baseboard is heated in water and then simply snaps onto the fasteners. When the material cools, the baseboard will become denser. It is advisable to start all work from the corner part of the room.
If installation is carried out using glue, then you cannot save on the adhesive composition. You should choose the highest quality solution. And, by the way, it is not applied to the floor surface, especially if laminate or parquet is laid.
Attaching cork skirting boards
Interestingly, on surfaces that are not overly curved, you can also use a regular polymer skirting board. You can see how to bend it in the video below.
The result of correct bending
Removing a baseboard screwed with self-tapping screws
In this case, it is likely that things will go easier. In the same way as in the previous section, you should find all the screw heads. They can be recessed into the baseboard, or they can protrude slightly above the surface. In order to dismantle the plinth, just use a screwdriver or screwdriver to unscrew all the screws, and the product will be easily removed.
Wooden plinth screwed with self-tapping screws
If the screws were driven into the baseboard, which is also not uncommon, then you must act in exactly the same way as when removing a baseboard secured with nails.
What tools will you need?
For ceiling plinths, the following tools may be useful, depending on the chosen method of work:
- Saw on wood. Useful for working with wooden ceiling plinths.
- Metal cloth. Suitable for other types of skirting boards (foam, plastic, etc.).
- Miter box. The tool is a groove that has the shape of an inverted U, where lines for cutting are drawn at angles of 45° and 90°.
- Electric miter saw. Can be used instead of a miter box, helps achieve high precision cuts.
- Jigsaw. Easy to operate, it can be used to cut corners efficiently and correctly without burrs.
- Stationery or construction knife. Suitable for foam baseboards, it is important that it has an excellent cutting blade, and therefore must be well sharpened.
Types of ceiling and floor skirting boards, selection of tools
Installation of baguettes and baseboards is no less important stage of repair than any other. And cutting the corners is the most difficult part here. It is important to choose the right tool for the job and the most suitable cutting method.
Ceiling plinth
Ceiling molding, also known as molding, fillet, border or simply plinth, is most often used to finish the joint between a wall and a ceiling. Although sometimes it is used to cover internal corners, make decorative frames or panels, and decorate niches and architectural elements. There are several most popular materials for making ceiling moldings:
Plastic (polyvinyl chloride). It is more convenient to cut wide and rigid moldings with a hacksaw. If you need a more gentle tool, use a jigsaw.
Foam plastic (expanded polystyrene). A very light and porous material that is best cut with a sharp construction or stationery knife.
Floor plinth
A modern floor plinth can hardly be called a plank that closes a gap. This is a structural component that complements the design and emphasizes the overall design. Skirting boards are made from several materials:
Wooden ones can be made from solid wood or veneer. For pruning, flat or circular saws and jigsaws are used.
Plastic skirting boards are “dangerous” competitors to traditional wood. Easy to install and cut with a regular hacksaw.
Aluminum skirting boards are the latest word in interior design. They are usually cut with an electric saw or a hand saw for metal.
Only on wooden baseboards will you have to make corner trims. The rest are cut straight and connected using special corners.
Conclusion
All three methods I described work; the choice depends on what tool you have and what your professional skills are. If after watching the video you still have questions, welcome to the comments, I’ll help in any way I can.
If you are not confident in your abilities, then for both floor and ceiling plinths there are joining elements that allow you to do without trimming.
Source