Cement self-leveling flooring is an excellent solution for those who want to create a smooth, beautiful, aesthetic and durable coating that will not be very expensive, but will last for decades. The problem of uneven floors with defects is quite common in both residential and industrial premises. It is impossible to lay this or that covering on such a floor, since the finishing is not able to hide all the problems on the surface.
Self-leveling cement flooring is characterized by self-leveling properties, laying itself evenly and requiring a minimum of effort, time, and money for finishing work.
Any modern self-leveling floor, regardless of its components, is distinguished by efficiency, functionality, simplicity and speed of installation, relatively low cost and a number of other useful properties. With the help of such a floor, you can solve the problem of leveling the floor and prepare it for laying the finishing touches or leave it as is.
Before you start pouring a self-leveling floor, you need to carefully study the range of mixtures, choose the appropriate one in accordance with the required operational characteristics and features of the room, and consider the technology for performing the work.
Distinctive features
A cement-based self-leveling floor is one of the modern materials that is capable of self-leveling during installation, creating a flat, smooth surface. The thickness of the layer can be any and depends on differences in the floor, the amount and magnitude of deformation, and other factors.
Advantages of cement self-leveling floors:
- High compressive resistance, which is demonstrated by the surface after a full hardening cycle, due to which the floor is not only leveled, but also significantly strengthened.
- Resistance to moisture and water without loss of performance properties.
- The ability to use any materials for finishing - self-leveling floors can be the basis for ceramic tiles, laminate, parquet, linoleum, carpet, polymer mixture (to create a decorative effect), etc.
- Low cost - taking into account the fact that prices for building materials today vary widely, this parameter is relative, but still.
- The relevance of choosing this arrangement option for a “warm floor” system.
- Simplicity and speed of installation - even a non-professional can pour a self-leveling floor based on cement or any other component with his own hands.
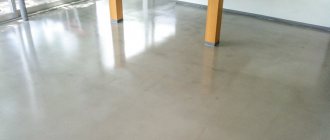
- Almost perfect evenness of the surface after hardening - the result is much higher quality compared to a conventional screed.
Consumption
It remains to calculate the consumption per 1 m² of the selected mixture. This is where the main highlight of the method appears: we get the flow rate immediately in the dry weight of the sales material, without bothering with calculating the density of the finished solution, for which we would have to make arbitrary assumptions. We just need to multiply the calculated layer thickness by the floor area and the specific material consumption; all these values are accurate and reliable.
In our example, for a room of, say, 16 square meters. m will yield 259.2 kg of leveler and 72 kg of level. All that remains is to reduce it to bags containing 25 kg. We round them according to the rules of arithmetic, from half to more. Calculation according to our data will give 10.368 bags of leveler and 2.88 bags of level. We take 10 bags of the first and 3 of the second.
And now your homework: go to the website of any hardware store, find out the prices and calculate the savings compared to traditional estimates.
Application environment
Cement self-leveling floors are installed in a variety of rooms, so the composition is considered universal. It is rarely used as a decorative coating, but it becomes an ideal choice for preparing the floor for finishing.
Pouring a self-leveling floor is relevant where you need to prepare the old coating for finishing with materials that require a perfectly flat surface. This could be linoleum, parquet, laminate, ceramic tiles, etc. You can lay such a screed anywhere, since it is not afraid of any influences and will serve for a long time both in the living room or corridor, and in the kitchen and toilet.
Self-leveling cement floors are suitable for use both indoors and outdoors. For residential premises, floors based on various polymers or gypsum are most often chosen.
Plaster dries faster, contains no toxins, but is not suitable for outdoor use. It is especially good to pour the floor in rooms with high humidity, where other types of finishing may suffer from moisture and water.
Modern cement and polymer screeds make it possible to provide a thin and durable leveling layer, the thickness of which can range from 3 to 10 millimeters (depending on the type of mixture, manufacturer, and characteristics of the floor). It is worth considering that 1 centimeter of thickness of such a floor is equal in strength to 3 centimeters of ordinary cement screed.
For industrial premises, polymer-sand self-leveling floors are usually chosen; after pouring and hardening, it is enough to paint them to obtain a strong, durable, high-quality coating. The surface is capable of withstanding maximum compressive loads, so it is often poured in warehouses, garages, ramps, industrial parking lots, etc. Often the floor is reinforced and poured with a layer of 50 centimeters, which provides excellent performance characteristics.
Installation technology
Although the self-leveling floor does not create any particular difficulties in operation, it is necessary to strictly follow the manufacturer’s instructions; even minor violations may result in the need to dismantle the expensive cladding that has “reared up on its hind legs.” Installation is carried out in several stages.
Preparing the base
Depending on the brand, self-leveling mixtures can be used on wooden, concrete and slab bases after appropriate finishing.
Wooden floor - boards are checked for strength, if necessary, weakened segments are cut out and replaced. The baseboard is dismantled, the previous coating is cleaned off, small cracks are sanded to open, the cracks are sealed with a repair mixture. Checking the moisture content of the base is mandatory. It should not exceed 10%, otherwise defects may appear in the future. All dirt and dust are removed, and if necessary, the wood is degreased. The last step is to treat the surface with a deep penetrating compound. The primer will not only ensure adhesion of the composition to the base, but also seal the canvas.
Concrete base - when it comes to repair work, the previous coating is removed, the surface is cleaned of dust and debris. If work is carried out on a fresh screed, the level is measured, the protrusions are chipped off, cracks and potholes are repaired. At least 28 days must pass from the moment the screed is poured to the level or decorative coating is poured. As with wood floors, the moisture level of the substrate must be maintained, with most mixtures requiring a standard of 4%.
VadimXL7FORUMHOUSE Member
Don't neglect humidity. If you start pouring the polymer ahead of schedule, problems cannot be avoided. Of course, pay attention to the manufacturer's recommendations. There are materials with a humidity tolerance of 5-12%, and there are also vapor-permeable ones, where the humidity is not regulated (such floors are matte). It is better to control humidity with a moisture meter.
If you don’t have a special device at hand, VadimXL7 suggests using a proven method - a piece of plastic film measuring 1x1 meter. It is glued to the floor with tape for a day. If, after tearing off, there is moisture on the film, or the concrete has darkened due to moisture, pouring is postponed until both the film and the concrete remain dry. At the end of the preparation, the surface, cleared of dust and contaminants, is thoroughly primed.
Tiles - there is no need to dismantle the entire coating; it is enough to strengthen the peeling elements, clean the surface of dirt and prime it.
In addition to standard preparation, when it comes to pouring a polymer floor over a screed or self-leveling leveler, VadimXL7 advises using a grinder, or at home, a regular grinder with an attachment. This is done to remove the “milk” and open the pores, after which the surface is vacuumed and primed.
The choice of primer depends on the type of self-leveling floor that will be poured; for a polyurethane floor, polyurethane primer; for an epoxy floor, epoxy primer.
For highly porous substrates, several layers of soil are applied; the room must be ventilated so that the humidity does not increase. The primer is applied with a roller to the main surface and with a wide brush in corners and hard-to-reach places.
To increase sound insulation and prevent adhesion of the self-leveling floor to the walls, which can lead to deformation, a damper tape is used, as when performing a dry screed. Its width must be no less than the layer being poured; the remains are cut off after the composition has hardened.
Preparing the mixture
Manufacturers indicate exact instructions on containers with mixtures. Do not violate the proportions: if you exceed the specified amount of water, the characteristics of the floor are reduced - both strength and durability. The self-leveling floor does not tolerate dilution “by eye”; it is better to bother with a measuring cup than to spoil the expensive material and your mood. The compositions are mixed with a construction mixer. It is not recommended to prepare a large volume at once, since the solution has a short lifespan and you may not have time to use it up. An IntroCom forum member encountered a similar situation.
IntroComForumHouse Member
I recently poured a two-component polyurethane floor and it turned out really nice and hopefully durable. The only negative is the short life of the solution; I managed to fill it in the hallway, but not in the bathroom; it turned out that half of the mixture was ruined. Hence the moral: if there are two sections, you need to mix proportionally and pour them into other containers.
Fill
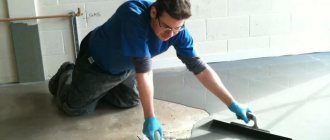
Although the base is pre-leveled and there should be no differences, in order to obtain a perfectly even coating, a level and beacons are used. A large coverage area is poured in fragments, starting from the far corner, moving towards the exit. Each portion is poured out and leveled with special devices (squeegee), the solution is “stretched” until it reaches the desired level. To remove air bubbles and prevent blistering, the mixture is rolled over the base with a needle roller. The sizes of the needles are selected depending on the thickness of the coating.
The number of layers to be poured depends on the type of floor and the desired effect. The drying time of each layer is determined by the brand of the mixture. The hardening time is on average 24 - 48 hours; there should be no drafts in the room. The last step is to apply a protective and decorative coating. As an option, a matte leveling mixture is used as a finishing layer, which, after hardening, is coated with varnish; the result is accessible and decorative.
The main enemy of self-leveling flooring is a wet base. If, after installation, the concrete slab draws moisture, even a properly poured coating may swell.
When there is such a danger, it is necessary to take care of additional waterproofing at the stage of preparing the base and use permeable mixtures when pouring.
Self-leveling flooring is popular both as a base layer for finishing materials and as a decorative coating that can turn an ordinary flooring into the seabed, green lawn or dunes. And the impressive cost is covered by versatility, strength and durability.
One of the possible bases for a self-leveling floor is described in the article “Dry screed”. The leveler will help prepare the base for the infrared heated floor. Decorative self-leveling flooring will be an excellent base for modern interior materials. And in our video, a specialist will show you how to properly make a light screed to prepare the base, including under a self-leveling floor.
Types of Cement Floors
The composition of the self-leveling floor can be different and the main properties, parameters, and features of the future coating depend on it. The main characteristics of all floors of this type are the ability to level independently under the influence of gravitational forces and create a smooth, perfectly even layer.
The most popular self-leveling floors:
- Cement-sand
- This is the classic and most popular option. In terms of parameters and composition, the mixture is similar to a conventional cement screed, but includes certain components that make the solution more plastic and self-leveling.
- Gypsum - dries quickly, is absolutely safe and non-toxic, successfully withstands loads, and is often used for furnishing residential premises.
- Methyl acrylate mixtures
– exhibit very high setting speed, can be used as a finishing coating, poured in a thin layer, often as a protective coating to counteract chemical attack. The composition has the property of being absorbed into ordinary concrete, creating a wear-resistant, strong surface.
- Polyurethane
– are made from polymer, a special hardener and several additives. Very fluid mixtures, can be used with various acrylic-based dyes. Strong, durable, withstands chemical and physical stress well, and is often used as a finishing layer.
- Epoxy
– are created on the basis of resins, the composition also includes a main component, a hardener and additional components. After the drying period of the composition has passed, a durable glassy surface remains, which is not afraid of the effects of even aggressive chemicals. There are special compositions for forming a transparent layer into which drawings and objects are poured, creating unusual effects and designs.
The last two types of self-leveling floors are often used in industrial premises where difficult working conditions are observed. A floor made from these materials has a seamless structure that is not afraid of even high levels of humidity and constant temperature changes.
Selection of finishing compositions
The main properties that any self-leveling floor has and which distinguish it from ordinary concrete are ease of preparation, ease of pouring, and the ability to create a perfectly even and smooth layer of any thickness. Such a floor can be poured as a screed even in a layer of up to 15 centimeters, without multiple pours, complex preparations, etc. After complete hardening, the floor will definitely be perfect, suitable for further processing or laying a decorative layer.
Features of cement floors
All types of cement self-leveling floors include polymer-based components (ordinary acrylic, various types of epoxy resins, etc.). Depending on the volume of these substances in the mixture, the screed may have different properties. There are mixtures that create a self-leveling surface, similar to a conventional screed, and there are those that literally create a glass coating.
Composition of a classic cement self-leveling floor:
- Cement - volume is determined based on the necessary parameters, purpose of the material, and operating conditions.
- The sand is high quality, of a certain fraction, clean.
- Polymer and mineral additives - in the volume established by production.
The floors have a high level of moisture resistance and are considered universal (suitable for pouring indoors and outdoors). When choosing, take into account the specific requirements for the floor, in accordance with which the optimal composition of the mixture is determined: the main characteristics are resistance to moisture and sudden temperature changes.
Cement self-leveling flooring is best used where you need to guarantee good adhesion to concrete - this will be safer than simply laying laminate or tiles on an unprepared surface.
Features of acrylic self-leveling floor
Acrylic self-leveling floor includes: cement, special filler, polyacrylate copolymers. Previously, such floors were laid only in industrial areas, but today they are also relevant in other areas.
The coating is resistant to various types of chemicals, moisture, very strong and durable. Often such mixtures are poured into toilets, showers, and subways. The floor is quick and easy to install and requires minimal surface preparation.
The main advantages of acrylic self-leveling floor:
- Ability to create glossy and matte surfaces with various effects.
- Resistance to high/low temperatures and sudden changes.
- The layer does not peel off from the surface, it holds tightly and reliably.
- Durability – provided the installation technology is followed, the floor lasts about 30 years.
- Creating a perfectly smooth surface, good elasticity.
- Easy maintenance - the floor can be simply cleaned from dust/dirt and does not require any special tools or skills.
- High drying speed until the surface can be walked on and finishing work can continue.
Floor coating with liquid glass
Liquid glass allows you to create glossy, very smooth surfaces that truly resemble glass. Often such floors are made in medical institutions, since they are not a medium for the spread of bacteria, are easy to clean, and are not afraid of chemicals and other influences. The material is always transparent and glossy, but dyes can be added to it.
To create 3D effects, objects, printed designs created using different technologies, etc. are placed between the layers.
The main advantages of this type of self-leveling floor are a perfectly flat surface, resistance to vibration and fire, chemicals and other aggressive influences.
Fill
Filling is the final part of the work. There is less such strictness as during kneading, but clear coordination of the actions of the master and partner is required. Fill the floor as follows:
Raquel
- The partner makes the first batch.
- As soon as it is ready, the master sets aside the first batch for ripening and substitutes another for the second batch.
- At this time, your partner quickly, for 3-4 seconds, rinses the mixer in two waters, without turning off the drill.
- The partner makes the second batch (don’t forget to rinse the mixer!), while the master dreams or gives the command.
- 20-30 seconds before the second batch is ready, the master takes the first one, pours it into the far corner, gives the empty bucket to his partner for the third batch and disperses the first batch with a special tool - a squeegee (or squeegee, see the figure on the right).
- Meanwhile, the second batch is ripening and the third is being prepared.
- The master sets the third batch to ripen, takes the ripe second batch, pours it out, and disperses it.
- The cycle is repeated and the mixing buckets are changed until the entire area is filled.
Needle roller for deaeration of self-leveling floor
Now the poured floor seems smooth, but in the layer of mortar there is an insidious fifth column hidden - air bubbles. If you forget about them, they will begin to float and the coating will turn out to be a “grater” or a lunar landscape. Therefore, the final stage of pouring is deaeration.
It is produced with a special (not for drywall!) needle roller, see fig. Pay attention to the visor above it. Its purpose is to protect not only clothes and faces from splashes, but the solution itself. Moisture from spray flying in the air evaporates intensely, especially at elevated temperatures. Falling back into the filling, they create inhomogeneities in it. They are not immediately visible, but when it has already begun to set and it is useless to do anything, a “grater” appears.
“Puncture”
In small areas (toilet, bathroom, hallway and kitchen in Khrushchev-era buildings), quite expensive squeegees with a roller (about 1000 rubles for both) are sometimes replaced with a homemade “piercing” tool - a board with nails on the handle, see fig. left. By “piercing” you can both disperse and deaerate the solution. In the first case, she is pulled; in the second, they spank her.
But already on an area of 10-12 square meters. m savings turn out to be illusory. The solution sticks to the nails, and the tool has to be rinsed every now and then. Extending the work is not a big deal here, because... You only need a few batches, but the expensive solution is wasted at a price much higher than the cost of a squeegee and roller.
Surface structure
Cement-based self-leveling floors can technically be classified as classic screeds. But they are different in composition and consistency - more plastic, fluid, self-leveling. Despite its specific properties, the material can also be used instead of ordinary concrete mortar.
Self-leveling cement-based floors:
- Basic – designed to eliminate (level) significant differences in the surface. You can fill a layer of up to 8 centimeters. Cannot be used as a final coating due to insufficient technical characteristics for operation.
- Solutions for medium floors – level out minimal defects subject to height differences of a maximum of 3 centimeters. Often this mixture is used to cover the base to obtain a durable and strong screed.
- Finishing – these mixtures level surfaces very accurately; laminate and other, more demanding, decorative materials can be laid on them. This mixture is usually applied in a layer of 1 centimeter.
Preparing the base
The quality and properties of self-leveling floors largely depend on how well the surface is prepared for applying the mixture. Before laying, a number of rough work should be performed to create a beautiful and durable surface.
Stages of preparatory work:
- Thorough and careful cleaning of the surface from dirt, dust, and various types of debris.
- Drawing a line around the perimeter of the room using adhesive tape in accordance with the level of the future floor. The width of the tape should be equal to the thickness of the floor. If the tape goes beyond the boundaries, it’s okay, then the baseboard will cover everything.
- Preparation of materials and tools for mixing the solution.
- Installation of beacons - they divide the area into zones and allow large surfaces to be filled in several times. The height of the beacons must correspond to the thickness of the coating. If the floor is flat, you can use self-tapping screws as beacons, which are screwed in in a checkerboard pattern in meter increments. If there are large irregularities, it is better to use metal corners, which are secured with gypsum or cement mortar.
- Checking the evenness of the beacons using a building level.
- Apply the primer to the cleaned floor surface with a roller or brush, carefully going through all the roughness and cracks. After half an hour, it is worth applying another layer of primer.
- Prepare the mixture according to the instructions indicated on the packaging, strictly observing the proportions and technology. The easiest way to mix the mixture is with a drill or hammer drill with a special attachment until the mass becomes homogeneous. Then it is allowed to stand for 10-15 minutes, mixed again and used.
Video description
About calculating the amount of mixture for a self-leveling floor in the video:
Final calculations
As a rule, provided that the base is well prepared, calculations are made based on the data specified by the manufacturer of the self-leveling floor. As an example, we will give the procedure for calculating the required amount of mixture to fill a layer of 2.5 millimeters. At the same time, the manufacturer indicated that for 1 millimeter, when pouring 1 square meter, 1.5 kilograms of the composition are needed. The calculation requires three steps:
- The area of the filled plane is calculated. With the correct geometry, it is enough to multiply the width of the room by its length. Complex contours are divided into rectangular sectors and their area is summed up.
- The required thickness is determined using a level. In the case of a relatively flat surface, you can use a standard or laser building level. In case of significant deviations in height, it is necessary to use a water level.
- All received data is recorded and double-checked.
Let's assume that the width of the room is 4.7 meters and the length is 5.9 meters. Therefore, the area of the room will be:
As mentioned above, it is planned to pour a layer of 2.5 millimeters at a mixture consumption of 1.5 kilograms per millimeter. So per square meter you will need:
For the entire room:
When calculating, it is necessary to take into account the density of the composition. We provided approximate indicators for this parameter above, but for more accurate calculations you should check the data provided by the manufacturer.
Self-leveling floor with colonial-style ornaments Source polsdelat.ru
Apply the mixture
The technology is quite simple and requires a minimum of knowledge and skills. However, the entire process must be carried out in accordance with the rules to ensure that the floor is smooth, durable and beautiful.
How to apply self-leveling floor correctly:
- Pour the mixture into the beacons quickly so that the composition does not have time to harden. The drying speed is usually written on the packaging - you should definitely pay attention to this point. The solution is carefully poured onto the floor and leveled with a roller. If two people work, then this is how it works: one pours the mixture, the second immediately levels it out, while the first prepares the mixture for subsequent pouring.
- When the surface is completely filled, it can be rolled out again with a needle-type roller so that the mixture fits well and air bubbles come out.
- Waiting for the floor to dry depends on the type of mixture and its properties, layer thickness and composition. You can walk on the floor after 24 hours. But first, you still need to calculate the hardening time and not take risks earlier.
A self-leveling cement self-leveling floor can be an excellent alternative to a conventional screed. Thanks to the choice of this material, it will be possible to obtain a smooth and durable surface. When choosing, you should pay attention to the physical characteristics of the product and its quality, giving preference to mixtures from well-known manufacturers.
Kneading
To properly make a self-leveling floor, kneading is the most delicate and responsible procedure. The vast majority of irreparable errors occur at this stage, so let’s take a closer look.
Temperature
Manufacturers indicate the operating temperature range for their mixtures. As a rule, it is 15-30 degrees. A floor poured in the cold will not gain the required strength (water will begin to destroy the polymers before it evaporates) and will soon begin to crumble. Neglect of temperature conditions is one of the most common reasons leading to marriage.
Pouring in the heat is even worse - the water evaporates too quickly, and the composition does not have time to spread. The mixtures are very sensitive to excess temperature. For example, even such a proven composition as ProfLine PR-1, poured at 32 degrees, hardens with a hedgehog.
Best before date
The permissible shelf life of packaged mixtures is from six months to a year. If there is no date stamp on the bag, but there is a tick in the month box, we subtract one month, because it is unknown whether it was made on the first or last day. For example, if March is ticked and the expiration date is 6 months, then from September 1 the mixture is considered unusable, no matter what the seller says.
Note: traders try to display bags with expiring dates in plain sight.
Water
The specifications for the mixture specify the amount of water for mixing with a certain tolerance, for example, 0.28 l/kg +/- 0.03 l/kg. Admission is not given for a blunder. In favorable temperature conditions (18-24 degrees), it is used to regulate the fluidity and survivability of the solution. If the temperature is near the upper/lower limit, then due to tolerance the mixture is adjusted to the temperature. In the cold they give a minimum of water, in the heat - to the maximum. But trying to fend off an unsuitable temperature by giving too little or too much water is useless - it will still end up either “cotton wool” or “hedgehog”.
Sand
Gypsum and cement-sand mixtures are not stored, so sand for the solution will most likely have to be purchased separately. The instructions for the solution most often indicate what kind of sand is needed, and these instructions should be strictly followed. Unsuitable sand is the second most important reason that spoils the work.
If there are no such instructions, you should be guided by the following:
- You need river sand, with round granules. What is important here is the spreadability of the polymer over it; adhesion is ensured differently. The most common mistake of hacks and amateurs is buying for the sake of imaginary savings of quarry sand.
- For levelers, the sand fraction is 0.4-0.8 mm, neither smaller nor larger.
- For leveling composition – 0.25-0.35 mm.
Note: for gypsum-polyurethane mixtures, a fraction of 0.15-0.2 mm is even better, but - alas! – the cost of river sand, already expensive, rapidly increases with a decrease in fraction.
Dishes
For kneading you will need 4 containers: 2 buckets of 30 liters each or tall basins of similar volume for the actual kneading and 2 ordinary buckets for rinsing the tools, “dirty” and “clean”. It is highly desirable that the kneading utensils have rounded corners on the bottom.
Mixing nozzle for mixing self-leveling floor
Mixer
You also need more than just a mixer attachment for a drill. It should be of a spiral type, double-threaded belt and with a bumper circle at the bottom, see fig. Other attachments with extremely limited kneading time (see below) will not create a sufficiently homogeneous mixture.
Mixing technology
Knead in half-bag portions. First, water is poured into the container according to the specifications for the composition, then the dry mixture is poured. Knead with a drill at low speeds, 100-300 rpm. While kneading, move the attachment in a circle and up and down, if possible without touching the walls and bottom: vibration of the dishes sharply worsens the homogeneity of the mixture. The duration of the kneading is 3-4 minutes; it cannot be shortened or prolonged. The kneading should end just when the solution begins to ripen, see below.
Ripening
The batch must mature before use. The bottom line is that the polymer must envelop the granules of the mineral components, which, ideally, should not come into contact with each other at all, only through the polymer film. Ripening also takes 3-4 minutes. Pouring out an unripe solution is a grave mistake. In most cases, the result is, if not a “hedgehog”, then a “wave” under other favorable conditions.