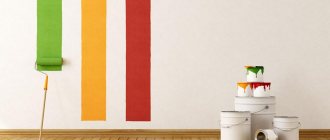
Painting drywall is the most affordable finishing method in terms of price and performance. You can handle it yourself, subject to high-quality preliminary preparation of the surface of walls or ceilings. And such preparation already requires a certain skill, experience, and accuracy. The appearance of the decor largely depends on the type of coating chosen, but compliance with the technology for installing plasterboard sheets also plays an equally important role, so it is very important to do everything efficiently from the very first stages of repair.
Preparation for painting is the most important stage in decorating gypsum boards Source couo.ru
Requirements for installation of gypsum boards for high-quality painting
For high-quality painting, drywall must first be installed correctly and efficiently. It is desirable that the requirements of SNiP be observed, and if we deviate from them, then not by much and understanding where. In general, partitions and ceilings must be strong, and plasterboard sheets on the wall to be leveled must be firmly fixed to it. Why such requirements? So that the paint doesn't crack.
The disadvantage of plasterboard structures is that it noticeably transmits vibrations and if installed incorrectly, the plastered areas at the joints of gypsum board sheets may crack, which will ruin the entire finish. If you carry out the installation yourself, take into account all the nuances of installing gypsum boards, and there are many of them, or order installation from professionals.
Not only must the gypsum board be installed correctly, but also proper painting work must be carried out on it, including sealing the joints of the gypsum board sheets and putting them on.
Proper sealing of joints of gypsum board sheets is the key to high-quality painting
Joints of gypsum board sheets are a problem that many people encounter when painting. Nothing seems to be a sign of trouble, but literally after half a year, or even less, cracks will form on the already painted wall. These cracks form at the joints of sheets.
Let's find out why this happens and how to avoid it. The fact is that many craftsmen seal the joints of gypsum board sheets with a “serpyanka” mesh, which does not sufficiently reinforce the seam and the seams crack. To seal gypsum board seams, it is better to use paper tape, or even better, combine both serpyanka and tape, and also putty the entire drywall in two layers! But this is already a bit expensive, so we are considering an option without putty.
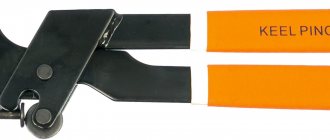
Tape for joints of drywall sheets
You can also stick sickle tape onto the joints under the wallpaper; you still can’t see under the wallpaper that cracks have appeared, and this won’t cause the wallpaper to tear, but you need to use tape when painting drywall.
It is better to seal the joints with a special putty, especially for gypsum board joints, it is stronger and more reliable. Self-tapping screws screwed into the gypsum board must be recessed into the sheet and these places must also be puttied.
The joints are glued with paper tape and puttied, the holes from the screws are also
Paint for drywall sheets - choose the right one
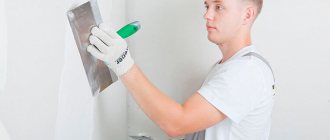
There are many options for finishing drywall. Painting plasterboard walls is still considered the most popular. Before you start painting walls and ceilings, you need to prepare the surface for these procedures. So, it is imperative to putty the sheets, carefully prime them, and also sand them. Only after this can you proceed directly to the staining process.
Before painting, drywall must be prepared
First, we’ll help you decide which paint for drywall is best suited. Let’s immediately discard options with oil-based paints, since such compositions practically do not interact with drywall. To make the gypsum plasterboard surface look very beautiful and stylish, and not lose its attractiveness for a very long time, it is recommended to use water-based paint or regular water-dispersion paint.
Dispersion compositions boast remarkable durability and moisture resistance; moreover, mechanical damage, such as scratches, will be almost invisible to the eye on such a wall. The only drawback, but a very serious drawback, is the extremely limited color palette. The problem is that dispersion paints for drywall are only available in light shades.
The same cannot be said about the water-based solution. The choice of colors is very large; you can find paint in bright, saturated colors, as well as lighter and calmer ones. Naturally, such compositions are much more popular, because with their help you can decorate a room in any style, the only limitation is your fantasy and imagination. The only negative point here is durability - water-based emulsion requires periodic updating on walls or ceilings.
Experts advise paying attention to the following compositions, which are varieties of the paints described above:
- Latex paint is an excellent choice, because this paint was created almost specifically for drywall surfaces. The use of such a composition will provide reliable protection from moisture and resistance to contamination. However, the cost of latex is very high, which forces some buyers to turn their attention to other options.
- Acrylic paint - for example, you can use this option. Acrylic compositions have such qualities as durability and reliability, as well as ease of maintenance. Thus, a surface painted with acrylic is very easy to clean; you just need to wipe it with a damp cloth to get rid of possible dirt or any other deposits. Paint made on the basis of acrylic practically does not emit harmful and toxic substances.
- Silicate paint is a fairly expensive paint that is ideal for use in rooms with high humidity levels. When choosing how to paint drywall in a bathroom or kitchen, it is recommended to vote in favor of silicate mixtures, since with them you will forever forget about the appearance of mold, fungi and other microorganisms on the treated surface.
It is recommended to use water-based or water-dispersion paint.
Another type of paint that has appeared relatively recently is universal silicone mixtures. Manufacturers have managed to combine all the main positive qualities inherent in silicate and acrylic materials. As a result, silicone paints are suitable for use in bathrooms and in ordinary rooms, protecting against external factors, providing the maximum level of durability, reliability and maintaining an aesthetic appearance. An important advantage of silicone materials is that they make it possible to seal relatively large cracks in drywall, up to 5 mm in thickness.
Preparing the base for painting
After high-quality puttying of the joints and filling of holes from self-tapping screws, the surface that was puttyed must be sanded a little with sandpaper (60-80), thereby removing small sagging and unevenness of the putty. If necessary, the puttying procedure can be repeated in places. Next, you need to prime the surface for high-quality painting. We prime with deep penetration soil, preferably 2 times. Let it dry according to the instructions or a little more.
Preparation for painting drywall
Surface preparation algorithm
Since the answer to the question of whether it is possible to paint drywall without preparation is definitely negative, you need to figure out how to properly carry out this preparation. The whole process can be divided into several stages.
- Inspect the surface for cracks, protruding joints, poorly screwed screws protruding beyond the surface.
- Treatment with acrylic primer for better adhesion to putty.
To prevent the paper from absorbing moisture from the solution, the surface is primed Source obustroeno.com
- Reinforce joints with masking tape and reinforce corners.
- Puttying joints, corners, fastening holes and surface defects.
- Rubbing the putty after drying.
- Applying a continuous thin layer of putty.
- Sanding the surface after the putty has dried.
- Re-priming with 2 layers of penetrating primer.
For leveling, use gypsum or polymer finishing putty. Source gipsmontaj-st.ru
A detailed description of all these processes is in other materials on the site; if necessary, you can familiarize yourself with them.
See also: Catalog of companies that specialize in paints and varnishes and related work
How to paint drywall yourself
Well, we got to the actual painting. Painting drywall is not as difficult as installing and preparing it, but it also has its own subtleties and nuances. Again, I suggest → ordering painting work (via the link, again in Moscow) in order to make your life easier. Painting work also includes sealing plasterboard joints, so you can order as a whole, a partition or ceiling, or leveling gypsum plasterboard walls for painting.
If you have decided on all this and think that the installation of drywall was carried out correctly, the joints are sealed correctly, let's start painting it.
What paint to use
Almost any water-based paint can be used. The main thing is that the label says that you can paint the walls and ceiling. These can be acrylic, latex and other paints. But only water-based! There is no need to use any smelly enamels for drywall; that is not what they are intended for in the age of water-based paints.
To install GVL on walls, you need to carry out some preparatory work:
- all old coverings are removed to the ground. The minimum possible interaction of the element with other building materials is required;
- if the base is concrete, then you need to carefully remove all elements that have already begun to peel off. So that the surface for working with gypsum plasterboard is free of noticeable flaws;
- if it turns out that there are several concrete slabs on one surface, additional work with the seams will be required. They need to be completely eliminated. In any hardware store you can easily find the latest generation of plastic compounds. They can fill in the gaps very well. How to putty GVL is discussed below.
In addition to interior wall treatment indoors, gypsum fiber sheets are also excellent for outdoor use. There are many features when facing walls with gypsum fiber board. They can simply be glued to the wall, or they can be mounted on profiles.
If a frameless cladding option is chosen, the joints are sealed with a special material. Putty with the required markings is available in all building materials stores. With this finish, no reinforcing tape is required.
But to skip this stage of work, you can take care of it right away. A wide range of different types is available in building materials stores. In addition to the main characteristics of resistance to moisture, low flammability and high thermal insulation, they are available with a polished surface and a regular one. And the edges can be chamfered or without them. If the edges are chamfered, then the joints are much stronger and less noticeable. These seams also do not require reinforcing tape.
Drywall in the bathroom: features of selection, application and cladding
Rooms are called wet if the air humidity in them periodically exceeds 60%. These are kitchens, showers and bathrooms, winter gardens, etc. In them, the ceiling, walls and floor often become areas of condensation or come into direct contact with water.
Finishing these surfaces with materials that are not resistant to water is fraught with the formation of colonies of fungi and mold and premature deterioration. Therefore, for leveling ceilings and walls, erecting partitions as a basis for decorative finishing and fastening heavy objects, exclusively sheets of moisture-resistant plasterboard (GVLV) are used.
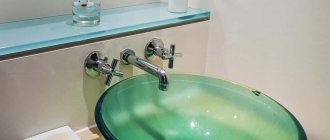
Features of moisture-resistant drywall
Unlike the usual one, which has a core made of moisture-sensitive gypsum between two layers of cardboard, special substances are introduced into the composition of moisture-resistant gypsum boards that reduce water absorption. It is easy to visually distinguish moisture-resistant material by the green color of the sheets. However, there is an alternative to moisture-resistant plasterboard sheets, albeit more expensive. These are cement-fiber panels, sometimes called fiber cement panels. They consist of 80-90% cement, which contains reinforcing fibers and mineral fillers. The panels are attached in the same way as gypsum boards, to a metal, or less often, wooden frame.
Additional protection for gypsum plasterboard sheathing
After the ceiling and walls are sheathed with sheets, these surfaces are covered with deep penetration primer, which strengthens them and reduces absorbency. Areas near sinks, bathtubs and showers, as well as the lower part of the walls, in short, everything that can come into contact with sprayed water, must be treated with waterproofing mastic.
The outlets of water supply and sewerage pipes, corners, in addition to waterproofing, are additionally sealed with sealing tapes, rings, etc. to make them maximally protected from the effects of water. The joints of walls, as well as walls and floors, are filled with sanitary sealant, which forms a waterproof and at the same time elastic connection that can withstand minor movements of moisture-resistant plasterboard sheets.
Features of laying finishing on gypsum boards
Ceramic tiles are most often used as cladding for bathroom walls. Obviously, the plasterboard sheathing must withstand the weight of the tile itself and the layer of cement tile adhesive, that is, be strong and stable. In this case, the most reliable cladding is made of two layers of GVLV. In this case, the vertical and horizontal joints of the sheets should not coincide. The optimal distance between them is from 40 to 60 cm. In addition, they should not fit tightly to the surface of the floor or ceiling, but be at a short distance from them (5-10 mm). To eliminate the appearance of internal stresses, the sheets are fixed sequentially from the center of the part to the edges or from one edge to the other.
The finished tile cladding prevents water from penetrating into the load-bearing structures. Anyone who does not want to cover the bathroom walls with ceramics, but prefers decorative plaster or paint, will need materials that will not be damaged by high humidity and will become an insurmountable barrier to water reaching the drywall. For example, special paint with waterproofing.
How to putty GVL for painting and wallpaper
Decorative painting and wallpapering are the most popular options for finishing surfaces lined with gypsum fiber board. Maximum smoothness can only be achieved by filling everything, the joints between the slabs, and the exposed screws. All work will be done in three stages:
- padding;
- preliminary puttying of the place where the sheets are glued;
- final puttying of the entire surface, finishing stage.
Do not forget that special dilutable compounds will be required for the installation of gypsum fiber board elements.
How to putty GVL for painting and wallpaper:
Preparation using the priming method will improve the binding properties of the putty with GVL. You can choose a primer from any company with special markings for surfaces with absorbent properties. Apply the liquid with a roller, paying special attention to joints and corners. After drying, you can proceed to the main stage;
First you need to cover the places where the gypsum fiber board is glued and the fastenings. Before starting work, you need to check all protruding elements by hand, if you need to deepen the screws as much as possible. Self-adhesive mesh is glued to the seams, it prevents cracks and helps it stay better in the seams. Dilute the putty of your choice according to the technology. Using a spatula, completely fill the joints with putty mixture, a layer such as to hide the mesh. In the corners, first one side is processed, then the other. The recesses from the fastenings are covered with a cross. After drying, it is advisable to repeat the procedure. The recommended thickness of each layer is no more than one and a half millimeters. Of course, there will be small unevenness and roughness that needs to be eliminated with a sanding device on which a sanding mesh of different grain sizes is attached. There is a misconception that this is where you can finish the putty if you have chosen thick vinyl or non-woven wallpaper for wall decoration. In fact, room lighting can highlight bad places, so try to go over the putty again;;
for the final layer of putty you will need a special high-tech polymer mixture, which will create the thinnest layer, less than one millimeter. The last layer is applied most carefully and is close to ideal. Any connection must be absolutely inconspicuous under any conditions. This work is best done with different tools: wide and narrow spatulas. Putty is applied first to the second and all excess is removed. Using a wide spatula, spread the mixture over the GVL from the previous stroke to the dry area. Professional craftsmen are able to apply the most ordinary, but high-quality putty mixture so carefully that there is no need to do anything else. Use a large spatula to remove small roughness after drying.
In any case, in a building materials store you will think about which putty is best for gypsum plasterboard. The choice of mixtures for these purposes depends on the price and manufacturer.
Secrets of GVL putty
When you decide to wallpaper a room, you need to remember that you need to buy rolls with a reserve. They will stick firmly to the walls if there were no drafts in the room when gluing and the windows were tightly closed.
So, there are three stages: processing of seams and the final one. When decorating with thin paper wallpaper for painting, it is recommended to putty the final putty in two layers and sand with a fine sanding mesh.
If the choice of interior decoration falls on gypsum fiber sheets or slabs, then the work life is noticeably reduced. This leads to undoubted savings not only in time, reduction in manual labor, but also saves money.
There are various options for attaching it to walls. It can be placed on metal profiles, on wooden beams, or simply glued with special glue. In this way, quickly and less expensively than leveling the walls with plaster and putty, you can make the walls even. And they are almost ready for wallpapering and painting, as well as tiling or tiling.
Types of compositions
In addition to the main product line, dividing coloring compositions by purpose, there are detailed clarifications.
For example, to paint a bathroom you need a composition containing antibacterial substances that is resistant to moisture. A completely environmentally friendly product with high hygienic indicators, capable of passing air flows.
The paint for painting walls in the bathroom must be resistant to abrasion, since the main surface must be washed regularly.
Oil products
Oil products are less popular now, but are often used.
Painted surfaces can be washed with any chemicals, without abrasive substances in the composition. They do not absorb moisture and do not allow air to pass through.
The main active ingredients are drying oil and tint pigments. Depending on the scope of application, manganese, cobalt, talc or other additives are added.
Oil paint
You can buy two types of consistency - completely liquid, ready-made. You just need to stir it. Or paste-like, which is diluted with drying oil to the required state.
It is allowed to dilute with kerosene, turpentine, White Spirit, you need to add them a little, 5% of the total mass is enough.
It is better to apply with a hard brush.
Remember that different types of surfaces have their own composition: metal, concrete. Information is indicated on the packaging. Here the presence of additives is prescribed that accelerate drying, reducing the period to 2-3 days.
Alkyd enamel
Alkyd compounds repel water. This is important in this room. Treated surfaces are not afraid of dampness, are easy to clean with any means, retain their gloss and color well, and are resistant to abrasion.
If necessary, it can be diluted with a solvent.
Alkyd enamel
In order for the coating to lie flat and firmly, it must be applied at a positive temperature of 5-35 degrees. If it is colder or warmer, adhesion decreases.
When you don’t like glossy solutions, choose matte varieties.
Pigments increase color protection from ultraviolet radiation. When purchasing, you need to study the markings: for interior work, universal paints are better.
Application to substrates is accompanied by the release of a sharp, toxic odor, which makes it impossible to continue work without a respirator.
On a water dispersion basis
This liquid is produced from a dispersion of polymers, usually acrylic or vinyl acetate.
Non-toxic coating, since the composition does not contain volatile solvents.
Water emulsion
As the surface dries, it becomes covered with a durable and elastic protective film. It does not interfere with air flow.
There are three types of components: acrylic, silicone and PVA. The latter are for painting the ceiling. They are not moisture resistant and cannot be washed.
With added latex
Latex compositions are for very wet rooms, but they are quite expensive.
The elastic mass smooths out small irregularities and makes the surface beautiful.
The easy-to-apply emulsion dries quickly and emits a slightly unpleasant aroma when painting.
Latex products
In addition to elasticity and wear resistance, the compositions are resistant to mechanical damage.
It is necessary to pre-apply a primer with an antiseptic. You cannot paint at sub-zero temperatures or inside unheated rooms - it will crack due to exposure to cold.
Direct exposure to sunlight spoils the resulting color.
Acrylate mixture
Acrylic enamel
Walls are painted with such compositions. They dry quickly, smooth out minor imperfections, and retain their original shade for a long time. Antifungal additives prevent the development of mold due to increased humidity.
During application, a slight odor is released, which soon disappears.
Better than this are only silicone ones, which repel liquids better, have a dense protective film, long-lasting shade and glossy shine. This is not the cheapest paint, but the costs are still lower than when laying ceramics.
Its analogue is a chlorinated rubber composition for painting swimming pools.
Glossy or matte?
All types of coloring agents are glossy, semi-matte, matte.
Gloss reflects light, a shiny surface visually expands the room. Painting the ceiling with this substance helps to visually enlarge the bathroom.
The smooth coating is easy to clean; cleaning will have to be done more often; the slightest droplets on the surface are noticeable. Does not cover minor flaws of the base, emphasizes them.
Matte painting is better at masking defects; creating completely smooth walls is technically impossible.
Once dry, the structure remains slightly porous, making cleaning difficult. Other qualities allow matte paint to compete with glossy paint.
The golden mean would be semi-matte products that reflect light a little and look good where they are applied.
Textured compositions
If you want to make your bathroom unusual, you can use textured compositions.
The viscous, dense structure allows you to create patterns of varying complexity using a special tool.
The paint is applied to the walls, then the designs are made with a textured roller. It is possible to use different application techniques; the desired shade is displayed with a color scheme, since the color of the product is always white.
Preliminary application is carried out with a brush, roller, spatula.
When the mass is thick, it can be brought to a liquid state by diluting with clean water.
Without violating the operating technology, the coating does not lose its quality for many years in a row, fades slowly, and easily tolerates temperature changes.
A more detailed review of bathroom paint in the following video:
Why is putty applied?
Plasterboard sheets have a smooth surface, so a number of preliminary works can be eliminated. A layer of putty is required for the following purposes:
- Increasing the strength of the material. The top coating of drywall quickly absorbs moisture, under the influence of which it collapses. Without the use of protective material, the strength qualities of the sheets are reduced. Over time, drywall deforms, causing the wall to become uneven.
- Improving paint adhesion to the surface. The putty composition does not absorb liquid paints used for final finishing of the room. The water base penetrates the cardboard, causing the finishing material to lie unevenly. The consumption of coloring agent increases.
- Aligning the color of the decorative coating. Paint applied to drywall dries unevenly, causing spots and streaks to appear. The appearance of the wall deteriorates, which can spoil the design of the living room.
The leveling material does not have to be distributed over the entire surface. It is enough to seal the joints of the sheets. Refusal to apply leveling compound to the entire wall helps reduce the duration of the repair.
GKL painting technology without putty
Proper preparation of the wall for painting helps extend the life of the decorative layer. When performing work, certain rules are followed.
Surface preparation
At the first stage, the structure is cleaned of dust using a vacuum cleaner. Removal of contaminants is carried out on the day of painting. Otherwise, the wall will again be covered with dust.
After this, the plasterboard structure is inspected for the presence of protruding fasteners with which the sheets were fixed.
To do this, take a spatula and rub it over problem areas. If protrusions are detected, tighten the screws with a screwdriver or screwdriver.
Applying primer
The pores of the sheet absorb paint, increasing the consumption of this material. Before finishing work, the plasterboard wall is treated with a penetrating primer. As a result, adhesion improves, paint consumption decreases, and the strength of the top coating of a plasterboard wall increases.
The primer is evenly distributed, carefully treating corners and joints with the ceiling. Otherwise, dark spots may appear at the final stage. The composition is applied with a wide brush, spray or roller.
Alignment of joints
Closing the joints between plasterboard sheets is an important part of finishing work. The caps of fasteners are also hidden under a layer of putty. The work order includes the following steps:
- Strengthening seams. It is impossible to apply the leveling mixture to unprepared joints. The seams are pre-reinforced with construction mesh, which prevents the putty from cracking. The choice of tape width depends on the distance between the sheets. Most often, a mesh size of 5-10 cm is used. This width is enough to cover the joints and screw heads.
- Puttying. The dry leveling mixture is diluted with water and mixed until smooth. You can purchase ready-made putty. The composition is distributed with a spatula, moving the tool along the seams. The places where screws are inserted are treated separately.
- The sealed seams are left for a day, which allows the putty to dry completely. The condition of the coating is assessed visually. Wet material is dark in color. As it dries, it gradually becomes lighter.
- Grinding. After the composition has set, surface treatment begins. For these purposes, choose a mesh grater, a special machine or fine-grained sandpaper. When setting high speeds, the cardboard covering of the sheet may be damaged.
- There is no such risk when sanding by hand. Evaluate the result by examining the surface in bright light. Flashlights cast at an angle create shadows that indicate unevenness. If defects are detected, grinding is carried out again.
Secondary priming
After closing the seams, the structure is re-treated with a vacuum cleaner with a soft nozzle. A second layer of primer is applied to the prepared surface. This will make the plasterboard structure more durable. The remaining pores are filled, which is why the paint goes on smoothly.
Dyeing technology
Before painting drywall, you should prepare the paint by mixing it thoroughly and, if necessary, diluting it with water or a recommended solvent. The volume of liquid for dilution should not be more than indicated in the instructions.
If you decide to tint the paint, then it is better to do it in a store where there are special machines. It is impossible to achieve the same shade in each jar on your own; you will have to pour them into one large container and tint the entire volume.
Advice! Before painting plasterboard walls, it is recommended to do test paints and let them dry to evaluate the actual color of the future coating. If necessary, you can adjust the shade by adding a little color or a white base.
After drying, the paint may slightly change shade Source forum.ivd.ru
To work, you will need a paint bath, a spatula for mixing paint and masking tape. To avoid staining floors or furniture, they are covered with film.
- A portion of paint is poured into the bath.
- First, paint with a brush all those areas where it is impossible to reach with a roller or where it can stain the adjacent surface - internal corners, the area along the baseboards and cornices, niches, etc.
- The main area is treated with a roller, which is dipped in paint and rolled along the ribbed surface of the tray to remove excess paint.
- Drywall paint for walls is applied from top to bottom, the ceiling is painted in parallel stripes from one to the opposite wall.
- After treating a small area, immediately roll it over again without dipping it into paint - this technique allows you to remove drips.
If individual areas need to be painted a different color, they are covered along the border with masking tape Source interieurdesigner.be
The minimum number of layers of paint is two. The second and subsequent ones are applied to the dried surface in a direction transverse to the previous one. The quality of painting is checked using a bright lamp directed at an angle to the surface. If necessary, the defective area can be sanded and repainted.
Painting gypsum board walls
After preparation is completed, staining begins. The work order includes the following steps:
- Preparation of materials. The thick water-based composition is diluted with water. When forming the first layer, a more liquid product is used. To apply paint, use a brush, roller or spray. Preference is given to tools with attachments made of artificial materials with an even distribution of lint.
- Applying the first layer. The coloring agent is applied several times. When applied once, the surface becomes spotty. The putty areas will appear under the decorative coating. To create an even layer, it is enough to apply the paint 2-3 times.
- In rare cases, additional coverage is required. The composition is distributed with a roller, which eliminates the formation of smudges and stains. After immersion in a tray of paint, the tool is rolled on a ribbed surface.
- Formation of the second layer. Work begins only after the coating has completely dried. Painted walls are left for at least 12 hours. Failure to do this will result in swollen or cracked areas. When applying the second layer, the direction of movement is changed, which eliminates the formation of color differences. Hard-to-reach places are worked with a narrow brush. You need to start painting from such areas.
Work continues until a smooth, uniform coating is obtained.