In multi-storey buildings, many residents suffer from noise coming from neighboring apartments. It causes significant harm to health and affects the state of the human nervous system. In addition, extraneous sounds make it difficult to concentrate on solving your problems. High-quality sound insulation of walls and floors will help get rid of such problems. It is especially difficult to soundproof the floor covering, since such a procedure in most cases requires the installation of special structures. It is extremely important to choose the right quality soundproofing materials.
High-quality floor soundproofing protects the living space from the penetration of extraneous sounds and noise Source trendy.house
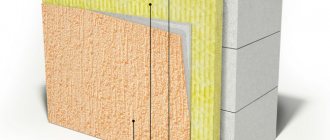
Soundproofing walls
Continuous sound insulation of all walls in an apartment in a panel house is not required. There are three types of such structures:
- External - those that go directly onto the street.
- Internal – dividing rooms in the apartment.
- Inter-apartment partitions that separate you from your neighbors, staircase and entrance area.
Sound insulation of external walls in Khrushchev and other panel houses is not required. Firstly, the source of noise behind them is located at a fairly large distance, and secondly, installing multilayer structures on them from inside the room leads to a shift in the dew point, which provokes the formation of mold and mildew.
To soundproof internal and inter-apartment panel walls, thin and reinforced soundproofing systems can be used. The former are designed to protect against noise whose level does not exceed 70 dB, the latter – from 70 and above.
It is advisable to install thin options on the walls of bathrooms and facing staircases.
Reinforced systems are used to soundproof the internal walls of panel houses, separating the living room, which has a home theater or a powerful music center, and the bedroom (children's room). These structures are a good barrier to the spread of indirect impact noise. They will also provide reliable sound insulation from noisy neighbors in the apartment of a panel house.
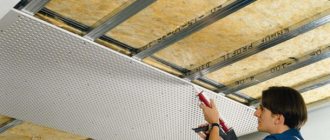
Consider sound insulation for a suspended ceiling
The most important thing is to vibration decouple the ceiling.
In simple words, you need to assemble a new ceiling that is not rigidly connected to the floor slab. This is accomplished through special vibration suspensions with a Silomer.
Vibration stop SLIM
Vibration stop SLIM is a vibration-isolating mount designed to combat impact noise penetrating floor slabs and walls. As an elastic element, a special polyurethane Silomer (made in Austria) is used, which has the ability to retain vibrations and durability.
Working with VibroStop SLIM vibration suspensions is similar to installing conventional KNAUF direct suspensions. Fastening to the ceiling is done with two anchor wedges or dowel-nails measuring 6 x 40 mm. Each vibration mount is designed for a load of 15 kg and the average consumption is 2.7 pieces per 1 m2.
In these suspensions, the design is made so that the metal that is attached to the ceiling does not interact in any way with the metal that is attached to the metal profile. Also, due to the fact that it is an elastic (damping) suspension, it acts as a shock absorber in a car and, due to this, dampens the shock wave from above.
Important: you need to use suspensions with the Silomer material; cheap suspensions with an elastic band will not work here.
Along the perimeter of the ceiling, the guide profile must be attached through a damper tape in 2 layers. To ensure that the metal profile does not adhere rigidly to the walls and vibrations are not transmitted to it.
Damping tape
Self-adhesive tape made of chemically cross-linked polyethylene serves to isolate structural noise, as well as seal and compensate for uneven surfaces of the floor, walls or ceiling at the junction of the guide profiles of the plasterboard structure frame.
The use of tape can significantly reduce the vibration load on profile elements and eliminate sound bridges along the perimeter of the soundproofing cladding in places where the cladding sheets adjoin adjacent surfaces.
Initially, the guide profile is attached to self-tapping screws, but after the entire frame is assembled, the fire itself will be held in place and the screws will definitely need to be unscrewed so that there are no sound bridges.
Next, the sheathing is done. All empty space must be filled with basalt fiber slabs. They work as a sound-absorbing material, protecting against airborne noise (voices, screams, TV). Sound absorption occurs when the formula mass - elasticity - mass is met. Between the floor slab and the finishing layers of gypsum fiber board and gypsum board there must be a fibrous, absorbent material.
Maxforte Ecocooker PRO
Sound-absorbing slabs Maxforte Ecoplite PRO are made of volcanic rock and do not contain volatile resins and phenol-formaldehyde binders. The boards are resistant to moisture and do not rot. Due to its low thermal conductivity, the material can be used as a thermal insulation material.
The plates effectively absorb noise even in the most problematic “low frequency” range.
And at the last stage, the entire structure is sewn up with GVL (gypsum fiber sheet) and gypsum board (gypsum plasterboard sheet). They work on the principle of mass. The heavier the finishing layer, the better the sound insulation works. Therefore, everything is sewn in 2 layers.
You can calculate the materials and their cost by following the link >>
The next type of sound insulation is acoustic, that is, it is a suspended ceiling with special perforation, the structure and size of which prevent sound waves from being reflected. As a result, noise is dampened in the room. The operation of such ceilings is approximately as shown in the following photo:
Perforated acoustic sheet is made exclusively from fabric. The base is a polyester mesh, which is filled with polyurethane. This fabric is subjected to 250 thousand micro-punctures, thanks to which it becomes a sound-absorbing membrane. The fabric base is much stronger than the PPC film. You can, of course, make perforations on the film, but this will cause the ceiling to lose some of its strength, since the film is thin and quite delicate. Most major manufacturers offer this type of acoustic ceiling. The widest range of products is represented by Clipso and Cerutti, by the way, and customer reviews speak in favor of these manufacturers.
The ceiling acoustic system from Clipso is completed with a stretch ceiling acoustic system, a proprietary mounting molding made of polyvinyl chloride with a complex cross-section and a sound-absorbing layer using Schumanet-BM slabs. This ceiling system most effectively eliminates echo and is suitable for people who are used to watching TV in acoustic comfort without disturbing the peace of their neighbors. The system is used in conference rooms, offices, and service areas to optimize sound.
Soundproofing the ceiling in a panel house.
Which system, thin or reinforced, to use for soundproofing the interfloor ceiling in a panel house largely depends on the neighbors above. Ceiling soundproofing is required to combat impact and airborne noise.
If in the apartment above you there is a floating screed on the floor, then a thin structure can provide silence and comfort. It will be enough to eliminate residual airborne noise.
In the absence of a floating screed for the neighbors above, even enhanced sound insulation of the ceiling in a panel house will not provide complete silence, but will significantly reduce the level of penetrating noise.
Design
A parquet board is always a pattern of natural wood. The choice here is great, from familiar wood species to the most exotic African ones.
Laminate has spread more widely and can imitate wood, tiles, stone or mosaics, and even all kinds of designs, although this is a designer laminate and the price will be higher.
So, in view of the above characteristics, we can say that each material has its own disadvantages and advantages. The most important thing is to decide on the purpose and characteristics of the room for which the coating is being chosen in order to make the most of all the positive aspects of the selected material.
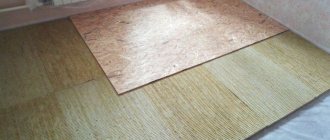
Soundproofing the floor in a panel house
Soundproofing the floor in a panel house is primarily necessary to prevent the spread of impact noise (sounds from footsteps, falling or rearranged furniture, etc.). The most effective way to solve this issue is to install a floating screed. Today the three most common technologies are:
- Traditional. It involves laying sound insulation under a sand-cement floor screed in a panel house. The disadvantages of this method include a long production time (due to the need to wait until the poured solution sets and gains initial strength) and the high weight of the structure, which creates a significant load on the interfloor floors.
- A prefabricated screed consisting of a layer of high-density mineral fiber material and a massive slab of two rows of gypsum fiber moisture-resistant sheets.
- KNAUF Superpol. This is a modern system that allows, without the use of “wet” processes, to eliminate unevenness in interfloor ceilings up to 10 cm high through the use of a bulk layer of fine-grained expanded clay.
Soundproofing base
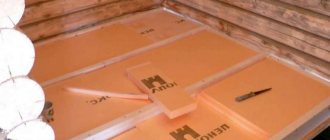
This design is sometimes called a “floating floor,” emphasizing the separation of the finishing surface and the interfloor panel. The sound insulation functions in it are performed by rigid slabs made of ecowool, mineral wool or extruded polystyrene, as the most suitable for this purpose. They are laid on a leveled base over a waterproofing membrane, and the perimeter of three to five centimeters is filled with soft stone wool.
A protective leveling screed with a thickness of one and a half to five centimeters is applied on top of the insulating slabs, on which the clean floor is mounted. This coating effectively dampens the energy of sound waves, although polystyrene is often mistrusted, considering it more of a heat insulator.
Sound insulation with bulk material, dry screed.
Good performance is provided by bulk materials, among which expanded clay of small and medium fractions is the leader. It is used to create a base for a screed, as a sound and heat insulating backfill between joists and for installing floors on a dry screed. An alternative to expanded clay is perlite or vermiculite, traditionally used for insulation and insulation of floors.
Materials for soundproofing floors
The specific composition of materials used in each design is selected based on the required level of sound insulation. For example, if the neighbors below have soundproofed ceilings, then it is enough to lay Termozvukoizol mats or a sound-reflecting membrane under the sand-cement screed to reduce the level of impact noise. If the neighbors below do not have a soundproofing structure on the ceiling, a layer of ROCKWOOL FLORR mineral fiber boards will need to be added to the system.
Reducing noise in an apartment from neighbors above - nuances
According to statistics, in the vast majority of cases, complaints are caused by noise of impact origin: falling objects, children playing with furniture, walking in heels, etc. if the ceiling structure is made with violations of impact noise insulation technology.
If this problem cannot (although it is highly desirable) to be solved from the side of the room above, there is only one way left - to increase the sound insulation of the enclosing structures from the side of your room. However, the best result can only be obtained with an integrated approach. Those. We are talking not only about soundproofing the ceiling, but also the possible insulation of the walls of the premises, and sometimes even the floor. The fact is that noise (and above all shock) travels well throughout the structure of the building and even with complete insulation of the ceiling in the room, the neighbor above will still be clearly audible, but already... from the wall. At the same time, in different houses, depending on the types of enclosing structures and the quality of their connection, the degree of transmission and emission of structural noise can be different (monolithic new buildings are the most sound-conducting). You can evaluate it yourself - just at the moment of intense noise “from above”, one by one, put your ear to all the walls in the room and listen. In this case, the other ear should be clamped with a finger, similar to the action of earplugs. If you can hear very well from the wall what is happening on the floor of the apartment above, it also needs to be insulated to get any significant effect.
At times, neighbors above, in addition to impact, are sources of airborne noise. This could be a dog barking, a loud conversation, a scream, or the sound of television and radio equipment. In this case, the insulating structure on the side of the apartment below must also be used comprehensively and have a thickness of at least 50 mm. At the same time, insulating airborne noise from the upstream neighbor does not have any advantages in terms of efficiency or thickness of the structure. If the neighbor above decided to save you from airborne noise, he would have to raise the floor level with a 3 mm thick pad.
The issue of effective impact noise insulation always concerns the floor of the room. Therefore, if we want the neighbors below to sleep peacefully, sound insulation must be done at home, on the floor of our room. If we ourselves want to rest and work peacefully, we should make sure that our neighbor above has done a similar design for impact noise insulation. Perhaps this is the main problem of impact noise insulation!
Often, by noise, many people mean only one type of sound - airborne. These are sounds that come to us from the outside: cars passing, children screaming in the yard, dogs barking, a construction site nearby. However, there is also an impact type of noise (driving nails into a wall, the notorious drilling in the neighborhood, rearranging furniture) and structural noise - in this case, sounds are transmitted directly through the structure of the building, the elements of which are joined rigidly and without the use of soundproofing pads.
Soundproofing. In our own apartment, home or office, we expect a calm room atmosphere that protects us, and also perhaps from disturbing noises from outside. Only when we find these relaxation areas can we find healthy, healthy lifestyles and productivity-oriented work.
Basic principles of sound insulation of airborne, impact and structural noise
Good sound insulation of ceilings, walls and floors is an important feature of high-quality rooms. However, if sound transmissions are transmitted through components, they should be prevented by appropriate measures so that noise pollution does not lead to health problems
A person feels comfortable with sound vibrations within 25 decibels
, although sanitary standards slightly overestimate this norm - up to 30 dB at night and up to 40 dB during the day. Of course, each person has his own standards of perception - some can easily tolerate all 60 dB, but a higher number of decibels can make you seriously nervous.
Sound insulation - body sound and air sound
First we have to split the sound into two areas. It is one of the air sounds transmitted by pressure waves as air vibration and perceived directly by the human ear. Airborne sound waves are, among other things. from a radiolane, a musical instrument or a human voice.
Impact and airborne noise
The second dimension for noise protection is the sound of the enclosure. It spreads through solids, especially in the house. Ceilings, walls and floors. A particular form of cabinet sound is impact sound, which can cause serious problems for the user in the lower room.
This is why sound insulation was invented - its task is to reflect noise and not allow it to pass through walls and other obstacles into your living environment. It’s good for those who have thick walls - they themselves perfectly reflect sound vibrations. However, this is unlikely to apply to most panel houses and new buildings. In addition to sound insulation, there is also sound absorption - the ability of materials to absorb sound waves. Most granular, fibrous or cellular materials have just this ability.
Relax with suitable soundproofing measures
To minimize sound propagation in residential construction and renovation, certain measures are mandatory. The most important are the separation of components and the exclusion of bend-resistant building materials, but the use of flexible materials with high mass.
The more mass a material has, the better it insulates sound. In this case, loose masses such as sand are better than solid masses. Positive insulating properties are also provided by cellulose insulation, fiberboard insulation, cellulose insulation and hemp insulation. Excellent sound insulation, in turn, comes down to the built-in mass and porous structure of the material.
These materials include soft, semi-rigid and hard. Soft sound absorbers are made from fiberglass or mineral wool, as well as felt and ordinary wool. These include pumice and vermiculite - the so-called porous aggregates. Semi-rigid materials include slabs made from fiberglass or mineral wool, as well as materials with a cellular structure, for example, polyurethane foam. By the way, their sound absorption coefficient is slightly higher than that of soft ones, but their specific gravity is greater.
The easiest way to deal with airborne noise is porous and fibrous materials that can be installed both outside and inside the building. In addition, they have another property - thermal insulation, so their use is doubly beneficial. Impact noise can also be “clogged” with materials with a closed cellular structure, laying them along the perimeter of the walls and ceiling. But structural noise is a more significant problem, because materials must be laid during the construction stage.
Frame or frameless sound insulation – which is better to choose?
Often, apartment owners in panel buildings, when ordering sound insulation, state that it should be as thin as possible so as not to take up useful space in the premises. Some unscrupulous craftsmen, not wanting to lose an order, suggest using frameless systems with low Rw (about 8 - 12 dB) to protect against high-level noise. The result of such irresponsible actions is the appearance of a large number of negative reviews about the sound insulation carried out in panel houses.
It should be borne in mind that materials of low thickness with high density are designed to reflect sound and cannot be used independently, without a layer of vibration isolation and noise absorption. Frame structures manufactured according to all the rules have a higher Rw coefficient (up to 70 dB) and are cheaper than frameless ones.
Care
Parquet board is a rather capricious material in terms of maintenance. Does not like temperature changes and high humidity. For cleaning, special parquet board care products are used, which will not cost much, but will still cost you. In addition, from time to time it needs to be opened with varnish or soaked in oil.
Laminate flooring also doesn’t really like moisture, but this only applies to moisture in large quantities; it’s better not to pour a bowl of hot borscht on it, as it will most likely swell at the seams.
But caring for laminate flooring is much easier - just a well-wrung out cloth and warm water.
Common mistakes when soundproofing apartments in panel houses
In an attempt to save on sound insulation, homeowners often choose a contractor based solely on the minimum price they ask for their services. Most often, this leads to a waste of money, and the result obtained is close to zero. The most common mistakes made by unskilled workers are:
- Incorrect use of materials - sound-reflecting membranes or panels are attached directly to the ceiling or wall without vibration decoupling and a sound-absorbing layer. This method of application is not recommended even by material manufacturers, since, according to the law of doubling the mass, its effectiveness is extremely low.
- Violation of installation technology - sound-absorbing materials are laid with gaps, seams between sheets of gypsum fiber reinforced concrete or gypsum plasterboard are not sealed, there is no vibration decoupling between structural elements, etc.
- The use of unsuitable materials - foam plastic, cork, foamed polyethylene are used as noise absorbers, which, due to their low density and resonating structure, are not intended to solve such problems at all.
- The use of cheap materials - low-density mineral wool, laid as a sound-absorbing layer, crumbles over time and shrinks, which leads to the formation of cavities through which sound freely passes into the room.
- Violation of the structure - when installing a floating screed on the floor, there is no vibration isolation around the perimeter of the room. Slabs made of mineral fibers on plastic mushrooms are attached directly to the interfloor ceiling, without cladding with sound-reflecting materials - such sound insulation in a panel house is very often found under suspended ceilings.
Sealing seams and joints
If in new buildings the problem is the poor quality of filling joints, then in old houses this is compounded by cracks resulting from deformations and displacement of elements. These defects allow sounds to pass through structures freely. A sound insulation device without eliminating through gaps will not provide confidence in the final result, since the protective layer will be insufficient.
If work is carried out on a bare floor base, then you should carefully evaluate the joints between the panels and the interface lines of the wall panels and the ceiling. If cracks or chips are detected, the cement or other sealing filling is removed to the base material, and the resulting void is filled with polyurethane foam or non-hardening construction sealant.
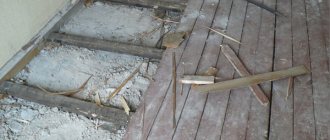
Treatment of joints and cracks in floor panels.
When improving the properties of the existing coating when performing repairs without completely dismantling the base, it is recommended to open it along the perimeter to the base, fill the joint with sealant and cover it with a cement-sand screed under the level. Sometimes they do not pay attention to the passages of pipelines through the floor panels located in the bathrooms and kitchen. By eliminating through gaps around them, they reduce the penetration of sounds and uncontrolled air exchange, which is a source of extraneous odors and affects the microclimate of the premises.
How to properly install sound insulation
The specific sequence of work on soundproofing an apartment in a panel house is determined individually for each object. The current condition of the premises is taken into account: whether decorative finishing has been completed, cosmetic repairs are being carried out or major renovations are being carried out, etc. Here we will describe the basic principles that must be observed when performing the entire range of noise insulation measures. This will help to avoid mistakes when performing them on your own, and if contractors are involved, it will allow you to fully control their work.
Preparatory stage
If you are planning a major renovation or redevelopment of an apartment in a panel house, which will include sound insulation of all types of surfaces (walls, ceilings, floors), then before installing soundproofing structures it is necessary to carry out the wiring of all engineering systems (electrics, ventilation, sewerage, water supply, heating). After this, we plaster the walls on which sound insulation will not be installed. If this work is carried out after installing a floating screed, then there is a high probability that a rigid connection will be formed between it and the walls, due to which impact noise will freely pass into adjacent rooms.
The sequence of installation of soundproofing structures in an apartment
- Floating screed device.
- Ceiling soundproofing. If you plan to make suspended ceilings, then it is better to carry out the installation of these two structures together - this will save space by minimizing the gap between the massive cladding of the soundproofing system and the stretched decorative fabric.
- Installation of soundproofing structures on walls.
What you should pay special attention to
- Vibration decoupling. Its absence sharply reduces the effectiveness of any sound-absorbing structure. When installing a floating screed, it is ensured by gluing the perimeter of the room with damper tape or laying strips cut from mineral fiber boards. The top edge of the vibration decoupler should be at the level of the finishing floor covering
- When installing frame systems on walls, the installation of metal profile sheathing is carried out “expanded”. This method eliminates any risk of transfer of mechanical vibrations from the building structure to the sound insulation frame.
Soundproofing concrete floor slab
What methods will be effective?
When planning work on soundproofing a room, you first need to decide which noises are most likely to interfere with maintaining a comfortable environment. Airborne noise can be easily dealt with with little effort. Impact noise becomes a real problem.
It is especially annoying if sounds disturb evening rest and night peace.
We can safely say that it is possible to completely protect a room from external noise only if sound insulation is provided for all surfaces of the room.
However, the topic of our article is limited to floor soundproofing. Therefore, we will go further in this direction.
When choosing a method and material for floor soundproofing, you should consider the following nuances:
- The created structure should not weigh down the floor slab too much. Most materials do not imply a significant increase in such load.
- They also do not forget that the creation of a soundproofing structure on the floor affects the height of the ceiling of the room.
Therefore, before purchasing materials, you should make thoughtful planning and, if necessary, the necessary calculations.
One of the optimal floor structures for sound insulation, in which different materials can be used, is a “floating” floor.
One of the “floating” floor schemes
A “floating” floor can have a different number of layers consisting of different materials. The fundamental thing is that the hard coating used in this “pie” should not be in direct contact with either the base or the walls. That is, the transmission paths of impact noise are minimized. And the use of bulk, fiber or viscous materials in the design prevents the propagation of sound waves from airborne noise.
The term “floating floor” can include a classic “floating” screed made of cement-sand mortar, as well as a dry screed with expanded clay backfill. The materials listed in the table above can be used as a distinctive layer of screeds.
Another option is to lay the floor on joists, but with mandatory damping pads or a layer of “sticky” sound insulation between the joists and the base, joists and flooring.
Preparatory activities
Whatever material is chosen for noise protection, and whatever technology is planned to be used, the surface must first be thoroughly prepared. These preparatory measures, by the way, will also help to increase the level of sound insulation of the floors.
| Illustration | Brief description of the operation performed |
| The first step is to clear the room of all furniture. Next, you need to completely dismantle the decorative coating. If, after dismantling it, old glue or sagging concrete mortar is found on the surface, these should also be removed. | |
| The next step is to thoroughly clean the concrete surface using a vacuum cleaner. This process is necessary so that cracks, chips and other defects can be detected in the screed, which, by the way, always weaken the soundproofing qualities of this layer. | |
| Detected surface defects are further cleaned. Then the cracks widen and dust comes out of them. Next, the repair areas are treated with a primer. After the soil has dried, the cracks and chips are tightly filled with repair mortar or sealant. | |
| It is imperative to inspect the joints between the floor and the wall - it is possible that depressions, cavities, and gaps that have formed during the period of operation of the home will be found there. In some cases, there are no visible gaps, but the mortar used to seal the joint crumbles. In this case, the seam must be cleaned of this crumbling mass, since it no longer fulfills its functions. Then these defects should be primed, and after drying, the joints should be sealed with a new solution, sealant or polyurethane foam. | |
| It would be useful to waterproof the joints, even if the apartment is located above the first floor. The waterproofing compound and tape will not only strengthen the joint, but also protect the ceiling from the penetration of vapors from the lower apartment. In addition, this layer will enhance sound insulation. | |
| It is very important to check the areas where pipes pass through the floor slab. As a rule, gaps are also found around them. Considering that the pipes pass through the slab, the holes around them can also be through, which means that noise freely penetrates both into one and another apartment. Therefore, the holes must be sealed, and the most suitable material for this purpose is high-quality polyurethane foam. | |
| When the foam hardens, its excess is cut off, and the entire surface of the floors is primed. The soil will penetrate the concrete structure and bind cement dust, which will greatly facilitate further work. After the soil has dried, you can begin the main work. |
To finally decide on the choice of soundproofing structure for floors, you should understand how each of them is equipped.
Soundproofing floor construction on joists
This method of reducing the level of noise coming from below will help make them warmer at the same time, since the materials used are also excellent insulators. To achieve the desired result, you need to strictly follow all the recommendations, since even seemingly insignificant nuances will affect it.
Vibration-isolating tape – prevents the transmission of impact noise through parts of floor structures
For example, in order to separate the joists from the concrete base and prevent the transmission of sounds through the wood, you should stick a vibration-insulating tape on the beam, which does an excellent job of dampening impact noise.
Briefly, the process of creating such a floor structure is shown in the table:
| Illustration | Brief description of the operation performed |
| To ensure that the logs are laid evenly and strictly in one horizontal plane, marking work is carried out. This process can be done using a laser, water or even a regular building level. The logs must be located in increments of 500÷600 mm, and always at a distance of 30÷50 mm from the walls. | |
| The prepared and marked concrete surface is covered with waterproofing material if necessary. Dense polyethylene or roofing felt can be used as this layer. A very good solution is to use a specific rolled soundproofing material – “Texound” or “soundproofing” – as the bottom layer. Polyethylene sheets are overlapped by 10÷15 mm, and the joints of the film must be taped with plumber's tape. The logs, with vibration-proofing tape glued to the bottom end, are laid on the floors along the marking lines and secured to the base using dowels. The height of the beams is selected taking into account the rise of the floor, and usually corresponds to the thickness of the thermal and sound insulating material (mineral wool), laid in one or two layers, as necessary. Between the joists and the wall along the entire perimeter of the room, a dense layer of mineral wool is laid, which insulates the joists from noise transmitted along the walls. | |
| The next step is to lay mineral basalt wool between the logs - in one or even two layers. If one layer is laid, its thickness is usually at least 100 mm. If you plan to use a two-layer flooring, then each layer will have a thickness of 50 mm. The top mats should overlap the joints of the bottom layer. If the ceiling height allows, then you can lay insulation with a thickness of 150 mm, that is, 100 plus 50 mm. | |
| To prevent hard contact between the joists and the wooden covering that will be attached to them, it is also recommended to glue vibration-isolating tape on top of the joists. In addition, this layer will prevent the occurrence of squeaks - there is no friction between the wooden parts. | |
| Next, a layer of waterproofing film is laid on top of the insulated frame structure. Thanks to this material, mineral wool fibers and dust will not penetrate into the air masses of the room. And the insulation itself will receive protection from getting wet in the event of an accidental spill of water on the floor. The membrane is attached to the joists using staples and a stapler. It should be clarified that in order to save money, many do not lay a vapor barrier layer. However, it is provided for by the technology of this method, therefore, you should not abandon it. | |
| Instead of mineral wool between the joists, you can make a backfill of expanded clay. Moreover, the smaller the fraction it has, the denser the soundproofing layer will be, which means it will better muffle the sounds coming from below. It is also necessary to lay a layer of waterproofing on top of the expanded clay. | |
| Well, then a plank or plywood covering is laid. The second option is chosen if you plan to use laminate, parquet board or linoleum as a decorative covering. |
Dry screed
This method of soundproofing a concrete floor began to be actively used not so long ago, but, judging by the reviews, it has already shown positive results.
Dry screed arrangement diagram
The advantage of this technology is the speed of work - in an average-sized room it is quite possible to complete it in one shift. Plus, after laying the dry screed, no technological pause is required. That is, you can immediately proceed to installation of the finishing coating. That is, without getting involved in large-scale and “dirty” repairs, you can create reliable sound insulation of the floor from the neighbors below in just two or three days.
An unusual but very effective technology is dry screed.
I can’t even believe that leveling the floor with a screed and immediately preparing it for laying the covering in just a day is not a fiction. Yes, this is indeed possible if the screed is dry, with a special expanded clay backfill and rigid gypsum fiber floor elements. Detailed, literally step-by-step instructions for calculating and laying dry screed with your own hands await the reader in a separate publication on our portal.
Reference data
To make it easier for you to navigate when deciding whether to soundproof an apartment in a panel house, we provide data on the Rw values of building structures made of various materials, the requirements for sound insulation of various rooms and the level of noise created in everyday life by various sources.
Rw value for the most common materials used in construction
| Installation material and format | Thickness in mm | Rw, sound insulation index | Application area |
| Brick (one and a half bricks) | 380 mm | 56 dB | External and load-bearing walls |
| Brick (one brick masonry) | 250 mm | 54 dB | External walls, inter-apartment partitions |
| Brick (half-brick masonry) | 125 mm | 47 dB | Apartment and interior partitions |
| Hollow-core reinforced concrete slab with a thickness of 22 | 220 mm | 52 dB | Interfloor ceilings |
| Vibration-pressed reinforced concrete floor slab 16 | 160 mm | 52 dB | Interfloor ceilings |
| Vibration-pressed reinforced concrete floor slab 14 | 140 mm | 51 dB | Interfloor ceilings |
| Monolithic reinforced concrete | 200 mm | 53 dB | Support frame |
| Monolithic reinforced concrete | 250 mm | 55 dB | Support frame |
| Gypsum concrete panel | 80 mm | 40 dB | Bathroom box |
| Foam block D400-15 | 150 mm | 41 dB | Apartment and interior partitions |
| Foam block D400-12 | 120 mm | 40 dB | Apartment and interior partitions |
| Foam block D400-10 | 100 mm | 39 dB | Apartment and interior partitions |
SNiP 23-03-2003 requirements for sound insulation of some premises
| House category | Minimum required Rw, dB | Impact noise level Lnw, dB (for floors) |
| Overlappings between apartment premises and separating apartment premises from staircase halls and used attic spaces | ||
| Category A | 54 dB | 55 dB |
| Category B | 52 dB | 58 dB |
| Category B | 50 dB | 60 dB |
| Floors between apartments and shops located underneath them | ||
| Category A | 59 dB | 55 dB |
| Category B, Category B | 57 dB | 58 dB |
| Floors between rooms in an apartment on two levels | ||
| Category A | 47 dB | 60 dB |
| Category B | 45 dB | 63 dB |
| Category B | 43 dB | 66 dB |
| Overlappings between apartment premises and restaurants, cafes, and gyms located underneath them | ||
| Category A | 62 dB | 55 dB |
| Category B, Category B | 60 dB | 58 dB |
| Floors between apartment premises and administrative premises and offices located underneath them: | ||
| Category A | 52 dB | 58 dB |
| Category B, Category B | 50 dB | 60 dB |
| Walls and partitions between apartments, between apartment premises and staircases, halls, corridors, lobbies: | ||
| Category A | 54 dB | — |
| Category B | 52 dB | — |
| Category B | 50 dB | — |
| Walls between apartments and shops: | ||
| Category A | 59 dB | — |
| Category B, Category B | 57 dB | — |
| Partitions between rooms, between the kitchen and the room in the apartment | ||
| Category A | 43 dB | — |
| Category B, Category B | 41 dB | — |
Parquet boards and laminate in everyday life
In everyday life, these two types of coatings manifest themselves in completely opposite ways.
Parquet board:
- Good sound insulation
- Warm material
- It’s easy to press under your heels and scratch the varnish when moving furniture.
Laminate:
- Cold enough
- Soundproofing requires a special underlay
- More resistant to external influences
Important! Laminate should not be overestimated. When sharp and heavy objects fall on the laminate, chips can easily form.
When choosing a covering, first of all you should find out the purpose of the room. If this is an office or a walk-through room, laminate would be more appropriate. For the bedroom and living room, parquet boards are more suitable.
Ceiling insulation
Let us immediately note that the average ceiling insulation in your apartment will not solve the most pressing problems. For maximum effect, it is necessary that the neighbors above make good insulation of their floors. Then all loud sounds will not reach your insulation, being absorbed on the way to it by the materials that your neighbors used to treat the floor. But if for some reason the neighbors did not take care of silence, you will have to double your efforts.
In order to absorb sounds transmitted from the apartment on the floor above, they came up with two insulation methods: frame and frameless.
The essence of the frame is in its name. Metal guides are attached to the ceiling. According to the laws of physics, any object securely connected to the coating will transmit vibration with the same intensity. In other words, in the places where the frame is attached to the ceiling, separate “pads” are made between the ceiling and the metal. The pads can be made from any synthetic materials, like those used to make yoga mats. For these purposes, some craftsmen purchase a laminate substrate of maximum thickness, or fold the standard one several times.
The cells formed between the ceiling and the guides are filled with mineral wool slabs. The entire structure is covered with specialized acoustic plasterboard sheets. The top can be puttyed, plastered, painted or a suspended ceiling can be installed.
The frameless insulation method is also generally intuitive. Soundproofing panels are attached directly to the ceiling. Fastening is carried out through specialized vibration units. These are the holes for installing fasteners. These panels are also covered with acoustic plasterboard sheets, and regular plasterboard is laid (glued, screwed) on top of the entire pie. And then everything follows the scheme - finishing the ceiling.
In both cases, the joints with the walls are treated with a special vibroacoustic sealant.
As you can see, conventional methods do not give an ideal effect, and besides, they steal precious square centimeters. For those who do not skimp in the name of silence, the latest sound insulator has been created - MaxForte Soundpro. This is an ideal material not only for noise suppression. It does not burn, does not lose heat, does not get wet, does not rot, does not stink, is unattractive to rodents and insects, and is easy to install. The only negative is that it is expensive. The manufacturer also claims that this material can be used to cover floors, walls, ceilings and even pipes. In general, there would be a desire and funds for this experiment
Types of noise
Sound has a number of parameters and can greatly influence the human psyche and brain. The most important thing in an irritating factor is the intensity of the sound, measured in decibels. In residential buildings, noise intensity is allowed up to 40 dB during the day, and at night - no more than 30 dB. In reality, this problem does not concern either home developers or workers in housing and communal services offices. “The rescue of drowning people is the work of the drowning people themselves,” so we have to think about how to protect ourselves from annoying neighbors.
Noises that penetrate through interfloor ceilings are divided into airborne and impact. They differ from each other in the method of acoustic influence on walls and ceilings.
- sounds of increased volume from video and audio equipment, as well as from musical instruments, are classified as airborne noise. When sound hits the floors, it causes certain vibrations, which in turn are partially reflected into the room on the ground floor;
- impact noise is a mechanical impact on walls and floors. As a rule, this is stomping, noise from moving furniture, knocking. Such actions involving the production of noise are not regulated by law depending on the time of day. The sound wave from impact noise is not partially dissipated, as with airborne noise, but is completely transmitted to the lower floor, additionally being reflected from the walls. This is called indirect sound transmission.
Semi-dry cement screed with sound insulation
Semi-dry screed and options for heat and sound insulation of the floor using different interlayer options to achieve heat and sound insulation of floors, of which there is a wide variety at the moment in 2022.
Some materials are used to lighten the screed with a large thickness, for example, using a dense material like penoplex you will not achieve high performance in terms of sound insulation of the floor (impact noise will be well transmitted through the dense material), but penoplex will allow you to achieve high performance in thermal insulation of the floor
, and lightening the screed with a significant thickness of 9 cm. Penoplex is also indispensable when installing water-heated floors + semi-dry screed.
For soundproofing the floor
Porous, shock-absorbing layers such as soundproofing layers, mineral wool, noise stop, sound insulation, basalt wool, foamed polymer materials are ideal.
For floor insulation
Dense materials, penoplex, foam plastic, basalt dense materials are ideal. Universal materials - expanded clay, polystyrene granules, slag, vermiculite and the like.
The procedure for working with penoplex:
- Installation of penoplex slabs:
the floor slab is first prepared, cracks and holes are sealed with polyurethane foam. Depressions larger than 1 cm are filled with sand and leveled so that the penoplex lies rigidly. It is also possible to fix penoplex with “fungi” - Film and steel mesh
A technical film of at least 120 microns (preferably reinforced) is spread on top of the penoplex; a steel mesh with a cell of 50*50 mm with a rod thickness of 4 mm is laid on top of the film; the mesh is fastened with knitting wire, and raised 2 cm from the penoplex with plastic spacers specialized for this purpose. . - An edge strip made of foamed polyethylene 0.5 cm thick is installed
along walls, columns and other rigid structures - this stage is necessary to prevent lifting and cracking of the screed during expansion during the process of strength gain. - The next step is to prepare a semi-dry mortar
- ready-made sand-cement composition M300 or 3 parts of sand and 1 part of cement is poured into the mortar mixer, 12 mm fiber fiber is added, water is added (the amount of water is minimal) the solution is considered ready when it is completely moistened, and when it is squeezed in a fist no moisture is released and it forms a stable lump. - Next, the mixture is laid in a path and beacons are formed
; they are rubbed, compacting the mixture and controlling the level with laser levels; they are pulled to the required length; parallel to the previously formed beacon, another guiding beacon is formed, after which it is filled with a solution between them and pulled out using the rule; as it is pulled out, the mixture is compacted. - After the semi-dry screed has been completely pulled into the room, the master, having put on special concrete shoes on his feet so as not to damage the screed and not leave marks on it, begins finishing grinding
. For this, a concrete trowel is used, a flat steel disk is installed on it - this process allows eliminate small defects in the surface of the screed, eliminate potholes and clog the screed, bringing it to a perfectly smooth surface, thereby preventing the process of rapid evaporation of the remaining moisture of the semi-dry screed (moisture in the screed is necessary for uniform gradual drying and strength gain. - Upon completion of grinding / grouting of the screed, technological seams are cut
to prevent possible random cracking of the screed. If “tension” develops in the screed and it begins to crack, then the crack will occur in a place where the minimum thickness technically formed at the seam site, after the semi-dry screed has fully “matured”, these seams can be filled with sand-cement composition.
ThermoZvukoIzol TZI Standard 14 mm
If you need soundproofing of the floor. Soundproofing floors with thermal and sound insulation is an excellent solution, reducing impact noise by more than 30 dB is an example of making a semi-dry screed using thermal and sound insulation.
- Cost of materials for sound insulation
350 rubles per 1m2 (2018) Cost of sound insulation work
150 rubles per 1m2 (without materials) Cost of semi-dry screed 60 mm
from 650 rubles per 1m2 (with materials) turnkey total:
9 db
Structure thickness – from 70 mm Maximum screed load – 300 kg / per M2
What to do if the floor creaks?
In addition to audibility due to poor-quality sound insulation or its complete absence, discomfort can also be caused by the creaking that occurs when walking on the floor.
To reduce the likelihood of squeaks during operation of the plank floor, its installation should be carried out in strict compliance with the technology.
Creaking can appear both in new boardwalks and in long-used ones. If new wooden floors squeak, then most likely the installation technology was violated, or a low-quality material was chosen. There can be many more reasons for the old coating squeaking.
The main reasons include the following:
- Deformation of boards due to improper installation.
- The wood has swollen from excess moisture.
- The wood has dried out and the fastenings do not hold the floorboards on the joists;
- The logs themselves are poorly secured to the floor beams.
Therefore, if the apartment owner has seriously decided to start renovating the floors, then he will have to check different versions of the appearance of squeaking.
If a new plank covering is being installed, then you should clarify in advance the points that may affect the appearance of squeaks in the floors. You also need to be aware of these rules when carrying out repair work.
So, here are a few recommendations that should be followed when installing a new plank covering and repairing an old floor:
- None of the structural elements of a wooden floor should come into contact with the surface of the walls - this applies to both joists and boards. The gap between the ends of the wooden parts and the wall should be approximately 10 mm, and the end board is attached to the joists, retreating about 15 mm from the wall. These gaps can be filled with polyurethane foam, and then they are covered with baseboard. It turns out, in addition, very good protection against the transmission of impact noise.
- It is very important that the distance between the joists matches the thickness of the deck board. Otherwise, the floorboards will sag, causing a creaking sound.
| Board thickness, mm | Recommended distance between lags, no more, mm |
| 20 | 300 |
| 25 | 400 |
| 30 | 500 |
| 35 | 600 |
| 40 | 700 |
| 45 | 800 |
| 50 | 1000 |
- It is not recommended to install boards directly on floor beams - this reduces the ability to achieve high-quality sound insulation without raising the floors. Therefore, the best option would be to first attach the joists to the floor beams (preferably through elastic gaskets), then arrange a subfloor on which it will be convenient to install sound insulation.
One of the sound and heat insulation schemes for a plank covering
If the ceiling in the room is of sufficient height, then the old floor can be used as a subfloor, but it will definitely need to be checked for squeaking.
Soundproofing tape for mounting on joists
- It is recommended to lay a special rubber or felt pad - tape - on the joists under the boards in order to prevent direct contact between two wooden parts. Also gives an excellent effect in muffling airborne and impact noise
- When laying plank flooring, it is recommended to purchase tongue and groove floorboards. This version of the board will provide excellent heat and sound insulation, and the likelihood of squeaking is significantly reduced, since the parts of the coating will be rigidly connected to each other along the entire length.
- You cannot use boards that are too wet for plank covering, as when drying they can become deformed, and gaps form between them, so creaking may occur. Wood must have normal humidity not exceeding 14%.
- The squeaking sound of planks can occur due to uneven surfaces of the boards or joists. That is, each part must be carefully checked before installation and, if necessary, “brought to perfection” or rejected.
Got a creaking sound on your plank floor?
Look for the cause and apply effective methods to eliminate this noise!
The problem of floor squeaking in this publication was touched upon, so to speak, “tangentially.” In fact, there may be much more reasons, as well as ways to combat this phenomenon. more about eliminating creaking wooden floors in a separate article on our portal.
* * * * * * *
We hope that the information about sound insulation of wooden floors will be useful to the reader. It is clear that there are many more ways to protect your property from noise, and you cannot tell about them all in one publication. But to expand the information content of the article, we also attach a video about soundproofing floors with acoustic mineral wool.
Step-by-step execution of work
Let's consider the procedure for installing sound insulation. As an example, we will choose one of the most complex but effective methods - laying a combined insulator under a “wet” screed. The material for noise reduction will be an underlying layer of felt and a Teksound 70 soundproofing membrane.
Step-by-step instruction:
- thorough surface preparation. Cleaning from small debris and dust;
- the floor is densely covered with technical felt. No cracks or gaps are allowed;
- A soundproofing membrane is laid on top of the first layer. Carefully smooth its sticky layer onto the felt to prevent the fabric from moving. The strips of material are overlapped by 2-2.5 cm;
- installation of damper tape. it is glued simultaneously to the wall to a height of about 10 cm, and to the surface of the membrane;
- installation of waterproofing. The polyethylene film is laid in overlapping strips, the joints are taped. The waterproofing sheet is installed with an overlap of 10-15 cm on all walls, the excess will subsequently be cut off;
- A metal mesh is carefully laid on top of the waterproofing. Separate pieces are tied with reinforcing wire;
- mix a thick solution and install beacons on it - strips of a thin metal profile. They will serve as supporting elements when leveling the screed;
- Fill the floor with mortar. You can make a standard sand-cement composition or use special mixtures for self-leveling floors;
- The filling surface is leveled using a rule, resting it on the beacons.
After the screed has dried, you can begin laying the flooring.
Advantages of insulating a wooden floor on joists
Soundproofing a wooden floor on joists has a number of advantages:
- High level of sound insulation.
- When laying insulating material, there are no mechanical fasteners that can transmit sounds.
- A simple installation technology that allows you to complete the work without the involvement of specialists and professional equipment and tools. Thus, most soundproofing materials have low thermal conductivity; they allow you to isolate a room from noise and insulate it.
- The materials have an affordable price. If the correct calculations are made, floor soundproofing is inexpensive.
- There is no weighting of the base compared to a concrete screed.
Floor insulation
Feedback on materials
The most informative description of any material is user reviews. These are disinterested people who provide the most truthful and unbiased information about a particular soundproofing material. Let's look at some of them.
Insulation of doors and windows
The windows and front door of the apartment play a significant role. A good window is half the success. If your neighborhood is still teeming with construction sites, or lies in the path of an open metro line, or is adjacent to a busy highway, replacing ordinary windows with soundproof ones will help you a lot. At the same time, some believe that the more glass, the quieter the silence. But no. The more space between the glasses, the less sound. Some manufacturers fill this space with special gases. These gases neutralize the sound wave, and in your apartment you can’t hear anything that the street is full of.
The same goes for the door. Our mothers and grandmothers (probably it would be more correct to say fathers and grandfathers) resorted to tricks in order to protect the apartment from extraneous sounds. They upholstered standard doors with leather and made a pattern on them with beautiful nails, and sometimes they installed two doors, achieving warmth and silence. Today everything has already been invented and implemented. There are a lot of doors with good sound insulation in the form of high-quality filler and good interior upholstery. And if you invite a good door installer, it will fully perform its function.
If the door is metal, old and does not protect against sounds, you can try to remove it from its hinges yourself, then remove the trim and fill it with the same mineral wool. Most likely, it will become quieter after the work is completed. If you can collect everything as it was and return it to its place.