- The plinth is installed only after the walls have been finished and the flooring has been laid.
Before purchasing these elements, you need to decide on their type and calculate the required amount of material.
How to make and join the corners of a floor plinth
How to make and join the corners of a floor plinth
When installing floor plinths, the most difficult task is finishing the corner areas. The plinth strips will have to be cut into separate elements according to the perimeter of the room. Experts recommend first drawing a visual installation diagram on paper, writing down all the dimensions, and also schematically depicting how to make the corners of the floor plinth. With such a hint at hand, finishing work will move much faster.
Which is better - plastic or wooden baseboard?
Skirting boards made of wood are more environmentally friendly, however, their service life is somewhat shorter. But products made from synthetic plastic, although unnatural, can last up to 100 years.
Plastic skirting boards successfully compete with wooden and other varieties of these products.
The following advantages of plastic skirting boards can be mentioned:
- Can be used in a wide variety of rooms - kitchens, bedrooms, children's and living rooms, bathrooms. A wide range of colors of plastic skirting boards allows you to choose a harmonious combination with the coating and the overall interior.
- Plastic skirting boards are convenient to install because they are stronger, more flexible, and easier to cut.
- They are characterized by fire safety, that is, non-flammable.
- They lend themselves well to wet cleaning and are not afraid of water.
- Available at a price for every buyer.
In addition, plastic skirting boards are often equipped with special gutters through which wiring or other communication cables can be laid.
Thus, we believe that plastic skirting boards in many respects, as a rule, turn out to be much better than wooden ones. The only exceptions can be cases when the interior of the room requires only wooden baseboards.
How to make an internal corner of a floor plinth
Despite the fact that rooms are usually a regular rectangle, their angles may not correspond to 90º. As a rule, developers and repairmen can only dream about ideal angular convergence of walls.
How to cut the corners of a floor plinth, if you are lucky and your apartment has the correct corners, then to cut the plinth strips you need to follow these steps:
- the plinth blank must be placed in a miter box (a special construction tool for cutting planks at a certain angle);
The miter box itself (good) can be ordered HERE. Before ordering, make sure that the width of your plinth matches the maximum width of the miter box!
- look for the 45º mark on the side panel of the tool, insert a hacksaw into the corresponding groove, saw off the excess part of the workpiece;
- Next, carefully sand the cut edge with sandpaper.
Important! When cutting a plinth strip, it is necessary to take into account its location (side of placement). It is recommended to make the cut with some magnification, which will make it possible to further fit the plinth strip as tightly as possible. If a wooden plinth is used, the joint is additionally treated with a special putty for painting.
What to do if the angle of the converging walls is uneven?
In this situation, gypsum plaster and a wide sickle tape will help.
- At the junction of adjacent walls, a small amount of gypsum mortar is applied approximately 10 cm in each direction.
- Next, a reinforcing tape is applied to the corner and gently pressed down with a wooden block.
- The corner is given the correct shape, and excess mortar is removed using a spatula.
Important! You need to work with a spatula very carefully so as not to disturb the position of the sickle tape, but also not slowly so that the plaster does not dry out
Installation of PVC fillets and its features
Ease of installation, low price, practicality and a huge range of models make PVC baguettes incredibly popular and in demand today.
It is also worth noting several more design advantages of such products:
You should know: thanks to the ability to imitate other materials, PVC baguettes are suitable for any type of floor.
There are three options for how to properly nail a plastic baseboard. We will consider them.
Fixation with clips
This method is especially beneficial if there are several cavities for wires. Also, when using it, there are no visible marks of attachment.
No traces of attachment
Here are detailed instructions for carrying out this method of installation work:
Tip: Make sure the end caps and transition corners are the same color. For cutting, it is best to use a miter box and a hacksaw. This will help make everything smooth and neat.
Especially if you do the work yourself
This will help make everything smooth and neat. Especially if you do the work yourself
For cutting, it is best to use a miter box and a hacksaw. This will help make everything smooth and neat. Especially if you do the work yourself.
The front panel can later be removed for cleaning or work on the built-in wiring.
In the case where the product does not have cavities for wires, it may be necessary to purchase clips for fastening separately.
Advice: calculate the feasibility of purchasing additional fastening systems in monetary terms. This is not always beneficial or justified.
Installation with glue
The option using glue is easier to use. In this case, we are not interested in how to nail the baseboards, because we will be gluing them.
No additional electrical tools are required here. But you won’t be able to remove the panel either. The frieze is glued once and until new repairs.
Try not to stain the floor with glue during installation.
You can purchase specialized adhesive for ceiling or floor plinths at any hardware store.
Tip: for gluing the frieze, it is recommended to use glue brands such as “Dragon”, “Titan”, “Moment”.
Installation using self-tapping screws and finishing nails
The cheapest way to nail plastic skirting boards is to use self-tapping screws or finishing nails. This option will be quite reliable and practical, but not very neat. The attachment points will be visible even after they are masked.
Now, in order, how to do it yourself:
Using a drill with a diameter of a couple of millimeters, we make holes in the fillets at the same distance of 30-60 centimeters;
Advice: be sure to maintain the same spacing between the fasteners, so that even if they are noticeable, they are at least located symmetrically.
You should take into account the fragility of the material and, at the moment of final fixation, screw in self-tapping screws or drive in nails with special care so as not to press through the surface.
Screwing in a self-tapping screw with a screwdriver
Tip: screw in the self-tapping screw in the area of the panel adjacent to the wall.
Hats are usually masked with special corks or wax, the same color as the baguette.
How to join the outer corners of a floor plinth
When the exterior corners of a room are 90º, the procedure for cutting baseboard trim is similar to that for interior corner joints. It is important when cutting to remember the future side of the plank placement. The ends of the joints of plastic skirting boards are closed with special plugs. If the cutting of the planks was not carried out very successfully, this defect can be corrected using mastic, and then covered with a plug.
How to join the corners of the floor plinth if they do not have 90º:
- First we apply the plinth strip to the first wall;
- draw out all boundaries with a pencil (marker);
- We perform similar actions with the second plinth attached to the other wall;
- when applying markings, you should get a rhombus, as in the situation with an internal corner joint, only it will be located on the outside, respectively, the diagonal is the cutting line of the workpieces;
- After cutting, we clean the ends of the planks with sandpaper;
- Next, we install the plinth, cover the corner joints with a plug (for plastic products). The joints of wooden baseboards are covered with putty for painting.
After completing the installation of the plinth strips in the corner areas, they can be finally fixed around the entire perimeter of the room using self-tapping screws, liquid nails, finishing nails or a special adhesive.
How to cover skirting board joints
Once you have cut the corner, sand the cut with sandpaper . Seal the joints of the corners and between the planks with putty or acrylic sealant .
And now we smoothly move on to the part of the story when the hands did not grow from there.
Tired of sawing with a hacksaw, I decided to try a grinder. Unfortunately, my grinder, which my husband gave me on March 8, does not have a speed controller, and at high speeds the duropolymer began to melt. And no one was there to hold the bar tightly while I sawed it.
The positive point is that the melted excess easily breaks off after cutting. The negative point is that the cut turned out to be uneven. When joining the corner pieces, cracks became visible.
Don't panic! You can get out of the situation with Epoxylin .
I advise everyone to have it on their farm. This is a two-component epoxy composition in the form of plasticine. It firmly bonds wood, metal and plastic parts. Once hardened, it turns to stone and can be sanded, drilled and painted. The thing is simply magical.
Joining skirting boards at non-standard angles
If you need to finish a rounded corner, then the plinth strip needs to be cut into 4-5 separate parts, and special plugs must be used to connect them. Fixation is carried out with putty or a special adhesive composition.
How to file the corners of the plinth of an internal-external floor corner:
- We apply the first half of the plank to the wall, draw its border on the base of the floor with a pencil (marker);
- then we apply the next half of the plank, draw two points: the first is the intersection with the border of the previous plank, the second is with the wall;
- Then we connect these points to each other and make a cut;
- The ends of the cuts of plastic samples are closed with plugs; wooden ones are pre-cleaned and then covered with putty.
Fastening veneered and wooden products
Natural wood plinths look noble; they look natural with coverings made of any material, but due to their high cost they are more often used when decorating parquet floors.
MDF models look like wood, as they are covered with natural veneer, but are slightly cheaper. Such slats are attached to the walls using staples, because the through method is not suitable - the product can be damaged.
Marking
Work begins with preparation - applying markings to the wall
This is especially important when fixing the planks to brackets. If the marking and fastening of brackets is done incorrectly, problems will arise when snapping the skirting boards into place.
If a through fastening is performed, then a corner element is placed on the baseboard. The product is applied to the wall and, stepping back 50-70 mm from the corner, a hole is drilled through the product so that a mark remains on the wall.
You will also need to mark and cut the baseboard itself. To get the correct angles, you need to use a miter box.
Here are some tips:
The cut for a right angle is 45 degrees, and for an angle of 120 degrees the cut is 60 degrees. It is necessary to take into account the location of the corner - external or internal, since the cutting method for each of them is different.
Fixation with fasteners
The design of the plinth, which is attached with dowels and self-tapping screws to a wall made of concrete or brick, consists of two elements - a load-bearing one (it is fixed to the wall) and an external decorative one (it snaps into the grooves of the load-bearing profile).
Clip mounting
Installing a plinth with your own hands is not difficult. Installation of wooden or MDF products is carried out using clips. The sequence is like this.
| Illustration | Description |
| 1. First, markings are applied to the wall, marking the locations of the clips. The first is fixed at a distance of 100 mm from the corner, the next after 500 mm. | |
| 2. Holes are drilled in accordance with the markings. | |
| 3. Using a dowel and a self-tapping screw, secure the clip. | |
| 4. The rail is cut at an angle of 45 degrees. Start of installation - from the corner. | |
| 5. The clips are inserted into the grooves on the back side of the bar. | |
| 6. The joints are puttied. |
Glue method
Polyurethane products are characterized by durability and a wide variety of external designs. They can also be painted in any color, which attracts designers. The process looks like this:
You can paint the skirting boards in the desired shade after 24 hours.
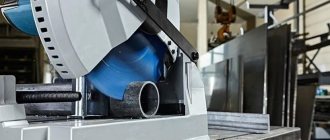
How to cut a corner of a floor plinth without a miter box
Finishing the inner corner with plinth
- a profile is placed on the installation site; it must be rested against the adjacent wall;
- a control line is drawn on the floor with a pencil (marker);
- similar actions are performed near the other wall;
- the point of intersection of two control segments is the lower cut, the junction point in the corner is the upper cut.
External corner finishing
- in this case, similar actions are performed, only the profile is brought out beyond the corner of the converging walls;
- where the control segments intersect - the lower cut, the upper cut - the corner edge.
Important! To edge the plinth, you must try to hold the hacksaw at 45º when cutting.
Please pay attention! We highly recommend purchasing a miter box for cutting corners - it is not expensive, and it is quite possible to spoil or make an uneven and ugly corner without it!
Joining plastic skirting boards
Today, additional elements are produced for plastic skirting boards: couplings, plugs, corners that help cover the edges of the planks. Therefore, when finishing corners, there is no need to additionally trim the baseboards.
How to install plinths:
- The length of both walls along which the planks are cut is measured.
- The plinth is screwed to the wall with self-tapping screws (more details on how to attach a floor plinth).
- At the corner, the plastic strips are connected with a special device, also made of plastic.
- Next, the corner of the plinth is closed with a corner cap, which you simply need to put on the edges of the planks.
Important! When using various plugs for corners and joining plastic plinths, we advise you to also attach them (in addition to standard fasteners) with a small amount of glue or liquid nails - this will allow you to “tightly” fix the corner, and with little physical impact (for example, your little toe caught on the outer corner)))) the plug will not pop out (less likely to break the fasteners or the plug itself with the plinth).
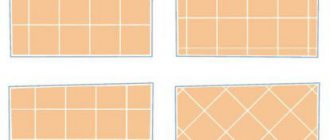
Calculation of material costs
Calculating the need for material will not be much of a problem. It is necessary to measure the perimeter of the room, subtract the dimensions of the doorways from it, divide the result by the length of one batten and round the resulting number up. It is necessary to take into account the number of trimmings. It is better to take one more profile than to assemble one side of the room from several fragments.
There is no point in closing the corner in those places where cabinet or upholstered furniture will be placed close to the wall. It is enough to cover only open areas.
There is one more little thing that should not be forgotten - components. In accordance with the layout of the room, you will need internal and external corners, connecting elements, one right and one left plug for each door.
uneven floors and walls when laying skirting boards?
The time has come to fasten the plinth. The plinth is wooden and bends reluctantly. It turned out that the floor has a slight hump (not visible visually) and the baseboard forms a rocker.
The situation is similar with uneven walls: gaps of 1-2 mm sometimes form from the straight line of the plinth. The walls are light so you can see the cracks.
What to do?
The problem is common, but there is a solution: we take transparent silicone and carefully fill the cracks, and at the same time smooth it level with the baseboard with a rubber spatula (if it’s wallpaper, if it’s paint, then you also need to tape masking tape along the wall close to the baseboard, otherwise there will be greasy spots on the paint, and then remove it). In general, this is called “repair syndrome”, that’s what the customer once called it, then you won’t pay attention to such nuances, the customer’s words are true, I know from myself.
In response to: The problem is common, but there is a solution: we take transparent silicone and carefully fill the cracks, and at the same time smooth it level with the baseboard with a rubber spatula (if it’s wallpaper, if it’s paint, then you also need to tape masking tape along the wall close to the baseboard, otherwise there will be greasy stains will be on the paint, and then remove it). In general, this is called “repair syndrome”, that’s what the customer once called it, then you won’t pay attention to such nuances, the customer’s words are true, I know from myself.
It is advisable to moisten the spatula with water so that the silicone does not stick..
Well, how about remembering everything?
In response to: the time has come to fasten the plinth. The plinth is wooden and bends reluctantly. It turned out that the floor has a slight hump (not visible visually) and the baseboard forms a rocker.
The situation is similar with uneven walls: gaps of 1-2 mm sometimes form from the straight line of the plinth. The walls are light so you can see the cracks.
What to do?
I, even having almost perfectly fitted walls/floors in all visible corners, did not dare to install wood. plastic in color, with soft top/bottom and a strip in the center - it turned out perfect.
Liquid nail technology
This mounting option is considered the simplest, fastest, but impractical. During subsequent repairs, when the panel is removed, it will not be possible to install it back. This type of fastening is used only once. There will be traces of liquid nails on the walls and on the plank itself. In addition, it may break during dismantling.
The installation technology is simple. The back side of the plinth is treated with glue and glued to the wall, which must be flat. Then you need to press the baseboard to the floor and wall at the same time, applying force in the center of the product. After pressing, it is necessary to hold the plinth for several seconds until the composition sets and the plinth does not lag behind the wall material.
Partial leveling of walls.
Good afternoon. Please tell me what partial leveling is and how it is done in stages?
Masters online: 75 Orders per week: 2,093 Offers per day: 1,001
depending on what for?
Removing the old coating, then primer, then putty or plaster; if the room is dry, then Rotband is better, if applied correctly you can get an ideal surface.
The plaster is applied and, as a rule, visually stretched along the plane without a level.
Clean the walls, if necessary, prime them and then level the plane using the rule, without observing the geometry of the walls and horizontal and vertical deviations. That is, if the walls had deviations, everything will remain that way, just the plane will be flat. But if the corners are blocked, this will create a lot of problems during further finishing, although this is not important for everyone and not always.
Partial leveling (or visual) is done on the walls, ceiling and floor. As a rule, beacons are not used for such leveling when applying mortars. The surface is primed (with concrete contact or a regular primer) and then the mortar is applied. This is usually done if visible there are large differences on the surface and they want to remove them if possible. But a person is limited in funds or cosmetic repairs are being made. This way, significantly less building mixtures are consumed. If the leveling of walls, for example, is done efficiently, then after wallpapering the surface will be almost flat.
This means removing the old material, applying plaster with a wide spatula, then applying putty, priming and wallpapering.
that is, this alignment of the walls is visually even.
First of all, wall plinths, ceiling plinths under the ceiling and floor plinths under the plinths are leveled. And the main wall is under a large spatula, visually. With all respect, Andrew.
Good afternoon, Olga. Partial leveling or (visual leveling of walls) is the leveling of walls with plaster mixtures according to the rule. This leveling method is used if the walls are almost flat and alignment with beacons is not required. Visually they will appear smooth.
It depends on what you want to align. If this is a misalignment of the slabs on the ceiling, then it can be leveled with a wide spatula, having previously primed the surface, then it can be used as a base layer of gypsum boards, followed by base putty and finishing putty. If this is a partial leveling of the wall, then you can use, as a rule, a wide trowel with the materials described above. If it is necessary to level the floors, then we use the rule and mixture to level the floors. Best regards, Dmitry
This is visible only to the master. Partial leveling can be carried out either under a rule or under a spatula (60cm). This is a slight unevenness of the surface (more like a depression) that does not require leveling the entire surface. It is done accordingly with the preparation of the entire plane))) Removal (notches) of the old coating, primer, plaster, stripping (since it is partial and we need to bring the edges of the plaster to zero), primer, putty, primer, etc. further at the customer’s discretion - wallpaper or something more exotic)))) Sincerely)))
COMPLETE BULLSHIT. "Partial alignment of walls." The holidays passed and it started again. “super duper euro bullshit”!. “Turnkey repair”, “Euro renovation”, “Euro standard”, “partial leveling of walls” - chase your specialists into the neck. The walls are either leveled or not leveled. See SNiP SNiP. And what they are trying to sell to you, send it back to the outskirts or to Moldova.
I agree with Dmitry. There is no partial leveling. The minimum is the tolerances for simple plaster (without installing beacons), which are described in the specified SNiP. But on the other hand, now SNiPs are not in authority. Only what is written in the Agreement is valid. How can partial equalization be indicated in a contract? No way. Complete arbitrariness. They make whatever they want. If there is no reference to a specific SNiP and specific tolerances. Just the day before yesterday we were invited to look at an apartment being built by Tajiks. Turnkey price 4500 rub. per meter According to the oral agreement, they were supposed to do a partial trim of the walls. The walls are already all puttied (but no electrical work has been done, and where there will be a tiled apron on the walls in the kitchen, the same is puttied). I apply the rule to the walls. Gaps up to 2 cm. The same gaps in the future locations of platbands and baseboards. I ask these performers, what have you done here? And they answer, well, this is a partial trim. So think about who is right here and what everyone understands by partial equalization. But that’s okay, so they also do the plumbing. This is completely garbage. I don’t even want to comment. And in this entrance they make 3 apartments at once, each with one riser. Well, I think people will live happily there, taking turns flooding each other. I don’t know what customers are thinking about, saving a penny and subsequently getting such squalor and the risk of subsequently paying for repairs to the apartments below in the event of a flood.
Yes, I forgot the most important thing. Dear customers, if you don’t want to get a very big headache and disagreement in the concept of quality, refer to the SNiP in the Agreement and what kind of finishing you want to get at the end, simple, improved or high quality. Better yet, refer to GOST R, which defines the standard in the provision of repair services. It, in turn, already contains links to almost all regulatory documents on repairs.
. as a result, we partially obtain partially smooth surfaces, partially produced by a direct rule at a partially correct level, partially leveling, partially gypsum, partially sandy mixtures, partially by craftsmen for full (100%) advance payment
)))))) Super and that’s exactly how it turns out +1.
))))) Indeed, accurately noted. That's exactly what they do. But if the customer’s priority is the price of the issue, then many people like it. They will also leave a positive review. If you look at the reviews, most of them are like that. A room in 3 days or a complete renovation in 2-4 weeks is done just like that.
done to save material, primer, plaster mixture and 2 meter wire to achieve visual evenness of the wall
The best savings is not to do repairs at all, than to do it like that.
Partial, how is that? A piece of wall, floor, ceiling? What does partially mean? In parts? What to level and with what, wooden frame, concrete floor, asphalt covering, iron roof.
this is called cosmetic repairs. Not everyone has the money to tear down walls, build new ones, knock down plaster, re-plaster the lighthouses, take away garbage. Otherwise, nothing falls on one’s head and thank God, he will live for another 7 years
if the question is asked, it means someone needs it, how to do it, each owner chooses according to his capabilities, finances, time, people refreshed the walls, painted the ceiling, and all of them are happy with this, we are also pleased
what? if there are walls, then these are holes in the walls, unevenness, first primed, then plastered or stretched with gypsum mixtures, saving material and money
Broaching is usually done with coarse putty. Eliminates minor irregularities, but does not solve the problem of crooked walls.
You can't be slightly pregnant. Partial leveling is not a construction term.
check the deep differences in the base with a provil and add or lubricate
In theory there is no such thing, but in practice it is complete. This is when you tell the customer that everything needs to be removed, but he doesn’t want to, or he can’t afford the money. So you do partial leveling. that is, the rule is to display a plane, usually vertical, less often horizontal. When doing this kind of work, light is important, I'm on. spotlights. so that everything can be seen, I put one behind my back, the second in the corner. and accelerate the plane. I draw the corners using a laser, but this is not work, but “shit,” in my opinion
Are you renovating the entrance?
Listen guys, with snips under your arm, read carefully “Russian Law No. 184-FZ” “on technical regulation” and you will understand that the term “partial equalization” has a right to exist. And I’ll tell you, Olga, that there’s nothing wrong with this There is no leveling (it all depends on the thickness of the pocket): the baseboard parts of the walls, the junction of the walls to the ceiling, the internal wall corners, the junction of the ceiling to the walls, and the differences between the shelf slabs are usually leveled. As a rule, it is advisable to use 1.5 - 2 m. leveling is done with something rougher, like a rotband. Before this, the surfaces are naturally primed. After leveling the surfaces, they are ready for continuous filling. good luck
It was even interesting where you found it in the Law on Those. regulation term “partial leveling”? Please voice the article and point.
no, it doesn’t say anything specifically about partial alignment. but the essence of the law is that SNPs must be strictly adhered to only when carrying out work related to the safety of life and health of people: construction of walls and ceilings, electrical and plumbing work, waterproofing, etc. How to finish the walls is decided directly by the craftsman or by prior agreement with the customer (not everyone has enough money for “European-quality renovation”). and there is no need to trump SNPs when the situation does not require it!
So this is what was discussed, that the customer and the contractor have different ideas about such a concept as partial leveling. Therefore, to avoid discrepancies, all details need to be discussed in the contract. But it is easier in this agreement to refer to a ready-made document in the form of SNiP or GOST. And then they automatically turn from recommendations into mandatory ones. In addition, it often happens that the customer wants to do lousy (partial) preparation and then buys wallpaper for several thousand rubles per roll. And then he makes a complaint about why such expensive wallpaper is pasted with diverging joints, not understanding that in order for these joints not to be visible, a flat plane of the wall is necessary. Therefore, personally, I don’t even know what partial trimming is and how it is done. And I will never do it. If the customer does not need high-quality finishing, then he is simply looking for other contractors who will do it quickly, cheaply, beautifully, efficiently and with other epithets of a scam. And then they will take off his glasses and the noodles from his ears. And with a sense of accomplishment, they will go looking for the next victim.
prime the surface, then putty with a spatula and God help you!
conclusions
Plastic plinth has a number of advantages:
- Available in unlimited colors.
- During operation it does not require special care.
- Installation is easy even for a beginner.
- They don't rot.
- The material is not afraid of water, moisture and ultraviolet radiation.
- Service life more than 100 years.
- No additional preparation is required before installation.
- Flexibility and lightness allow for high-quality installation.
The plinth performs three main functions:
- Protective. Thanks to this solution, the walls are protected from moisture during cleaning.
- Decorative. The floor surface becomes decorated. In many cases more expressive. Emphases in this case are placed as desired. The leading elements can be the floor, the wall, or the baseboard itself, if it is a contrasting color.
- Leveling. Hides all defects and irregularities that formed during the repair process.
By attaching the ceiling and floor plinths in the living room, you can emphasize the completion of the repair work. If you want the installation to be carried out by a specialist, then in the online service you can easily find a large number of organizations that will help you in this matter. On the main page, the company's contacts will be at your service.
Did you manage to solve your problem using the recommendations from the article?
Yes!
46.8%
No. More answers required. I'll ask in the comments now.
37.47%
Partially. There are still questions. I'll write in the comments now.
15.74%
Voted: 718
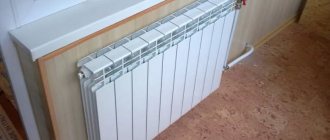
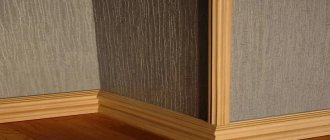
Installing skirting boards on the floor - choice, stages of work
Most classic and modern interiors are difficult to imagine without skirting boards. With their help, they visually combine the decoration of walls and floors, decorate rooms and emphasize the originality of the design. They also hide uneven joints, mistakes made by repairmen, and also protect wallpaper, linoleum, laminate and tiles from early destruction. Such linings are easy to maintain, often resistant to moisture and mechanical damage, and can be easily repaired if necessary. You can hide wiring or cables from the TV or Internet in them so as not to overload the space with them.
In this article we will look at how to install a plinth on the floor in an apartment. We'll tell you when you can do without it, and when you need it, and we'll point out its main advantages. We'll tell you what to look for, list the types of fasteners and what materials the products are made from. We will share step-by-step instructions for installing plastic and wooden models.
- 1 To bet or not?
- 2 Why install skirting boards on the floor
- 3 How to choose a plinth - the main nuances 3.1 Method of fastening to the floor
- 3.2 Material of the floor plinth
- 3.3 What else to consider when choosing
- 5.1 Installation of plastic skirting boards
Do-it-yourself fastening of plastic plinth to the floor
You should start with organizing your workplace. Since installation involves constant movement along the walls, it is advisable to prepare a container or box with several cells for hardware, dowels, fittings and tools. This way everything will be at hand, just move the container to a new place. In addition, you will need an extension cord that will be long enough to reach the farthest corner.
Correctly attaching a plastic floor plinth to a concrete base should be done in the following sequence:
- Draw up a profile layout diagram. It is better to do the joining where it will subsequently be covered by furniture. It is advisable to start installation from the door or from the corner, installing whole lamellas first.
- Take measurements taking into account that the cavity of the corners is 5 mm, and the joints are 2 mm. Cut the slats using a miter box and a hacksaw. Remove burrs with your fingers or cut with a knife.
- Make a hole in the baseboards with a thin drill or awl. Holes are made at a distance of 5 cm from the edges at intervals of 40-50 cm; if the wall is very curved, less often is possible.
- Use a marker to transfer the holes from the panel to the floor. Drill holes, clean them from dust and crumbs, insert dowels inside. If some of the plastic remains above the surface, cut it off flush. Sweep the floor and wipe it with a wet rag so that dust does not spread throughout the apartment.
- Remove the decorative strip, connect the profile to the corner, insert the cable (if any), tighten the screws. Return the bar to its place.
- Take measurements, cut off the entire strip as needed to the corner. Install the connecting element, angle, try on, adjust.
In the future, similar actions are carried out with drilling and screwing. With correct calculations, the plinth will lie flat, without cracks or distortions.
Sources:
https://strport.ru/poly/kreplenie-plastikovogo-plintusa-k-polu https://strojdvor.ru/krupnye-konstrukcii/kak-krepit-plintus-plastikoviy-k-polu/
To bet or not?
Installing a plinth on the floor is not a mandatory procedure, although with it many interiors look more organic and attractive. It is omitted when decorating a space in the spirit of techno, hi-tech and minimalism. Laminate and ceramic tiles are also combined, since these materials can sit flush and are unlikely to move away from the walls, such as wallpaper. The linoleum is lifted up a few centimeters and secured with special fasteners that protect the edge from damage and early wear. Floor coverings at joints are also abandoned when installing hidden doors in a room.
You can replace the usual baseboard with a cork backing, which is especially important when combining two materials. Wall panels can be equipped with discreet inserts and do not require additional ones. You can mount LEDs and other decorative elements on them. But they are all very expensive, so their destiny is expensive interiors.
Functionality of the plinth
This seemingly inconspicuous detail in the interior is quite important for its overall design. It is difficult to imagine the respectability of a room in which there is no baseboard framing of the floor covering. However, this element performs not only decorative functions, since previously it had a different purpose.
In addition to the fact that when framing the floor covering it acquires a neat, respectable appearance, the plinth also performs other important functions.
- Initially, when arranging wooden floors, the baseboard was primarily intended for a kind of insulation. The fact is that there is always a gap left between the boards and the wall, which serves for thermal expansion of the wood. But such a remaining gap often became the reason for the unhindered flow of cold air from the underground. It was to avoid this that they began to fasten skirting boards along the walls.
- In modern apartments and private houses with concrete and other floors, the plinth serves to protect the edge of the flooring - laminate, linoleum or carpet, from damage and penetration under it, as well as into the gap between the flooring and the wall, dust, dirt and moisture.
- The presence of cable channels in the back wall of the plinth allows you to hide communications, for example, a television cable, telephone cable or for connecting to the Internet.
- Modern products have a very aesthetic appearance, which allows the plinth to be used as a special decorative element of interior design.
Why install skirting boards on the floor?
It has a number of incomparable advantages that should be used and not forgotten when renovating an apartment:
- Hides uneven joints between walls and flooring, allowing you to hide any defects.
- You can run wiring in them. There are models with special niches and recesses. At the same time, current construction requirements are not violated, since all materials are safe.
- Using skirting boards you can create a beautiful transition from one type of covering to another.
- Linings made of plastic or wood will at least briefly retain water in case of leaks or pipe breaks. This will give you more time to fix the problem without flooding your neighbors.
- Skirting boards can become part of the interior and decorate the space. Now you can find original models with attractive designs, in different sizes and shapes. Wooden products are sometimes even decorated with decorative milling or carving.
- Overlays will extend the life of the finish, since the joints will not wear out as much during the use of the room. This means that you will have to make repairs less often, and the interior will retain its original attractiveness for a long time.
Floor skirting boards have a couple of disadvantages, but they can hardly be called serious.
- Plastic models can be damaged or broken if handled improperly. Wood gets scratched and real wood sometimes needs to be varnished.
- If the cover is poorly secured or does not fit tightly, then debris may become clogged under it and it will be difficult to clean it out.
With proper care and installation, no difficulties will arise.
Types of skirting boards and secrets of their installation
Decorative strips can be purchased at a hardware store and are made from wood, plastic or MDF.
Wooden plinth
Wooden design is well suited to any floor finishing material, but due to its high cost, it is most often used for finishing parquet or parquet flooring. Skirting boards can be found both ordinary domestic ones made of oak, larch, alder, and those meeting European standards, with special niches for laying cables.
Skirting boards are made from various types of wood.
It is worth remembering that you should not install wooden skirting boards on uneven walls; there is a risk of getting unsightly or even poor-quality work with skirting boards that will not be able to hold on. Before installing the skirting boards, it is necessary to cut the plank to precisely measured dimensions.
Skirting boards on MDF base
Planks with an MDF base are slats covered with foil, laminated film or veneer. In terms of aesthetic and decorative indicators, they are no worse than materials made from valuable types of wood, but their price compares favorably on the smaller side. MDF is a rather fragile material that can be easily damaged if used incorrectly. That is why MDF floor plinths are mainly attached to the walls using hook-shaped brackets, onto which the slats are then hung.
MDF skirting boards are similar to skirting boards made from valuable types of wood.
To visually design the corners and cuts of the plinth, it comes complete with corners and end caps. This move by the manufacturers allows them to easily dismantle the planks and install them again after the floor repair process.
Plastic skirting board
PVC planks have a high strength index and are not afraid of temperature changes, treatment with water and sunlight. Plastic strips are produced following the example of wooden skirting boards and are ideal for floors covered with laminate, carpet, and linoleum. But at the same time, they look tasteless when installed on parquet.
PVC skirting boards, which are produced for working with carpet and linoleum, are equipped with special grooves to securely fix the edges of the floor covering. Light slats can be attached using liquid nails, which is quite easy and does not require a lot of force. But the disadvantage of this type of fastener is that during future repairs the baseboard will have to be torn off the floor, and the material will be damaged.
Plastic has a huge selection of shades.
The advantages of plastic skirting boards include the presence of internal channels for cables, as well as the ability to use plugs to form a beautiful corner. Also, the plastic plinth does not need to be cut, and an uneven wall will not become an obstacle to installation, because the plastic is quite flexible and will not break when pressed.
How to choose a plinth - the main nuances
Method of fixing to the floor
Overlays can be fixed using several methods - everyone chooses the most optimal option for themselves.
- On clips. These are kind of fasteners that are fixed on the wall. There is a groove under them on the back side of the lining. The fastener pitch is 30-40 centimeters.
- On the dowels. This is how most models are mounted. Many of them have holes for self-tapping screws; just drill a hole at the required level, drive in a plastic insert and screw on the hardware.
- On glue. It is used if the trim is installed for a long time and there are no plans to remove it regularly, since dismantling will damage the rest of the finish. For this purpose, construction adhesives or liquid nails are used. The product is applied to the back side in an even layer, and then pressed against the wall and held for several minutes.
Separately, it is worth noting the installation of a plinth with a compartment for cables. It can be mounted in any of the listed ways, whichever you prefer. But before starting work, remove the cover from the groove for the wires. This is where the holes for the screws are located. After installation, it returns to its place, and then the wiring continues. It is not recommended to lay it in advance, since there is always a chance of damaging the cable winding.
Floor plinth material
There are four main varieties you can find in stores:
- Plastic. A popular option, available in a variety of configurations, designs and shades, and can be of different hardness. Always complemented by connecting elements, it looks more aesthetically pleasing and attractive. It is not afraid of moisture, but can hardly withstand mechanical damage, so it must be handled with care. PVC linings are cheap, which also explains the increased demand.
- MDF. They are made from small pressed shavings, painted or covered with veneer or plastic film. They delight with the number of colors and the naturalness of textures and designs, and can be complemented by milling. This plinth is optimal for parquet or laminate. Complete with connecting elements. Quite expensive, although sometimes made to individual designs.
- Array. There are both cheap and luxury linings. The former are made from pine or birch, the latter from oak, walnut or elm. They stand out for their beautiful texture and natural shades. To protect against moisture, they are varnished or waxed. With care they will last for many years. Easily withstands mechanical loads and shocks. If desired, they can be decorated with carvings of varying complexity.
- Metal. Not so widespread because it does not suit all interiors. Most often used for finishing utility rooms or when arranging an apartment in a loft, hi-tech or techno style. Made from stainless steel, aluminum or brass. Resistant to moisture and chemicals, it will last for several decades. But impacts leave marks.
The choice of one option or another depends solely on the preferences of the owner. In stores and to order, you can make models of any complexity, including those with original design. The wide color palette of all products makes it easy to decorate your home.
What else to consider when choosing
- Design and style of the room;
- Finish shade;
- Availability of additional functions and their necessity;
- Product size, width and height;
- Nuances of maintenance and care;
- Complete set - corners, plugs and other parts.
Knowing all this, you will easily find the optimal solution for your home.
MDF skirting boards
Everyone is probably familiar with MDF boards, used as a facing material and widely used in furniture production. They are produced in a wide range of thicknesses and shapes, most often decorated with a special polymer film with a pattern, usually imitating various wood textures. MDF skirting boards are their closest “relatives”.
What is MDF? No matter how hard they try to freely decipher this abbreviation! Some argue that this is a designation for “fine fraction” or “modified fiberboard.” Interestingly, both options are quite close to the truth.
Indeed, MDF is a step forward compared to the usual fiberboard. And in the production of this material, wood fibers are ground to very small sizes. But still, in fact, this is the Russified English abbreviation MDF: “Medium Density Fiberboard”, literally translated - “medium density fiberboard”.
MDF boards are made from crushed wood fibers, which, when heated and pressed, release natural glue - lignin, which is an excellent binder for the created mass. Manufacturers position MDF as an environmentally friendly material, but in fact, to bind fibers, some companies sometimes use formaldehyde resins, which are not at all beneficial to human health. This factor must be taken into account when choosing this material for finishing - it is better to give preference to manufacturers with a consistently high reputation.
MDF skirting board production line
MDF skirting boards are made from boards that are not yet decorated with film. The blanks are cut and processed on special milling equipment, where they are given the intended shape and relief pattern. After this, the skirting boards are cleaned of dust, and their front surface is laminated with a self-adhesive polymer film.
Taking into account the manufacturing technology, MDF skirting boards most often have the form of a profiled smooth board, which is sometimes also decorated with simple reliefs, without any special frills.
MDF plinth with an insert, which is designed to mask the points of its attachment to the wall.
Variants are produced with an insert-bar along the entire length of the plinth. This detail allows you to simplify installation as much as possible - it will perfectly hide all the heads of the fasteners after installing the plinth on the wall.
In addition to lamination, natural veneer and painting are used to decorate the front side of MDF skirting boards.
Prices for MDF plinths
their MDF plinth
Veneered MDF plinth - Italian walnut look
Veneered plinths, instead of PVC film, are covered with veneer made from natural wood of expensive species. Therefore, in appearance they are almost impossible to distinguish from real wooden ones.
Painted MDF plinth
Skirting boards can also be sold in painted form. For such decoration, special paints are used, which are designed to reliably protect the material from moisture, as well as from the effects of household chemicals. If you want to give the products individuality, that is, paint them yourself, you can purchase a baseboard primed with a neutral white or light gray color, prepared for painting.
MDF skirting boards, like products made from other materials, have their own advantages and disadvantages, which you need to know about before purchasing and installing them.
- The MDF plinth has an easy-to-install design, so even a novice craftsman who is inexperienced in construction can handle its installation.
- The products are very well fixed tightly to a flat wall surface.
- The aesthetic appearance of plinths made from this material brings neatness and sometimes exclusivity to the interior design. Especially if the products are made to order or painted independently.
- The fairly high moisture resistance of MDF allows the material to be used in rooms with slightly higher humidity levels. But direct ingress of water should still be excluded.
- The products have a certain flexibility, so they can be attached even to a slightly curved surface.
The disadvantages of products made from this material include instability to fracture, that is, they can easily be broken by hand. Therefore, during installation you should act carefully, without applying excessive force.
Although buyers are assured that MDF is an absolutely pure, harmless material, this statement should be treated with a certain degree of caution. In order to save money and speed up the manufacturing process of boards, some manufacturers (90% of the world production of this material comes from China) additionally use phenol-formaldehyde resins as a binder. And products may have a negative ability to emit toxic free phenol.
Tools - what you need for work
Installing skirting boards on the floor involves the use of some equipment and equipment. The set may vary depending on the material from which the pad is made and the method of its fastening. Standard activities require:
- Ruler, tape measure, pencil.
- Knife, hacksaw or jigsaw.
- Hammer or drill with suitable drill bits.
- Self-tapping screws of the required size, dowels for them.
- Screwdriver or screwdriver.
- Hammer.
Sometimes glue can come in handy if you are suddenly unsure of the quality of the joints and do not plan to remove them in the coming years. It may also be worth laying down an oilcloth so as not to stain the floor, or preparing a dustpan and brush for cleaning.
Required tools and materials
To install the plinth, a set of tools that any home craftsman has in his pantry is enough:
- hammer drill, screwdriver, electric drill;
- hammer;
- hacksaw for metal;
- awl;
- core;
- miter box;
- stationery knife;
- marker;
- plastic dowels, screws:
- safety glasses and gloves.
Since the work will be accompanied by the formation of dust, sawdust and cuttings, you need to prepare a broom, dustpan, bucket of water and a rag.
Stages of installation work
Installation of plastic skirting boards
This is not the most difficult operation and can be done independently without the involvement of craftsmen or any construction experience. Most often, self-tapping screws are used for fastening, less often other options. The whole procedure is performed in several steps:
- The overlays are laid out around the perimeter of the room, cut to the required length, and connected with corner joints.
- After laying out, the protective strip is removed. The mounting points are hidden behind it.
- Holes are drilled through the marked holes and dowels are inserted.
- Self-tapping screws are inserted into them and wrapped.
- The process is repeated, and the same is done with the corners.
After this, you need to remove the dust and the installation can be considered complete; all you need to do is slide the decorative strips into place.
Installation of wooden skirting boards
Installation of such structures is somewhat more difficult than plastic ones, since only MDF has corners and plugs. But the array will have to be adjusted and trimmed. It is also important to consider that products made from pine often need to be additionally sanded, while products made from oak or walnut are delivered in a finished state, but it is advisable to varnish them.
They are installed with self-tapping screws or clips. The installation itself takes place in several stages.
- Wooden plinths are laid out around the perimeter of the room, the corners are cut into joints. To do this, it is advisable to use a tool - a miter box, but it can be replaced with a hacksaw or jigsaw.
- Hardware is screwed into it in increments of 70-100 mm. So that they come out, but not all the way.
- The plank is applied to the wall, pressed slightly so that at least slightly noticeable marks remain from the location of the fasteners. You can also grease the ends with chalk or charcoal.
- Holes are drilled at the marks and dowels are inserted into them.
- The casing is put back and screwed so that the cap is buried in the wood.
You can use pins, but you need to know how to handle such hardware and attach any objects to them. It is also not recommended to place wooden floor coverings on glue or nails; the latter will definitely not be able to be hidden. Self-tapping screws can be used to find decorative elements that will distract attention.
Installing skirting boards on the floor is not such a difficult task that you need to turn to the experts. The exception is complex models made according to a unique design. Standard varieties made of plastic, MDF or solid wood can be placed independently. To do this, just decide on the desired fastening method, color and size of the product. When installing, first lay out the floor pads around the entire perimeter, trim them, connect them using corners, and then fix them in one way or another. After all the actions in the room, you will only need to sweep and remove the resulting debris.
Mounting methods
Depending on the material from which the skirting boards are made, as well as on the type of flooring, there are several ways to install these elements.
They differ from each other both in the method of fastening and in the fasteners used.
Using dowels
In this case, you need to screw the baseboard not to the floor covering, but to the wall. This is due to the fact that many materials used for flooring can expand and contract during use, so if a baseboard is attached to them, it will become deformed.
Most often, these elements are attached to a concrete or brick wall using dowels and screws:
- work begins from the far corner, a hole is made in the wall, a dowel is inserted into it, and then, using a self-tapping screw, the corner element is screwed on;
- First, the elements are attached to the long walls of the room; on level areas, the step between the fastenings should be 50-60 cm; if the walls are uneven, then additional screws are installed in the places of bends;
- also mounted on the opposite wall;
- if it is necessary to install an outer corner, then holes are made in it on both sides;
- existing joints are covered with decorative strips.
Instead of dowels and screws, you can nail the baseboard using nails that are fixed in wooden pins.
For clips
Often plastic skirting boards and strips made of other materials are attached to special fasteners, which allows, if necessary, to quickly and easily dismantle them.
The work is performed in the following sequence:
- in increments of 30-40 cm, special clips are securely attached to the wall; if the surface is uneven, then they are installed more often;
- The bar is inserted into the clips and with a light blow with your fist, it is securely fixed in it.
On glue
Can be installed using glue or liquid nails. This can be done in the case when you do not plan to dismantle these elements, since you will no longer be able to remove them without damage.
Installing skirting boards with glue is only possible if the surface of the walls is perfectly flat, otherwise the elements will not be able to adhere tightly to it.
Glue for baseboards “Instant Grip” or “liquid nails” is applied in drops to the plank in increments of 40-50 cm, after which the element is pressed tightly against the wall, held slightly and a strong fastening is obtained.
Thus, you can attach it directly to the wallpaper , then it will be easier to dismantle it. Using glue, you can install these elements on curved walls, but before that, a leveling strip is fixed to them.
Without splice application
We looked at installation with corner elements, but you can do without them.
First, the ends of the planks that are placed in the corner are cut off at an angle of 45 degrees using a miter box, after which they are mounted end-to-end, and the joints are covered with a decorative strip.
Installation of skirting boards with cable duct
In this case, fastenings can be done using one of the described methods, but before starting work, remove the strip covering the cable channel from the baseboard, install it, install the cable and close the strip.