In the modern construction market, materials for facing work are presented in a wide range. Let's look at what epoxy grout is for tiles. Let's get acquainted with the advantages and disadvantages of filler, with the technology of proper application and removal of excess from the tile surface. Read to the end and you will learn what mistakes you should not make so that the work is completed with maximum quality.
Ready-to-use epoxy grout Source zatirkin.ru
Features of the material
Epoxy grout consists of two components - a paste based on epoxy resin and a liquid hardener, which are mixed immediately before use. When hardened, the mixture forms a translucent solid mass with a smooth surface, which, unlike its cement counterpart, does not absorb moisture at all.
Colors
Without the addition of dyes, epoxy resin is colorless and resembles glass in its transparency. The introduction of pigments into the grout makes it possible to obtain a material of various colors, and the addition of quartz sand helps to change the degree of transparency.
Litokol epoxy grout is available in a wide range of colors, including shades of all colors of the solar spectrum, as well as black, white, gray and beige tones. This allows you to choose a color that blends harmoniously with tiles of any shade. To achieve a shimmering effect, glitter can be added to the mixture.
The material has high color fastness, it does not fade in the sun and does not fade under the influence of water and detergents, maintaining the brightness of the color throughout its entire service life.
Features and Benefits
Compared to cement-based compounds, epoxy grout has many advantages:
- High degree of adhesion with any facing materials without the use of additional means - primers, etc.
- High strength and durability. Its service life is at least 50 years, it is so durable that it is impossible to remove it without damaging the tiles.
- Absolutely waterproof.
- The durable, smooth surface with zero water absorption prevents the growth of mold and bacteria.
- Resistance to low and high temperatures (from -20°C to +100°C), aggressive chemicals, ultraviolet radiation.
- Hypoallergenic and environmentally safe. It can be exposed to contact with food.
- High aesthetic qualities throughout the entire service life.
- Easy to care for.
Application area
Due to its absolute waterproofness, mechanical strength and high decorative qualities, epoxy grout is used:
- for lining swimming pools;
- wherever moisture resistance and strength are required - in the cladding of countertops, floors exposed to high mechanical loads, rooms with high humidity;
- where chemical resistance to aggressive environments is required;
- in rooms with high requirements for cleanliness;
- for working with glass tiles and mosaics;
- where its aesthetic properties are important.
Advantages and disadvantages
The structure of the frozen mixture resembles plastic - it is smooth and looks very attractive. A huge advantage of the material is the ability to wash the floor in any convenient way:
- with funds;
- using brushes, including metal ones.
Tiles are more likely to be damaged than epoxy grout - they are so durable.
Other advantages of the material:
- a huge variety of colors and shades;
- can be used for any premises;
- maintaining an ideal appearance in any weather conditions during active use;
- no need to update;
- the ability to replace tile adhesive, which is important for mosaics or panels;
- drying without cracks;
- lack of response to temperature changes;
- harmless to humans after drying.
The material also has disadvantages. It will be difficult for a beginner to glue onto epoxy and rub the seams. The product hardens quickly, and without experience it is not easy to adapt to it. The price of repairs is not encouraging - the cost of epoxy grout paste is much higher than the price of cement paste. To grout joints, you will have to buy special devices, without which it is impossible to work with epoxy. Another disadvantage lies in the strength of the material. If you need to replace the tiles, you will have to try hard - removing them will be somewhat more difficult than with other types of grout.
Types of epoxy grout Litokol
Litokol has 5 types of epoxy grout:
- Starlike C.350 Crystal is a colorless mixture with a chameleon effect, suitable for grouting artistic and glass mosaics. The maximum thickness of seams is 2 mm. It looks most beautiful on transparent bases illuminated from within.
- Starlike Defender is a two-component acid-resistant epoxy-based grout with antifungal and antibacterial effect. Suitable for filling tile joints with a width of 1 to 15 mm, and can also be used for laying tiles and mosaics. Available in 7 color options.
- Starlike Color Crystal – for glass and artistic mosaics with joints less than 2 mm. Sold in 5 colors.
- Litochrome Starlike is a two-component epoxy grout for filling joints from 1 to 15 mm and laying mosaics or tiles on it. Can be used for interior and exterior work. There are 103 colors available, there are options with glitter, luminescent (glow in the dark), metallic (gold, bronze). To add optical effects to the base color, an additional additive component is purchased.
- Epoxystuk X90 is a two-component acid-resistant epoxy mixture. Suitable for filling joints with a thickness of 3 to 10 mm indoors and outdoors.
Will you use Litokol epoxy grout?
Not really
Choosing the right composition
Epoxy pastes include coloring pigments that give the mixtures good decorative characteristics. Repairers highlight proven brand names that are of high quality. The compositions are sold in two buckets; you need to purchase both components from the same manufacturer and immediately select a tile cleaning product. It is important to choose a paste that matches the color of the facing material:
- Light tiles, mosaics, and stone go well with mixtures of pastel shades.
- To highlight individual details of the composition, dark grout joints are made on light-colored material.
- White grout is suitable for any interior style, which is considered universal (except for hallways and corridors).
- Under the tiles, choose a paste that matches the main color of the room.
- It is appropriate to use colorless mosaic grout if the fragments of the composition are bright and do not require additional emphasis.
To make the interior beautiful and original, you can use pastes of different shades. Each person can be guided by their own creative vision. But the main condition is to choose a color scheme that matches the main background of the room.
Calculation of material consumption
Epoxy grout for tiles is not cheap, so it is advisable to make an accurate calculation of the required quantity before purchasing. It will depend on:
- distances between tiles (minimum seam when using Litokol grout - 1 mm);
- tile size - the larger it is, the less material is required per 1 m²;
- thickness of the tile - the thicker it is, the deeper the seam, which means the greater the consumption;
- surface smoothness (embossed tiles require more grout).
Knowing all these parameters, you can easily calculate the required amount of epoxy grout by making the following calculations:
- We multiply together: the width of the seam (A) the thickness of the tile (B) and the sum of the width (C) and length (D) of the tile. We take all dimensions in millimeters.
- We multiply the resulting value by the density (specific gravity) of the grout (P). For LITOKOL Litochrom it is 1.9 kg/l, for LITOKOL Starlike - 1.55 kg/l.
- Dividing the result of multiplication by the area of one tile (the length of the tile multiplied by the width (DxW), both parameters in millimeters), we obtain the grout consumption per 1 m².
The full formula is:
Consumption (kg/m²) = (D+C)(mm)xA(mm)xB(mm)xP(kg/l)/(DxC)(mm²)
By multiplying the resulting specific consumption of material by the number of square meters of cladding, we obtain the total required amount of grout. Since a small part of the material remains on the surface of the tile and is then removed, another 10% of the result should be added to the calculated amount.
When covering large areas, it makes sense to first buy the minimum package, and then calculate the required amount of material based on its actual consumption.
Grout amount calculator
Possible errors
The most common mistakes made by novice craftsmen and those who simply decided to seal the seams themselves include:
- Prepare the mixture not according to instructions, but by eye. If you ignore the proportion of the composition, it can easily be spoiled and made unsuitable for use. The instructions contain information about the correct ratio.
- Do not leave mixture residues on the surface of the tiles, postponing their removal until later. This is wasted time, during which the grout will harden greatly and will be difficult to clean off. Many questions will arise on the topic of how to clean the tiles without damaging the masonry at the same time.
- Often, novice craftsmen work with epoxy- and cement-based compositions with the same tools. This saves money, but has a very negative impact on the result. The savings are completely unjustified. The specifics of these materials require the selection of different tools.
Possible errors in operation
Instructions for use
Each package of epoxy grout for Litokol tiles comes with detailed instructions, which are recommended to be read before using the material. We present the main provisions of the instructions, as well as advice from experienced craftsmen who will help you master high-quality sealing of tile joints with epoxy-based grout.
How to divorce?
To obtain a working mixture, it is necessary to mix the bulk with a liquid hardener. The main thing you need to know before you start mixing: the mixture must be used up within 40 minutes. After this period, the epoxy grout hardens and becomes unusable.
In 40 minutes, it is necessary not only to seal the seams, but also to rinse the treated surface with water. Therefore, you need to mix the mixture components in small portions. For beginners, for the first time it is enough to dilute 200-250 g of the mixture.
To prepare the grout you will need:
- scales;
- clean plastic container;
- mixing spatula;
- latex gloves.
Dilute the mixture in a proportion of 8 g of liquid hardener for every 100 g of epoxy mass; this proportion should be clarified in the instructions for the grout.
Let's describe this process step by step:
- The corner of the bag with the hardener is cut off to create a small hole. This will allow you to store the opened package for a long time.
- Place the container on the scale and pour the calculated amount of hardener into it, for example, 20 g.
- Using a spatula, add the epoxy mixture to the same container in the calculated amount, for our example - 250 g.
- Remove the container from the scales and thoroughly mix the contents with a spatula until the liquid fraction completely disappears and the mixture becomes homogeneous.
It is not recommended to use mixers with a high number of revolutions for stirring, since if the rotation is too fast, the mixture self-heats and its hardening time is reduced.
To obtain a shimmering effect, glitter is added to the prepared mixture in an amount of 3% of its volume. Stir them carefully, away from drafts, as they easily rise into the air.
How to apply?
Before preparing the grout, the surface for its application must be completely prepared. The optimal air temperature for work is +18-23°C; at temperatures below +12°C it is not recommended to use epoxy grout.
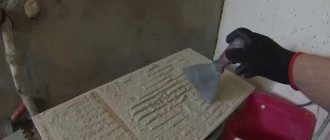
It is convenient to rub the seams with a special rubber float. The grout is applied to the float with a spatula, then the material is spread with a float over the surface of the tile with diagonal movements, rubbing into the seams. Use the edge of a grater to scrape the mixture off the tiles and rub it back into the joints.
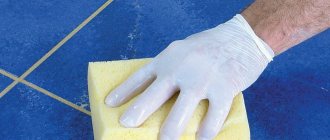
To grout the corners, use a spatula and a special corner with a 45° chamfer. After using all the diluted mixture, the treated area is cleaned with a clean rubber float and poured with plenty of cold water, after which it is wiped with a cellulose sponge, rinsing it thoroughly. This helps to create an even and smooth surface for the seams.
After grouting, a film appears on the surface of the tile from the epoxy mixture, which must be removed the next day, otherwise indelible yellow stains will remain. This is done using a special product called Litonet, which is applied every other day according to the instructions and left for half an hour. After this, the surface is washed with water using a stiff brush or white felt and wiped dry with a cotton cloth.
Only on the fifth day after cleaning can you begin using the treated surface. Before this, you should not cover it, splash it with water or other liquids, walk on it, place objects on it, or expose it to temperature changes. Therefore, it is advisable to lay the floor tiles last.
Plaque removal
The next day you need to remove the epoxy coating using Litonet. It is not cheap, but it is a concentrate, so it will last a long time.
- Spray the surface with the product, wait according to the instructions and clean. There will be a lot of foam; it is most convenient to remove it with a self-squeezing mop or a washing vacuum cleaner.
- Using a “hairy” dishcloth (or a special cellulose sponge), remove the remaining grains of sand and plaque.
- Glossy tiles are easy to clean, so the product can be diluted with water 1 to 4. For matte surfaces, it is better to work with a concentrated solution or dilute it in small proportions (1 to 1).
- After cleaning, let the surface dry and check for gaps where plaque remains. If you paid little attention to washing with water, or you use clinker, clay tiles, terracotta, you may even need 2-3 passes. If you use relief decors, it is better to seal them in advance to save yourself some work.
Litostrip gel is used to remove plaque 24 hours or more after applying grout.
Seam filling technology
Before using the grouting material, you need to thoroughly clean the surface of the tiles, if necessary, vacuum well and degrease the seams. Since epoxy grout has two main components, they are sold in different containers. The material is very viscous and hardens quickly, so it makes no sense to combine the entire volume of grout. Unprocessed paste will dry out and lose its quality. Technology for processing tile/mosaic seams:
- Cleaning gaps from dust, dirt, and glue residues.
- Removing plastic crosses and alignment elements.
- The paste is applied to a dry base with your hands or a spatula.
- The mixture is evenly distributed over the entire depth of the gap.
- Decorative joints are made with a molding spatula.
- Remove excess colored or transparent grout from tiles.
Some craftsmen pre-glue the surface around the seams with masking tape to reduce staining of the facing material. If you leave the mixture for more than five minutes, you will have to remove the sealant with a cleaner. Complete polymerization occurs after five days - epoxy grout takes longer to dry in the gaps than cement grout.
Important: After combining the grout components, leave the resulting mixture for several minutes and mix it again with a drill with an attachment at low speed.
On video: master class on applying grout
Useful tips
When purchasing epoxy grout in the cold season, make sure that it is not exposed to freezing temperatures for a long time. When crystals form in the hardener, it loses its properties.
When washing off traces of grout, do not use fabrics with lint, because... it can change the color and texture of the surface of rubbed seams.
When working with natural porous stone tiles, it is recommended to choose the closest possible shade and carry out a test application, as there is a high risk of staining.
Rules you need to know
Mixing epoxy fugue
A two-component solution is a mixture of epoxy resin (filler) and hardener.
In some cases, quartz sand is added (three-component composition). The color range in the case of a two-component composition is narrower than that of a three-component one.
After combining the filler and hardener, you have about half an hour to use it. The solution will harden, and the process will be accompanied by a slight increase in temperature.
If the area is large, the solution should be prepared in parts (it is better to buy several small bags than one large one) or work together.
If someone wants to purchase and use a large package (5 kg) and use only part of the material, it is necessary to strictly follow the instructions to maintain the original proportions of the components (hardener and filler).
Epoxy fugue has lower resistance to biodegradation (destruction, exposure to various microorganisms, fungi and algae), because under the influence of warm water and organic elements in a slightly acidic environment, ideal conditions are created for the development of mold and microorganisms.
Price
Among the variety of grouts from the Litokol company, Litochrome Starlike grout is very popular because of its versatility and reliability. It has a rich range of shades, a good price, the grout is easy to use, safe, and has improved aesthetic and strength characteristics. Let's find out how much it will cost us to purchase this brand of grout.
It should be noted right away that the price will largely depend on what type of composition you choose. Well, depending on the weight of the packaging, it is clear that the greater the weight of the packaged products, the cheaper the price and vice versa.
Thus, the average price of a 2.5 kilogram can of Litochrome Starlike epoxy grout in a neutral shade will cost the buyer an average of 2,400 rubles. A five-kilogram package will cost 4000-4100 rubles. Agree, the savings are significant - it is more profitable to buy large quantities than several small ones.
Lithochrome Starlike of dazzling white color with a capacity of 2.5 kg will cost 2,700 rubles. Interesting and unusual colors, such as turquoise, lilac and others, will cost a little more than the usual neutral brown and beige. Their average price for a 2.5 kg jar is 2,500 rubles. Crystal-transparent grout weighing 5 kg will cost around 4800 rubles.
Thus, we can conclude that no matter what color you choose, the average price for a 2.5 kg jar will be from 2300 to 2700 rubles, and for a 5 kg package – from 3700 to 4800 rubles. Keep this in mind when going to a hardware store.
Shade selection
Typically, the choice of color for any building material is based on the personal preferences of the residents. For grout, white is considered a universal option. If necessary, it can be tinted with dry or liquid pigment. It is best to make the seams a little darker than the main tone. Epoxy grouts are often sold in already painted form, since colors are added at the production stage.
Kerakoll Fugalite Eco color range
Both epoxy and cement grout are considered high-quality finishing materials. The choice must be made based on specific requirements and conditions. In this case, the finished coating will last for many years and retain its visual appeal.
Buyers' opinions on quality
Consumer reviews regarding Litokol epoxy mixtures are mostly positive. Experienced craftsmen believe that working with paste is difficult, but if you follow the instructions and recommendations of the manufacturer, the result will definitely please you. Buyers note that grouts are expensive and mistakes should not be made when working. Due to the short pot life (45-60 minutes), the paste must be processed immediately and the surface must be cleaned at the same time.
In terms of quality characteristics, epoxy compounds are much better than cement mixtures. The resulting seams do not fade over time, do not allow moisture to pass through, and are easily washed off from any contaminants.
The brand's colored grouts have a stunning optical effect and convey the beauty of tile and mosaic compositions well. Litokol epoxy pastes compete with other materials and fully meet the stated characteristics.
How to fill seams correctly
To fill the seam you need to perform the following algorithm of actions:
- Distribute the grout over the area with a spatula, spreading it evenly in the selected area.
- Wash the seams with a sponge and water, not reaching the end of the treated part, so as not to wet the unrubbed area.
- Half an hour after these steps, moisten the seam with a spray bottle and smooth the surface with your finger.
- Erase the seams with a sponge and water.
- Apply the substance again and perform the same steps.
Follow the grouting technology from the manufacturer. One day after applying the material to the tiles, you need to remove any remaining plaque from the seams. It is necessary to treat the material with a special substance, wait a little and clean the surface with a vacuum cleaner or a well-absorbing sponge. If small pieces remain on the tile, they can be removed with a cellulose sponge. If you used grout for the floor covering, then you should not load it for 5 days.
Let's sum it up
The tile is ready
Working with epoxy grout is more difficult: the surface must be dry and clean, it is more difficult to clean the deposits, it is difficult to form internal corners in one day, you need to wash it with a lot of water. Due to the high price, strength of the seams and labor-intensive work, this grout does not leave room for error.
But on the customer’s side, the advantages of using such a mixture are obvious: the seams are easier to clean and dirt will not collect in them, they will not change color when wet, you can clean them with any chemicals. means. Externally, the seams will look like plastic with sand; many people do not like such a rough surface.
comments powered by HyperComments
Related posts:
- Grout consumption for tiles per 1 m²: calculation formula, calculator and standards
- Do-it-yourself tile grouting: selection of mixture and use
Specifications
Technical characteristics of EPOXYSTUK X90
Technical characteristics of LITOCHROM STARLIKE
Technical characteristics of STARLIKE C.350 CRYSTAL
Chemical resistance table

