First, decide what kind of pattern you want: white against a background of clear glass, translucent or transparent in a matte halo. Maybe you need a color picture? Or just lines, contours? Or do you want the pattern to cover the entire window with lace? Any of the options is available - it depends on the drawing method and the type of stencil.
A direct stencil (1) is a sheet (of paper or film) with a silhouette or pattern cut out in it, which is filled with paint. Reverse stencil (2) - a figure cut out of a sheet. The image appears when you paint the space around it. In the contour stencil (3, 4), only the edge of the drawing is cut and painted: what comes out is a picture full of air, similar to a sketch with a pencil (or marker). To cut such a stencil, use a stationery knife or scalpel - scissors are not suitable for this.
Holding a stencil and drawing is uncomfortable, don’t even try. Dense material should be secured to the window with tape, preferably masking tape: it does not leave marks and can be quickly removed. A lightweight paper cutout can be glued onto the soap. The thin film will stick to the glass on its own.
In addition, by attaching stencils, you will be able to evaluate the entire composition. And if necessary, correct it before you have applied the drawing - it’s quite a shame to erase and redo something that’s already ready. So, look at the photos of New Year's windows and choose the decoration method that suits you best.
Powdered sugar, flour and semolina
This is one of the simplest and most delicious techniques for painting window glass. Small children can participate in the process - for them this activity will become real magic.
Using a direct stencil, we apply an adhesive base to clean glass - honey or sugar syrup diluted in water. Then we spray powdered sugar on it, using a soft sponge or microfiber sponge. Let the patterns dry, then remove the stencil and brush off excess powder with a brush.
To create a transparent design against the background of a sweet “snow fog”, we take a reverse stencil from thin paper. Apply syrup to it so that a wide outline is formed along the outer edge. Next, dust the picture and the area around it with a dry soft brush, barely touching the glass.
To create New Year's patterns on syrup, you can use flour instead of powdered sugar - the pattern turns out almost the same: maybe a little less airy and more contrasting.
And if you take syrup and semolina, the coarse grain and slightly yellowish color of the picture will resemble an old photo from a family archive. Apply the cereal onto the syrup in a thin layer using a slightly damp sponge or hard brush.
Note: this interesting effect occurs only in silhouette drawings—semolina is not suitable for working with reverse stencils.
Requirements for panoramic windows
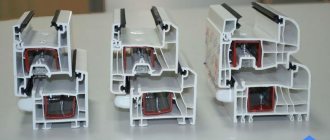
Double-glazed windows should have a size within 300×320 cm, and the distance between them in the structure should not be more than 2.5 cm. If you choose the width between layers greater than the above value, then a significant temperature difference in mid-autumn or spring can cause expansion or contraction of the air gap . Sooner or later this will lead to depressurization or even damage to the integrity of the glass unit. Gaps will subsequently appear next to the seal. The profile for panoramic window systems should be chosen as durable as possible, designed to support the weight of large windows. Incorrect calculation will affect the durability of the structure. Profiles for this type of window are manufactured in compliance with a number of standards. The possibility of reinforcement is the first criterion. The availability of options for installing double-glazed windows with a total thickness of more than 5 cm is the second.
In a temperate climate zone, the most important nuance is the quality of thermal insulation.
Soap drawings
Everyone has almost forgotten about this method, but in vain! With its help, translucent velvety pictures are obtained, similar to ice covered with frost.
You can make them the old fashioned way: grate a piece of soap on a fine grater, add warm water and beat (preferably with a mixer) until a thick, stable foam is obtained. Dip a sponge into it and apply a design using a stencil. If smudges form, wipe them off with a wet cloth.
It’s even easier to use white liquid soap or a creamy soap base: you don’t need to whisk or dilute anything - just pour it into a saucer and draw! Just one piece of advice: it’s better to cut the stencil out of thick paper or cardboard - it will make the edges of the image clearer.
Or you can draw lace patterns with a thin soap on dry glass. In any case, soap patterns are not only beautiful, but also wash off well from the window, allowing you to save on cleaning products.
Tiffany
Tiffany is considered one of the representatives of the classical stained glass manufacturing technology.
Tiffany stained glass
Stained glass using Tiffany technique
For work you will need the following materials:
- glass of different colors;
- special copper foil;
- transparent glue;
- soldering acid;
- solder;
- any detergent available on the household.
As special tools you need to prepare:
- diamond glass cutter;
- a device for turning cuts and chips of glass or a simple sharpening stone;
- wire cutters;
- pliers;
- thin soldering iron.
Step 1. The initial stage of making Tiffany stained glass is creating a sketch. It is advisable that the picture, divided by lines into separate fragments, be drawn on a sheet of thick cardboard.
Sketch
Step 2. At the next stage, you need to cut out each element of the sketch separately and outline it with a marker on pieces of colored glass. If soft paper is chosen for the sketch, then tracing the outline will not be very easy, since such paper constantly wrinkles, which is what thick cardboard is used for.
Drawing a detail on glass
Step 3 . Now you need to cut out the fragments outlined on the glass using a glass cutter. After cutting, carefully break off the excess glass. When working with glass, you need to understand that you won’t be able to immediately achieve an ideal cut line. After breaking off, there will be small protrusions that need to be removed. Small wire cutters are ideal for this.
Cutting out stained glass elements from glass
Step 4. Hold the glass element with pliers and use wire cutters to break off the excess protruding elements. To prevent pieces of glass from scattering throughout the room, use a small box to collect all unnecessary glass debris. Don’t forget that when holding the glass with pliers, you can’t squeeze it too hard, otherwise you might just break it.
Trying on the cut out piece in the diagram
Step 5. After completing the operation of cutting out the elements, we proceed to processing the sharp glass edges. This is where a special grinding machine comes in very handy.
Edge processing
If it is not there, then you will have to work with a grindstone. It's much slower and more tedious. In order to process the edge, you must follow the following algorithm:
- first you need to put the sharpening stone in a certain bowl with water so that it is completely immersed in it;
- after that, we take the glass blank and begin to methodically grind its edges;
- upon completion of the grinding procedure, we proceed to preliminary fitting;
- all cut and turned elements are laid out on the sketch;
- At this stage, the degree of compliance of the elements with the original plan is determined.
Lay out the processed parts
Step 6. At this stage you will need foil prepared in advance. It is sold in the form of a narrow tape, one side of which is adhesive.
It is necessary to very carefully wrap this tape around the edges of each of the glass elements of the future stained glass window. You need to wrap it in such a way that equal-sized strips of copper foil protrude from both sides of the fragment.
Wrap the edges with foil
To do this, when wrapping, the copper strip is located in the center of the edge of the glass element. For a tighter fit, the edges of the foil must be smoothed to the glass. For these purposes, use only a wooden spatula, as a metal one can leave scratches that will ruin the appearance of the entire stained glass window. After finishing the wrapping, you need to once again put all the elements into a single sketch to once again make sure that all the fragments fit and are where they should be.
Step 7. The next stage involves lubricating the edges of the glass elements, which were previously wrapped with special foil, with soldering acid. This is best done with a cotton swab on a stick.
Coat the joints with soldering acid
In soldering, which goes further in the production process, the acid will serve as a flux. Using a heated soldering iron, we hook a part of the tin and solder the elements along the edges. Thus, we combine the fragments into a single stained glass window. To achieve the maximum aesthetic effect, the seam must be continuous and resemble a shaft in appearance. This is very difficult to achieve and it is best to practice in advance.
Stained glass soldering process close up
When soldering, tin should cover the entire visible part of the foil, not only on the edge between the elements, but also on their outer side. It is necessary to immediately determine where the manufactured Tiffany stained glass window will be placed.
Soldering process
We perform soldering on both sides
Step 8. Having completed soldering, you need to wash the seams. This is necessary in order to wash off any remaining soldering acid. If it remains, it will react with tin and, over time, will lead to the appearance of an unnecessary mossy coating on its surface. For this procedure, you can use what you always have on hand. For example, dishwashing detergent.
Step 9. The final stage of creating the named stained glass window is the final coating of the tin seams with patina. It must be applied with a cotton swab or cotton swab. First, wet the swab and then vigorously rub the patina into the tin joints. After this, rinse the finished stained glass window again and you can begin installing it.
Applying patina
Finished work
Prices for different types of electric soldering irons
Electric soldering irons
Toothpaste
A very popular technique. Who didn’t draw with paste on the bathroom mirror as a child! But not everyone knows what potential it holds: you can make seven(!) different types of images with it. Just never rush to remove the stencil when working with toothpaste - the picture must dry completely.
To get a dense white pattern on glass, take a straight stencil, a piece of foam rubber (or a sponge) and a non-colored paste. Squeeze it onto a saucer (a little bit so it doesn’t dry out), grab it a little with a sponge and thickly stamp the cut out silhouette.
We perform a transparent drawing on a matte background in the same way. Just take the reverse stencils and cover all the free space between them with paste “stamps”.
Don't want to make the entire window matte? Then depict a snowflake, a month with stars, a Christmas tree or any other object in a halo. At the same time, achieving a shining effect is not difficult: apply the paste tightly along the edge of the tenderloin, and the farther from the edge, the thinner the paste should be, the thinner the layer and the less frequent the stamps.
The frost effect can be achieved by spraying the glass with a paste diluted with water. If you use a spray bottle, the droplets will be smaller, and if you spray with a toothbrush, the droplets will be larger.
Note: You can make toothpaste multi-colored by mixing food coloring or a few drops of diluted watercolor into it. You can add details to the stamped silhouette by drawing them over the wet image with a toothpick or a manicure stick.
It’s also easy to make a contour drawing with paste using a stencil - just fill the slots using the same stamping technique. The splashes applied on top of them give a special charm to the delicate linear outlines.
There is another option - drawing contours without a stencil. In this way, you can easily and quickly turn a window overlooking a neighboring house into a window overlooking Paris.
But this technique is suitable for those who have a confident hand and no fear of a “blank slate”. Ready? Then we attach a conical nozzle to the tube (the same as on ointments and creams) and draw, squeezing the paste onto the glass directly from the tube - just like Van Gogh!
By the way, we always say “paste,” but there is also tooth powder that can perfectly replace it when painting a window. If you dilute it with water to a thick sour cream, you can paint on glass with a hard brush.
And dry tooth powder applied to wet glass with a soft brush looks like real snow.
The manufacturing process of film stained glass
To work you will need film and lead tape. The complexity of manufacturing this type of stained glass is comparable to painted ones. Most often, stylized elements and simple shapes are used here, which also makes it easier to manufacture.
Film stained glass windows are the best way to decorate and protect your home
Step 1. First of all, you need to print a picture on a printer, which will be transferred to glass in the form of a stained glass window. To do this, again, you can use any of the graphics applications that support multi-page printing. The thickness of the lines in the drawing must be at least four millimeters. After this, all parts of the picture are carefully glued together.
Step 2. Next, you need to carry out preparatory work with the glass on the basis of which the stained glass window will be made. It must be thoroughly cleaned, degreased and wiped dry. Proper preparation of glass plays one of the determining roles in the production of future stained glass.
Degrease glass with mirror and glass cleaner
Step 3. The next step is to carefully place the glass on the printed drawing. In case of an incomplete match, the transfer of the stained glass image will occur with a shift, which can no longer be corrected in the future.
To prevent the glass from moving to the side during the manufacturing process, ruining all the painstaking work, you need to take care of securing it in advance. For this, several pieces of double-sided tape are ideal, with which you can fasten the design and glass together. They need to be placed in areas where they will not interfere with the picture of the stained glass window.
The set of necessary tools includes:
- squeegee;
- small special roller;
- a knife equipped with blades that can be replaced;
- scissors;
- metal rulers of several lengths;
- clamp
Materials you need to purchase:
- special stained glass film with the number of colors required for the selected pattern;
- self-adhesive lead tape for making stained glass windows.
The choice of film must be approached carefully. Cheap and low-quality film can fade very quickly under the influence of ultraviolet radiation, as a result of which the stained glass window will lose its appearance and you will have to start making it again.
Immediately before starting work, it is recommended to degrease the glass surface again and wipe it dry. An alcohol solution and a microfiber cloth, which does not leave fibers on the surface of the product, are suitable for this.
To prevent the glass from bursting, we place soft but durable pads under it.
Step 4. This stage consists of cutting out individual elements from the film. In this case, it will be better and easier if it is possible to organize illumination of the workplace from below. If this is not possible, you will have to cut out the elements, measuring them with a ruler. To achieve maximum effect, you will need to adjust them to the place where you plan to attach them. By cutting out slightly larger pieces, they are then perfectly adjusted to size and cut along the contour immediately after gluing.
Draw the approximate shape of the part on the film
Step 5. Gluing of individual elements cut from colored self-adhesive film is carried out after the next thorough degreasing of the surface.
Cut and glue immediately
If it is necessary to glue a strip, the backing is removed from a small fragment at one of its ends, and it is pressed against the surface of the glass with a squeegee with a soft pad. The rest of the strip is stretched, which allows it to be positioned exactly along the lines of the design. After this, in one sharp movement, the entire remaining part of the strip is pressed to the surface using a squeegee. At this stage, speed is important, since dust can get under the film, which will immediately spoil the aesthetic appearance of the future stained glass window.
Glue the film by rolling it with a rubber roller
Important! It should be borne in mind that the glue on the film sets almost immediately, but due to the fact that at first it does not “hold” very strongly, it is possible to quickly correct possible unevenness and inaccuracies.
When applied, the film covers the black dividing lines by only two millimeters. The remaining part will be hidden later using self-adhesive lead tapes. To get rid of excess film, use a ruler, which is applied evenly along the black line and, using a sharp knife with a thin blade, the excess is cut off.
Using a painting knife along the contour of the pattern, we cut off the excess and roll it again, for reliability.
In the event that a particle of dust somehow gets under the glued fragment of the film, it must be gotten rid of.
This is done as follows:
- The end of the film is partially lifted and the interfering particle is removed using the end of a knife blade. Under no circumstances should you take it out with your hands, because in this case fingerprints will remain on the adhesive solution, which will be clearly visible in the light after installing the finished stained glass window;
- After the speck of dust has been removed, the film must again be stretched and glued in place, smoothing it with a squeegee.
Prices for self-adhesive stained glass films
Self-adhesive stained glass films
Gluing curved fragments
Gluing curved fragments is a little more difficult than straight ones. In this case, you need to cut out a larger piece of film, stick it in the right place, and after that carefully cut out the desired shape along the black lines using a sharp knife. This operation must be carried out carefully, but confidently, so that the edges are smooth, as if cut out according to a template. You may need to practice beforehand to feel more confident.
In those places where there are many small multi-colored fragments adjacent to each other in the stained glass picture, you can do this in several ways.
- The first method will take much less time and effort, but you will have to spend a lot of consumables. In this case, the entire area is covered with a large piece of film of one color and then excess fragments of a different color are cut out of it.
- The second method is more professional, because the consumption of materials is minimal, but the process itself requires time and painstakingness. In this case, all colored fragments are cut out separately and glued one by one. Trimming of excess film should be done strictly along the black lines.
Important! You need to know that under no circumstances should you allow several adjacent films to be layered on top of each other. As the temperature rises, the film will begin to expand, and if there is no room for this, then deformation of the pattern and peeling of the film will most likely occur. The gap between the individual elements of the stained glass window should be at least one and a half millimeters. Further gluing of all colored parts occurs in a similar way.
Stained glass in the making
After finishing gluing the colored fragments from the film, you need to move on to the lead tape. Due to the fact that it consists of almost one hundred percent lead, this tape has excellent ductility.
The color scheme is also varied. In addition to basic colors such as gold, silver and copper, there are many more shades. The lead tape is equipped with an adhesive layer on the inside, ensuring perfect adhesion to the glass.
Lead tape must be used to frame each individual fragment of the future stained glass window.
Lead tape
Please note that at those points where several ends of the tape meet, the junctions must be covered. We must try to plan the work in such a way that all ends are covered with the next layer. As a result, only one end of the tape should remain, unobstructed. This is done, first of all, so that during the cleaning process no one accidentally catches the protruding elements and does not violate the integrity of the stained glass window.
Rolling lead tape onto a stained glass window
After gluing the tape to the stained glass window, it is carefully rolled using a roller prepared in advance. Where there are straight lines on the stained glass window, the lead tape on them must be further aligned before the glue has time to dry. A ruler and squeegee are best for this. The alignment method is as simple as it is effective:
- first, the ruler is installed on the line exactly according to the template;
- then a straight line is drawn between it and the lead tape using the edge of a squeegee;
- after this, the tape will take its allocated place and will be perfectly even.
We close the joints with lead tape on a self-adhesive basis and outline the outline
Bonding lead tape
The joints of the tape are carefully sealed
Ready film stained glass window
Sealing seams
After applying and rolling the tape with a roller, the moment comes to compact, one might even say, seal the seams. Using a special clamp, you need to go through all the joints of the tape and press them more tightly together.
This is done so that in their place in the future there will be no gaps into which moisture and detergents will get in, which will lead to the destruction of the stained glass window. By pressing the ends, we add naturalness to our product. In this case, the seams will have a forged effect and will look very beautiful, and the stained glass window itself will serve for a long time and will not be afraid of cleaning.
Photo of lead tape
Stained glass film and lead tape close up
Upon completion of production, it is recommended to wash the finished stained glass window using a cleaning agent. You should not apply it to the glass itself; it is better to drop it on a microfiber cloth and gently wipe the surface.
In order not to displace the tapes that have not yet had time to stick well, all movements must be carried out in the direction along them. At this stage, the main thing is accuracy in actions. After all the above operations, you can remove the pattern from under the glass.
If everything is done correctly and all the lines and elements are glued evenly and accurately, then such a stained glass window will look beautiful and organic in any interior.
Film stained glass
Film stained glass
Masterpieces on glass
Regular paints and markers
By “regular” we mean gouache. Of course, you can use any other water-soluble paints, even water-based ones for the interior. The gouache just adheres more tightly to the glass, the picture turns out brighter and also washes off perfectly.
Watercolor is another matter. It leaves colored shadows on the window long after the New Year: it will take more than one wash for them to disappear.
And painting with watercolors is more difficult - you need a very soft brush, the humidity of which has to be constantly controlled. Otherwise, due to excess water, the paint on smooth glass will “shrink” and the design will not work.
Note: to add shine to a gouache painting, you can apply glitter and sequins to the wet paint. And to make the picture more contrast, just outline it with a black outline - also with gouache or a washable marker. The latter will also help if you feel like an insecure artist: attach the stencil to the window, outline the silhouette with a marker, and then paint over it.
By the way, washable markers themselves are a great way to paint on glass. They can be used to draw white and colored pictures instead of paints and brushes, or to make outline drawings using a stencil and by hand instead of toothpaste.
Filled stained glass
Creating a stained glass window begins with choosing a design and transferring it to the glass surface. All further actions are aimed at giving the pattern a convexity, which will prevent paint from leaking beyond the specified space.
Making contour paint
First, let's look at the process of creating a special contour paint. To create it you will need:
- 50 ml PVA glue;
- 30 ml mascara;
- about 40 grams of silver.
Glue and ink in measured volumes are poured into a small container and begin to mix. In the process, silver is gradually added to them. The result should be a lead-colored mass similar in consistency to sour cream. As paint is applied to the surface of the stained glass, its consistency may gradually become more viscous. This can be corrected by adding a small amount of heated water and mascara of the same black color. The paint will return to its original condition.
Rules for applying contour paint
Selecting a sketch
After preparing the contour paint, we begin to apply it along the lines transferred to the glass from the sketch. You must follow the following rules for working with contour paint.
- The contour lines are applied with a thin brush and should be convex enough to contain future paint spills. Therefore, you should not save on it. The resulting homemade paint should adhere confidently to the surface of the glass being decorated, and its color will be close to the color of lead seams inherent in stained glass windows made using classical technologies.
- In the process of applying contour lines, stir the paint periodically, otherwise lighter silver particles will constantly strive to the top. In addition, the color of homemade paint will change over time, so it is advisable to complete the contour application as soon as possible. Otherwise, the uniformity in the framing of the stained glass mosaic elements will be lost.
- After application, you must wait about three hours until the paint dries completely.
Drawing contours
Process of drawing contours
Painting glass elements
When the outline is dry, you can proceed directly to painting the glass elements. We will look at the process of making paint at home below, but for now we will understand the process of applying it.
Step 1 . First of all, you need to make sure that the workplace with glass is located in a strictly horizontal plane. Even a slight tilt in any direction will subsequently lead to the collection of all the paint at one of the edges and a thickening of its layer.
Step 2. Filling the elements must be done with a wide brush. We dip it in the paint and, generously greased, begin to paint over each fragment individually.
You can use a pipette, fill it with paint and paint over the design, as in the photo below.
Manufacturing of contour stained glass
Important! When working, there is one main rule: under no circumstances should you cross the previously applied contour, otherwise the paints will mix and the stained glass window will be hopelessly damaged.
At this stage, you need to show enough perseverance to completely fill in all the fragments of the picture without spoiling anything. After finishing the pouring, we again wait 4 hours until the paint dries, and we can continue.
Manufacturing of stained glass
Pouring paint
Pouring paint
Step 3. This stage consists of re-drawing the contours. This is done with the same brush as the first time and applying the same generous amount of paint. You must be sure that the contours are painted evenly and have no flaws. The black paint should dry within three hours.
Step 4. This stage is to preserve the created stained glass window and protect it from damage. To do this, apply up to four layers of nitro varnish to the entire surface of the stained glass. It can be applied with a brush, but it is best to use a special sprayer. Please note that at least ten minutes should pass between sprays to allow the layers to dry better. Thanks to the measures taken, the stained glass window you created yourself will delight your eye for at least the next ten years. Its production is completed by installing the glass in a specially prepared frame.
Beautiful stained glass window in the interior
Paper decorations
Another greeting from childhood. True, before you had to improvise, but now there are ready-made templates - there are a lot of them on the Internet. Just print, cut and paste.
The New Year theme offers snowmen, Christmas tree balls, symbols of the year, Santa Clauses and Snow Maidens, angels and bells, Christmas trees, deer, houses in snowdrifts... In general, there is so much to choose from!
From this set you can easily create your own unique composition. But you don’t have to be original - traditional snowflakes made of matte paper look wonderful on the window.
Note: the glass should be wiped dry, otherwise the pasted paper will not stick. And don’t use glue, it’s better to use a thick soap solution or sugar syrup, they wash off the windows faster!
History of the use of stained glass windows
The technical capabilities of modern design make it possible to realize almost any customer desire, including special color filling of the interior space. For designers, stained glass windows represent a chance to realize fantasies that favorably focus attention on the necessary details or properties of the premises.
Design using stained glass will make the room expressive and unique, thanks to the special effect of light. Stained glass sets accents and brings harmony to the interior. Decorative design can have not only aesthetic value, but also provide additional functionality. One such example is the creation of a decorative screen from stained glass, which allows you to hide everything that happens inside the house from strangers.
The original combination of colored stained glass was known in ancient times. People who used multi-colored glass noticed a special shimmer when the sun's rays passed through it.
Impressed by the amazing effect of light, the ancient masters began to create true masterpieces in the field of mosaic art. Multi-colored glass, when skillfully combined, made it possible to create truly highly artistic samples. Stained glass windows became widespread in later times - they were used in the construction of palaces, religious buildings, public buildings, etc.
Stained glass windows made of multi-colored glass contained impressive paintings with scenes from the Bible. Stained glass windows were installed in doorways, contributing to a spectacular transformation of the interior and internal space. Since then, mosaic art has not lost its relevance, improving in the technique of execution and the complexity of decorative characteristics.
Blitz survey: What shape are bay windows? They are closer to the form: From the previous article you can learn more about bay windows + photos
PVA and hot glue
This is a way to create amazing “ice” pictures that during the day do not interfere with seeing what is happening outside the window, and in the evening they flicker beautifully, illuminated by street lights.
To make snowflakes you need PVA glue in a soft plastic bottle with a dispenser, transparent files and stencil drawings on A4 paper.
For silhouette pictures, you will also need a brush - it will help to evenly distribute the glue over the stencil. Then everything is simple: insert the sheet with the template into a file, place it on a flat surface and apply glue on it, following the outline of the drawing.
When the glue becomes completely transparent, it is dry. Then we separate our sticker from the file (it can be removed very easily), apply it to the window and press it a little. The adhesive patterns are embossed, elastic, adhere to the glass by themselves, and are easily removed and glued back. Essentially, they are reusable.
Note: if you have a glue gun, snowflakes and silhouette drawings can be made with hot glue. By the way, it comes in transparent, milky matte, gold, silver, solid colored and colored with glitter - all types of glue sticks are easy to find, they are on sale.
And to make a colored or sparkling picture from PVA, you need to mix a little water-soluble paint or, accordingly, small glitter into the glue before drawing. You can do both together. But don't overdo it, or your sticker will lose its elasticity and transparency.
Making painted stained glass at home
The first step is to decide on the dimensions of the glass blank and select the desired pattern for it. When choosing a picture for a stained glass window, you can use several methods.
- If you have certain creative inclinations and imagination, draw it yourself.
- Find a suitable picture on the Internet and print it on A4 sheets, using any program capable of printing in multi-page mode. After this, all you have to do is glue together, using tape, a full-size sketch of the future stained glass window from many sheets.
DIY painted stained glass is a pleasant addition to your interior
Stained glass window for a children's room
In the selected or drawn picture, you must pay close attention to ensure that all fragments are clearly drawn and separated by continuous lines.
Next we proceed to preparing the glass.
Step 1. First of all, thoroughly degrease it (a solution of alcohol or ammonia is suitable for this) and wipe it dry so that the surface is not only free of traces of grease, but also completely dry.
Step 2. We lay the glass evenly and accurately on the prepared sketch of the future stained glass window, made on a sheet of paper.
Step 3. Using special stained glass paint, carefully trace on the glass the contours of all the elements of the sketch located underneath it. Most often in this case, black paint is used, since it gives clarity to the resulting picture and also clearly expresses the boundaries of all fragments.
Stained glass paints
Drawing contours
Step 4. After drawing the lines, let the paint dry thoroughly. Otherwise, all the work done may go down the drain if you then accidentally catch a line that has not dried and smudge it. When making stained glass, you cannot rush; you must understand that this is painstaking and lengthy work.
Step 5 . This stage of creating a painted stained glass window is the most creative and represents the process of painting glass, broken by lines previously applied with black paint into separate fragments. Despite the apparent simplicity of this process, maximum care must be taken here. To complete the job, you will need thin brushes with which you will apply paint to the mosaic pieces. Thanks to the previously applied and already dried contour lines, the colored paint will not spread and will remain within the boundaries of the designated area in the overall stained glass pattern.
Filling the contours with paint
While you are carried away by the technical side of the process, you should not forget about its creative component. The colors of paints for filling stained glass pieces must be selected as follows:
- they must be in harmony with each other, creating a feeling of a single picture;
- try to use bright and pure colors;
- It is advisable to apply lighter or darker shades after the paints of the primary colors have dried. In this case, you will be able to increase the picturesqueness of the work, avoiding the appearance of dirt as a result of mixing colors that are not separated by lines;
- The final stained glass window should look harmonious with the surrounding interior.
Ready stained glass
This stained glass window will be the main advantage of the kitchen or dining room
Stained glass "Flowers", made with stained glass paints
Ready-made stickers
You can decorate glass not only with stained glass pictures, figures made of paper and glue, or drawings with toothpaste.
If you don’t have time, and the New Year’s window as a result is more important to you than the process of creating it, ready-made self-adhesive stickers are at your service.
Their variety will not let you get bored: white, colored, plain transparent, matte with glitter and mirror, paper and vinyl.
Simply remove the sticker from the mounting backing, place it on the glass and smooth it out. That's it - the drawing is ready!
conclusions
A house with panoramic windows looks beautiful and modern, attracting the eyes of surrounding people. Before starting the design process, it is worth considering all the main points. This way, you will furnish your home with the best comfort that will serve you for a long time.
Beer and magnesia
An exotic, but very effective way to decorate windows for the holiday. It is for those who, when hearing the words “New Year,” see a winter forest, snowdrifts and a house with windows in frosty patterns.
Such patterns, very similar to natural ones, are obtained from a mixture of beer and magnesia. The solution is easy to prepare: for 100 grams of light beer you need 50 g of powder. You can apply it in one to three layers in two ways: using a spray or a sponge, brush, cotton swab - whichever is more convenient for you.
To ensure a reliable ice pattern, it is better to select the “fine fog” mode on the spray bottle. And using the second option, improvise - depict curls, lines, feathers, snowflakes. As the liquid evaporates, a crystalline pattern gradually appears on the glass. You can speed up the process by drying the window with a hair dryer.
Note: the smell of beer in the apartment, of course, remains for some time, although it quickly dissipates. For those who cannot tolerate it at all, we offer another solution: 100 g of boiled water, a tablespoon of diluted gelatin and 50 g of magnesia.
To create ice patterns, you can also use a photo fixative solution: 40 g of fixative per 100 g of water. The process is similar. The only difference is that the fallen crystals quickly turn white and become opaque. As a result, the window ends up with a pattern that is silky to the touch, similar to dense frost.
Frosty designs adhere well to glass, do not crumble when touched and are easily washed off with water.
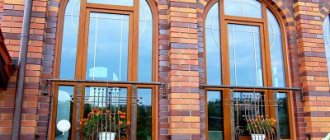
Where are panoramic double-glazed windows used?
Large private houses and cottages are decorated with panoramic windows. This implementation looks especially good in forests and spacious clearings. Panoramic window systems are used to decorate the facades of hotels, large office and shopping centers. They are also used in hospitals where patients need to receive a lot of direct sunlight. This glazing method can be found on the facades of many conference centers and avant-garde art buildings. It is actively used in countries with a small number of sunny days per year. This is why panoramic glazing is so popular in the Scandinavian region, in particular in Finland. Another traditional use is in the penthouses of luxury apartment buildings, especially high-rise ones. And in general, any premises on the upper floors of buildings of public importance.
Other places where panoramic windows can be used:
- winter gardens;
- greenhouses;
- terraces;
- open walls of swimming pools;
- halls and halls;
- large bay windows.
Composition
In a room with several windows, real compositions from stained glass windows look great. Several stained glass windows can be connected by a single plot, characters or the same ornament.
However, for the creation to become truly original, it is better for owners to consult with the designer. A specialist will help you choose motives and turn them into reality.