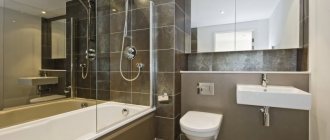
The appearance of open communications in a bathroom, as a rule, is not attractive and does not fit into the interior. Therefore, they try to hide all this pipework in every possible way, some of which will be discussed below. The features of technical solutions and options for implementing the most accessible and interesting ideas will be described in detail. The material is supplemented with a large number of photos and videos on how to close the pipes in the toilet.
Option to hide bathroom communications “in the closet” Source mebel-expert.info
Deciding on the necessary material
A feature of any bathroom will be the presence of a specific microclimate. Therefore, before hiding the riser in the toilet, you should decide on the appropriate material.
The main selection criteria will be:
- moisture resistance indicators, because Many toilets are characterized by the presence of constant condensation, which must be dealt with, starting with the choice of materials (moisture constantly settles on surfaces, which leads to some of them getting wet, causing fungus and mold);
- indicators of the strength of materials and the reliability of structural elements (the product will be constantly used to take readings from the meter or to access water shut-off valves);
- visual appeal (for most owners, aesthetics is very important, so that the back wall of the toilet is in harmony with the overall style of the restroom).
The offers of the modern construction market are replete with a choice of various finishing materials and design solutions to hide pipes in the toilet. The main thing is that the materials meet the above criteria, as well as the compact design and ease of installation.
Access to the pipes is minimal, but aesthetically very attractive Source remont-book.com
The most common ones, i.e. structures made of plasterboard, moisture-resistant plywood, plastic panels, MDF, tiles or roller shutters are considered to meet the requirements.
The amount of materials needed is determined after drawing up a scaled plan of the toilet, drawing all communications on it and identifying all possible options for hiding them. This is the only way to understand which material choice will be as organic and economical as possible for the interior space of a rather small room.
Before sewing up the pipes in the toilet, it is important not to forget that there must be an opening that will allow easy access to them. The dimensions of this opening must allow for maintenance work on plumbing equipment.
It should also be taken into account that, if necessary or in the event of an emergency, the structure must be quickly disassembled so that pipe products can be replaced.
Purpose of the water heater
Among traditional, modern energy carriers for the conditions of the Russian Federation, there is no worthy alternative to natural gas in centralized supply systems. This guide discusses the installation of an electric water heater, which heats water exclusively when the hot water supply is turned off or gas lines are prevented in apartments with water heaters using this type of fuel.
That is, the water heater is an additional source of boiling water for baths, faucets, and showers. And the owner wants to hide the boiler in the bathroom or other rooms of the apartment to increase the decorative value of the interiors. In this case, the heater can be used for one plumbing fixture or supply hot water to all faucets in the house.
The importance of closing toilet pipes
The typical structure is characterized by ease of pipe routing - they are located at the far end of the bathroom (the sewer riser runs parallel to the water supply). Those. These pipes, together with the branches extending from them, must be masked.
Covering pipes with plasterboard in the lower part of the room Source remont-grandnn.ru
The main problem is how to hide the riser in the toilet along with the metering devices so that there is free and constant access to the latter.
Sewing with a regular box “tightly” is not suitable, so it is necessary to provide for the presence of partitions, screens, doors, etc.
Own housing (private house) makes it possible to take care of this problem even at the design stage. It is enough to lay the pipes in the walls and leave the required number of technical hatches to provide access to the main components, and bring the metering devices to special rooms. Multi-storey buildings are not ready for such actions - the walls are not thick enough, and it is quite problematic to obtain permission for such work.
Therefore, for apartments, a real salvation is the sewing and external decoration of the far wall of the bathroom. This could be in the form of a beautiful plumbing cabinet, or under plastic and plasterboard. Read more about sewing options below.
Beautiful closing of pipes using roller shutters Source kakpostroit.su
Hidden installation - gating
In addition to decorative cladding options for masking pipes, there is also an “internal” option - installing toilet wiring in specially punched grooves. Using a wall chaser, a hammer drill or a door, special grooves are cut out in places where pipes are laid, where water supply and sewer branches are hidden.
The sewer riser has a large diameter (100-110 mm), so it is not sewn into the walls, but cold water and hot water pipes easily fit into the grooves
For hidden installations, preference is given to straight pipeline sections with permanent or semi-detachable connections and assemblies. “Invisible” installation has two main advantages: the absence of plumbing parts, the appearance of which does not correspond well to the beautiful wall cladding, and space saving.
There are a number of rules prescribed in regulatory documents that sharply limit the use of gating:
- it is impossible to lay grooves in load-bearing walls;
- For hidden installation, only pipes connected using one-piece, monolithic technology (soldered) are suitable; access to other types is required;
- the gating area must be free from electrical networks;
- when choosing the width of the groove, you need to take into account the linear expansion of the material (for example, polypropylene expands in all directions);
- clamps are used for installation so that the pipes do not make sounds when they come into contact with the walls; sometimes heat-insulating material is used.
Experienced plumbers recommend storing a hidden wiring diagram, as it may be useful during major or emergency repairs. Before sewing up and walling up the pipes in the toilet, we recommend drawing up a detailed drawing.
Methods for closing a drainage system
Before closing the riser in the toilet, it is important to understand that the choice is significantly influenced by the direction and dimensions of the pipes, their location, and installed metering devices. The character of the bathroom interior is also important. But the main thing, of course, is the preferences of the homeowner. The most common and accessible methods for ordinary people are discussed in more detail.
Plasterboard product
A fairly common way to hide pipes is to create a plasterboard box. Its popularity lies in the flexibility of the technology, which allows you to hide almost any communications configuration. Also a huge plus is the large number of final finishing options - tiles, putty, painting, wallpaper, etc.
Depending on the passage of the pipes, the plasterboard box can have a vertical or horizontal orientation.
See also: Catalog of companies that specialize in finishing materials and related work
Specifics
Having decided to worry about how to sew up pipes in a toilet with plasterboard, it is important to take into account a number of nuances.
The process of sewing pipes into a plasterboard box Source stroyfora.ru
Availability of key components (meters, ceiling valves, filters, etc.) is a prerequisite. The importance of this is understood when there is an urgent need to shut off the water supply. This condition is achieved in several ways:
- creating a folding or rotating panel that ensures this accessibility;
- the panel can be mounted using a removable principle (using magnets or self-tapping screws);
- It is possible to install an invisible hatch (plastic surface made to resemble tiles).
Sometimes the structure is mounted in a non-demountable manner. But at the same time, you need to be prepared that the occurrence of unforeseen problems with the water supply or sewerage may require the destruction of the structure, and to restore the functionality of the pipes, it will be necessary to restore the ceiling.
If a niche in the toilet is finished with tiles, it is recommended to use special glue rather than cement mortar. This will make the process of using the lid much easier.
Exterior view of the back wall of the bathroom, covered with plasterboard and tiled Source vestnikao.ru
Sequence of arrangement
Before starting work, it is important to decide on the appearance of the box. It would be better if, along with the main purpose of closing the pipes, the design performed additional tasks. For example: if there is a hygienic shower in the toilet, the box that covers the pipe connections near the floor can be made higher in order to use it as a stand for various necessary small items.
The standard Khrushchev layout involves the passage of risers in the corner behind the toilet. In this case, by sewing up the entire wall, the remaining free space (behind the ceiling) can be used for shelves (closed or open type). The use of such cabinets or shelves is especially important for small apartments.
If the shape of the bathroom is elongated and narrow, then it is better to cover the pipes located at the rear wall with a blank wall.
Plastic box
The sewer can be disguised with a plastic box. This is one of the common methods of hiding.
The process includes several stages:
- Testing. Before starting work, you need to check the operation of all devices, as well as the condition of the components and connections.
- Sanitation. Antiseptics are used to combat fungi. Before closing the sewer, the wall is treated with a special agent. The toilet is a small enclosed room. The ventilation in it is poor. Therefore, the risk of fungal spores is very high.
- It is necessary to make a crate. It can be on all walls where the box will be installed, or only in those places where communications pass. The sheathing is made from a metal profile or wooden blocks.
- Box installation. Cover the desired area with plastic for a short time. Each section must be fixed strictly in its place. Small nails will suffice as fasteners. Small gaps remain in corners and joints. We hide them using liners or decorative strips.
Note! It is not advisable to cut a hatch out of plastic. It's better to buy ready-made. It will be visible, so it should have a presentable appearance. A fairly large model will provide full access to the devices located inside the box.
Video description
The process of creating a plasterboard box for pipes is shown in detail in this video:
Having decided on the appearance of how to sew up the pipes in the toilet, you need to mark the future structure on the walls and floor where the galvanized profiles for the plasterboard will be attached. Along the perimeter, it is recommended to use a load-bearing sample without bending the sides of the PN (UW) type, about 50 mm wide and 40 mm deep (these dimensions will be sufficient for such a small structure). As jumpers, it is sufficient to use a PS (CW) type rack profile with the same width and any depth.
The fastening of the jumpers, previously cut to the required size using metal scissors, is carried out with self-tapping screws. For small dimensions of the structure (up to half a meter on a side), using one self-tapping screw at the end of the jumper is sufficient. For large sizes, it is recommended to fit on a pair of screws on each edge. The usual distance between installed racks is considered to be 0.5-0.6 m, and the same for jumpers. When using doors, the mounting point is equipped with a reinforced double profile.
Profile frame for covering sewer pipes with plasterboard Source yavvannoy.ru
Connection diagrams
Clause 6.37 of SNiP 2.04.08 prohibits the installation of gas appliances in bathrooms for the following reasons:
- room volume is less than 15 m³ (6 m² with standard ceiling height);
- there is no chimney according to SNiP 2.04.05, and it is prohibited to connect a column to the ventilation hood;
- There is no window with an opening transom in the room.
Taking into account the above, electric water heaters should be used in apartments. During scheduled boiler room maintenance in the absence of hot water supply, residents will be provided with hot water from a boiler or instantaneous heater.
To install a boiler in the bathroom without violating the SP, PUE, you must perform the following sequence of actions:
- piping the water heater water system;
- connection to 220 V power supply.
Tying is done according to the following scheme:
- insertion into cold water and hot water lines after riser valves;
- a safety valve with a drain line is installed at the entrance to the boiler;
- after it a drain tap/valve is installed.
When connecting the electrical part, it is necessary to install a grounding device, an RCD or a differential circuit breaker as required by the water heater manufacturer in its data sheet.
Thus, two flexible hoses in a metal braid depart from the storage wall-mounted boiler or instantaneous water heater, a drainage tube that must be connected to the sewer system.
For power supply, there must be a 220 V socket with grounding nearby, a differential circuit breaker or an RCD device. There are two shut-off valves at the cold water inlet, and one tap at the hot water outlet. That is, hidden installation will require additional space, and the device itself cannot be removed far from the water supply and sewage system.
Details about electrical wiring and installation of electrical equipment in the bathroom are written in this article.
Video description
The process of installing a metal box for covering pipes with plastic is described in detail in this video:
As for aesthetics, it would be ideal to decorate the entire bathroom with plastic in the same style. If you don’t want to change the decoration of the entire room, then there are two ways - choose plastic panels that fit into the interior, or try a game of contrasts, supplementing your choice with several similar elements.
To cover the pipes in the toilet with plastic panels, you do not need to have deep construction knowledge. The sheathing process is quite simple.
You should also start by assembling the frame, only this time it’s made of wood. It is fastened using dowels to the surface of the walls and floor. Since the area of the structure is not large and does not require to withstand large loads, it can also be mounted on nails.
Next, the starting profiles under the plastic panels are attached to a wooden frame, with the subsequent insertion of these same panels of the appropriate length into them. They are connected according to the tenon and groove principle, leaving no gaps. Fastening the plastic to the frame is easily achieved with ordinary staples and a construction stapler.
An example of hiding pipes in a toilet behind a plastic box Source sense-life.com
To ensure free access to the pipeline for the purpose of carrying out periodic maintenance work, it is necessary to provide equipment in the wall or frame of a special door. It would be optimal to use factory-made plastic hatches - lightweight and quite stylish. Or they can be made of wood (plywood) and lined with plastic. Sometimes an option is used when several plastic elements are not firmly fixed so that they can be quickly dismantled if necessary.
Recommendation! When buying plastic panels, do not make a mistake, because... You can buy not a wall version, but a ceiling one (less durable, easily pressed through). And if the upper plane of the box is used as a shelf or stand, it is better to strengthen it with an additional layer of moisture-resistant plywood under the plastic.
Building a Plumbing Cabinet
Having a convenient cabinet mounted on the wall behind the toilet is also one of the solutions to the problem of how to hide pipes in the toilet with access to them. This is especially convenient in rooms whose size allows for the installation of a high-quality structure that helps in storing various small items.
External placement of communications
Is masking of pipes always required? They are left in sight in the only case: if they are visually attractive and themselves carry some kind of aesthetic meaning. For example, copper pipes, along with plumbing fixtures made of a similar material, are often a decorative element.
External pipelines made of copper (less often - steel or cast iron) decorate the interiors of bathrooms decorated in modern industrial styles - loft, techno, hi-tech
Installation of an external pipeline, as well as repairs, does not cause difficulties. All parts and connections are visible, so they can be easily replaced or strengthened if necessary. As parts of the decor, they require constant care.
The big disadvantage of metal external pipelines is their high cost. Another inconvenience is the risk of getting burned from a hot pipe.
Briefly about the main thing
When the problem arises of how to hide a sewer pipe in a toilet, many people panic in anticipation of large financial expenses. However, there are many ways to do this, some of which require minimal investment. The main thing is to carefully examine the room and decide on the choice of the optimal material and lining option.
You should also take into account the frequency of preventive maintenance on pipes and, as a result, ensure sufficiently free access to them, i.e. equip a door, curtain or opening. The final decision on choosing a method for hiding bathroom pipes remains with the owner and depends entirely on his preferences.
Partition position
This question is quite important. Where should the false wall be located - behind the toilet cistern or in front of it? It depends on the toilet model. For the “compact” design, in which the cistern is mounted directly on the toilet bowl, there is only one option - the wall is mounted behind the cistern. If you use a wall-hung model with the tank located on a special installation, you can safely install a partition immediately behind the back wall of the toilet. The installation in many cases becomes the basis for installing such a partition and always has a sufficient distance from the racks to the edge of the toilet so that decorative panels can be mounted.
Below is a diagram of the placement of the wall between the wall-hung toilet and the installation.
Price issue
Here are the approximate prices for the main materials for the box:
- sheet of drywall: about 70 rub. per sq. m;
- PVC panels: RUB 120/sq. m;
- metal profile for installation of gypsum boards: guide (3 m) – 52 rubles, rack-mount (3 m) – 68 rubles;
- putty: about 50 rubles/kg (per 1 sq. m of gypsum board surface usually requires 1.3 kg).
Materials for a plasterboard partition with dimensions of 1.5x2.5 m will cost 1,300 rubles.
If you hire a master, you will have to pay an additional 416 rubles. (125 rubles per sq. m).
The task of re-arranging pipes in the bathroom is quite troublesome, but such work can be done independently. Laying out pipes in the bathroom with your own hands - a detailed description of the stages of work.
We will look at which filter for water purification is better to choose in this material.
How to put corrugation on a toilet?
The installation process is simple if you follow the step-by-step instructions. Installation and replacement of the toilet bowl corrugation is carried out in the following order:
- Clean the toilet pipe, cover it with sealant and put the end of the corrugation with internal membranes on it. You need to make sure that everything is even and symmetrical.
- Give it time to dry.
- The edge of the toilet corrugation, which has external sealing rings, is connected to the pipe leading to the riser. It is important to insert it all the way. As with the other part, preliminary cleaning of debris and rust is carried out. For more reliable fixation, a sealant is additionally used.
- Leave for a while to dry completely.
- The installation of the corrugation on the toilet is completed by checking the quality of sealing of the joints. This is done by pouring a bucket of water into the toilet.
Why is the toilet bowl dripping?
Sometimes situations arise when all the work was carried out at a high level, but problems with leakage are still present. The reasons why the toilet bowl drips may be as follows:
- The product is of questionable quality and does not adhere well to the pipe, forming unwanted folds.
- The skirt at the cuff is not straight, but cone-shaped. This is a problem that can only be corrected by replacing the corrugation.
The toilet bowl is leaking - what to do?
When plumbing malfunctions, it becomes the source of a large number of problems. To prevent the smell of sewage that leaks from being absorbed into the floor surface, you need to know what to do if the toilet bowl leaks. Before starting repairs, an inspection is carried out to identify the problem and only then a decision is made on how to correct the situation. The causes of leakage may be the following situations:
- pipe rupture;
- poor sealing of joints.
The corrugation for the toilet bowl is repaired according to the following scheme:
- The crack is dried and covered with a rubber patch. To do this, use only waterproof glue.
- You can soak a bandage in a cement mixture and wrap it around the pipe.
- The loose fabric is treated with sanitary silicone and placed on the toilet outlet.
How to disconnect the corrugation from the toilet?
Despite the durability of the product stated by the manufacturers, there are cases when the corrugation for the toilet flush requires removal. There are different ways to remove it:
- Maximum stretched
. Remove it from the toilet pipe, and then from the sewer pipe. This sequence helps to easily remove remaining water. - Corner location
. Use the arc rule. Disconnection is carried out as in the previous method. - Maximum contracted state
. In this case, you will need to remove the toilet initially. Then the corrugation is disconnected, as in the previous versions.
How to clean the corrugation of a toilet bowl?
There are situations when the sewer becomes clogged, which is especially true for old buildings. Clogs form due to the accumulation of hair, dirt, grease, or insoluble detergents. Flexible and rigid toilet corrugation is cleaned in the following ways:
- Plunger
. It is installed as close as possible to the drain and pressed several times. A plunger can easily remove a small blockage. - A folk remedy is a mixture of soda and vinegar
. Proportion 1:1. Pour in the dry ingredient, then pour it in and give it a few minutes to react. Finally, use a plunger. - Chemicals for cleaning drains
. The product is poured inside, as described in the instructions on the package. The process takes up to 5 hours. - The resulting fossils are removed using a metal cable
. It is placed in a pipe and begins to rotate, moving deeper. - Remove the corrugation
. Shut off the water, place a deep container under the pipe, remove everything and clean it mechanically.
What is a toilet corrugation?
This name refers to a special type of pipe that acts as a transition element in the sewer system. The corrugation for connecting the toilet is made of polymer material, which simplifies installation. Its weight is light, which allows you to install it yourself and alone. To understand the popularity of a product, you need to know its advantages:
- Low cost compared to other plumbing parts.
- Easy to install, no professional skills or tools required.
- Installation speed – operation can be carried out almost immediately.
- Practicality due to the flexibility of the body.
- The versatility of the design allows it to be used in different device models.
- Reliability thanks to rubber seals.
The corrugation for the toilet also has negative aspects of the product:
- Low mechanical strength due to the design.
- Possibility of clogging if the product is not used correctly.
What does a toilet corrugation look like?
This name refers to a bend made of plastic and distinguished by its flexibility. In addition, an important indicator is the ability to stretch. They use products for installing various plumbing fixtures, selecting the appropriate pipe diameter. You need to know what parts the toilet corrugation consists of. A simple design includes several parts:
- cuff;
- corrugated pipe;
- seals.
How to seal a toilet bowl?
To get rid of voids, a silicone compound is used. This is done at the installation stage, the sealant is distributed in a thin strip over the seam, and then smeared over the surface. Installing the corrugation on the toilet with your own hands allows you to use the plumbing after just a few hours. When using quality products during the installation phase, reapplying sealant is more of a precaution than a mandatory process.
Sealant for toilet bowl corrugation
Among the range offered on the market, the following types are used for installing corrugations on a toilet:
- Silicone
. The most popular option, which has high resistance to humidity and temperature changes. It can be used for both external and internal application. For example, Ravak Professional and Ceresit Sanitary CS 15. - Polyurethane
. Elastic adhesive composition, characterized by strength, durability and wear resistance. Due to toxicity, it is recommended for outdoor use only. For example, Molder PU and PU 39 Bostik.
When figuring out how to lubricate the corrugation between the toilet and the pipe, we note that professionals recommend using silicone sealant. Popularity was achieved due to the following advantages of the composition:
- resistance to UV rays;
- suitability for working with all materials;
- resistance to temperature changes;
- creating protection against the appearance of fungus;
- high strength;
- resistance to household chemicals;
- environmental cleanliness.
Install roller shutters
On the box that hides the pipes, you need to make a hole to repair them. To close it, they install plastic roller shutters. If they are the entire length of the wall, from floor to ceiling, the box does not need to be installed.
Photo:
How to shorten the corrugation for a toilet bowl?
If there is no need, then it is better not to violate the integrity of the product, because leaks may occur due to future load. However, sometimes situations arise when this cannot be avoided. Straight and corner corrugation for a toilet bowl is shortened as follows:
- carefully cut off the accordion from the pipe;
- remove excess length;
- the end is installed back, running sealant along the seam;
- give time to dry;
- check the quality of joints.
Flow or storage heater
An electric water device should be selected according to its characteristics:
| Characteristic | Water heater type | |
| Cumulative | Flow-through | |
| Electric power | from 1.5 kW | from 3 kW |
| Dimensions | large | small |
| Price | high | low |
| Hot water volume | 200 l/4 hours | 200 l/h |
| Operating mode | long | intermittent |
| Service | permanent | not required |
| Water pressure | low | high |
In 85% of cases, apartment owners in the Russian Federation choose a storage boiler:
- 30 l – for one user;
- 70 l – married couple;
- 150 l – for all water intake points;
- 210 l – large family, boiler for kitchen and bathroom.
There are storage heaters of the following types:
- wall;
- floor;
- vertical;
- horizontal;
- flat;
- short, large diameter;
- narrow elongated;
- pressure;
- atmospheric.
For spare hot water supply lines, used only at the time of shutdown of the central hot water supply or maintenance of the gas pipeline of the dispenser, only direct-acting heaters with electric heating elements are used. Indirect heating devices with heat exchangers are not suitable for these purposes.
