How to seal or close a joint
Regardless of what type of ceiling is installed in the apartment - suspended, plasterboard, covered with tiles or wallpaper, or simply painted, to make it look complete, it is necessary to complete the final touch - to decorate the joint.
The gap where the ceiling meets the wall looks untidy, and the structure itself looks unfinished. Therefore, it is necessary to choose a way to decorate this area so that it does not stand out from the overall composition.
Everything about installing and repairing ceilings with your own hands
Regardless of what type of ceiling is installed in the apartment - suspended, plasterboard, covered with tiles or wallpaper, or simply painted, to make it look complete, it is necessary to complete the final touch - to decorate the joint.
The gap where the ceiling meets the wall looks untidy, and the structure itself looks unfinished. Therefore, it is necessary to choose a way to decorate this area so that it does not stand out from the overall composition.
Types of mirror tiles
This type of tile can be made of plastic, metal, glass. Glass tiles vary in color, shape, purpose, and even surfaces, which can be matte, glossy or polished.
Joint design methods
Having perfectly smooth surfaces of the walls and ceiling, additional design of the joint may not be required unless the style of the room requires it, when molding is simply necessary to maintain a special atmosphere. If not, then the joint looks natural and smooth, forming a clear right angle without gaps.
Sometimes, with a perfectly even joining seam, in order to create an optical illusion and “raise” the ceiling, the upper part of the wall is painted.
If there are even small gaps, the use of special masking devices will be required at the joint. The instructions for use usually consist of simple manipulations and do not require special skills and tools, so this work can be easily done with your own hands.
Masking tape for stretch ceilings
The joint between the wall and the ceiling made of tension fabric is masked using a PVC plug in the form of a special profile or insert (read more here). The junction of several levels and the junction of the structure with the wall acquire a finished, neat appearance.
To do this, you will need to place a plug in the baguette slot, where during the installation of the canvas a harpoon or profile is inserted and fixed. When flooded from above, such an insert can be easily removed, the canvas is dismantled and the water is drained, and then the product is installed in place.
There are several types of plugs for suspended ceilings:
A wide decorative border is used to contrast colors, creating a clear, noticeable boundary between the ceiling and walls.
Black or white inserts are usually used. White canvas is the most common due to the fact that its price is lower, and the universal white color allows you to visually increase the height of the room.
Using a white edging, the gap between the light-colored canvas and the same wall is masked. And with the help of black, the border between two planes will be emphasized. You can choose a colored plug to match the ceiling or wall.
Important! If the walls have a pronounced curvature, it is recommended to abandon colored inserts, as they emphasize the geometry of the planes.
Due to the fact that during the production of PVC tapes they are placed in reels of 100 meters or more, you can purchase products of the required length in the store.
Fabric cord
Using a thick twisted fabric cord is an alternative solution when the question arises of how to create a gap between the tension fabric and the wall. The product is pressed into the baguette slot.
With this decorative element you can emphasize the transition between the ceiling and the wall, drawing attention to the structure thanks to the expressive appearance of the cord. It looks especially impressive in combination with satin and fabric fabrics.
Important! It is necessary to ensure tight contact of the cord with the wall and the edge of the stretch ceiling. If necessary, it can be “seated” on the sealant, but this will create difficulties if you need to temporarily remove the product.
One of the advantages of the edging cord is its flexibility, which allows you to design curved elements of the hanging structure. A wide selection of colors and textures allows you to choose a design for any interior. Such a cord will look especially organic against the background of fabric wallpaper.
Fabric cords can be plain or multi-colored, consisting of several shades with embossed braiding. They may have metal threads or rubber veins as decorative inserts.
You can choose products with a pattern of the desired theme. For a rich classic interior, you can use lurex cords - imitation of silver or gold threads.
Masking tape
As a rule, the joint between a stretch ceiling and a wall is covered with masking tape, since this is the most universal and fastest way to seal the technological gap. Manufacturers do not use a single name for this product; it is called differently: decorative plug, ceiling insert, edging tape, wall corner, elastic for stretch ceiling, etc. In all cases, we are talking about the same thing - a long product made of PVC for masking cracks in the area where the wall adjoins the tension fabric.
The tape is made of plastic of varying degrees of hardness and elasticity, and is also available in a wide color palette. The most popular are standard white inserts, since they are the cheapest and most versatile, but bright multi-colored plugs with a matte or glossy surface are also sold. Additionally, you can make custom tape and paint it in any color. Thanks to this, it is easy to choose the edging to match the stretch ceiling, even if it is of an unusual shade.
Tapes vary in shape and purpose. Some are used to disguise the connection between the ceiling and the wall, others are used when joining materials. For example, for sealing the transition between levels in two-tier structures or when combining textures using a dividing baguette.
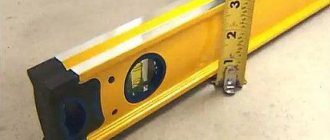
According to their shape, camouflage tapes are divided into several types: T-shaped, L (corner), F, SL, R. Each has its own characteristics and is better suited for a specific situation. For example, if the surface is curved, it is worth choosing a wide SL plug to hide uneven walls, since the T-shaped insert is narrower and gaps may remain. Depending on the shape, the appearance of the tape on the ceiling also differs.
Advantages of this type of disguise:
The disadvantages include:
The average cost of 1 meter of white tape is 10-30 rubles. If you use color, it will be more expensive - about 20-50 rubles. (the price still depends quite a lot on the manufacturer). If made to order, it will cost about 130-150 rubles.
Installation is very simple. Installation does not require glue or special tools; the tape is inserted into the gap, pressed with your fingers and fixed in it due to the design of the baguette. In the corners, the plug is cut with a knife and joined at 90 degrees.
Note! Sometimes craftsmen use a spatula to speed up the process, but if there is no experience, you should not use any tools during work so as not to damage the ceiling and the plug itself.
Ceiling molding
You can give a finished look to the ceiling - suspended, made of plasterboard or simple, painted white - with the help of moldings, which have long become familiar. They can have different widths, materials, colors and textures.
A wide range of ceiling decor products offered by manufacturers allows you to select elements for decoration in any interior.
The term “molding” refers to various elements of stucco molding for decorating the ceiling and walls. For the overlay profile that decorates the joint, the name “ceiling molding”, “plinth” or “border” is used.
The material used to manufacture such products can be:
Wood moldings
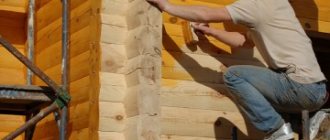
With the help of wooden moldings you can give the room respectability. This finish is appropriate in classic interiors, as well as where wooden suspended or false ceilings are installed.
The price of such products depends on the type of wood that was used to make them. For mid-price segment skirting boards, spruce, poplar or alder are used. Expensive items include products made from oak, yew or mahogany.
The advantages of wooden skirting boards include the following:
Important! It takes special skills to install wood molding correctly.
Foam molding
Foam molding is the most budget-friendly option for decorating the joint between the wall and the ceiling. These products are easy to use, they weigh little and are easy to cut with ordinary scissors. But you should be careful not to accidentally damage the foam border, as it is quite fragile.
The disadvantage of this material, like the wood discussed above, is flammability.
Polystyrene molding
Polystyrene plinth for the ceiling is made by extrusion. Such products are distinguished by a clear relief and have a smooth matte surface. Such products are harder and more durable than their foam counterparts.
One of the positive qualities of this material is its affordable cost.
The advantages of this material are that it does not contribute to the maintenance and spread of fire. Polystyrene is also easy to work with, it is easy to cut, but it is more resistant to mechanical stress.
Polyurethane molding
Polyurethane plinth is practical to use, it can be painted, and due to the presence of rubber in its composition, this material can bend without losing its integrity, which allows it to be used to design semicircular structures.
Such borders can have a smooth, even surface or patterned, with a clear pattern and maximum detailing of small elements.
Among the positive qualities of the material, the following can be noted:
Plaster molding
Gypsum moldings, which are also used to decorate the ceiling where it meets the wall, can be considered an exclusive type of finishing.
how to cover up small imperfections on a wall
Not only because all the parts are made by hand and have a high cost, but also due to some unique properties of gypsum:
Gypsum stucco molding can be painted, patinated, acquiring an aged appearance, and it can be coated with gold.
The video in this article will tell you how to design the joint between the ceiling and the wall.
Source
Repair technology
Carrying out secondary sealing, as a repair seal, is advisable in the event of negative factors occurring, or the expiration of the primary seal.
If deep cleaning or complete destruction of the interpanel space is necessary, the seams are opened and thoroughly cleaned of dirt and old substances.
In some cases, they are even washed with clean water and then dried with a heat gun.
Then the surface is treated with special antiseptic solutions, primed twice, dried, any selected tape insulation is laid, and the sealant is poured in the same way as during the initial sealing. Here you need to use only high-quality material, so that after a year, at the same cost, you do not have to redo the work again.
It is advisable to carry out any work with external seams in dry, warm weather, despite the fact that a large amount of polyurethane foam has appeared on the market, which can be used for frosts down to –10 C°. In the process of forming seams, it is necessary to strictly adhere to technological standards and sequence.
Full information about seam repairs is here.
How to close the joint between the suspended ceiling and the wall: plastic plinth or decorative molding?
Any suspended ceiling, and suspended ceilings are no exception, after installation is completed, needs decorative finishing around the perimeter. There is a gap where the ceiling meets the wall. Different suspended structures have their own preferred options for how to close this gap and give the structure a complete look. A stretch ceiling is a universal system, since it can use both a special plinth and a traditional decorative profile for any ceiling.
Therefore, there are two options for how to design the joint between the ceiling and the wall: use a special plinth (quick installation) or spend time and effort creating an exquisite finish.
Selection and installation of ceiling plinths
From the Soviet period of construction, we inherited a number of buildings where the joint between the ceiling and the wall was simply rounded so as not to install any decorative device there (see How to saw down a ceiling plinth correctly and in the best way - a description of the process). Well, in the years when the solution to the housing issue was one of the most pressing issues - such a design of the premises was quite acceptable and understandable - it was necessary to build quickly and cheaply. The question of decorating a joint looks completely different nowadays, when decorative details may turn out to be cheaper than fussing with rounding .
How to choose a ceiling plinth
Foam ceiling plinth
Polyurethane plinth is easy to bend without any deformation or cracks
Gypsum ceiling plinths
Oak ceiling plinth
Installation of ceiling plinth
The cut should be smooth so that there are as few gaps as possible
Painting a pattern on the ceiling plinth
Advice. Not every room has an outer or inner corner that matches the miter box stencil, so marking the ceiling plinth can be done manually. The profile is applied to the place and a line is drawn along the ceiling before turning and the same is done on the other side .
Now, when we install the baseboard, it is crossed by a line running at an angle . The point at the intersection and the point at the bottom extreme corner will be a guide for the cutting line. You need to cut towards the wrong corner of the profile - the joint will be smooth and without gaps.
Using stubs
A special plinth for installation on a suspended ceiling is a practical option. It will hide the gap between the two surfaces, but the frame itself will not stand out. This option is characterized by simplicity and laconic finishing. Externally, the ceiling will simply fit snugly against the wall.
Plastic corner
Important! If the customer does not receive any wishes regarding the design of the perimeter, then the craftsmen themselves offer to install such a plinth on the suspended ceiling.
Variety of decorative caps
If the stretch ceiling is single-level, and it was installed in a room in an ordinary apartment, then either an F-shaped plinth or an L-shaped one is used. The latter is also called the wall corner.
In large rooms, a dividing profile with a separating plug is also used. This plinth differs from others in that it has a symmetrical profile: two locks and two shelves that cover the panel on both sides of the joint.
Connecting baguette with plug
The L-shaped plinth has one edge with hooks, which is inserted into the load-bearing profile of the trim. It is made from soft types of plastic, so it is flexible and allows you to make a joint along a curved line.
F-shaped baseboards are rigid and are installed on flat surfaces, mainly tile or drywall. Due to its rigidity, it holds a straight line well, which is important for the overall impression of neat framing.
To install such a plinth, the owner will need a few minutes. Using the fastening rib, the corner is inserted into the profile and pushed through with pressure. To do this, use a blunt spatula.
In addition to quick installation, such a plinth has a number of advantages:
An equally colorful assortment of decorative plugs is produced for a wide range of fabric and film materials. This is done not from an excess of imagination, but because it is advisable to select a plug of the same color for any canvas. The fact is that over a long span the decorative tape gives a wave, no matter how hard the master tries to even it out. A plinth of the same tone will only mark the smooth edge of the ceiling, and the wave will not be noticeable.
Variety of decorative caps
It is important to choose the right baseboard for the installed load-bearing molding. There are plugs that are used only for baguettes of the harpoon system; in others, the fastening ribs are designed for the baguette of the wedge installation technology. There is a difference between plugs for aluminum and plastic baguettes. Therefore, returning to the previous recommendation, rely on a master installer. If you have to buy masking tape yourself, then take a piece of the supporting profile with you so that you can select a suitable baseboard in the store.
Video of how the decorative plug is fixed:
The quality of wall finishing plays an important role when choosing a baguette for a suspended ceiling. If they are uneven, then it is better to abandon the standard masking tape and use a wide baseboard made of polyurethane or foam.
Laying tiles with a decorative bevel along the edge
To do this, we carefully clean the walls, eliminating all roughness, since the base for this type of tile must be smooth.
If the room where it is planned to lay such tiles is constantly humid, then before starting work the walls are treated with products with an antifungal effect.
- As soon as the soil dries, you can begin laying.
- First, we make markings that will help you navigate the size of the tiles.
- If there are regular temperature changes between the tiles, a thermal joint of about two millimeters should be left.
- It will help protect the facing material from damage.
Installation of tiles should begin from the bottom up, strictly following the markings.
Grind the seams after four hours.
Decorative baguettes
Decorative plinth is chosen by those owners for whom the stretched canvas does not yet mean the end of the work on decorating the ceiling space. In this case, the plinth not only hides the joint, but also performs an important decorative function. Although it can be installed flush against the ceiling, more often it is mounted at a lower level. A stretch ceiling looks much more impressive with lighting, and lamps are installed in this niche.
Of all the variety of forms, a smooth extruded type plinth will be a win-win. The smooth baguette harmoniously combines with the glossy surface of the film in any setting. A plinth with imitation of decorative stucco requires a balanced approach, taking into account the style of the rest of the interior.
Foam baguette
Any baguettes made of polyurethane or polystyrene are used under the tension fabric, but with some installation features. Since the plinth cannot be glued to film or fabric, it is only attached to one side to a vertical surface. Hence some nuances regarding the selection and installation of decorative moldings:
The disadvantages associated with the complexity of installation are obvious:
Important! You won't be able to remove the baseboard without damaging it. If it is necessary to dismantle the canvas, the baguette is torn off and after installing the film in place, a new one is purchased.
If desired, you can install gypsum stucco. In this case, we are talking about creating an entire cornice-type composition using elements of pilasters, curly moldings, and columns. Such decorations decorate complex multi-level structures with combined finishes.
Wooden skirting boards are installed only in rooms decorated with wood, where other materials are inappropriate.
Comparison and conclusions
For convenience, we have prepared a comparison table from which you can quickly compare the main characteristics of methods for masking a ceiling joint.
| Characteristic | Masking tape | Ceiling plinth | Decorative cord |
| Price | From 10 to 130 rubles | From 50 to 120-150 rubles | From 100 to 250 rubles |
| Versatility | Suitable for most interiors | Better suited for tall rooms | Doesn't fit well with modern design |
| Appearance | Not too original, just a variety of colors | Large selection of models, materials and shapes | Noble and expensive look, wide range of colors and weaves |
| Backlight installation | Impossible | Available on some models | Impossible |
| Care | Virtually not required | Complex only for illuminated curtain rods | Requires regular dust cleaning |
| Difficulty of installation | Very easy | Quite labor intensive, requires experience and tools | Can be installed by hand |
| Reuse | Maybe | Impossible | Depends on installation method |
Summarize. Masking tape and decorative cord are more suitable for smooth walls with slight curvature. Due to their flexibility, these materials are more convenient for finishing rooms of non-standard configuration (with bay windows, columns, etc.). And if access to the ceiling space is periodically required, then only a tape and cord will allow for repeated dismantling and reinstallation.
Ceiling plinth provides more space for implementing design ideas, but such decor is much more difficult to install, especially when it comes to non-standard layouts. If there are communications located behind the tension fabric that may require access, then it is better to abandon the fillets.
Source
Decorative braid
Recently, a new way of decorating the contour of the ceiling using decorative cord has appeared. This element will not only hide the joint between the vertical and horizontal planes, clearly separate the canvas and the vertical surface, but will also become a bright detail that requires a special style throughout the rest of the interior.
The texture of the braid can be woven or twisted. It is installed in the same way as a plastic plinth: pressed into the groove of the profile. But at the same time, you need to control the straightness of the edging, so on straight sections they use a long rule, and on curved sections they rely on eye and patience.
Decorative cord
There are the following types of decorative cord for installation in a suspended ceiling:
As a rule, the interior always contains garlands and picturesque ornaments inherent in the classic, empire, and baroque styles.
Source
The role of wallpaper tiles in surface decoration
In appearance, imitation tiles are not inferior to wallpaper. Tile manufacturers annually offer collections that contain several stylistic solutions in the form of tiles to match the wallpaper. It can be anything:
- One or more colors;
- With or without a pattern, ornament;
- With or without a picture;
- Large, medium or small;
- Glossy, matte, polished, etc.
Tiles that imitate wallpaper retain their appearance throughout the entire period of operation. The design and color do not fade or fade - all the same rich and bright shades. Tiles with a matte surface prevent glare, although the glossy version looks no less luxurious.
Defect options
Most often, owners blame both the craftsmen and the quality of the wallpaper. But if the craftsmen are professionals, and before this room they managed to glue kilometers of canvases with high quality without any comments, why did they not take into account the peculiarities of the brand of trellis when gluing. Indirect confirmation is the fact that the same problem occurs with both cheap paper and expensive non-woven wallpaper.
The answer to the question of how to make wallpaper joints invisible does not have a clear answer, since the defect itself at the joints can manifest itself in different ways:
The last point is the most unpleasant. It often happens that when buying wallpaper in a company store, you can purchase rolls from the same manufacturer, the same brand, but belonging to different batches. To sell mismatched items and make the product attractive, salons collect leftover rolls from different batches into one and sell them at a slightly reduced price.
music posters for the wall
For your information! Even within the same batch, wallpaper may differ in shades.
Many manufacturers, due to the peculiarities of the technology for applying paints to the panel, are not able to ensure ideal distribution of the toner; as a result, one edge turns out to be slightly darker and more saturated than the other. It is impossible to hide such a defect, so an icon with two vertical arrows directed in different directions is placed on the roll. This means "reverse sticker sequence". To hide uneven coloring, each subsequent roll must be turned 180° before cutting and gluing. If you do not pay attention in time to the icon hidden in the text of the marking, the discrepancy in shades at the joints can only be corrected by painting the trellises.
What are interpanel joints?
Joints in panel houses have important functions, since they simultaneously play a protective and insulating role.
The temperature in the rooms of the entire room depends on the condition of the joint. The sealed seam affects :
- no condensation in the wall cake;
- prevents the appearance of fungi and mold;
- freezing of the material, which has the most positive effect on the condition of the wall structure.
Timely sealed joints extend the life of any building . Joints are usually divided into external and internal. Primary sealing is carried out for these types immediately after laying the slabs, and refers to one of the construction stages.
Secondary (repair) sealing is carried out as necessary, years later, or when it is urgently required (earthquake, mechanical destruction, sudden atmospheric fluctuations).
The tightness of interpanel seams is important, as it protects the walls from the penetration of precipitation (snow, rain, fog), and prevents the formation of cracks, bulging and damage to the panels.
Therefore, when sealing seams, in order to achieve a high-quality result and adhere to technology, a number of regulatory documents are used, such as, for example :
High heat-shielding properties of interpanel recesses are obtained by placing sealant, mastic, or strong grade sand-cement mortar (M300, 500 and higher) into them. Almost always, a special insulation made in the form of a thin tube or bundle is placed inside the joint. This reinforcement serves as a kind of “reinforcement” for the seam, and keeps it in its original form for a long time.
The seams are either horizontal or vertical in location. In the technical literature they :
Partition in a room with a suspended ceiling
Almost all partitions that exist today can be combined in one way or another with suspended ceilings. We will tell you about the types, design features and design options taking into account the stretch ceiling.
Stationary partitions
Such structures are made from durable and popular materials:
The frame is sheathed with any of the listed materials - it is made of wood or profiles. For sound insulation, sound insulating materials are laid.
The design turns out to be durable, strong, powerful, so you can simply attach it to the floor and walls without affecting the ceiling. We will tell you below how to make such a partition after installing the ceiling.
Mobile partitions
This type of partition does not pose any problems with the ceiling at all, since they practically do not touch the ceiling surface. Mobile partitions are convenient to use to delimit space. The basis for such a structure is made of wood or metal, and a durable partition material, for example, fabric, is attached to it. Typically, such partitions are also made to solve interior problems. After all, any design can be quickly and beautifully complemented by the construction of an elegant or, on the contrary, brutal partition that matches the style of the main interior of the room.
The advantages of such partitions:
Lightweight designs
Such structures are lightweight, and therefore even have advantages over other types of partitions - both mobile and stationary. Lightweight options look very fresh, modern, and fit perfectly into the interior of almost any style. Material for their manufacture:
This is a convenient option for installing a partition over existing stretch ceilings. This partition is attached to the floor.
Such structures, despite their lightness, are quite durable; they are easy to install and quickly disassemble. In addition, the material is durable and the design is soundproof.
Semi-septa or pseudo-septa
Actually, they cannot be called partitions in the full sense of the word, because they are installed more as an object of decoration. Usually fancy, original designs of such partitions separate different areas of the room and, of course, decorate the room. They are made from plasterboard, usually designed so that the shelves and through holes remain open.
Such partitions do not clutter up the space at all; on the contrary, they sometimes lighten the interior and expand the room.
As for installation options and connection with a suspended ceiling, in each case the option is thought out separately, depending on what the structure is and the method of its fastening. A simple solution is to first install a partition, then make a stretch ceiling frame.
Pasting the ceiling
If there is a need to visually increase the space, then you can decorate the ceiling with mirror and opaque tiles. However, you need to be careful when choosing tile sizes:
- Large ones will create the impression of non-residential premises.
- Secondly, they increase the risk of splitting, and the dirt that appears on them attracts attention.
A great option would be to combine tiles with panels. The use of small tiles is excellent for decoration. It is better to use dark shades for framing.
The mirror base harmonizes well with wooden surfaces, which creates a feeling of warmth and makes the design special.
Five ways to hide joints
Correctly hiding a defect at a joint is often even more difficult than gluing wallpaper correctly. You can learn how to work with trellises from the instructions, while you have to come up with and look for ways to hide defects on your own.
You can hide joints using one of the following methods:
Advice! Before trying to hide joints with paint or tinting compound, you will need to practice in a closed area, for example, behind a closet, where the furniture is covered by wallpaper.
The easiest way to hide revealing light spots is to try to paint over them with special paint or pencil. To do this, you will need to buy a special coloring composition.
To hide the white stripe between the panels, just apply a tinting color to the seam using a brush or ear stick. Wipe off excess paint with a clean napkin.
Unfortunately, hiding the joints in such a simple way is only possible with plain wallpaper, if you can choose the composition of a suitable color.
The riskiest way to hide seam problems is to use tinting paste. To prepare it, you will need to trim the wallpaper, from which the surfaces with paint are removed with a sharp knife or sandpaper. Colored paper dust is mixed with glue and the joint is rubbed. In this way, restorers restore old books and paper products; the method is complex, so it is not always possible to hide the problem.
In particularly difficult cases, owners decide to use polyurethane decorative strips that are glued to the joints. In this way, you can hide any defects, even if the shade of the panels is different.
How to match wallpaper with tiles on a kitchen apron
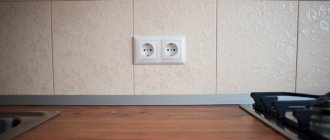
During repairs, situations may arise that are difficult for an inexperienced person to cope with without prompting. For example, if you lay tiles on a kitchen backsplash, and you have to glue wallpaper above or on the side, then the places where they join may not have a completely aesthetic appearance if you don’t know the specifics.
In this case, some people tear out the wall to create a uniform plane of tiles with wallpaper pasted. But you can use other methods to hide this unsightly area.
Decorative braid
Recently, a new way of decorating the contour of the ceiling using decorative cord has appeared. This element will not only hide the joint between the vertical and horizontal planes, clearly separate the canvas and the vertical surface, but will also become a bright detail that requires a special style throughout the rest of the interior.
The texture of the braid can be woven or twisted. It is installed in the same way as a plastic plinth: pressed into the groove of the profile. But at the same time, you need to control the straightness of the edging, so on straight sections they use a long rule, and on curved sections they rely on eye and patience.
Decorative cord
There are the following types of decorative cord for installation in a suspended ceiling:
As a rule, the interior always contains garlands and picturesque ornaments inherent in the classic, empire, and baroque styles.
Design with mirror tiles
The bathroom can be decorated with tiles, combining mirror and ceramic ones. At the same time, mirror surfaces, as noted earlier, look much more effective with dark shades.
If the bathroom has a window, then the tiles are laid on the opposite side. However, you should not get carried away with completely decorating this room with glass, as it will create the effect of a cold room.
- In order to preserve the beauty of the tiled surface for a long time, it is necessary to regularly ventilate the room and wipe it after each water procedure.
- Such tiles are ideal for masking communications in an apartment.
- The boxes, made from plasterboard sheets, are lined with mirror tiles.
- They create a wonderful backdrop for the boxes and help them become a great part of the decor.
To increase the height of the walls, use this method of installing tiles: lay them starting from the floor and so on to the ceiling.
If the room is poorly lit, then lay out a small area of mirror tiles above the chandelier. The light that hits such a surface will be reflected and spread throughout the room, making it many times brighter.
How to hide a joint contaminated with glue
Excess glue at a joint is the simplest case, but only under one condition, if you pay attention to the problem in time. If the wallpaper is glued by hired craftsmen, you will need to check the quality of the work in the first hours, while the glue is still wet.
On vinyl or non-woven wallpaper, it is enough to simply wipe the glue with a dry and clean napkin; on paper, excess adhesive material is blotted, like an ink stain, without rubbing on the canvas. After the wallpaper has dried, the joints must be checked again, since over time, glue stains tend to turn yellow and appear in the picture, after which it will be impossible to hide them.
On dark wallpaper, residual glue at the joints can be hidden using a retouching pencil. Before decorating the seams on the wallpaper in the photo, the marks are wiped off with a paper eraser.
Step-by-step instructions for laying mirror tiles
Installation of tiles should begin from the corner of the room, gradually filling the wall in rows from floor to ceiling.
- Apply the adhesive mixture to the outer layer of the wall surface. After three minutes, apply the tile to the base, pressing with your hand.
- Don't forget to use spacer crosses to eliminate gaps between other elements.
- After installation, remove any remaining adhesive with a damp cloth.
Cut items carefully using a special diamond hand tool for cutting glass surfaces. Before proceeding, make a mark on the line drawn on the surface, then press firmly to cut the material.
Wait a day after finishing the work and only then start grouting the joints using a rubber spatula. The completed coating can be washed after six hours.
The most difficult case
It is most difficult to hide joints with a gap when the edges of the panels have diverged so much that the wall is visible. To hide the unmasking seam, you need to try to move the edges and fix the canvas using proven glue. Many two-layer wallpapers react differently to moisture. Most trellises swell and become plastic when liquid glue is applied. After gluing to the wall and smoothing, the width of the canvas can increase by several millimeters, and after drying the reverse process occurs.
floor tunnel vaz 2110 lux
To hide the resulting gap, you first need to moisten the edges of the canvas using a spray bottle or spray bottle. After 10-15 minutes, the wallpaper will become soft, and you can lightly press the canvas with your hands and try to connect the edges of the panels. The seams are glued with PVA glue and rolled with a rubber roller.
If it is not possible to hide the joint in this way, for example, joints on paper wallpaper are very difficult to hide in this way, you can try to decorate the seams, as in the photo.
Colored stripes and individual fragments are suitable for decorating joints; you just need to stick them on the panel so as to hide the defect and at the same time distract attention from the problem area. Wallpapers of different patterns will help to ideally hide a frayed seam, since a brighter color always attracts the eye. Before you make a joint from different wallpapers, you need to plan an overlap transition. The glued new trellis does not even need to be cut.
Preparation for installation
Thoroughly clean the surface of old tiles, wallpaper, and remove any remaining plaster and adhesive. If there are small roughnesses and irregularities, use plaster to eliminate them.
- If in some places the unevenness differs in height, then use plasterboard sheets.
- After fixing them to the wall, the evenness of the surface is checked using a spirit level and a plumb line.
- Next, a mixture of soil is applied, and marking lines are drawn vertically.
Draw a straight line horizontally, taking into account the seams. If you intend to use glass tiles when laying them, then where the first row begins, attach a support rail and start working from this point.
Recommendations for selection
It’s not easy to choose from all the options offered. But there are tips that will make the choice easier. For example, if you need to save money, it is better to purchase foam elements.
Photo of foam baseboard
If the walls have an unusual configuration (for example, rounded), then it is better to buy polyurethane baguettes.
Photo of polyurethane skirting board
For a modern stretch ceiling, plastic skirting boards are the most suitable.
Photo of plastic plinth
When choosing a material, you need to take into account that each of them must meet several requirements. The fillets should be flexible, but at the same time durable, adhere well to the wall, harmonize with the design of the room and be lightweight.
Immediately before installing the baguettes, the plane itself and the walls need to be leveled. If you do not level, you will end up with a gap between the wall and the baseboard, which is not easy to eliminate.
In order not to stain the stretch ceiling, you need to carefully cover it with film and begin installing the baguette. Then you need to cut the baseboards to size. To ensure they lay beautifully, you should use a miter box in the corners. The edges of each individually cut baguette should be carefully cleaned. From the inside, prepared glue is applied to the baseboard (it is selected for the material used). Then the plinth is applied to the wall and pressed lightly with your hands. You can hold it for a while until the glue sets.
Installed baguettes, especially if they are made of foam, need to be painted. This can be done even before their installation. All resulting cracks are sealed with finishing putty. A correctly selected baguette for a stretch ceiling will definitely transform the room.
We attach modern “stucco”
Let's focus on fastening polyurethane fillets, since this is the most affordable and widespread material today. First, let's calculate the materials and prepare the tool. We count the length of all the walls of the room and divide by the length of one plank. The number obtained as a result of the calculation is rounded up to the nearest whole number. It is recommended to buy fillets with a small margin. Liquid nails glue or acrylic sealant are ideal for fastening. By the way, acrylic sealant will also be needed to fill the seams between the baseboard, wall and ceiling.
Required tool:
Seal ceiling cracks
It is most convenient to start installing the planks from the inner corners, moving along straight sections. Next, install the plinth in the miter box. Press the smooth surface against the side wall and file at an angle of 45 degrees for right angles. If the angle of the walls is different, the cutting angle is determined experimentally. Attention! For one corner or slope, the planks should be mirror-cut. After the stucco is ready, we begin gluing. To do this, apply glue to the side surfaces of the fillet and gently press it from the corner along the entire length. We continue to glue the planks end to end.
We continue to glue the planks end-to-end
Important! If you can’t get a perfect fit, you can use thin steel wire as connecting pins.
After all the planks are glued, we seal the seams between the ceiling, baseboard and wall with a thin layer of acrylic sealant. We remove the excess with a napkin or a “universal tool”, i.e. finger. Stucco molding has transformed your ceiling!
Stucco molding has transformed your ceiling
If you still find it difficult to decide on the choice of stucco, calculate its quantity or choose the color of the ceiling and walls, do not worry. Many manufacturers' websites have free online services for selecting materials, calculating their quantities, and selecting the color of the ceiling and walls. It all works very simply. You go to the online service. Indicate the dimensions of your room, select colors if necessary, and determine the number of decorative elements. Feel free to create, experiment with colors and materials, and your home will be filled with beauty and comfort!
Source
Fighting the edges that have risen up like a house
Not the most difficult, but quite common case when joints rise and twist, photo. Usually craftsmen in such a situation, in order to hide their imperfections, blame the quality of the wallpaper and poor glue. In fact, the problem lies precisely in the lack of professionalism of the workers. In the process of coating the cloth, experienced craftsmen apply glue to the edges twice, because the adhesive mass dries much faster along the edge of the cloth. To hide the raised joints, just apply an additional layer of adhesive under the seam line and roll the trellis with a rubber roller.
It is much more difficult to hide a defect at the joints in a situation where the seams have risen along with pieces of soil and whitewash. This means that the preparation of the wall surface was carried out extremely carelessly, and when shrinking, the wallpaper tore off the adhesive seam at the joint. In this case, you have to spend a lot of time soaking and removing the old glue from under the joint, and only then gluing and rolling the fabric. If you try to re-glue the seams as they are, the remnants of the old glue and whitewash will make the seam stand out, and under certain lighting the defect will appear in a new way.
Preliminary stages
When choosing the appropriate method, you should determine the thickness of the tile, and also calculate what the thickness of the adhesive layer underneath will be. If the walls were not previously leveled to zero, and the tiles on the kitchen apron were laid on a pre-applied layer of glue, you should allow time for it to dry completely. This should be done because during drying, the thickness of the adhesive mixture decreases.
At the next stage, grouting of the tile joints is carried out. After the specified drying time for the adhesion agent has passed, the tile should be wiped with a damp sponge, removing excess grout, as well as traces of the mixture, which usually stains the surface of the tile. The resulting dust must be brushed off the top row (end) of the tile. Then the end part is primed and time is given for the mixture to dry.
How to install a plasterboard ceiling and the technology for providing work
Jumpers are inserted across the longitudinal profiles. These are sections of the same ceiling profile, installed in increments of 60 cm. The principle is the same: all edges of each gypsum board sheet should fall in the middle of the profile. The middle of the sheet should also be secured.
The length of the lintels = 50 cm minus the width of the ceiling profile (60 mm), that is, 44 cm. It is best to install the pendants before you secure the longitudinal profiles and install the lintels. You just need to make sure that the profiles are exactly in place: they will guide you where to place the hangers. How much materials will you need? In order to have enough, but not have any surplus, you need an accurate calculation.
How to do it, read in the section “Scheme and calculations”. We will conditionally divide the installation of gypsum boards on the ceiling into five large stages. Next, each section of the article will describe these stages in full detail.
The screw head should be slightly recessed into the surface of the slab. Do this carefully: the self-tapping screw is quite easy to tighten, especially if you lack experience. In such work, a special bit for drywall with a limiter is very helpful.
The right color combination for a stylish ombre
To create a gradient on the walls, you need to choose the right shades. It is important that the colors are “friendly” with each other - only then will they shade and complement each other.
For easier selection, you can use the color wheel. It is not necessary to take two adjacent shades - you can skip several tones. The gradient will be especially noticeable if you take the darkest and lightest shade from the same group. If you don't want such a clear transition, consider colors that are closest to each other.
Designers often play with contrasting shades. This combination looks impressive, but it is important not to make a mistake with the components of the ensemble. Before transferring the color to a wall or fabric, test the color scheme you like on paper.
Another interesting technique is to combine a white or cream shade with a bright one. This is a universal option for creating an ombre effect.
Advice! You can peek at combination ideas in completed design projects. Then you will be less likely to make mistakes.
When they differ noticeably in texture or stand out in contrast
How to proceed? - Depends on the place where both materials meet: on the surface (wall or ceiling), in the corner between the walls or between the wall and the ceiling.
Task 1: Joints on the wall or on one surface
Solution 1: Pronounced drop
The easiest way to connect different materials is to screw a sheet of plasterboard at the junction of the coverings. The minimum difference is 12 mm: this is enough to separate different materials. But it is possible to build more complex structures - it depends on the task and capabilities. In any case, a joint made by a difference in planes will look logically complete.
Solution 2: Bring to one level
This happens when you have to join a relief material of a certain thickness and a smooth one (like wallpaper or a wall painted over plaster) in one plane.
The same drywall will help - “bring” the failed fragment exactly to the protruding level, as was done, for example, with the transition of a slatted wall into a decorative fragment behind the headboard.
Lighting and furniture
Often, well-chosen lighting allows you to visually mask the difference in planes. For example, when the perimeter is illuminated from the inside, a volumetric panel will successfully merge with the surrounding surfaces, and the junction of materials will become natural and logical.
In addition, the border of different textured finishes can be successfully hidden with furniture. The easiest way is to hang shelves and install an interesting rack. When connecting vertically, you can install a built-in cabinet in the problem area.
Wallpapering the ceiling for painting
/ / / Minor defects on the ceiling surface are not the rarest occurrence in modern apartments.
You can fight them in different ways. You can level the floor using plaster, you can make a tension covering, but all these options involve quite impressive financial costs. There is a way that will allow you to save money and bring the surface into proper shape - pasting the ceiling with wallpaper for painting.
Wallpaper has been applied to ceilings for a very long time.
This is a good opportunity to give the surface a certain texture or pattern. The choice of textures is very wide and you can choose the right option for any interior. The height of the walls will not change with this finishing, which means you don’t have to worry about this problem in rooms that are not too high.
Visually, the room may, on the contrary, become a little higher. To achieve this effect, you need to choose the color in which the ceiling will be painted.
Perfect angle or a bummer?
Don't be alarmed, everything is fine! In architecture, a bummer is a decorative element that varies in cross-section.
Many people have heard these terms:
However, professional builders usually call this element a fillet (aka a plank covering the joint between the wall and the ceiling). There are many materials from which this decorative element is made. This can be classic plaster stucco (there are workshops that still make it by hand), wood, modern plastic fillets, and even luxurious marble.
When choosing, it is important to remember that the width of the cornice affects people’s perception of the room. A wide element will visually reduce the height of the ceiling and the volume of the room. While narrow, on the contrary, increases the height of the ceiling and the volume of the room. And the choice of color should be done carefully - a color that is too contrasting will “rip” the cornice out of the interior.
Depending on the material, installation methods also differ. If plastic parts are glued, then wood, plaster stucco and other heavier materials are attached with nails or screws.
Ceiling fillet