Construction mixtures for leveling floors make it possible to quickly and efficiently prepare the base for any coating. In this case, it will take much less time for the surface to dry than for a classic screed. When starting repairs, it is necessary to make correct calculations and find out the approximate consumption of the self-leveling mixture, which will allow you to avoid unnecessary costs.
Self-leveling floor mixtures
What it is?
Self-leveling floor mixtures are new generation mixtures based on cement or gypsum, mixed with fine filler and special additives that ensure uniform distribution of the mixture and accelerate its hardening.
Such mixtures are also called levelers or levels. Self-leveling floors can be installed in any type of premises. Within a day, such a coating can be used. The peculiarity of self-leveling floors is that they are used only as a base for the finishing coating. You can easily lay linoleum, laminate, parquet or any other floor covering on top of them.
Self-leveling floors can be installed on different types of substrates.
The mixture hardens onto them into a thin film, which:
- Has little weight;
- Has good heat and sound insulation characteristics;
- Resistant to wear;
- Not a source of dust.
With the help of self-leveling mixtures, differences in the height of the base up to 2 cm can be eliminated.
The advantages of this type of mixture also include:
- Good fluidity. The mixture does not need to be specially leveled over the surface of the base;
- Evenness of the coating. Thanks to its good fluidity, the mixture spreads evenly over the entire floor, creating an absolutely even base that hides all protrusions and depressions;
- High penetrating ability. The mixture fills even the smallest recesses and crevices in the base and adheres well to it;
- Increased strength;
- Non-flammability;
- Fast hardening and strength gain. A self-leveling floor takes two weeks maximum to dry (cement floor). Quick-drying (gypsum) - even less;
- There is no need to reinforce the base and place beacons;
- Resistance to temperature changes;
- Minimum percentage of base shrinkage;
- Low cost of material;
- A variety of types of mixtures from different manufacturers;
- Low labor intensity and simplicity of the process of preparing and pouring the mixture.
The thickness of the applied layer of self-leveling mixture is usually from one to 10 mm. In some cases, a layer of 50 mm is allowed.
Despite the abundance of advantages, self-leveling floors have certain disadvantages:
- The thinner the layer, the lower the strength of the floors;
- Such floors are difficult to dismantle;
- Due to the liquid structure of the mixture, it is impossible to make foundations with a slope using it.
How to reduce the consumption of levelers
The consumption of the building mixture directly depends on the total area of the uneven surfaces and the absorbency of the base itself. It is better to level overly porous and damaged surfaces using a regular cement or dry screed, since filling with a leveling solution will be too expensive. But if the base is dense and the uneven area is small, proper preparation of the floor will help reduce the consumption of the mixture without reducing the quality of the pour.
Elimination of irregularities
The smaller the number of recesses and cracks, the less mortar will be needed for filling. The main defects can be eliminated using available tools and putty.
Putty for concrete floors
To work you will need:
- grinding attachment;
- perforator;
- putty knife;
- primer;
- putty solution.
Concrete floor repair
In order not to miss a single crack, the base must not only be swept, but also vacuumed. The exfoliated concrete is cleaned off, and the tubercles protruding above the floor are knocked down with a hammer drill. Cracks with a width of more than 2 mm should be expanded along their length and removed from dust; on long cracks, perpendicular notches should be made with a grinder. It is convenient to remove roughness and small irregularities using a grinding wheel. After this, the floor is vacuumed again, all recesses and cracks are treated with a primer, dried and filled with polymer putty. When the putty areas have dried, their surface must be sanded.
| Name and packaging | Application base | Consumption kg/m2 | Maximum layer thickness | Drying time | Price RUR/pack |
| PVA-based putty, 4 kg | Plaster, concrete | 0,450 | 3 mm | 5 minutes | 154 |
| Putty stone flower, 25 kg | Concrete, wood, plaster, drywall | 1,4 | 10 mm | 24 hours | 138 |
| Ready putty Sheetrock, 3.5 l | Any | 0,67 | 2 mm | 5 o'clock | 350 |
Padding
Padding
Primers impregnate the top layer of concrete or screed, filling pores and microscopic cracks. Thanks to this, the leveler spreads better over the base and is consumed less. But keep in mind that the primer must match the surface to which it is applied and have high penetrating properties. For porous substrates there is a special strengthening primer, which is not suitable for ordinary floors. Before applying the primer, the floor must be cleaned of dust and oil stains must be removed. As a rule, the base under the self-leveling floor is primed twice; Until the first layer has dried, the surface cannot be treated again.
| Name, weight | Description | Drying time | Consumption kg/m2 | Price |
| Acrylic universal primer, 10 l | Suitable for concrete, cement-sand and gypsum bases; strengthens the surface layer, reduces diffusion capacity | 1 hour | 10 | 151 rub. |
| Soil BOLARS Betonkontakt, 12 kg | Suitable for concrete, stone, plastered surfaces, increases adhesion | 15 o'clock | 0,3 | 712 rub. |
| Primer for absorbent substrates CT17, 5 kg | Suitable for concrete and cement-sand screeds, has antifungal properties and elasticity | 4 hours | 0,2 | 251 rub. |
| Axton concrete contact, 18 kg | For treating smooth concrete substrates, increases adhesion | 2 hours | 0,25-0,3 | 788 rub. |
| Adhesive primer GLIMS BetoContact, 4 kg | For processing smooth concrete substrates, floor tiles | 24 hours | 0,3 | 272 rub. |
Where is it used?
In addition to its main purpose, which we have just highlighted, it is sometimes permissible to use this kind of mixture for narrow purposes: removing dust, priming, improving the structure of the processing surface, and so on. It is worth saying that the short time period for drying the mixture is a great advantage. In a short period of time, cracks simply cannot occur, there is no shrinkage, and water does not penetrate into the base.
There is such a term as coarse leveler - this is a self-leveling mixture that allows you to organize a subfloor, even with a heated floor screed.
Advantages and disadvantages
The compositions are mixed without any problems and are extremely easy to use. You need to fill the dry mixture with water, and then pour the resulting paste onto the floor. It will fill the holes with great speed, forming an ideal surface. Now let’s name some more advantages of such mixtures.
- Dries quickly.
- It is permissible to move on the surface after just a few hours.
- The final coating can be applied after 24 hours.
- Even an inexperienced person can understand the device of such a floor.
- The floors are hard, resist wear well, and there is no shrinkage.
- The smallest layer thickness reaches approximately 5 millimeters, so self-leveling floors are perfect for rooms with low ceilings.
Such mixtures dry quickly - this is one of the main advantages
Of course, there are also disadvantages to be mentioned.
- The surface must be very well prepared: care must be taken to ensure that there are no potholes of any kind.
- To level the floor using this method, you need to have certain experience and qualifications, since dismantling an unsuccessful coating presents certain difficulties.
- The price of the compounds is high.
- During the drying process, the mixture is dangerous for humans: toxicity and flammability reach high levels. If the composition gets on the skin, it may burn it.
Therefore, self-leveling mixtures must be used with caution.
Types of similar mixtures
The point is not which particular composition is better (or worse) to use - there is a suitable composition for every reason and purpose. So it is important to answer such questions before purchasing the product.
- To what extent will the room where the procedure will be performed be kept dry?
- Will the floor continue to come into contact with the liquid? To put it simply: is the floor treated in the kitchen, bathroom or other room?
- Will you need to clean the coating with aggressive household chemicals in the future? For example, how this happens in the kitchen.
- Will the mixture be required for leveling or as a final coating?
- What base will be used for the self-leveling floor, how does it react to water?
- Do you need additional floor characteristics: anti-slip, anti-noise, thermal insulation?
- Will it be necessary to make additional decor for this floor?
When you analyze all of the above questions, decide on the self-leveling mixture that suits you. And there are not many varieties.
Cement based
The cheapest ones are self-leveling dust-removing mixtures, which additionally act as a good primer. The layer turns out to be very thin, and such a floor lasts only three years.
Cement-acrylic self-leveling floor. Main advantages:
- High adhesion, minimal shrinkage.
- Durability, possibility of use as a screed.
- Absolutely any base is suitable, even wet.
- No cracks during use, good frost resistance.
- You can walk on this floor in just a few hours.
And of the minuses:
- Moisture absorption, minimal or more noticeable, depending on additives.
- Acquisition of final strength after three weeks.
- Unattractive appearance that usually does not serve as a finished floor, and expensive dyes to add color.
- Considerable consumption - any layer cannot be less than 5 mm.
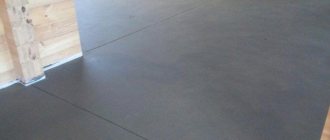
This is what the filling process looks like:
Cement compositions are much more expensive than gypsum compositions, but gypsum compositions can only be used in dry rooms.
Gypsum based
Gypsum self-leveling floor is one of the most undemanding in terms of leveling the base, has good thermal conductivity and is excellent for installing a “warm floor” system. Another name for gypsum mixtures is anhydrite.
Virtually no shrinkage, fast drying and environmentally friendly. But here, as for a polyurethane mixture, only a completely dry base is suitable.
Gypsum itself, as you know, is an absolutely natural product, does not accumulate dust, and has excellent heat-insulating properties. Gypsum self-leveling mixtures are often used to obtain a sufficiently thick floor screed. After all, there are restrictions on the height of the screed: cement-sand screed cannot be made more than 5 cm high, but gypsum screed – at least 10 cm.
As for brands, along with the well-known Knauf brand, domestic self-leveling floors “Starateli” are also actively in demand. They are suitable for both manual and machine application. This brand is also valued because this solution flows well through mortar hoses without thickening or getting stuck.
Gypsum self-leveling mixtures also take longer to dry. In addition, the strength of gypsum screed is much higher than that of cement screed.
With epoxy resins
But the epoxy self-leveling mixture also has serious disadvantages: increased surface abrasion, cracks from falling heavy objects, and slipperiness from spilled liquid. It’s not at all suitable for the kitchen, nor for the bathroom, but for chemical laboratories it’s just what you need.
Polymer based
With their help, it is possible to obtain a durable surface that is not afraid of vibration, shock, serious loads, and temperature changes. Such mixtures have a long service life, have high noise insulation characteristics, are waterproof, and their hardening time is only a few hours.
Self-leveling compounds based on polymers and gypsum can only be laid on a dry surface.
Difficulties when pouring the floor
Even if you acted strictly according to the instructions and prepared the bulk material strictly following the instructions on the packaging, you are still not immune from some difficulties.
For example:
- If you planned a layer of 3 mm, but the prepared mixture does not spread well , resulting in an uneven layer thicker than necessary, then there is no need to add water so that the mixture becomes thinner and can be well distributed over the surface. Just use special tools: a needle roller, a squeegee . With their help, you can easily roll the mixture over the surface to achieve the desired result.
- If you do not follow the proportions specified by the manufacturer, the surface may become lumpy and many bubbles may appear, which will not decorate your floor and will interfere with the installation of the final coating.
- Please note that some diluted mixtures thicken very quickly . Therefore, dilute the amount of mixture that you can quickly level. It is best for two or three people to fill the floor at once. While one is busy stirring the mixture, others are leveling the floor.
- Some users note that such surfaces do not retain heat, but this is easy to fix if you use a backing.
However, do not be afraid of difficulties. Even a non-professional can do this work. And the high cost of self-leveling flooring is compensated by its durability and long service life.
We calculate the cost of building a house from aerated concrete with our specialists: the price of materials and labor. You can find out the rules for choosing soft decorative panels for interior wall decoration here.
The topic of technology, main stages and average prices for parquet sanding work is discussed in our article.
Materials and tools
If you decide to make a self-leveling floor yourself, you will need the following tools:
- container for mixing the mixture;
- construction mixer or powerful drill with an attachment;
- a spatula, with which the solution will be placed in hard-to-reach places;
- a needle roller, which is used to remove air from the solution.
Remember that self-leveling mixtures begin to crystallize after 30-40 minutes, so all work must be done quickly and efficiently.
Self-leveling sweeps are sold in bags. To obtain the finished composition, you need to dilute the purchased mixture with water; the proportions are indicated in the instructions, which are on each bag. To ensure a high-quality solution, you must adhere to the recommended proportions and mix it well.
How to properly mix leveling compounds
How to properly mix leveling compounds
If the mixture is diluted incorrectly, no amount of tricks will help make a high-quality coating. The main mistake beginners make is adding more water than indicated in the instructions. A more liquid composition spreads faster, but the strength and durability of the floor is reduced several times. In addition, peeling, cracks, and other defects may appear on the coating.
To properly prepare the solution, you will need water with a temperature of at least +10 degrees, a convenient container for mixing, a drill with an attachment and a dry mixture. Strictly adhering to the specified proportions, pour the mixture into water and mix for 3-4 minutes with a mixer attachment. Then leave the solution for 3 minutes to ripen and mix again for a minute. The result should be a homogeneous mass without lumps, liquid enough to spread without additional leveling. If the technology is followed, the filling process will not cause difficulties, and the mixture consumption will not exceed the calculated one.
| Name | Drying time | Layer thickness | Consumption kg/m2 | Price RUR/kg |
| Horizon universal | 3-7 days | 2-100 mm | 3-4 | 236/20 |
| BOLARS | 4 hours | 2-100 mm | 3-4 | 239/20 |
| Vetonit 3000 | 4 hours | 1-5 mm | 1,5 | 622/25 |
| Palafloor-303 | 4-6 hours | 2-100 mm | 1,4-1,6 | 308/20 |
| GLIMS-S-Level | 24 hours | 2-5 mm | 3 | 478/20 |
| Perfecta Multilayer | 2-3 hours | 2-200 mm | 7-14 | 312/20 |
| xton | 3-4 hours | 6-100 mm | 14-16 | 256/20 |
| Name. Short description | Packaging kg | Consumption kg/mm/m2 | Price | Strength MPa | Layer thickness in mm |
| ALFAPOL VP - finishing self-leveling self-leveling floor M200 F200 Pk5 W12 on a cement base | 25 | 1,75 | 375-471 | 20 | 2-40 |
| REAL Floor leveler, High-quality dry cement-based mortar | 25 | 1,7 | 360 | 20 | 2-80 |
| Bergauf BODEN ZEMENT MEDIUM, self-leveling floor for the final leveling of horizontal surfaces, ideal for further installation of any floor coverings (ceramic tiles, parquet, carpet, linoleum) | 25 | 2 | 289-324 | 20 | 6-60 |
| Forbo Eurobond 915, fast-hardening self-leveling floor, low shrinkage, self-leveling, quick-drying. Suitable for heated floors. For indoor use, incl. in damp areas. Withstands the load from furniture on casters. | 25 | 1,7 | 405 | 20 | 3-50 |
| Petromix PS, for leveling floors on concrete and other hard substrates in dry, damp and damp areas. Serves as a base for floor coverings (parquet, ceramic tiles, textile carpets, plastic coverings, linoleum, etc.) | 25 | 1,5 | 441-471 | 25 | 2-30 |
| The foundation will be T-42 Nipline, a self-leveling, high-strength, moisture-resistant, non-shrinking leveler on a cement-sand base using special chemical additives. | 25 | 1,7 | 342-433 | 25 | 3-30 |
| Ceresit CN 178, for the manufacture of screeds operating under conditions of low and moderate mechanical loads, incl. with constant exposure to moisture (in residential and public premises, on exploited roofs, balconies, terraces, open areas, etc.), during external and internal work, in civil and industrial construction. | 25 | 2 | 370 | 35 | 5-80 |
| Vetonit 4100 cement-based mixture for leveling concrete floors indoors | 25 | 1,6 | 520-537 | 20 | 2-30 |
| vetonit 4150, suitable for quickly leveling concrete floors and creating screeds in residential buildings, offices and public buildings. It is used for repairs and new construction under various types of floor coverings. Used in “Warm Floor” designs | 25 | 1,6 | 520-550 | 20 | 2-30 |
| Berghauf BODEN ZEMENT FINAL, self-leveling cement-based flooring for perfectly smooth surfaces. For rooms with normal and high humidity (bathroom). | 25 | 1,8 | 435-490 | 20 | 0,5-5 |
Calculations
To calculate the consumption of self-leveling mixture for installing a subfloor, you need to know:
- Room area;
- Thickness of the layer of mixture being poured;
- Density of the leveling mixture.
Before starting calculations, we assume that for filling 1 sq. m of base 1 mm thick requires 1 liter of water.
So, for example, if you need to level the floor in a room of 10 square meters. with a level layer thickness of 7 mm, 70 liters of water are required (1 l * 7 mm * 10 sq. m.).
Next, the density of the mixture is entered into the calculation, which must be indicated on the packaging. The amount of water obtained in the previous calculation must be adjusted to the actual density of the leveling mixture. If the density of the level is, for example, 1.4 kg/l, then the required amount of solution will be 1.4 * 70 = 98 liters.
It could be easier. On the packaging of the self-leveling mixture, the manufacturer indicates the consumption of the composition per 1 m2 of floor 1 mm thick. This value is multiplied by the area of the room and the thickness of the filling layer in mm. The result will be the consumption of the mixture for the entire room.
Step-by-step instructions for applying the mixture using the example of a floor with ceramic tiles
For a better understanding of how to work with such material, let's look at an example.
Condition: ceramic tiles on the floor. It is very durable and difficult to remove. The difference in floor height between the bathroom and the corridor is up to 10 mm. The apartment layout is Khrushchev style.
Solution: the surface of the bathroom floor will be leveled with a self-leveling mixture on top of the old coating. The finishing composition will best help with this due to its high adhesion and strength. As a rule, its recommended thickness is from 1 to 15 mm, which suits the conditions.
So, what materials will be needed to complete the work?
- dry material (in the example – finishing composition);
- drill with an attachment (for stirring the self-leveling mixture);
- roller (a needle roller is better);
- tassels;
- spatula (wide);
- deep penetration primer (its performance characteristics are higher than those of the regular version);
- grinder with diamond blade;
- large capacity for solution (for one batch for the entire area required for pouring).
Separately, it is worth noting the need to purchase special shoes that will not spoil the damp floor covering. With it, you won't have to smooth the surface again. True, this is only necessary if the floor is poured in a large room (more than 20 sq. m.).
Since the difference between the floor in the bathroom and in the corridor is very significant, careful alignment is required. It is difficult and time-consuming to do this on beacons, so you need to resort to a self-leveling mixture.
Below are step-by-step instructions for leveling the floor surface with a self-leveling mixture.
- Calculate the required amount of material.
- When the characteristics of strength and adhesion are unknown, but there is a flat surface of ceramic tiles, you can use a grinder (remember, a diamond disc is used) to cut lines. You should get a lattice, the pitch of which is from 5 to 10 cm.
Please note! This stage is associated with the appearance of a large amount of dust and loud noise from the cutting process.
- Preparing the base. To do this, use a metal spatula to remove any remaining building materials. Afterwards, thoroughly vacuum the floor. Don't forget about covering the cracks in the walls.
- Floor primer. Before doing this, you need to carefully study the instructions, since the primer material is not universal. You can use a roller, but in hard-to-reach places it is better to use brushes. When the primer absorbs quickly, another layer is applied. This way you can ensure that the future flooring remains of high quality.
Practical advice. To prevent the primer from flowing outside the room, a side is made. For example, it can be constructed from polyurethane foam. An alternative is a thin strip of drywall.
- Prepare the solution in such a quantity that is enough for subsequent pouring of the solution into the room. When cooking, it usually bubbles a lot, so you need to set the drill to 400–600 rpm. In this case there will be no bubbles. It’s better to stir a little longer than to fix problems later. How to cook: first pour water into a container, then add the dry mixture. The material is not added at once, but gradually. The amount of water will directly affect many parameters. If there is more of it than required, the solution will be less viscous, which means it will adhere better, but it will take longer to dry, and the floor will become less durable. If there is not enough water, the leveling will deteriorate due to the appearance of bumps.
- After preparing the solution, you can start pouring the mixture. It would be more correct to do this from the far corner of the bathroom and move towards the corridor. Do not pour too quickly to avoid bubbles.
Important! Carefully monitor the thickness of the coating formed.
To make the process go faster, you need to smooth the solution evenly poured onto the floor with a spatula. The last stage of work is rolling the mortar poured onto the floor with a needle roller.
Everything needs to be done quickly - there is only half an hour before the mixture begins to harden.
There is an interesting life hack from experienced craftsmen. To level the mixture, they use hammer drills in the following way: place the tip of the chisel on the floor and turn on the equipment. Alignment is improved by vibration. The downside is that you cannot hold the tool like this for a long time, otherwise the composition will delaminate and the floor covering will become worse.
Installation work must be continued only when the poured solution has completely hardened. To find out how soon this will happen, look at the manufacturer's instructions.
Application Features
The following tools and materials are required for work:
Clean water to add to dry powder.- An electric hammer or construction mixer with an attachment for mixing the solution.
- Construction level (regular or laser).
- A spatula for filling holes and cracks.
- Primer emulsion based on acrylic.
- Needle-type roller for correcting spreading and removing air bubbles.
- Notched trowel and rule for leveling rough composition.
The technology of leveling the floor with a self-leveling mixture in a house, apartment or other premises by pouring is carried out in several stages and begins with the preparation of the rough coating. The room should not be very cold, as otherwise the self-flowing of the leveler will be disrupted. The temperature should be approximately +10 degrees, and it takes two or three people to fill it in order to finish it before it hardens.
First you need to clean all surfaces from dirt, debris and dust. It is easier to remove dust with a vacuum cleaner, and then do wet cleaning and dry the floor. For removing oil stains and various detergents and chemicals. Carefully cover all cracks, potholes, cracks and large differences in height, more than 8 cm. The result should be a clean, dry, and relatively even rough screed without large and noticeable defects. For adhesion, you need to prime the base with an acrylic compound, which will seal microcracks in the screed, improve spreading and adhesion, and reduce material consumption.
Primer should be applied in 2 layers, and to apply the second, thoroughly dry the first. For porous surfaces, special emulsions are made to strengthen them. When the layer hardens and changes in humidity/temperature, the volume will expand, and the load on the walls will also increase. In this case, the floor may crack and even become deformed. To prevent floor destruction and compensate for the load, a damper tape is usually used.
Mistakes when using the mixture
It is known that the result of using a self-leveling mixture is a smooth floor, but this can only be achieved if you know how to use it correctly. Below we list a few annoying mistakes that significantly worsen the condition of the floor.
- Error in mixture selection. Basically, this error appears due to inattention when reading the instructions or misunderstanding of the operating technology. Each material has its own characteristics and subtleties of working with it, therefore there is no universal method, just like a universal material.
- Poor preparation of the base for pouring. Grease, paint, or rather its residues, dust and much more can become a catalyst for the self-leveling mixture to peel off. This is especially affected by cement laitance with its low adhesion index.
Important! Cement laitance is a by-product of pouring liquid concrete into the base of the floor.
- Neglecting to prime the floor. Reluctance to prime the floor before leveling it can be found quite often. Moreover, there are no arguments for this. At the same time, the primer has many positive properties, including increasing adhesion and slowing down moisture absorption. Without a primer, the floor will quickly absorb moisture after pouring the mixture, and this will reduce its strength.
- Filling without an assistant. Working with this kind of mixture should be quick, since the solution hardens quickly and it will require at least two people - while one is pouring the floor, the other is preparing new material. If you try to do everything yourself, the floor will not be leveled properly and the material will simply be wasted.
- Inattention to finishing coatings. And they, meanwhile, affect a lot - both the thickness of the floor and the forces exerted on the base. Glued board distributes the load pointwise, linoleum does not. Ceramic tiles with cement adhesive are generally placed only on a floor made of the same material; it simply cannot be placed on another base.
- Working with floors that are not completely dry. For many, a hard surface is a signal that they can continue working with the floor. This is absolutely not true. Work can be continued only when the mixture has completely hardened.
- There are no suitable conditions for the floor surface to harden. If there is a draft in the room, high temperature and heating of certain areas of the floor by the sun's rays, you need to leave the floor for a longer period than indicated on the packaging, otherwise the result will be unsatisfactory.
When pouring the floor, don’t “reinvent the wheel” - just strictly follow the recommendations given by the experts in their field.
Conclusion
In order to get a perfectly flat surface, you will need to put in a little effort. You don’t have to hire a team of workers; you can do everything yourself, or by inviting one assistant. It will cost much less, and the result will please you with its quality. The main thing is to choose the optimal material option and the required coating thickness.
In our online store you can buy a SVP tile leveling system on the most favorable terms, with organized delivery! All you need to do is just write in the feedback form, or call the phone numbers listed on the website! After this, our polite managers will definitely contact you and answer your questions! In general, we will be glad to cooperate! See you in touch!
Expert advice
Typically, one bag of mixture is designed for one batch, but everything will depend on the quality of the floor surface and the presence of curved areas on it. Taking into account water, when mixing from one bag, 20 liters of solution are obtained; it is not recommended to do more at one time. Since the solution is liquid, there are no joints when pouring it; one room is filled at a time, by carrying out several pours.
To remove air efficiently, the roller with needles should be several millimeters above the pouring level.
To prevent the mixture from spilling outside the room, you need to install dampers; it is better to do this right away than to install them in a hurry.
Manufacturers
In the building materials market there is fierce competition between manufacturers of dry mixtures for self-leveling floors. Large companies are developing the entire line of types of mixtures for various conditions of use, provide certificates for their products, give detailed instructions and recommendations from in-house specialists, collect feedback from craftsmen and study consumer demand in order to increase their ratings to improve the quality of materials. The following brands are the most popular and well-known to consumers:
- is famous for its high quality and wide range of produced levelers. A specially developed composition of the Boden line based on purified gypsum, quartz sand and polymer additives increases the strength of the floor by 50% compared to concrete floors. Can be used for warm floors, dries quickly. Users note the high quality of the products and the possibility of using them for heated floors.
- Vetonit products contain special additives that accelerate the spreading of the solution and drying without deformation. An excellent choice for experienced builders. The composition dries within 24 hours. This material is not painted or sanded, and is not used as a finishing coating for floors. Consumer reviews indicate that the products of this brand are worthy of attention: the mixture dries really quickly, but when applied to a damp surface it may begin to smell unpleasant.
- Bolars mixtures are distinguished by consistently high quality of products and an affordable price for the general consumer. Thin finishing levelers, which instantly harden and create a perfectly even coating, receive excellent customer reviews. An excellent solution for installing underfloor heating systems. Imported polymer additives allow you to level floors in basements, garages, and damp rooms.
- Ceresit levelers are very popular in Russia and are used for any floors: concrete, wood, cement. They produce coarse-grained dry mixtures, as well as special self-leveling compounds for rooms with increased loads during operation. Users highlight these products as high-quality and inexpensive goods that have many advantages over analogues.
The use of high-quality factory-certified self-leveling mixtures and adherence to technology will allow you to quickly obtain a durable, strong and level floor.